Garage Door Opener Installation
About This Project
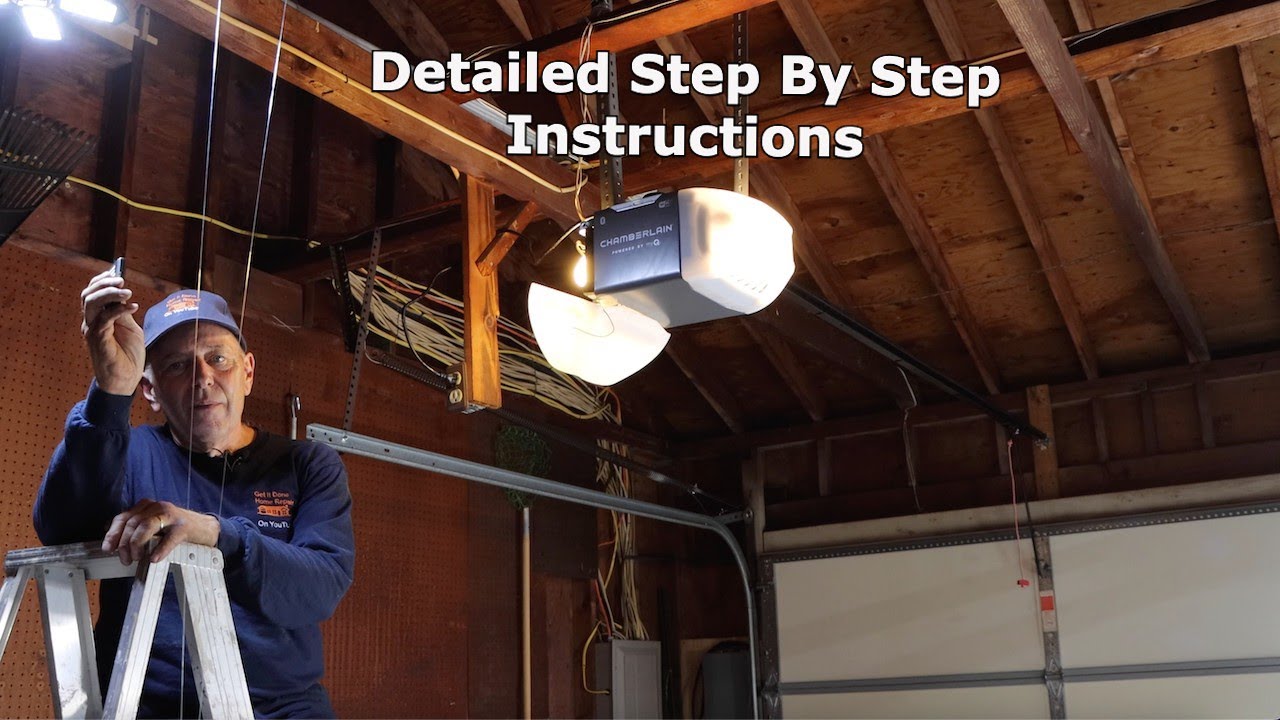
Outline for installing a new automatic garage door opener system.
Tools & Materials

Drill
Drill Bits

Adjustable Wrench
Level
Measuring Tape

Pencil
Drill
A power tool used for drilling holes in various materials.
Drill Bits
Various sizes for different drilling tasks, including making holes for screws and latches.
Adjustable Wrench
Fits various nut and bolt sizes with its adjustable jaw.
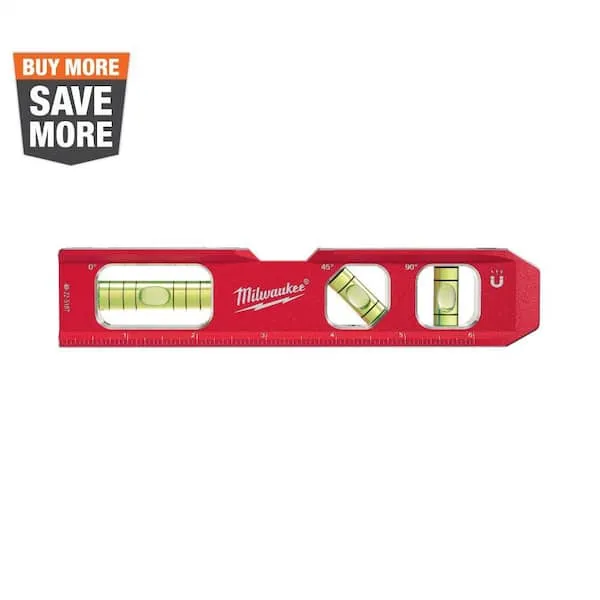
Level
Ensures surfaces are just right.
Measuring Tape
For accurate measurements of plywood and components, ensuring proper assembly.
Pencil
Marks and draws with ease.
Steps
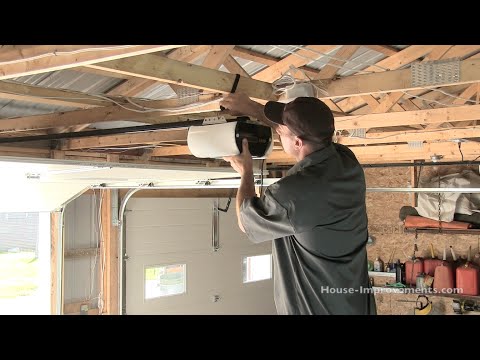
Mount the Garage Door Opener Motor Unit
30 minutesPosition the motor unit bracket against the mounting surface (ceiling joist or wall stud) directly above the garage door and in line with the door's travel path. Mark the mounting holes. Drill pilot holes and then attach the bracket using lag screws or bolts appropriate for the mounting surface. Once the bracket is secure, lift the motor unit and attach it to the bracket according to the manufacturer's instructions. Ensure the unit is level and firmly fixed.
Watch: Mount the Opener Assembly
Attach the Curved Door Bracket and Straight Arm
20 minutesAttach the curved door bracket to the garage door near the top center, aligning it with the opener's path. Use the provided bolts and nuts to secure it firmly. Next, attach the straight arm to the motor unit's output drive. Connect the free end of the curved door bracket to the end of the straight arm using the provided clevis pin and clip, ensuring the connection is secure.
Watch: Attach Garage Door Arm to Trolley
Install the T-Rail and Trolley Assembly
25 minutesAssemble the T-rail sections according to the manufacturer's instructions, ensuring they are securely joined and aligned. Once assembled, slide the trolley onto the T-rail. The trolley will engage with the chain or belt, and it's the component that moves along the rail to open and close the door. Ensure the trolley moves smoothly along the rail without binding.
Watch: Assemble Rail and Trolley
Mount the T-Rail to the Motor Unit and Ceiling
35 minutesAlign the T-rail with the motor unit's drive mechanism and attach it according to the manufacturer's instructions. Once attached to the motor unit, use the appropriate mounting hardware (e.g., adjustable angle iron, straps, or eye bolts) to secure the other end of the T-rail to a ceiling joist or appropriate support. Ensure the rail is level and stable, and that the trolley can move freely without obstruction.
Watch: Install Door Bracket and Motor Unit Ceiling MountsConnect the Trolley to the Door Arm
15 minutesWith the garage door in the fully closed position, connect the trolley to the opener arm. This is typically done by attaching the end of the opener arm (which is already connected to the door bracket) to the trolley assembly using a clevis pin and retaining clip. Ensure this connection is secure.
Watch: Attach Garage Door Arm to TrolleyInstall the Safety Sensors
20 minutesMount one sensor on each side of the garage door, typically near the bottom, about 4-6 inches above the floor. These sensors emit an infrared beam across the door's opening. If the beam is broken when the door is closing, it will automatically reverse to prevent accidents. Follow the manufacturer's specific mounting instructions, often involving brackets and screws.
Watch: Install Safety SensorsWire the Opener and Sensors
45 minutesRun the low-voltage wires from the safety sensors to the motor unit, and from the wall control button to the motor unit. Follow the manufacturer's wiring diagrams precisely, connecting the wires to the designated terminals on the motor unit. Ensure wires are neatly secured along the wall and ceiling using insulated staples or clips, keeping them away from moving parts. Properly connect the power cord to a grounded electrical outlet.
Watch: Wire Motor Unit and Wall Control
Program the Remotes and Keypad
15 minutesFollow the manufacturer's instructions to program the handheld remote controls and the wireless keypad. This typically involves pressing a 'learn' or 'program' button on the motor unit and then pressing a button on the remote or entering a code on the keypad within a specified time frame. Test each remote and the keypad to ensure they activate the opener correctly.
Watch: Install Battery Backup and Program ControlsAdjust Travel Limits and Force Settings
30 minutesWith the door disconnected from the trolley (usually via a pull cord), manually move the door to its fully open and fully closed positions to ensure it operates smoothly. Reconnect the trolley. Then, using the adjustment controls on the motor unit, set the travel limits so the door stops at the fully open and fully closed positions. Adjust the force settings so the opener has enough power to operate the door without excessive strain, and so that it will reverse if it encounters resistance.
Watch: Set Travel Limits and Test OperationTest the Opener and Safety Features
20 minutesConnect the power cord to a grounded electrical outlet. Test the opener using the wall control, remote controls, and keypad. Verify that the door opens and closes completely, stopping at the programmed limits. Test the safety reversal system by placing a 2x4 flat on the ground in the door's closing path; the door should reverse upon contact. Test the safety sensors by interrupting the beam while the door is closing; it should immediately reverse. Check that the opener light functions correctly.
Watch: Install Light Bulbs, Test, and Adjust OpenerCommon Problems
Safety sensors are misaligned or not working, causing the garage door to reverse or not close.
Solution: Check both safety sensors (the small boxes near the bottom of the garage door tracks). Ensure they are firmly mounted, pointed directly at each other, and free from obstructions like spiderwebs or dirt. Look for indicator lights on each sensor; they should be glowing steadily. If one is off or blinking, gently adjust the sensor's position until the light becomes steady. Also, verify that the sensor wires are securely connected to the motor unit as per the wiring diagram.
Prevention: Mount the safety sensors at the exact recommended height (typically 4-6 inches from the floor) and ensure they are perfectly aligned. Double-check all wiring connections for security. After installation, always perform the 'safety reverse test' by placing a small object (like a 2x4 board) in the door's path to confirm it reverses properly.
Garage door does not open or close completely, or it 'bounces' off the floor and reverses.
Solution: This indicates incorrect travel limit settings. Locate the 'travel limit' adjustment screws or buttons on your Genie 1035-SV garage door opener motor unit (refer to your manual for exact locations). Follow the instructions to adjust the 'down' limit so the door closes fully and seals without excessive force or reversing. Adjust the 'up' limit so the door opens completely without hitting the motor unit or straining. Make small adjustments and test the door after each change.
Prevention: Carefully follow the manufacturer's instructions for setting travel limits during the initial setup. Test the door's full travel multiple times before making final adjustments, ensuring the door moves smoothly and stops precisely at the open and closed positions.
Opener motor runs, but the garage door doesn't move, or the chain/belt is slack.
Solution: First, check if the emergency release cord (usually red) has been pulled, which disconnects the trolley from the door. If so, re-engage the trolley by pulling the cord towards the motor unit or pushing the connection lever until it clicks. If the chain or belt is visibly loose or detached from the sprockets, you will need to adjust its tension. Refer to your Genie 1035-SV manual for specific instructions on how to properly tighten the chain or belt until it is snug but not overly taut.
Prevention: During installation, ensure the chain/belt tension is set correctly as per the manufacturer's guidelines. Securely connect the trolley to the door arm using the Everbilt 3/8 in. x 2 in. Zinc-Plated Universal Clevis Pin and its retaining clip, ensuring all connections are solid.
Garage door opener motor unit vibrates excessively or sags when operating.
Solution: This is a safety hazard and likely due to insecure mounting. Inspect the mounting brackets and the Crown Bolt 5/16 in. x 2-1/2 in. External Hex Hex-Head Lag Screws (50-Pack) holding the motor unit to the ceiling. Ensure all lag screws are driven into solid wood framing (ceiling joists or a header) and are fully tightened with your GEARWRENCH ratcheting wrench. If mounted only to drywall anchors, it will not hold; you must relocate or add sturdy wood bracing to attach to joists. Add additional support if necessary, such as angle iron connected to multiple joists.
Prevention: Before drilling, use a stud finder or tap the ceiling to locate and mark the solid wood framing. Drill appropriate pilot holes for the lag screws to ensure strong, secure attachment. Use a level to ensure the unit is mounted perfectly straight and does not put uneven stress on the mounting points.
Drill bits break or screw heads strip (especially lag screws) during installation.
Solution: If a drill bit breaks, try to extract it with pliers or a vise grip. If a screw head strips, use a pair of vise grips to clamp onto the head and turn it if there's enough to grab. For flush or deeply stripped screws, a screw extractor kit might be necessary, or you may need to drill out the screw (which can be challenging for lag screws) and use a new mounting spot.
Prevention: Always use the correct size drill bit for pilot holes, as specified in the instructions (usually slightly smaller than the screw's shank). Apply steady, firm pressure with the drill and use a slow speed, especially for large lag screws. When driving screws, use the correct size driver bit from your TEKTON Multi-Bit Screwdriver Set that fits snugly into the screw head, and avoid overtightening. If you encounter significant resistance, back out the screw and check the pilot hole.
The garage door arm detaches from the trolley or the door, causing the door to stop abruptly.
Solution: Carefully reattach the curved door bracket (Clopay Quick Turn Bracket) and the straight arm to the garage door and the trolley assembly. Ensure that the Everbilt 3/8 in. x 2 in. Zinc-Plated Universal Clevis Pin is correctly inserted through all connection points and securely fastened with its cotter pin or other retaining clip. Also, double-check that the door bracket itself is firmly attached to the garage door with all fasteners tightened.
Prevention: During assembly, meticulously inspect all connections involving the door arm and trolley. Ensure that all clevis pins are fully inserted and secured with their respective retaining clips. Verify that the Clopay Quick Turn Bracket is properly installed and tightly fastened to the garage door according to the instructions.
Frequently Asked Questions
What are the most critical safety precautions to take when installing a garage door opener?
Always ensure the garage door opener is unplugged from its power source before performing any work or adjustments. Never attempt to adjust or tamper with existing garage door torsion springs, as they are under extreme tension and can cause severe injury. Use a sturdy ladder, and have someone assist you with heavy lifting, especially when mounting the motor unit and rail.
What specialized tools might I need for this project beyond common household tools?
While the listed tools cover the basics, consider having a stud finder to accurately locate ceiling joists for secure mounting. Depending on your garage door and ceiling height, you might also need a hacksaw or bolt cutters to trim the T-rail or other mounting hardware to size. Always wear safety glasses to protect your eyes from debris.
Is the 6-hour estimated time realistic for a beginner, and what are the most challenging steps?
For a beginner, the 6-hour estimate can be tight; plan for 8-10 hours, especially if you encounter unforeseen issues or need to consult the manual frequently. The most challenging steps typically involve accurately aligning the T-rail, securely mounting the motor unit, and precisely setting the travel limits and force. Patience and careful measurement are key.
What are common mistakes beginners make during garage door opener installation?
A common mistake is not ensuring the garage door is perfectly balanced and moves freely by hand before connecting the opener, which can strain the motor. Incorrectly aligning the safety sensors is another frequent issue, preventing the door from closing. Always double-check all connections and settings according to the manufacturer's manual.
What should I check on my existing garage door and electrical setup before starting the installation?
Before you begin, manually open and close your garage door to ensure it operates smoothly, is well-balanced, and doesn't stick. Also, verify that you have a functioning, grounded electrical outlet in your garage ceiling, typically within 6 feet of the proposed motor unit location, for the opener to plug into.
What does 'Wire the Opener and Sensors' entail for a DIY installer?
For a DIY installer, 'Wire the Opener and Sensors' primarily involves connecting the low-voltage wires from the safety sensors and wall control button to the main motor unit, following the manufacturer's color-coded instructions. The motor unit itself typically plugs into an existing 120V electrical outlet; it rarely requires hardwiring a new circuit.
Are there any alternative mounting methods or materials I should consider?
If your garage ceiling has exposed joists, you can typically mount directly to them. For finished ceilings or if joists aren't optimally located, you might need to install additional lumber framing or a mounting board between joists to provide a secure anchor point. Always use appropriate lag screws or heavy-duty fasteners for your specific ceiling type to ensure stability.