
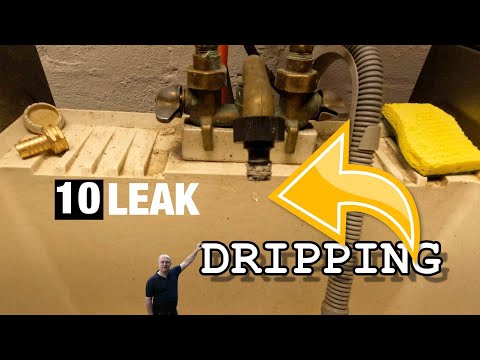
Fix a Leaky Two-Handle Bathtub Faucet: A Step-by-Step Guide
About This Project
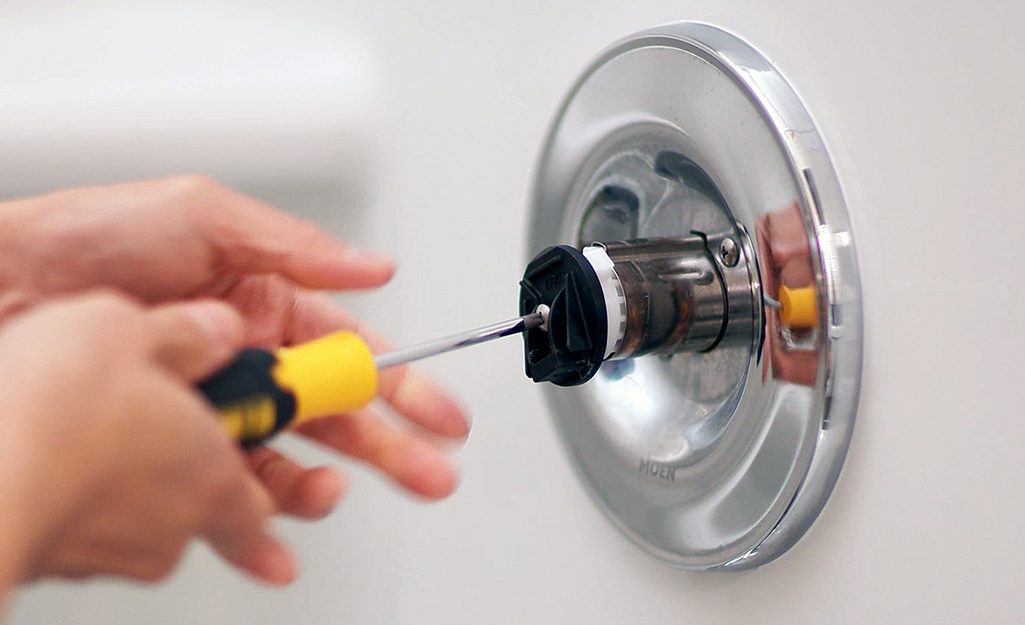
This DIY guide demonstrates how to fix a leaky two-handle bathtub faucet by replacing the valve stems. The project involves several steps: First, turn off the water supply to the bathtub, including the hot and cold water lines under the sink or behind an access panel. You may also want to turn off the main water supply. Second, Remove the faucet handles by taking off the decorative caps (if any) with a flathead screwdriver, unscrewing the handle screws with a Phillips head screwdriver, and gently pulling the handles off. Third, remove the old valve stems using an adjustable wrench to loosen and remove the packing nuts. Then, pull out the stems, and take note of the orientation and positioning of all parts for reassembly. Take the old stems to the hardware store to find matching replacements. Fourth, install the new valve stems, ensuring the rubber gaskets at the bottom create a good seal. Hand-tighten the stems first, then secure them with the adjustable wrench, being cautious not to overtighten. Fifth, reassemble the faucet by putting the handles, screws, and decorative caps back in place. Slowly turn the water back on and test the faucet for leaks. If any leaks remain, re-tighten and double-check. Finally, seal around the base of the faucet with silicone caulk to prevent water seepage.
Best for experienced DIYers and homeowners with some experience.
Tools & Materials
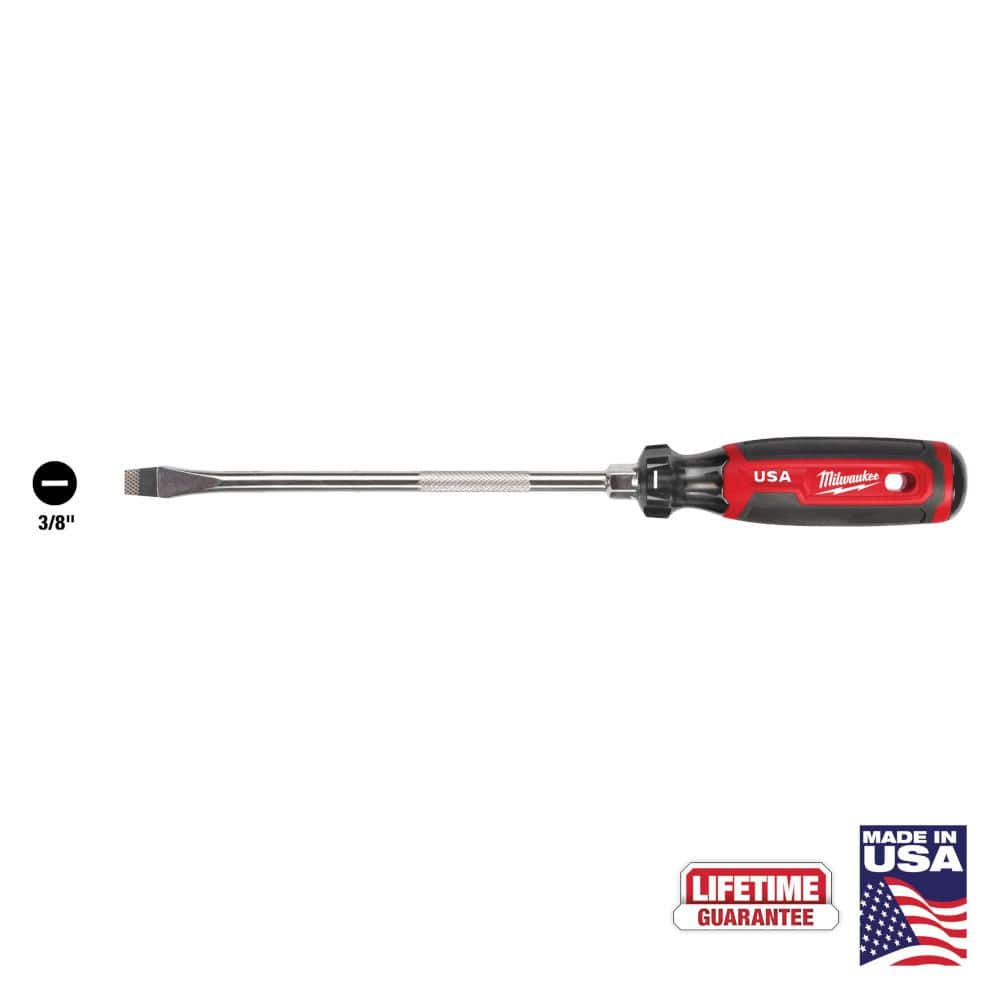
Milwaukee 8 in. x 3/8 in. Slotted Flat Head Screwdriver with Cushion Grip MT209
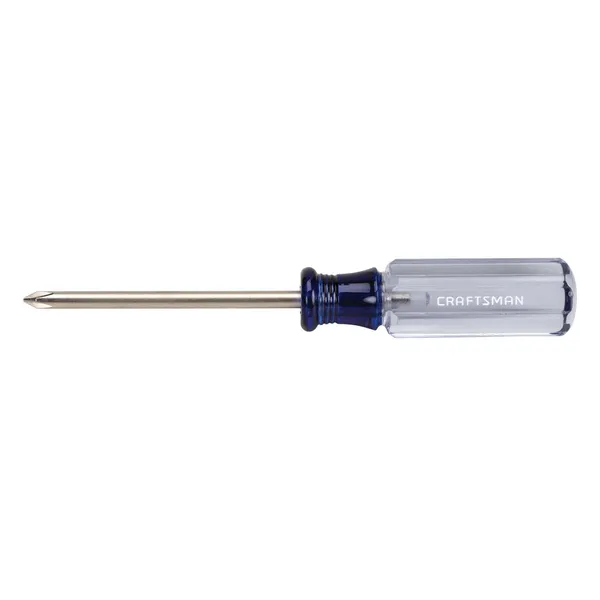
Phillips head screwdriver

Husky 12 in. Adjustable Wrench 90933
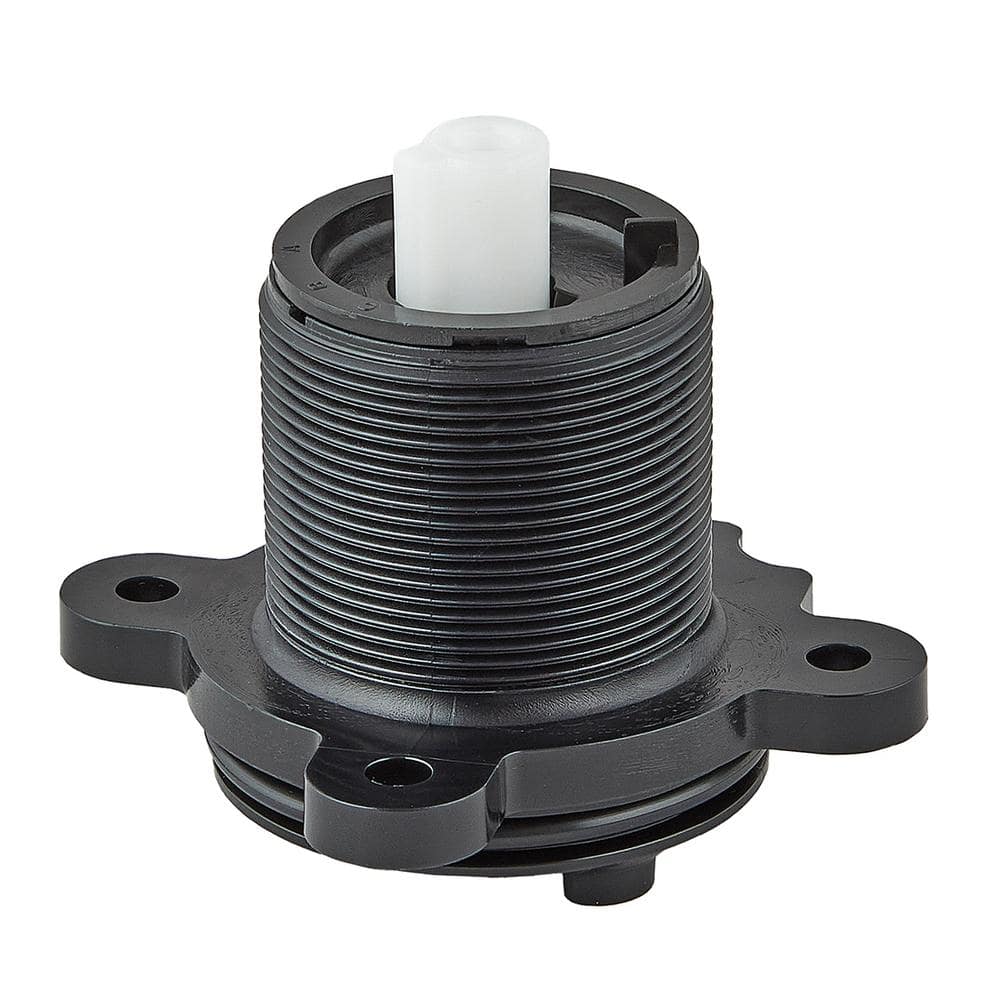
Pfister 971-250 2-3/4 in. Replacement Valve Stem Assembly for 08 Series Tub and Shower Single-Handle Faucets 864540
Milwaukee 8 in. x 3/8 in. Slotted Flat Head Screwdriver with Cushion Grip MT209
The Milwaukee® 3/8" Slotted 8" Cushion Grip Screwdrivers (USA) are manufactured to give the professional the best-fitting screwdriver with max grip. These screwdriver tips are custom machined to deliver
Phillips head screwdriver
This is a type of screwdriver that has a cross-shaped tip.
Husky 12 in. Adjustable Wrench 90933
The Husky 12 in. Adjustable Wrench features a durable, comfortable handle. A large knurl allows for easy adjustment and a tight-fitting hex jaw design reduces slippage and tightly grips the fastener for
Pfister 971-250 2-3/4 in. Replacement Valve Stem Assembly for 08 Series Tub and Shower Single-Handle Faucets 864540
Pfister OEM (original equipment manufacture) 971-250 valve stem assembly. Used to replace worn or damaged assemblies in 08 series Pfister tub/shower faucets. Durable plastic construction for years of reliable use.
Steps


Reassemble the Faucet and Test
10 minsReassemble the faucet handles and decorative caps. Slowly turn the water supply back on, checking carefully for leaks. If any leaks persist, re-tighten fittings and re-check. If no leaks are found, apply silicone caulk around the base for added protection.
Common Problems
Failure to turn off the water supply will result in flooding.
Solution: To avoid this issue: Be mindful of this warning and take appropriate precautions.
Dropping small parts down the drain can lead to difficult retrieval and project delays.
Solution: Covering the drain is a simple step that can save you the major headache of retrieving a lost part.
Failure to shut off the water will result in a significant leak and potential water damage when you disconnect the hose.
Solution: To avoid this issue: Be mindful of this warning and take appropriate precautions.
Ensure the water is fully shut off before disconnecting any lines to prevent flooding.
Solution: To avoid this issue: Be mindful of this warning and take appropriate precautions.
Scratched chrome finish from wrench slippage.
Solution: Using a cloth between the wrench and the faucet's chrome finish will prevent scratches and damage.
Handle won't budge, risking damage during removal.
Solution: If the handle is stuck, gently wiggle it back and forth while pulling to loosen it.
Scratched faucet cap after prying it off.
Solution: Be gentle when prying off the cap to avoid scratching the plastic or chrome finish.
Frequently Asked Questions
Do I really need to turn off the main water supply, or is turning off the lines under the sink enough?
While turning off the hot and cold water lines directly to the bathtub faucet is often sufficient, it's a good safety practice to turn off the main water supply as well. This prevents accidental water flow if the individual shut-off valves are old or fail, minimizing the risk of floods during the repair process.
How do I ensure I purchase the correct replacement valve stems for my specific two-handle bathtub faucet?
The most reliable way is to remove your old valve stems and take them to the hardware store for an exact match. Pay close attention to the length, number of splines on the handle attachment, and the type of rubber washers or seals. Knowing your faucet's brand and model number can also help, but the old part is the best guide.
My faucet is still leaking after I've replaced the valve stems. What should I check next?
First, ensure all connections, especially the packing nuts and valve stems, are securely tightened, but not overtightened. Check that the rubber gaskets or O-rings on the new stems are properly seated and undamaged. Sometimes, a leak might originate from the faucet spout base rather than the handles, which could indicate a separate issue with the diverter or spout O-rings.
How long should a beginner expect this repair to take, and what's the typical cost involved?
For a beginner, this project typically takes 1 to 2 hours, assuming you have the correct replacement parts readily available. The cost is usually low, primarily for the replacement valve stems, which can range from $15 to $50 per pair depending on the brand and complexity.
What are the risks of overtightening the new valve stems or packing nuts?
Overtightening can cause significant damage, such as stripping the threads on the valve body, cracking the faucet housing, or deforming the rubber gaskets on the new stems. This can lead to persistent leaks or even require a full faucet replacement. Always hand-tighten first, then use a wrench for a snug fit, being careful not to force it.
What should I do if the decorative caps or faucet handles are stuck and won't come off?
For stubborn caps, try gently prying with a thin flathead screwdriver, or applying a penetrating oil like WD-40 around the edges and letting it sit. For handles, check for corrosion or mineral buildup; penetrating oil and gentle wiggling can often help. Avoid excessive force, which could break the handle or internal components.

:max_bytes(150000):strip_icc()/how-to-replace-a-bathtub-faucet-5210836-hero-dbea72550ab646829a3fb289eb4e9a65.jpg)