
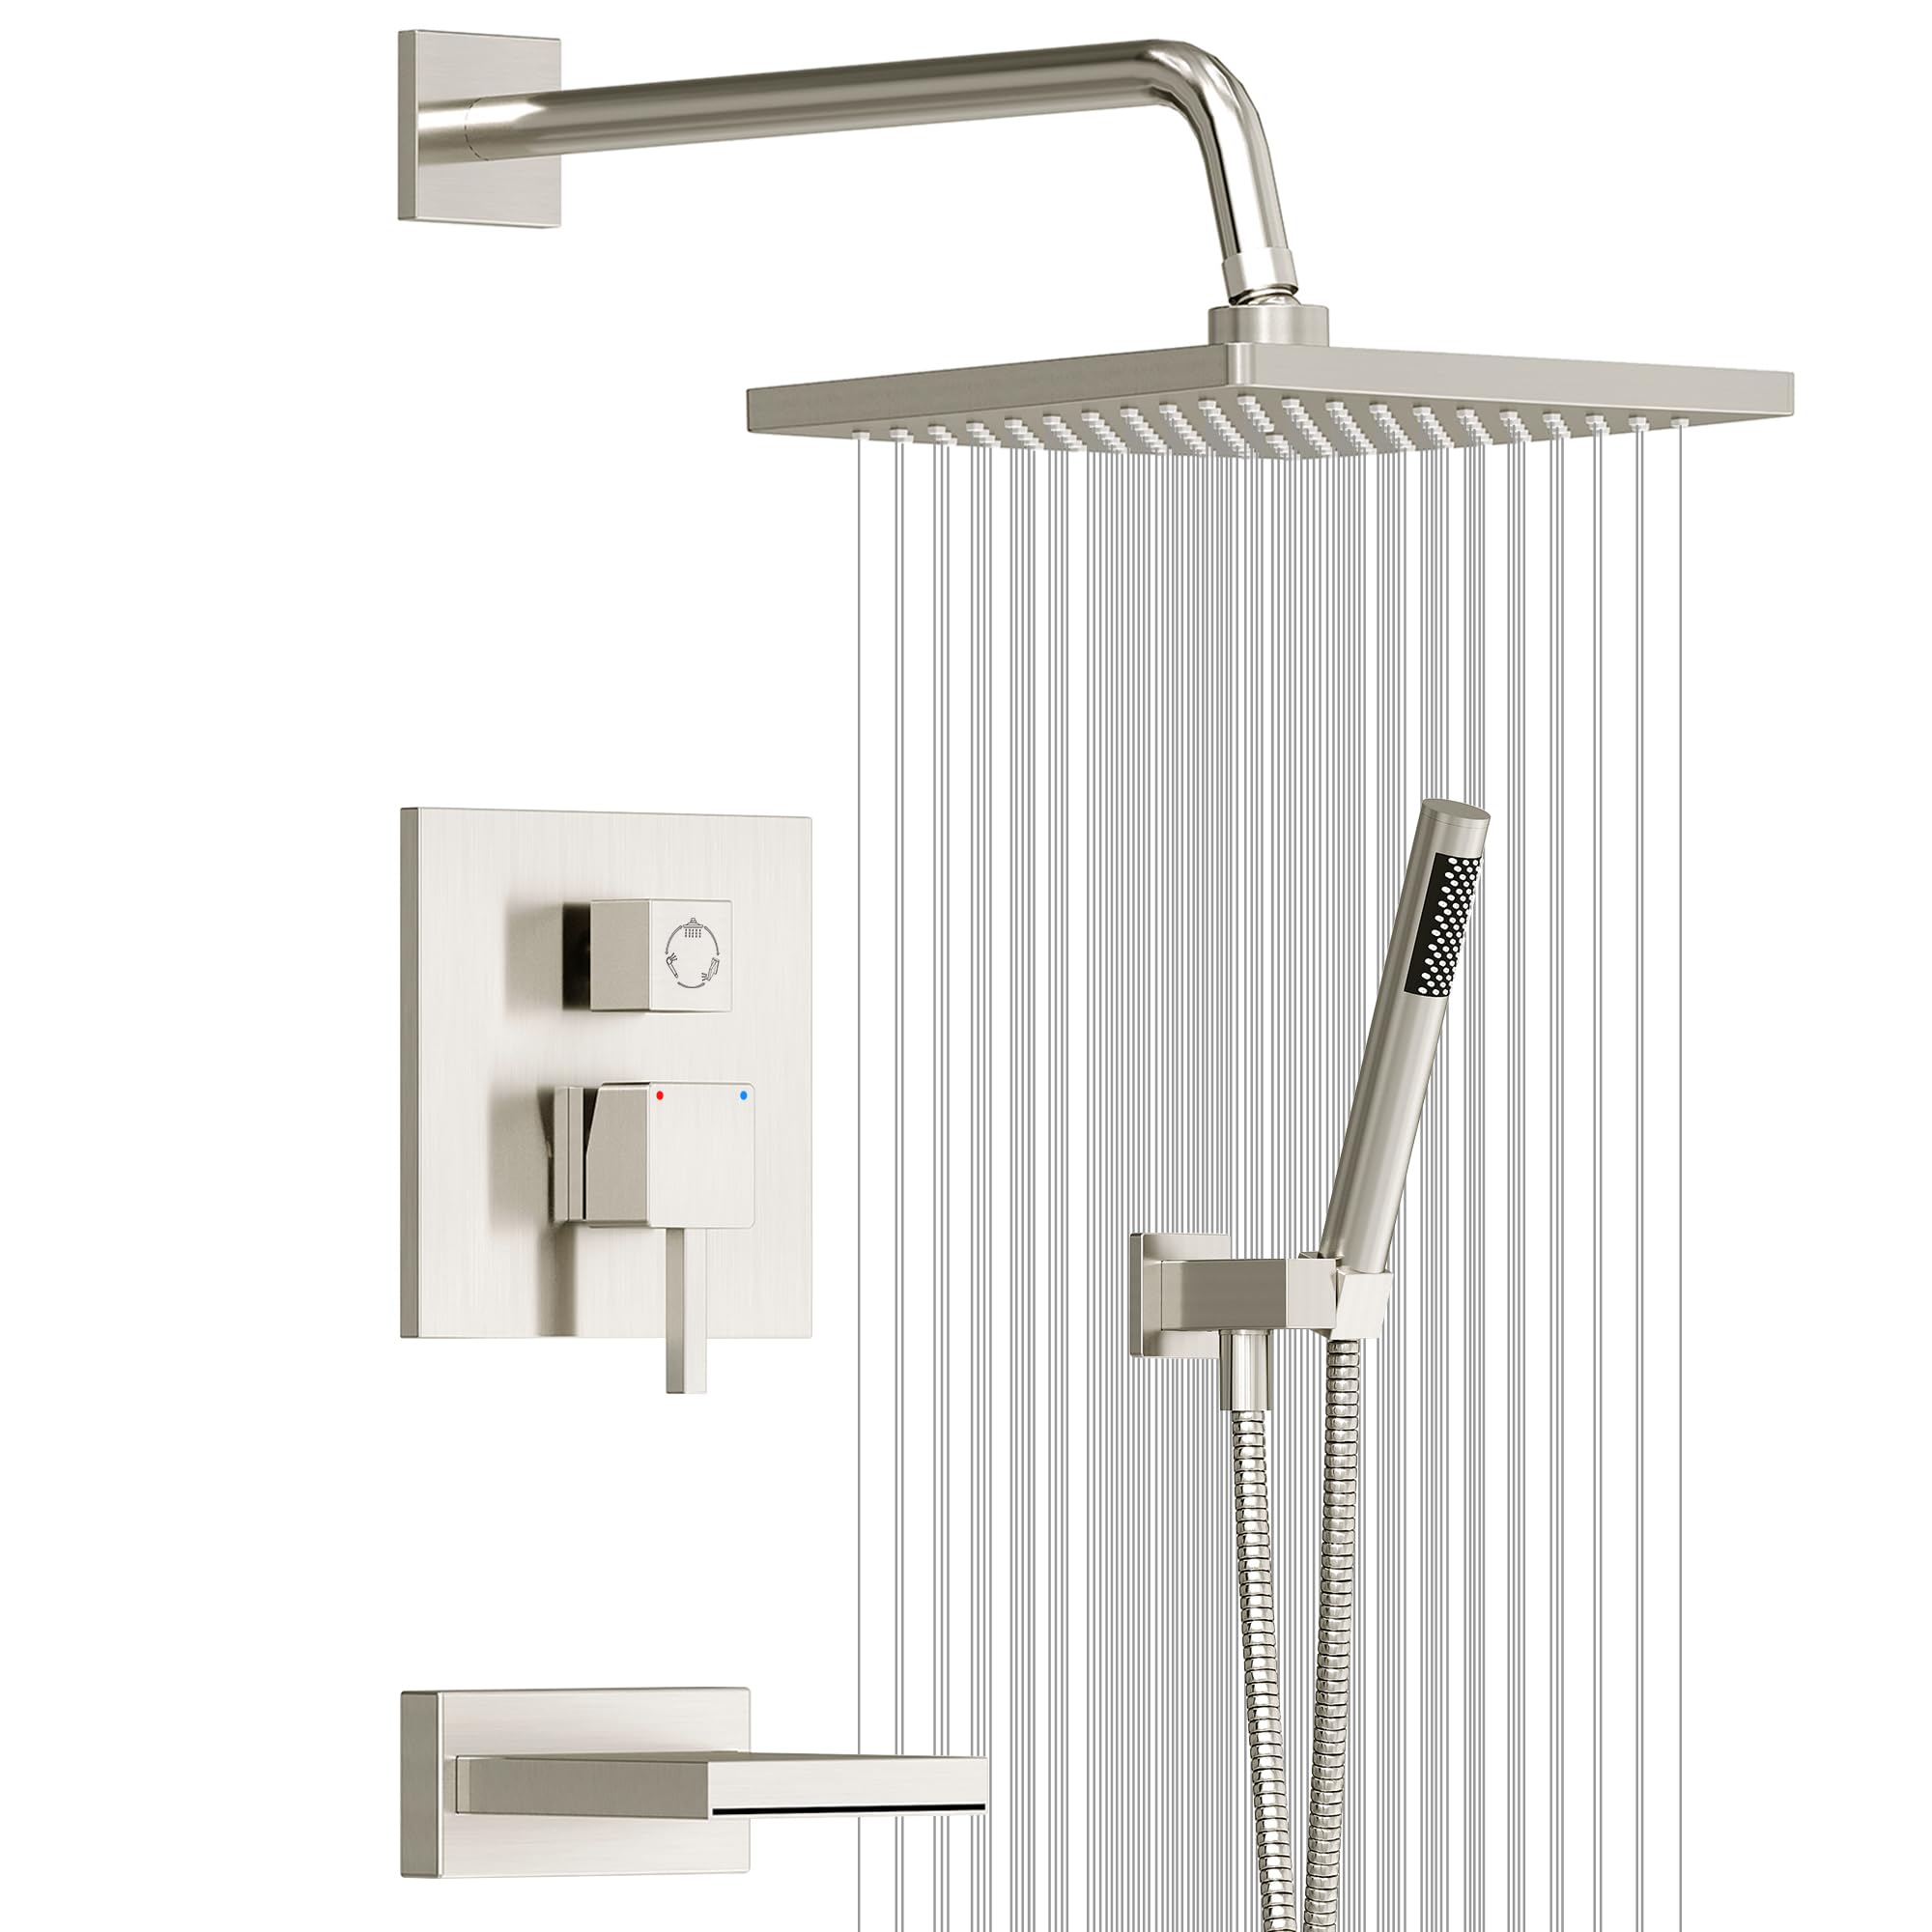
Tub Faucet & Shower Valve Replacement: A Complete DIY Guide
About This Project
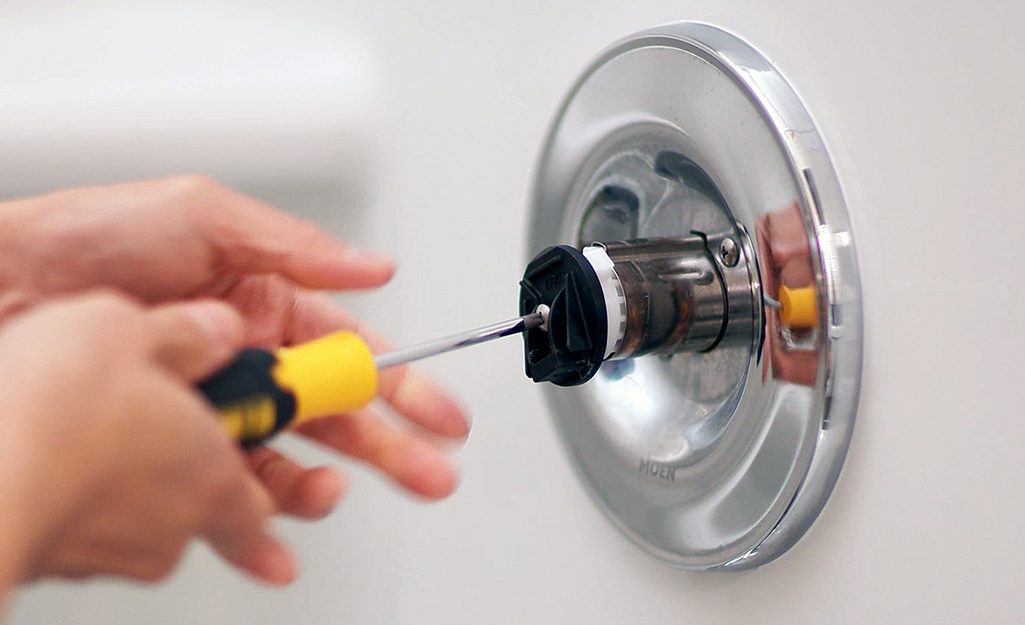
This DIY guide demonstrates how to replace tub faucet valves and other shower components. Begin by turning off the water supply, then remove the old faucet handles and escutcheon plate using a screwdriver. Next, remove the old valve stems with an adjustable wrench. Install the new valve stems, ensuring proper O-ring placement and secure tightening of nuts with a wrench. Install new faucet handles, escutcheon, showerhead, and other components according to the manufacturer's instructions. Finally, turn the water supply back on and check for leaks, testing the new faucet and showerhead to verify proper function.
Best for experienced DIYers and homeowners with some experience.
Tools & Materials
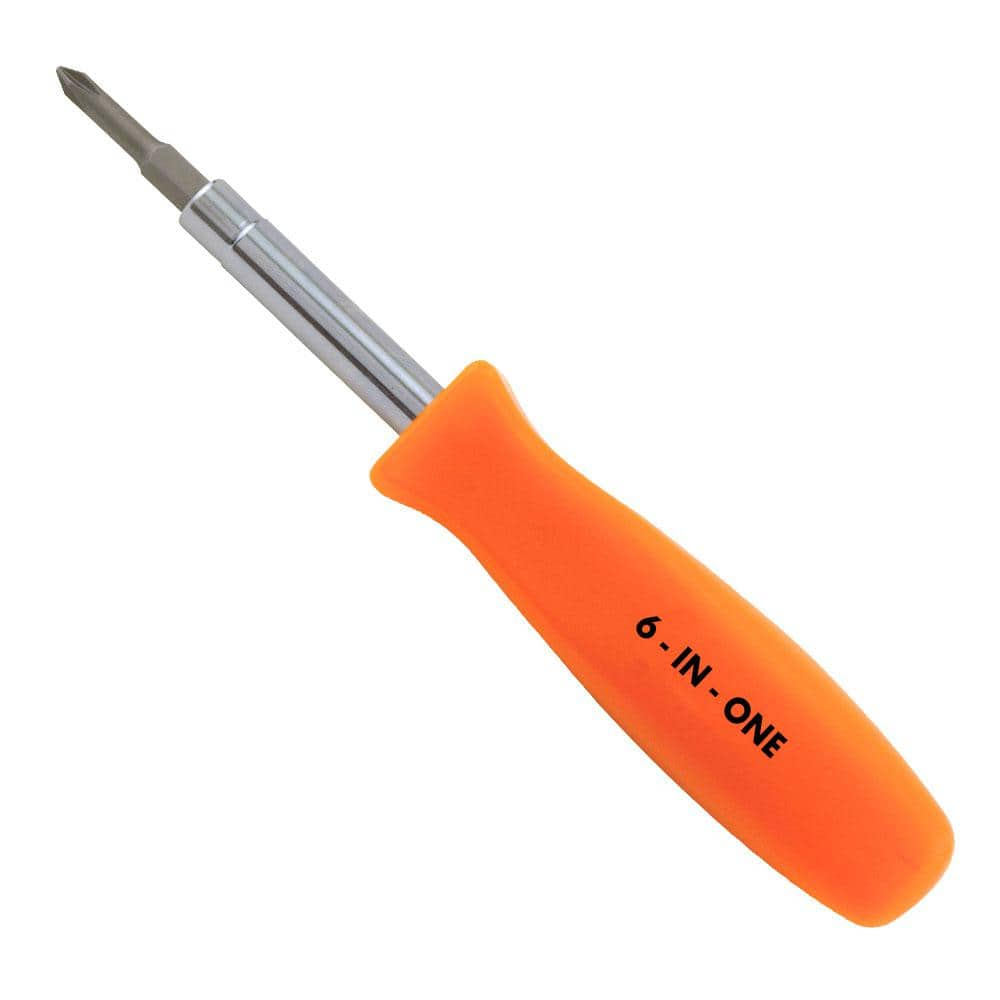
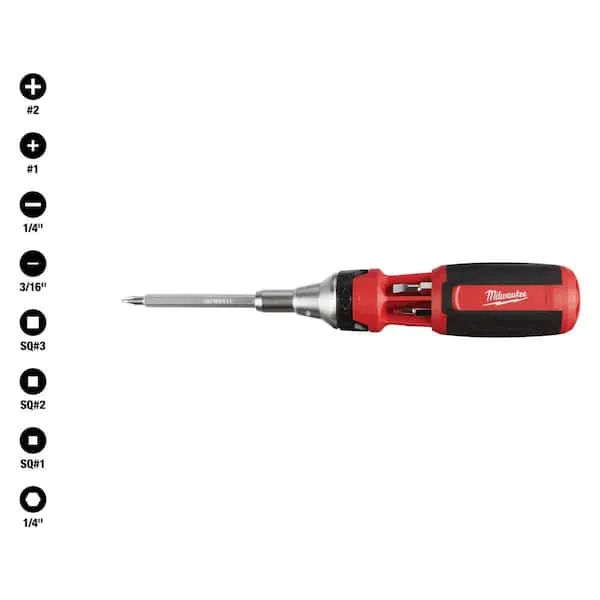
HDX 3-1/4 in. 6-in-1 Screwdriver 120SD12D
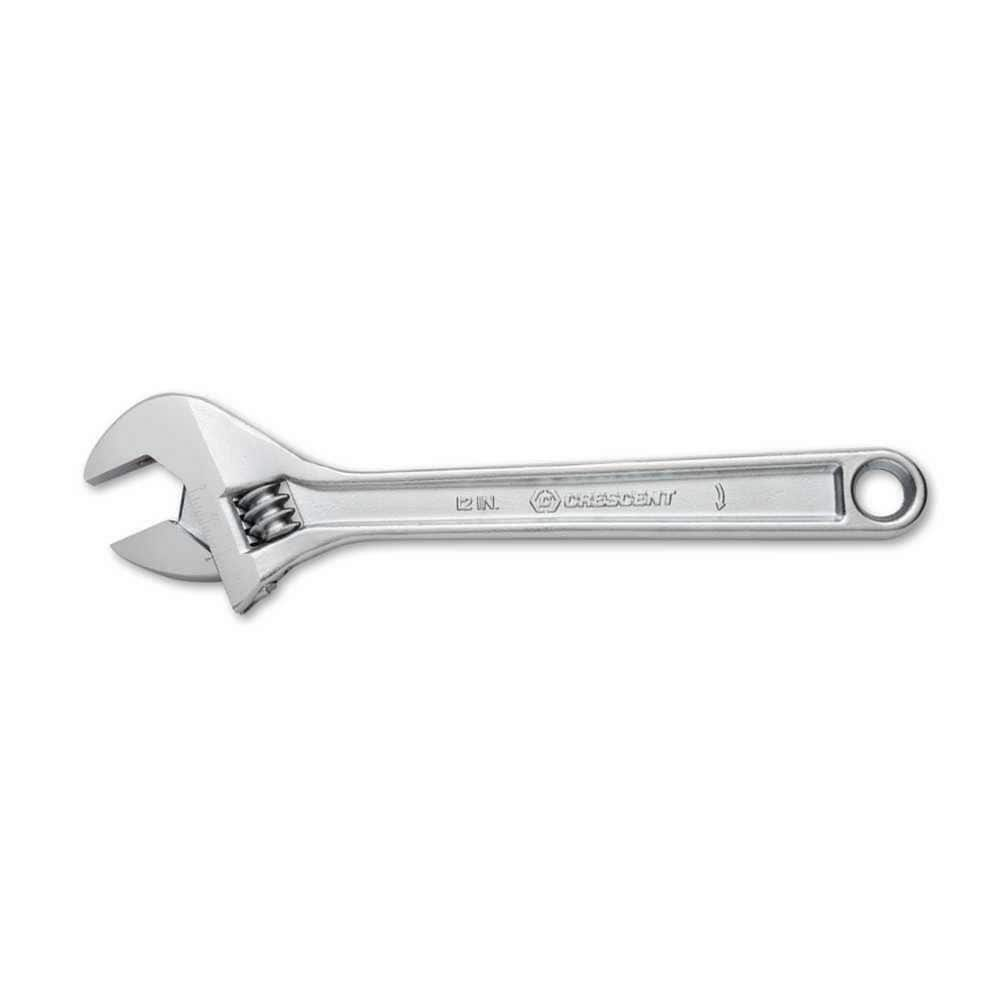
Crescent 12 in. Chrome Adjustable Wrench AC212VS

Adjustable Wrench
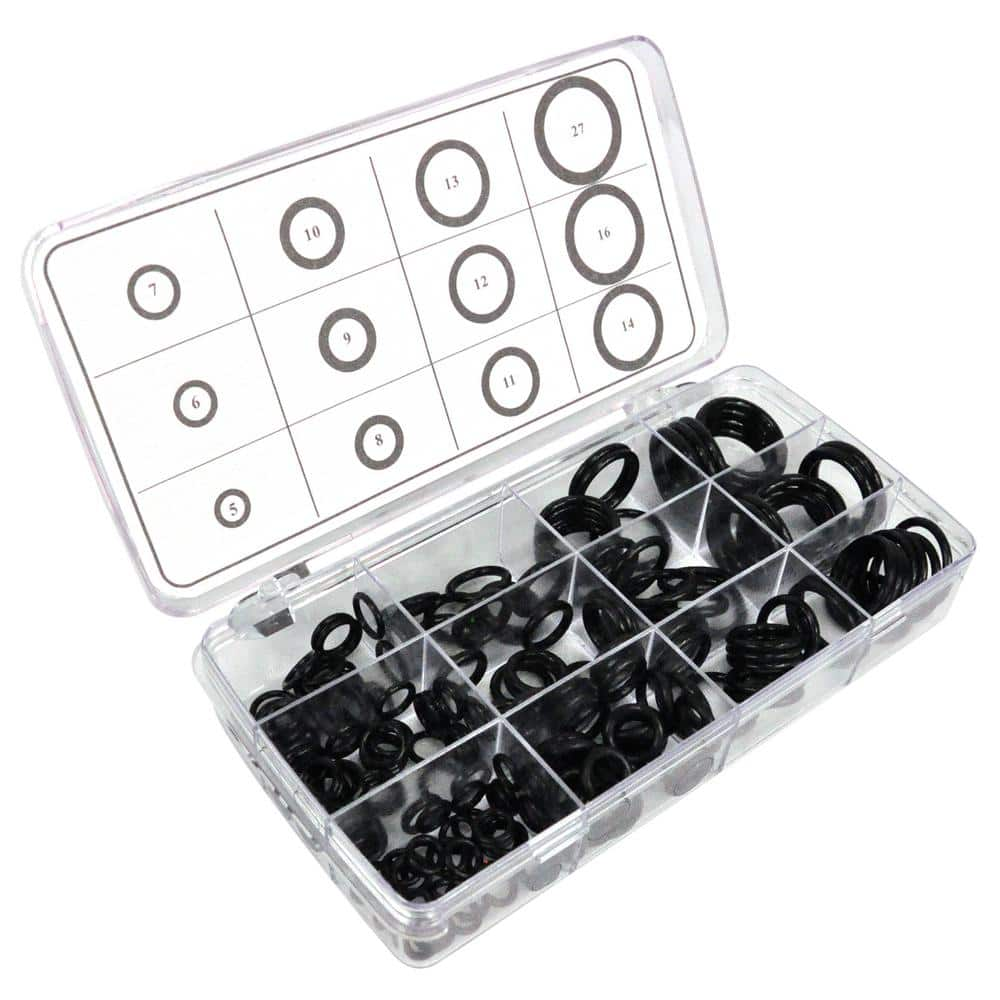
DANCO 200-Piece O-Ring Kit 34443
Screwdriver (Multi)
HDX 3-1/4 in. 6-in-1 Screwdriver 120SD12D
The HDX 3-1/4 in. 6-in-1 Screwdriver features double-sided bits with the four most common screwdriver tip styles, including a #1 Phillips bit, a #2 Phillips bit, a 3/16 in. flathead bit and a 1/4 in. flathead bit. Both ends of the shaft can be used as 1/4 in. nut drivers when the bits are removed, offering convenient, versatile use. The high-visibility orange handle makes the handy tool easy to find on a job site or in a toolbox.
Crescent 12 in. Chrome Adjustable Wrench AC212VS
Since the introduction of the original Crescent wrench in the early 1900s, the Crescent brand has become synonymous with adjustable wrenches. Crescent Adjustable Wrenches feature a large knurl for easy
Adjustable Wrench
Fits various nut and bolt sizes with its adjustable jaw.
DANCO 200-Piece O-Ring Kit 34443
O-rings get lost periodically and get warped/worn out over time. A damaged O-ring,(or no faucet O-ring, at all) means a poor seal, leading to a leaky mess. Always have a spare O-ring on hand! Faucet O-rings
Screwdriver (Multi)
Multiple bits for versatile use.
Steps


Common Problems
Ensure the main water supply is completely off. Failure to do so can result in significant water damage.
Solution: To avoid this issue: Be mindful of this warning and take appropriate precautions.
Failure to completely shut off the water will result in water leakage during the repair process.
Solution: To avoid this issue: Be mindful of this warning and take appropriate precautions.
Failing to shut off the water supply before disassembly will result in uncontrolled water flow and potential flooding.
Solution: To avoid this issue: Be mindful of this warning and take appropriate precautions.
Failure to shut off the water can lead to significant water damage.
Solution: To avoid this issue: Be mindful of this warning and take appropriate precautions.
Water trapped behind escutcheon causes damage.
Solution: Caulking only the top and sides of the escutcheon plate allows any water that gets behind it to drain out the bottom.
The central mistake of the project occurred here: the retainer clip for the valve cartridge was not installed. This clip is essential for holding the cartridge in place against water pressure.
Solution: To avoid this issue: Be mindful of this warning and take appropriate precautions.
Do not overtighten the escutcheon screws, as this can crack the tile or the plate itself.
Solution: To avoid this issue: Be mindful of this warning and take appropriate precautions.
Frequently Asked Questions
What should I do if I can't find or turn off the main water supply to my house or apartment?
Locating and shutting off the main water supply is the most critical first step. If you can't find it, check your water heater for a shut-off valve, or contact your building manager or a professional plumber. Do not proceed with the project until the water supply is completely off to avoid significant water damage.
Besides the screwdriver and adjustable wrench, are there any other essential supplies or tools I might need for this tub faucet replacement?
Yes, it's highly recommended to have plumber's tape (Teflon tape) for sealing threads, penetrating oil for loosening stuck or corroded old parts, and a small wire brush for cleaning debris. You might also find a basin wrench helpful for reaching nuts in tight spaces behind the tub wall.
I've replaced everything and turned the water back on, but the faucet is still leaking. What should I check first?
First, re-check that the new valve stems are fully seated and securely tightened, but not overtightened. Ensure all O-rings are correctly positioned and intact, as a misplaced or damaged O-ring is a common cause of leaks. Also, verify that the connections to the water supply lines are tight and sealed with plumber's tape.
Is 4 hours a realistic estimate for a complete beginner, or should I budget more time, especially if I encounter stuck parts?
While 4 hours is a good estimate for someone with some DIY experience and no major issues, a complete beginner should budget more, perhaps 6-8 hours. Encountering corroded or stuck parts, or making unexpected trips to the hardware store for forgotten items, can significantly extend the project time.
What if the old valve stems are corroded or stuck and I can't remove them with an adjustable wrench?
Apply a penetrating oil to the base of the stems and allow it to sit for 15-30 minutes, then try again with the adjustable wrench. Gentle tapping with a hammer on the wrench or stem can also help loosen corrosion. If they remain stuck, you may need to call a plumber to avoid damaging the pipes.
Why is proper O-ring placement so important when installing the new valve stems, and what happens if I get it wrong?
O-rings are crucial for creating a watertight seal around the valve stem, preventing water from leaking out. If an O-ring is pinched, torn, or improperly seated, it will fail to seal, leading to persistent drips or significant leaks, potentially causing water damage behind your wall or under your tub.
After replacing the faucet, the water pressure seems lower than before. What could be causing this?
Reduced water pressure often indicates a blockage or an issue with the new components. Check if the aerator on the new faucet head is clogged with debris from the pipes, or ensure that the new valve stems are fully open. Sometimes, debris can get dislodged during the replacement process and settle in the aerator.

:max_bytes(150000):strip_icc()/how-to-replace-a-bathtub-faucet-5210836-hero-dbea72550ab646829a3fb289eb4e9a65.jpg)