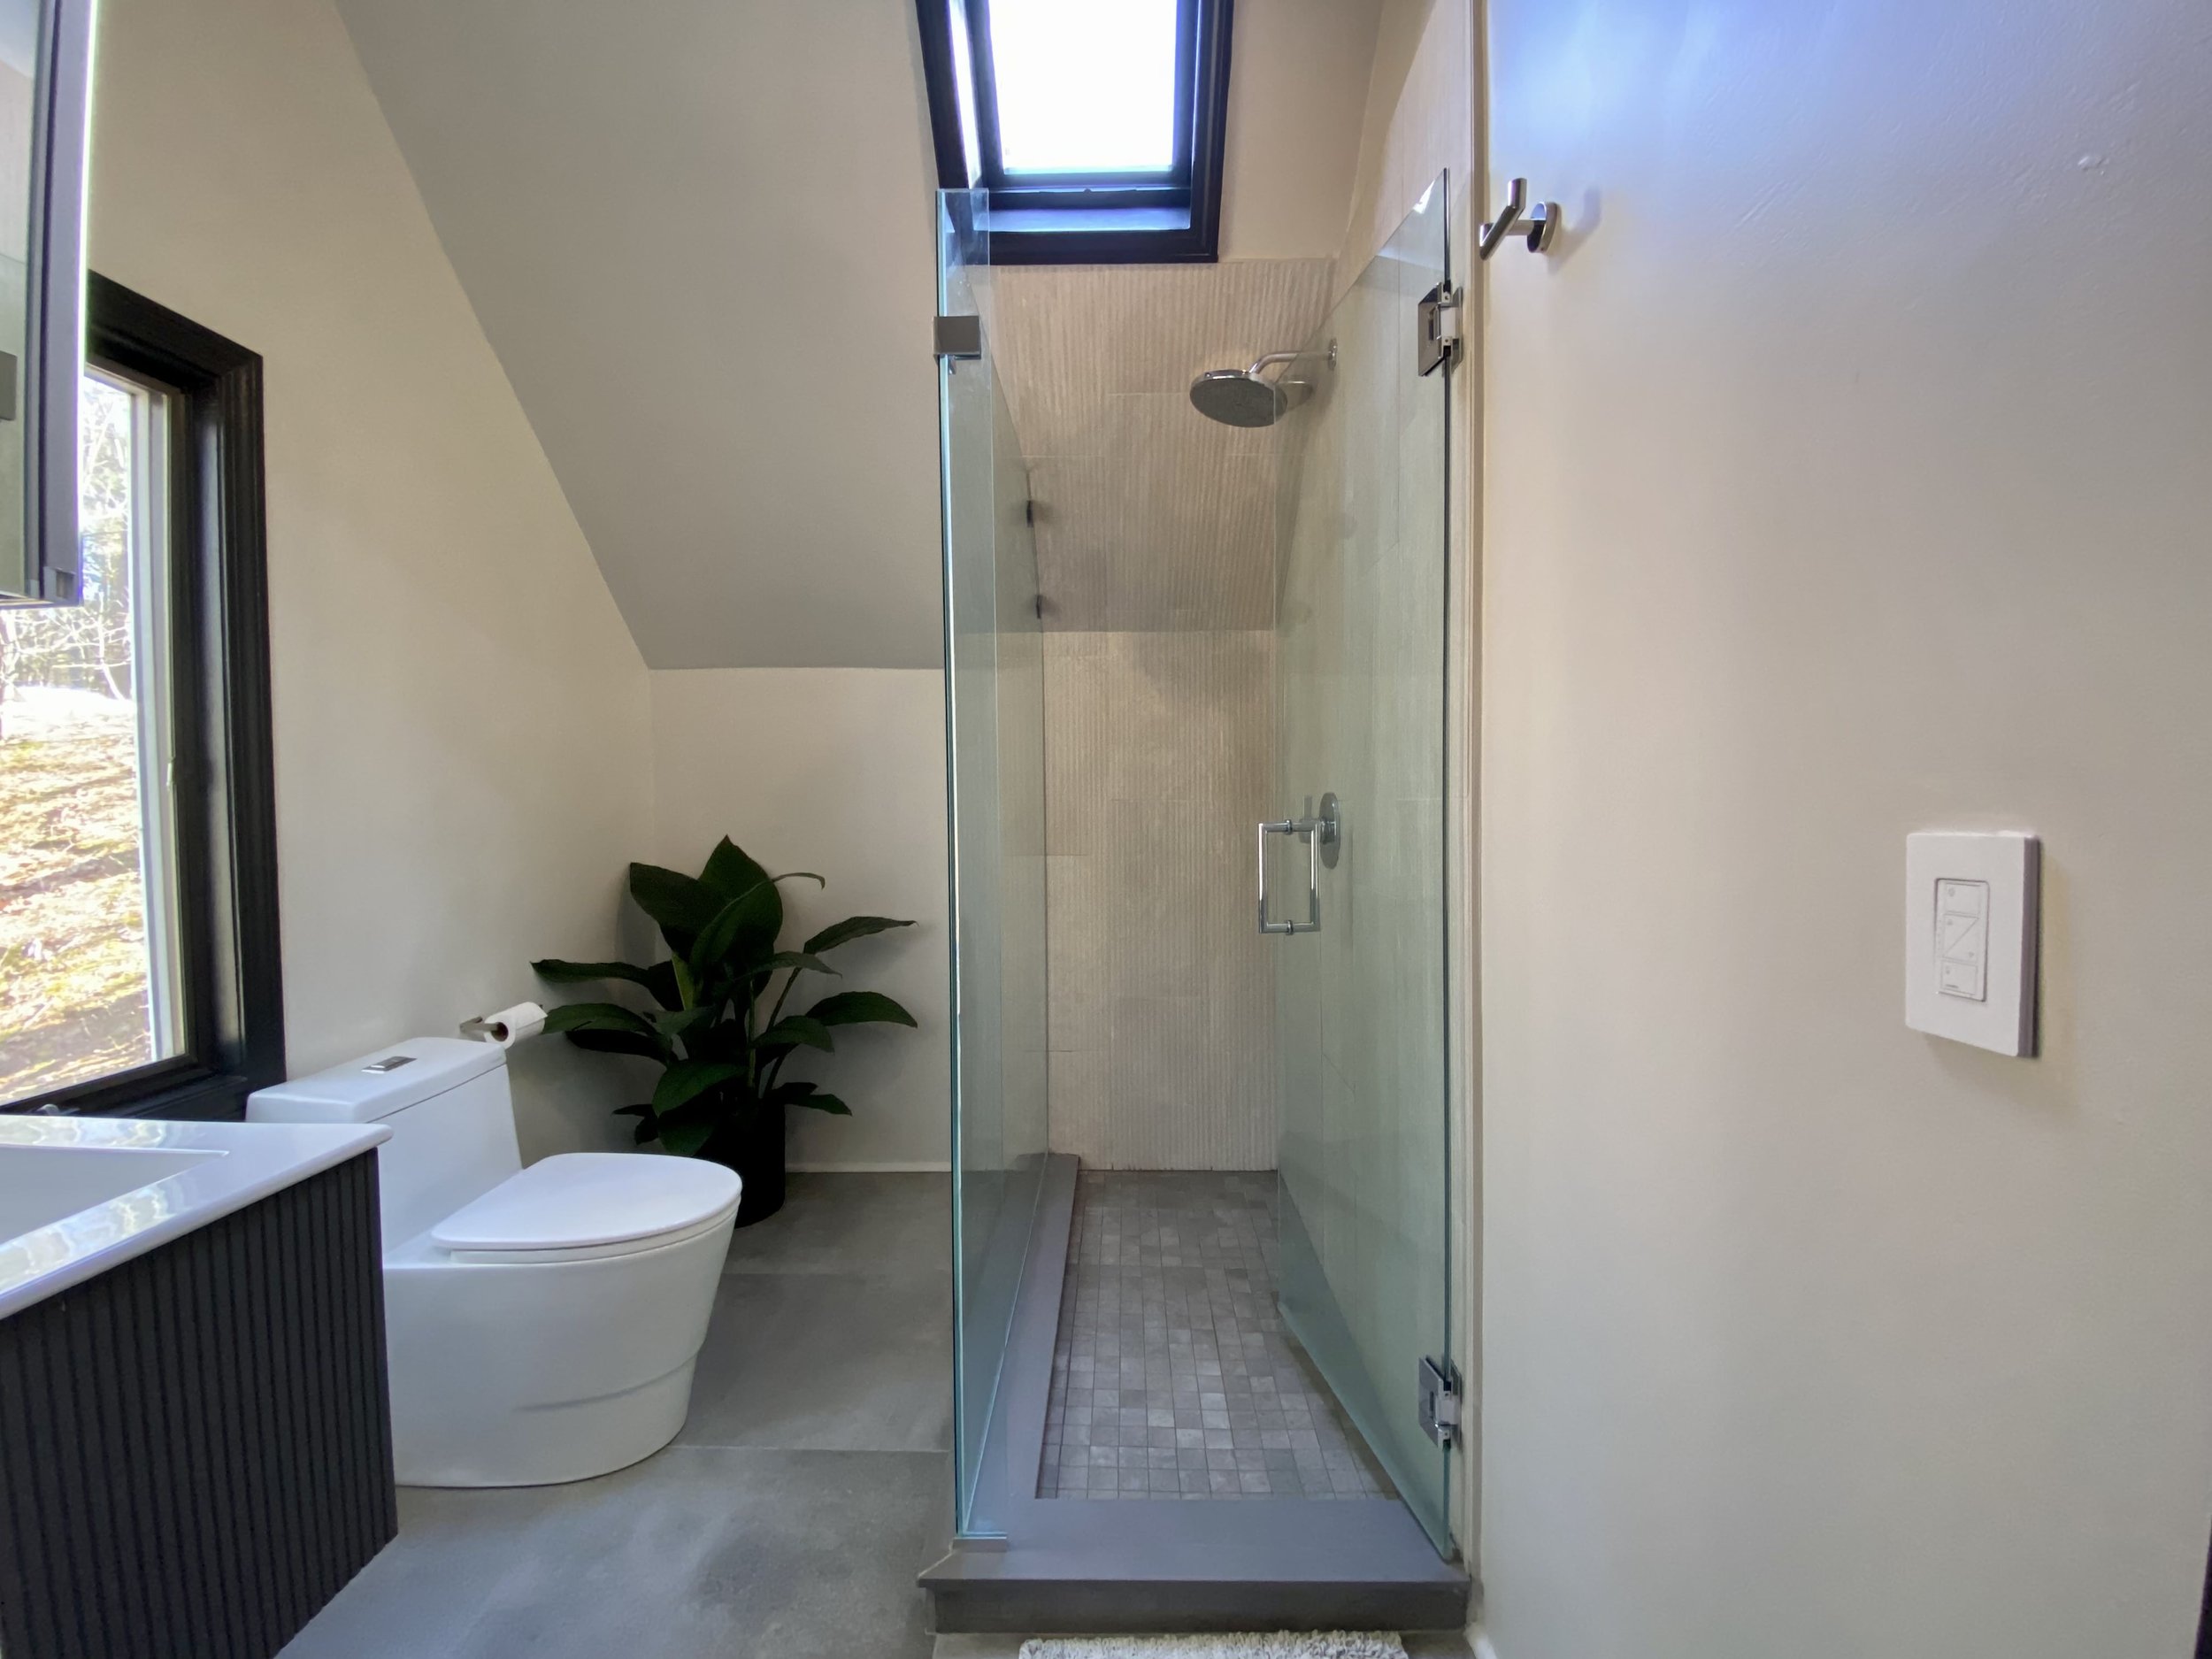
Shower Valve Installation: A Complete DIY Guide with Plumbing Tips
About This Project
This DIY guide demonstrates how to install a shower valve, covering steps from turning off the water supply and draining pipes, to removing old fixtures and soldering the new valve in place. The guide also details connecting the faucet plumbing, including using plumber's tape on threaded connections and testing for leaks to ensure a secure and functional shower.
Best for advanced DIYers and professionals.
Tools & Materials
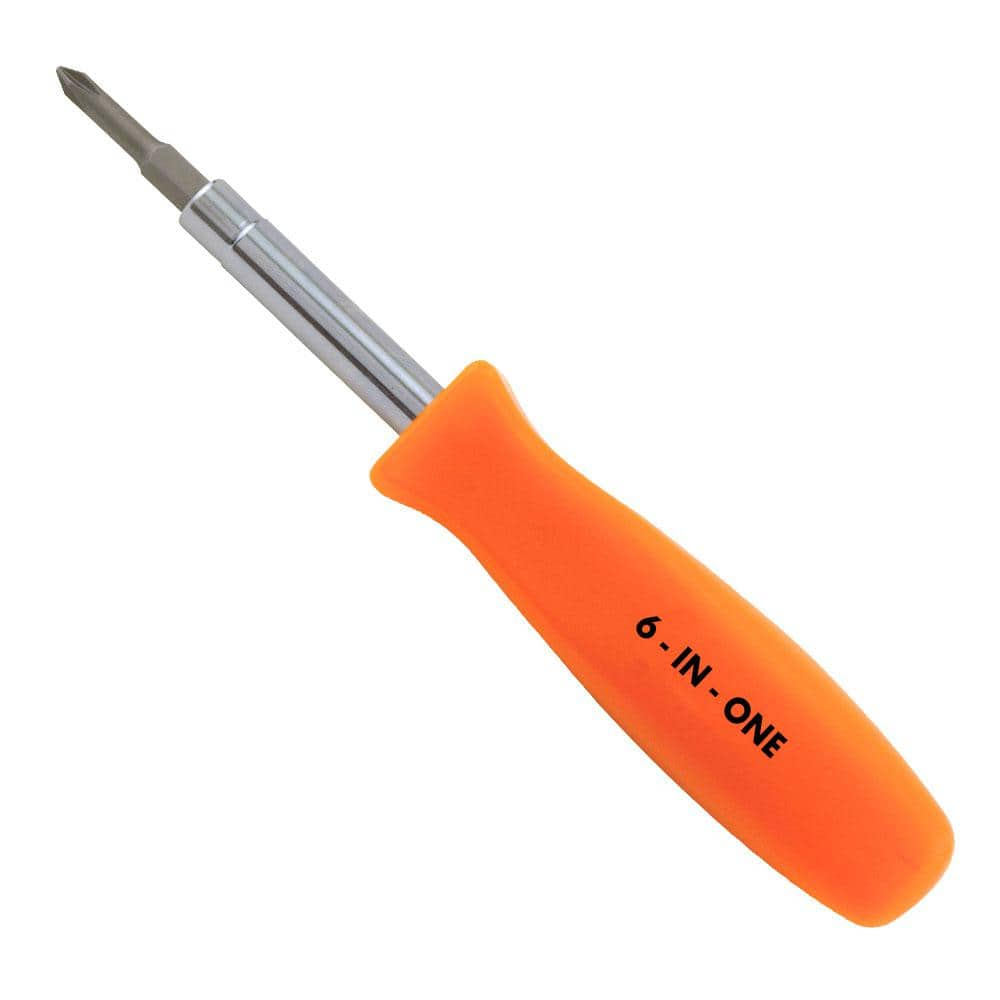
HDX 3-1/4 in. 6-in-1 Screwdriver 120SD12D
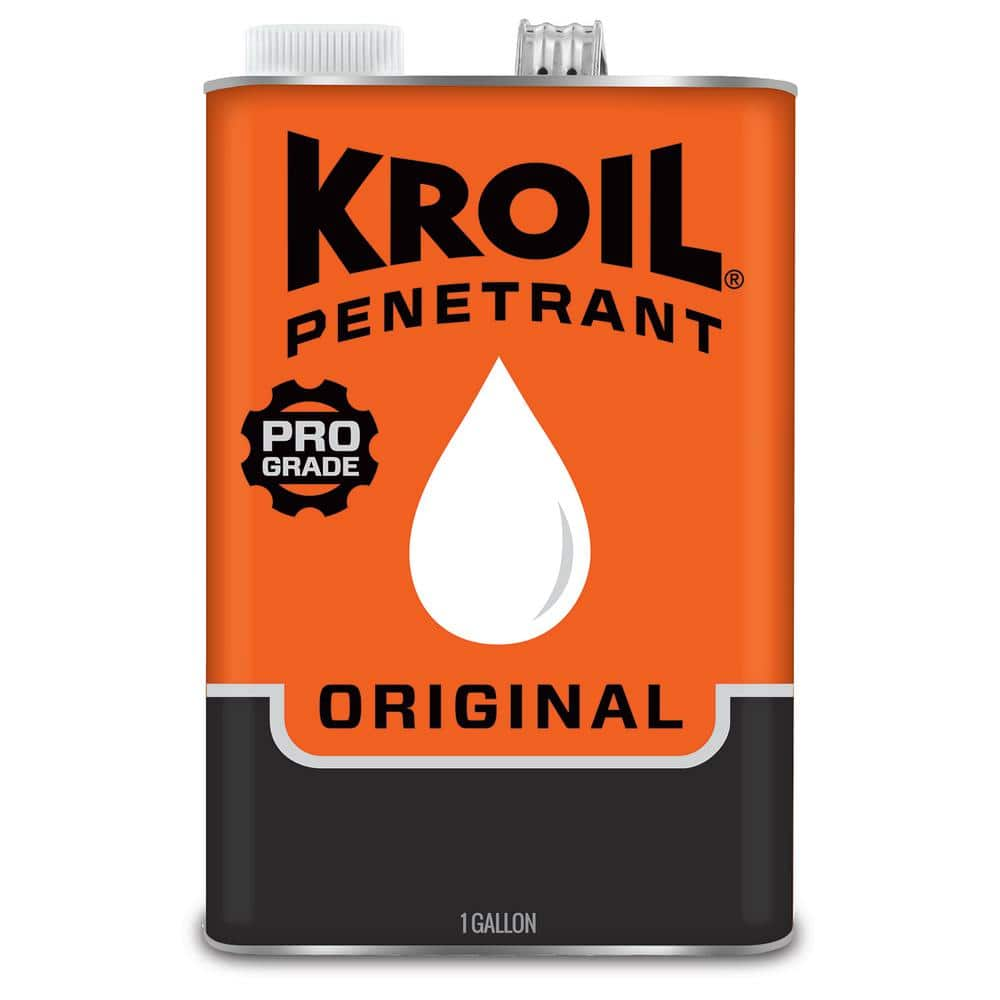
KROIL Penetrating Oil Liquid, Industrial-Grade Penetrant, Multi-Purpose Oil, Liquid, NSF H2,50-State VOC Compliant KL011

AUTOCUT 1/2 in. Copper Pipe Tubing Cutter ATC12
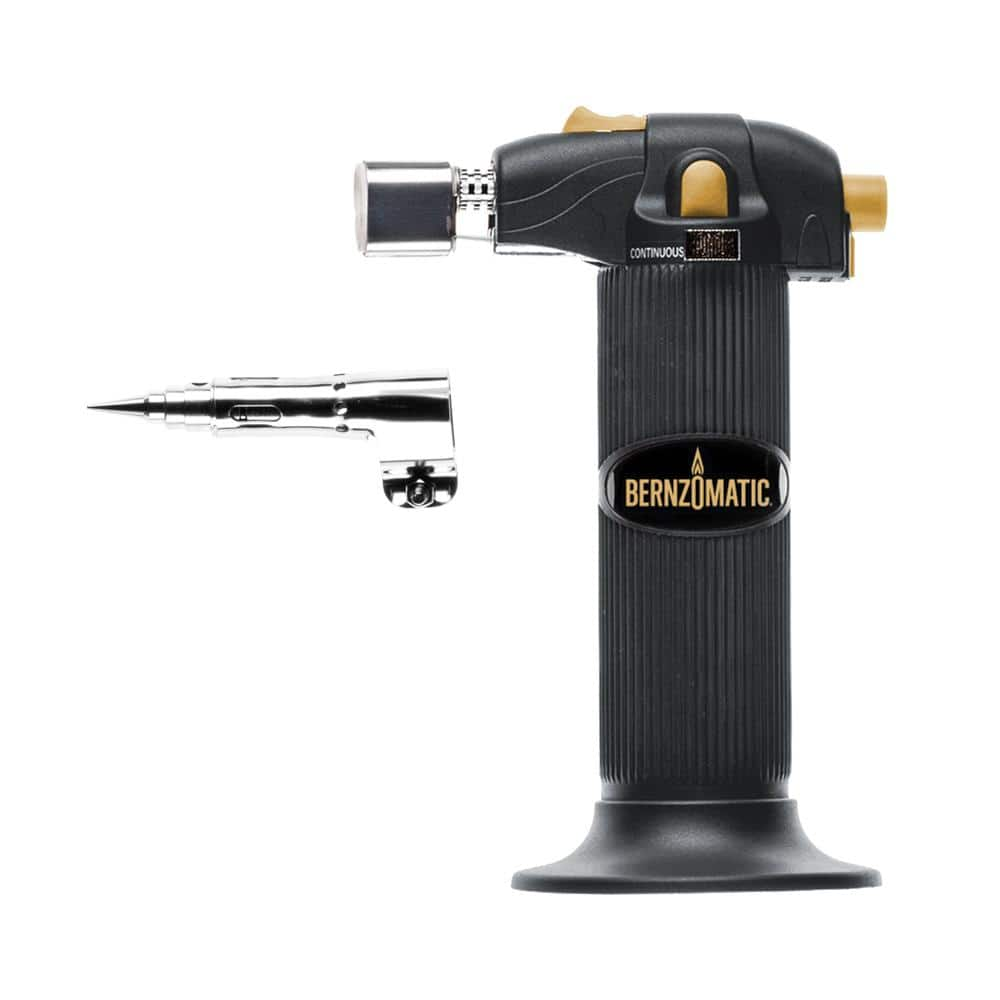
Bernzomatic Butane Detail Torch with Soldering Tip, Trigger Ignition and Flame Lock ST2200T
Oatey Safe Flo 1 lb. Lead-Free Silver Solder Wire 290252
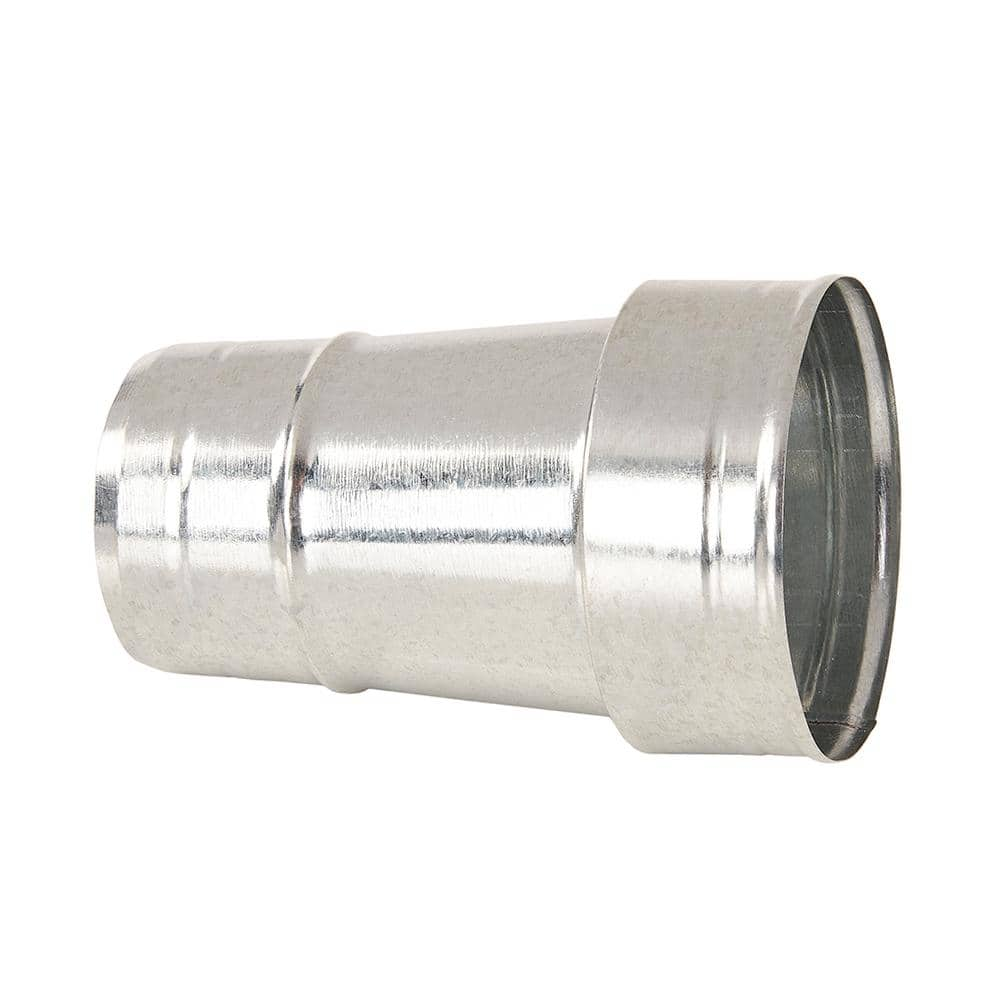
Master Flow 8 in. to 7 in. Round Reducer R8X7
HDX 3-1/4 in. 6-in-1 Screwdriver 120SD12D
The HDX 3-1/4 in. 6-in-1 Screwdriver features double-sided bits with the four most common screwdriver tip styles, including a #1 Phillips bit, a #2 Phillips bit, a 3/16 in. flathead bit and a 1/4 in. flathead bit. Both ends of the shaft can be used as 1/4 in. nut drivers when the bits are removed, offering convenient, versatile use. The high-visibility orange handle makes the handy tool easy to find on a job site or in a toolbox.
KROIL Penetrating Oil Liquid, Industrial-Grade Penetrant, Multi-Purpose Oil, Liquid, NSF H2,50-State VOC Compliant KL011
KROIL Penetrant 1 Gal. can is an industrial-strength penetrating oil formulated to quickly penetrate deep into small crevices. KROIL attacks rust and corrosion to help loosen frozen or seized metal fasteners
AUTOCUT 1/2 in. Copper Pipe Tubing Cutter ATC12
Autocut copper tubing cutters are a great tool to have when you don't have enough swing room to use a full-size tubing cutter. You can cut copper tubing with less than one inch of clearance or you can
Bernzomatic Butane Detail Torch with Soldering Tip, Trigger Ignition and Flame Lock ST2200T
The Bernzomatic Detail Torch with trigger start ignition provides instant flame activation and adjustable flame control for precise heat application. Its ergonomic design offers a comfortable grip, reducing
Oatey Safe Flo 1 lb. Lead-Free Silver Solder Wire 290252
This Oatey 1 lb. Safe-Flo Silver Wire Solder is made from a lead-free alloy specifically formulated for use on lines that carry drinking water. This solder requires the use of flux (not included) and features a wide melting range, from 415 degrees Fahrenheit to 455 degrees Fahrenheit. Meets the requirements of the Safe Drinking Water Act.
Master Flow 8 in. to 7 in. Round Reducer R8X7
The Master Flow 8 in. x 7 in. Round Reducer is made of galvanized steel. It features hemmed collar edges for enhanced strength and a secure fit. The reducer is used to transition from a 8 in. pipe to a 7 in. pipe in an HVAC system. It is suitable for most HVAC applications.
Steps


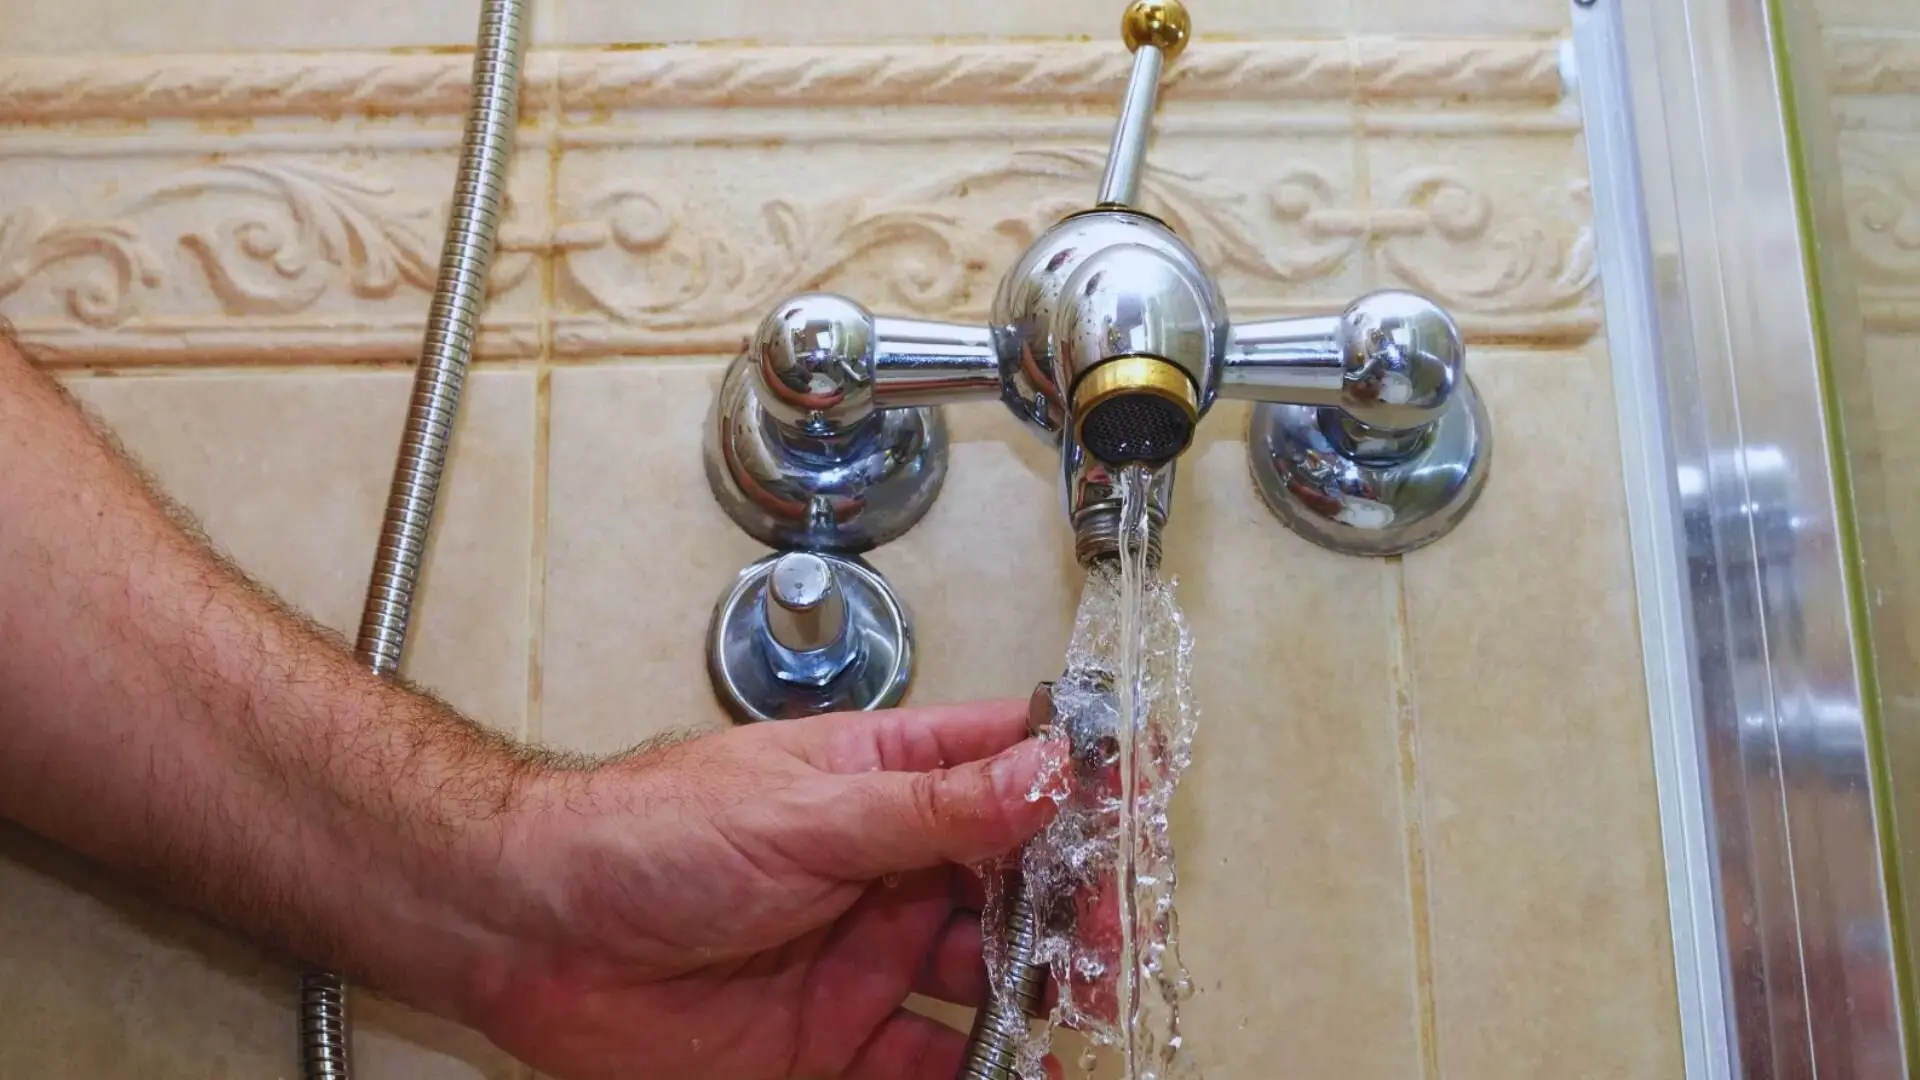
Remove Old Shower Valve and Handles
30 minsCarefully remove the old shower valve and faucet handles. If stuck, apply penetrating oil and allow it to sit for a few minutes before attempting removal. Use the appropriate tools (screwdrivers, pliers, Allen keys) to loosen and detach the components.

Prepare and Solder Copper Pipes
1 minMeasure and carefully cut the copper pipes to the correct length for the new valve. Ensure proper alignment and slope for drainage. Apply flux, then solder the connections using a propane torch and lead-free solder. Maintain proper ventilation and safety precautions.


Common Problems
Safety concern: Turn off the main water supply before starting any plumbing work., Solder with proper ventilation and safety precautions.
Solution: Take proper safety precautions. Turn off the main water supply before starting any plumbing work., Solder with proper ventilation and safety precautions.
Prevention: Always follow safety guidelines before starting the project.
You can't start the shower valve installation without water.
Solution: Locate the main water shutoff valve beforehand to avoid delays.
Do not attempt to shut off the water using the under-sink valves as they may leak.
Solution: To avoid this issue: Be mindful of this warning and take appropriate precautions.
If the main valve is resistant or won't turn, you may need to call a plumber.
Solution: To avoid this issue: Be mindful of this warning and take appropriate precautions.
Failure to shut off the main water supply will result in a flood when you open the valve.
Solution: To avoid this issue: Be mindful of this warning and take appropriate precautions.
Carefully follow the manufacturer's instructions to ensure the valve is set at the proper depth. If it's too deep or too shallow, the trim will not fit correctly.
Solution: To avoid this issue: Be mindful of this warning and take appropriate precautions.
Shower valve installed crooked, leading to uneven water flow and potential leaks.
Solution: Use a level to ensure the valve and the brace it's mounted on are perfectly level and plumb.
Frequently Asked Questions
I'm hesitant about soldering copper pipes. Are there alternative connection methods for a shower valve that are easier for a DIYer?
Yes, for those uncomfortable with soldering, push-to-connect fittings (like SharkBite) or crimp connections are excellent alternatives. While often more expensive than traditional copper fittings, they significantly simplify the installation process by eliminating the need for a torch and solder, making them very DIY-friendly. Ensure you purchase fittings compatible with your pipe type (PEX, copper, CPVC).
What crucial safety precautions should I take, especially when using a torch for soldering near walls or inside the shower enclosure?
When soldering, always have a fire extinguisher or a bucket of water nearby, and use a heat shield or flame protector to protect surrounding studs and finishes from the torch's flame. Ensure the work area is well-ventilated and that pipes are completely drained and dry before applying heat. Always wear appropriate personal protective equipment, including safety glasses and gloves.
What is the most common mistake DIYers make during a shower valve installation, and how can I avoid it?
A common mistake is not fully draining the pipes before attempting to solder, leading to steam pockets that prevent a good joint. To avoid this, ensure the main water supply is off and all nearby faucets are open to completely empty the lines. Another error is not properly using plumber's tape or thread sealant on threaded connections, which can lead to leaks.
The estimated time is 6 hours, but I'm a beginner. How much extra time should I realistically budget, and what part typically takes the longest?
As a beginner, it's wise to budget 8-10 hours or even a full weekend, especially if you're new to soldering or working in tight spaces. The steps that often consume the most time are ensuring all old components are fully removed without damage, accurately measuring and cutting new pipes, achieving clean solder joints, and thoroughly testing for leaks before closing up the wall.
Do I really need a special copper pipe tubing cutter, or can I use a hacksaw for cutting the pipes?
While a hacksaw can cut copper pipe, a dedicated copper pipe tubing cutter is highly recommended. It provides a much cleaner, straighter cut with less burring, which is crucial for creating strong, leak-free solder joints. Clean cuts minimize the need for reaming and ensure the pipe fits snugly into fittings, leading to a more reliable plumbing connection.
What should I do if I discover a small drip or leak after the final leak test and the wall is closed up?
Immediately shut off your main water supply. If the wall is already closed, you'll likely need to carefully re-open the access point or drywall to locate the source of the leak. For threaded connections, try gently tightening them; for soldered joints, it may indicate a poorly made connection that will need to be re-soldered after draining and drying the pipes again. Do not ignore even small leaks.
/how-to-replace-a-shower-valve-5197461-10_reattach_23668-86d35b214a3849a796f94e0b38fab900.jpg)