Refresh Your Bathroom: A Step-by-Step Guide to Shower Trim Replacement
About This Project
This project outlines the steps to replace your shower trim. It begins by emphasizing safety and turning off the water supply. Next, you remove the existing handle, often secured by a setscrew requiring an Allen wrench. After the handle is removed, the escutcheon and any additional trim pieces are carefully removed, sometimes requiring unscrewing or prying. Then, you install the new trim components according to the manufacturer's instructions, typically screwing or fastening them into place. Finally, the water supply is slowly turned back on, and all connections are checked thoroughly for leaks. If leaks are detected, connections are tightened, or components are disassembled and reassembled as needed. A qualified plumber should be contacted for persistent leaks.
Best for homeowners and DIY enthusiasts.
Tools & Materials
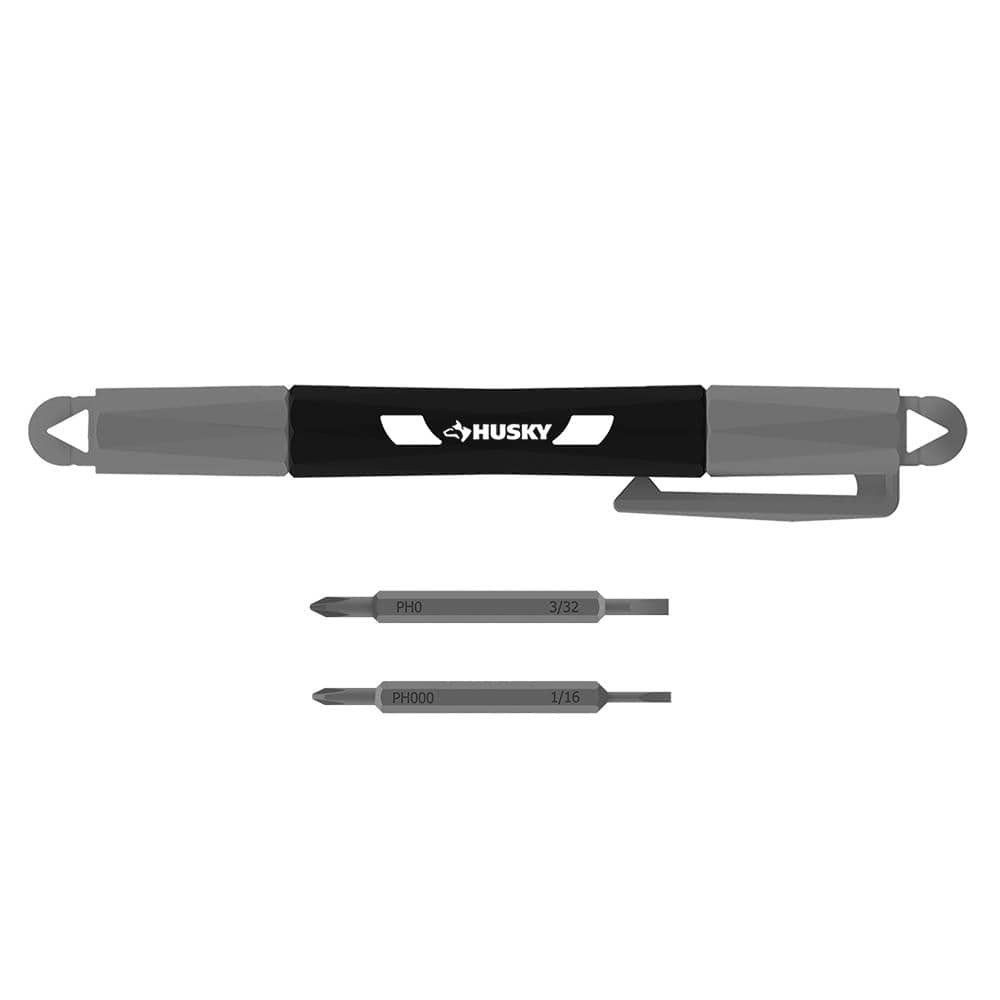
Husky Pocket Screwdriver (4 in 1) 632360012
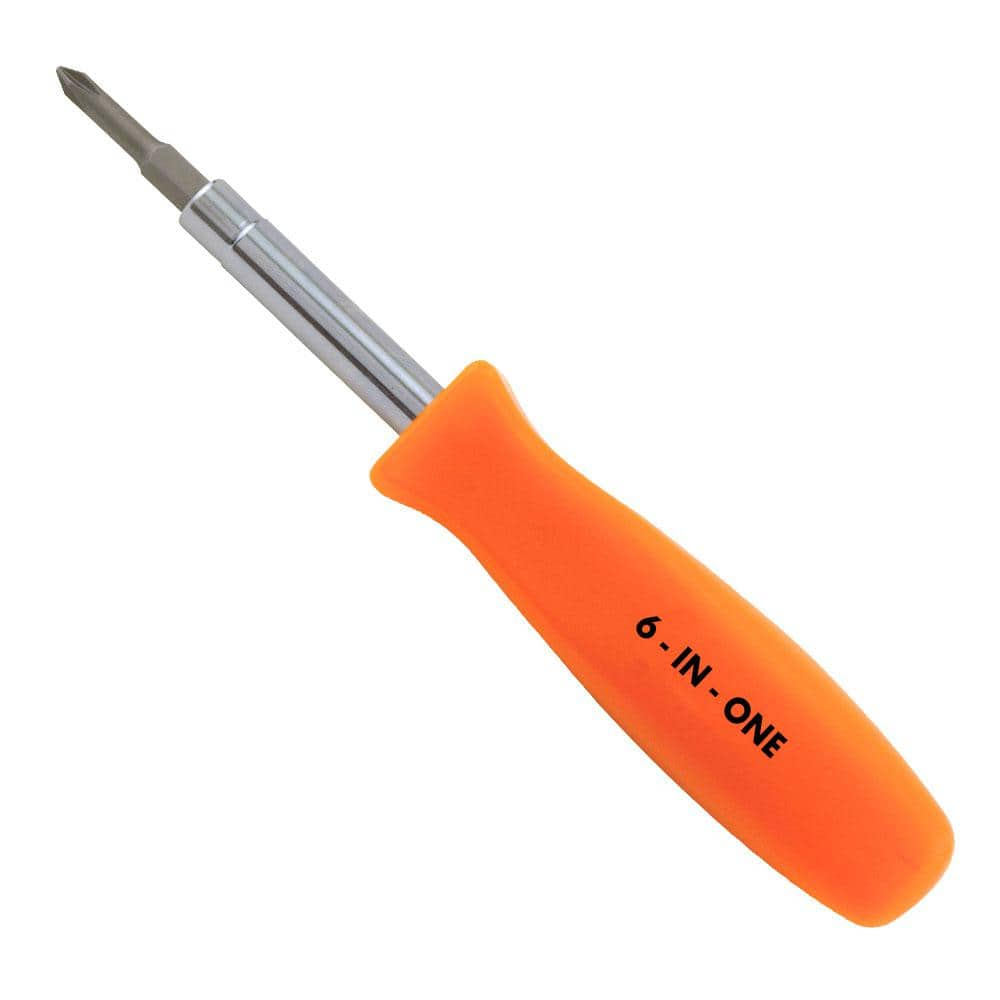
HDX 3-1/4 in. 6-in-1 Screwdriver 120SD12D
Husky Pocket Screwdriver (4 in 1) 632360012
The Husky 4-in-1 Pocket Screwdriver features 4 different tips (2 double ended bits) in 1 tool, includes #0 and #000 Phillips plus 1/16 in. and 3/32 in. Slotted tips. This tools is designed for precision
HDX 3-1/4 in. 6-in-1 Screwdriver 120SD12D
The HDX 3-1/4 in. 6-in-1 Screwdriver features double-sided bits with the four most common screwdriver tip styles, including a #1 Phillips bit, a #2 Phillips bit, a 3/16 in. flathead bit and a 1/4 in. flathead bit. Both ends of the shaft can be used as 1/4 in. nut drivers when the bits are removed, offering convenient, versatile use. The high-visibility orange handle makes the handy tool easy to find on a job site or in a toolbox.
Steps

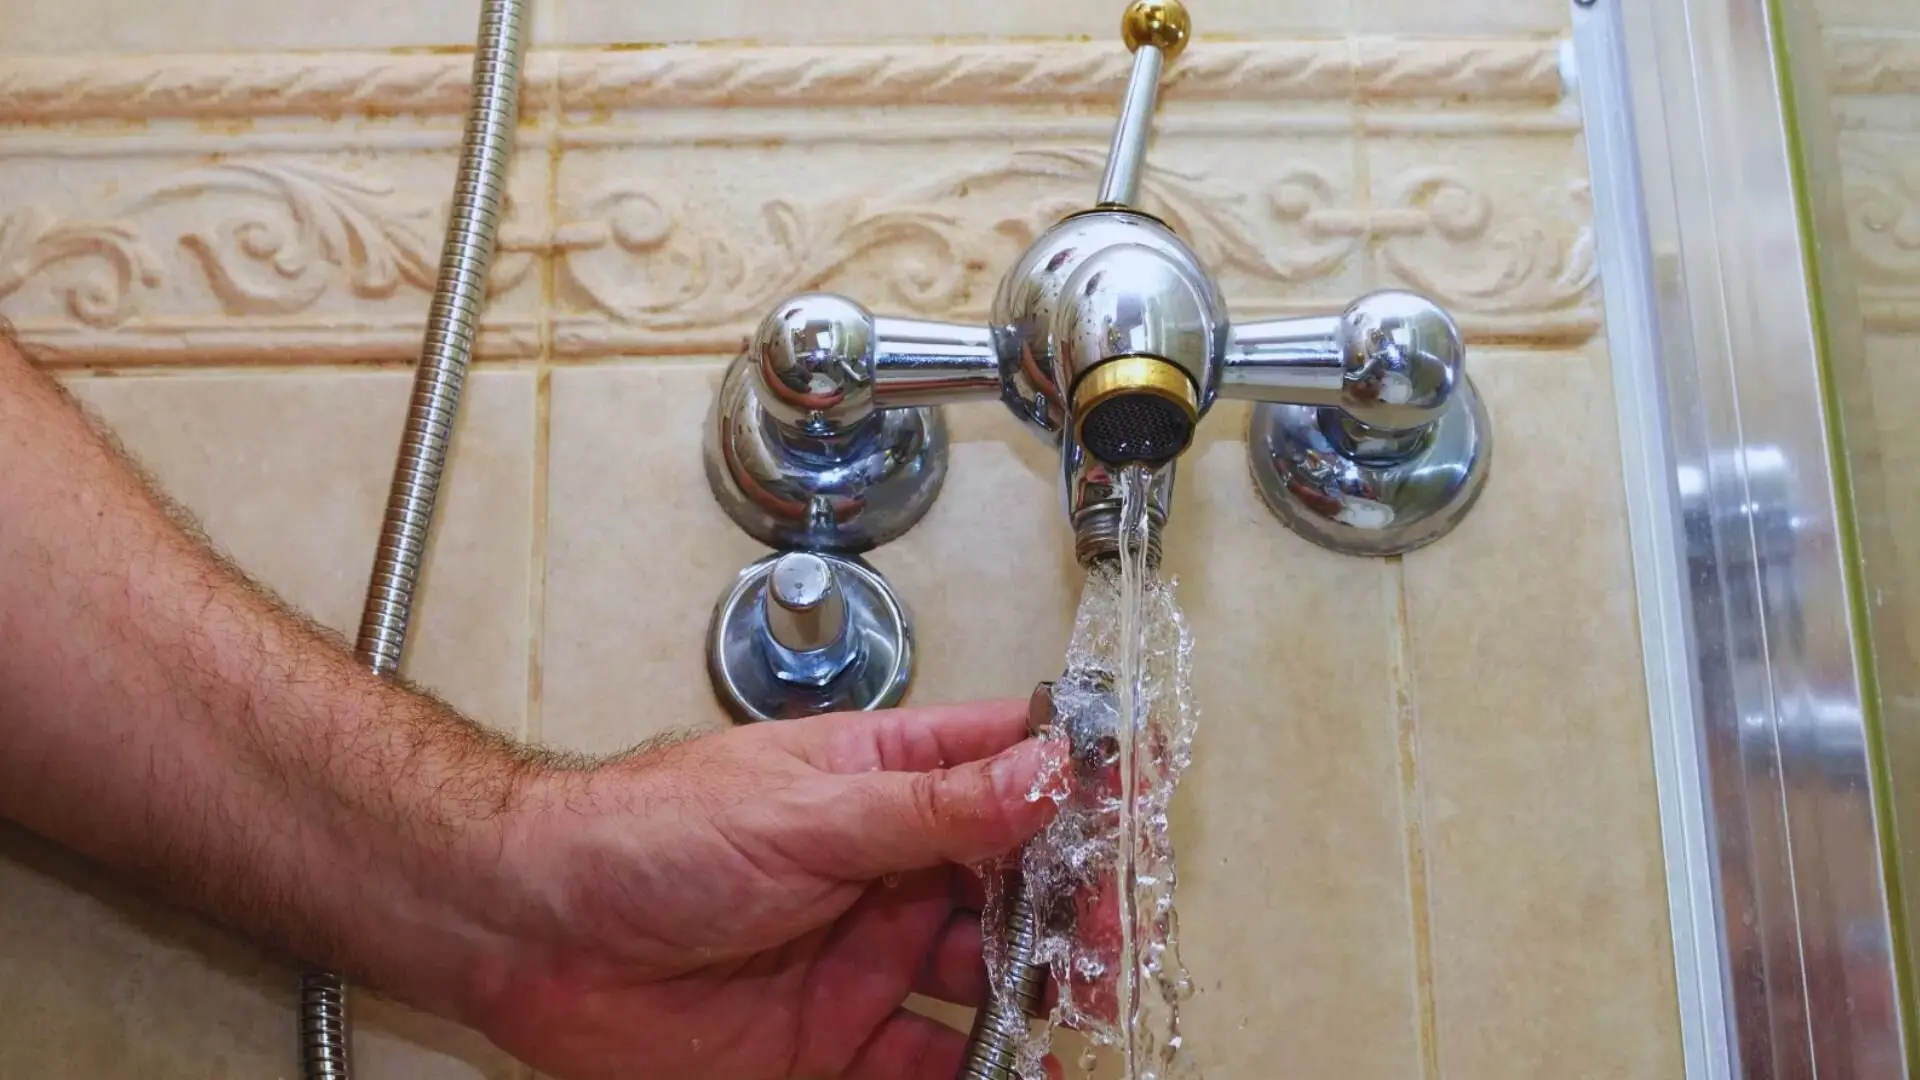
Turn Off the Water Supply to Your Shower
5 minsBefore starting, safety first! Locate the shut-off valves for your shower (usually near the shower or in the basement). Turn the valves clockwise to completely shut off the water supply. Double-check that the water is off by briefly turning on the shower faucet.

Remove the Shower Handle
10 minsRemove your existing shower handle. For a single-handle Delta faucet, locate the setscrew (often under a cap). Use an Allen wrench to remove the setscrew, then carefully pull the handle off. If the setscrew is stubborn, consult alternative methods in the linked videos.

Remove the Escutcheon and Trim
15 minsCarefully remove the escutcheon plate and any remaining trim components. You may need to unscrew them or gently pry them off using a flat-head screwdriver. Be cautious to avoid damaging the wall or valve. If the escutcheon is corroded, a wrench may be necessary.

Install Your New Shower Trim
15 minsInstall the new trim components, carefully following the manufacturer's instructions. This typically involves screwing the new escutcheon plate and other trim pieces into place. Ensure everything is aligned correctly and securely tightened. Don't overtighten!

Test for Leaks and Final Touches
5 minsSlowly restore the water supply. Carefully inspect all connections for leaks. If any leaks are found, tighten the connections or disassemble and reassemble the trim components. If leaks persist, contact a qualified plumber. Once satisfied, enjoy your updated shower!
Common Problems
Be careful not to strip the Allen screw.
Solution: To avoid this issue: Be mindful of this warning and take appropriate precautions.
Lost set screw prevents reassembly of shower trim.
Solution: Keep the small set screw in a safe place so it is not lost during the repair.
Losing the shower trim cap during replacement.
Solution: The cap is small and can be easily lost. Place it in a small bowl or container.
If you find a leak, turn off the water supply before attempting to tighten or fix the connection.
Solution: To avoid this issue: Be mindful of this warning and take appropriate precautions.
Small leaks go unnoticed, leading to water damage.
Solution: Place a dry paper towel under each connection; it will make even the smallest drip immediately visible.
The central mistake of the project occurred here: the retainer clip for the valve cartridge was not installed. This clip is essential for holding the cartridge in place against water pressure.
Solution: To avoid this issue: Be mindful of this warning and take appropriate precautions.
Handle gap too large or small after shower trim replacement.
Solution: To adjust the gap between the handle and escutcheon, remove the handle, loosen the set screw with an Allen wrench, twist the stem to the desired length, and then retighten the set screw and reinstall the handle.
Frequently Asked Questions
What specific tools will I need beyond the listed screwdrivers, especially for removing the handle?
You'll almost certainly need an Allen wrench or hex key set for the handle's setscrew. A utility knife can be helpful for scoring old caulk or stubborn seals, and a flashlight improves visibility in tight spaces. Pliers might also be useful for gripping and turning any stuck nuts or components.
What should I do if the main water supply valve to the shower doesn't completely stop the water flow?
If water still drips after turning off the local shut-off valve, it might be faulty or not fully closed. Try turning off the main water supply to your entire house, usually located near your water meter or main shut-off. If the problem persists, you may need a plumber to inspect or repair the valve before proceeding to avoid water damage.
My old shower handle or escutcheon is stuck due to corrosion or caulk; what's the best way to remove it without causing damage?
For corroded parts, apply a penetrating lubricant and let it sit for a while to help loosen rust. If caulk is the issue, carefully score around the edges of the escutcheon with a utility knife. Use gentle prying with a non-marring tool, like a plastic putty knife or a wide, flat screwdriver, to avoid scratching your shower surround.
Is the 3-hour estimated time realistic for a beginner, and what factors could make the project take longer?
The 3-hour estimate is realistic for a straightforward replacement with easily removable parts. However, older fixtures, significant corrosion, stripped screws, or unexpected compatibility issues with new trim can extend the project duration. Always budget extra time, especially if it's your first time tackling this type of DIY.
How can I ensure my new shower trim is compatible with my existing valve, and what are my options if it's not?
Always verify the brand and model of your existing shower valve before purchasing new trim, as many manufacturers have proprietary designs. Look for stamps or markings on the escutcheon plate or valve body. If your new trim isn't compatible, you'll either need to find a compatible kit or consider replacing the entire shower valve, which is a more complex plumbing job best left to professionals.
After installation, what's the most thorough way to check for leaks, and what if I find a small drip?
Slowly turn the water back on, carefully watching and feeling all new connections for any moisture. Run the shower for several minutes, then let it sit for an hour and recheck. A small drip often indicates a connection needs further tightening; persistent leaks may require disassembling and re-sealing the components with plumber's tape or thread sealant.
Are there any special considerations or differences when replacing trim on a tub/shower combination versus a stand-alone shower?
The process is largely similar, but tub/shower combinations often have a diverter handle or knob in addition to the main control. Ensure your new trim kit includes all necessary components for the diverter and, if applicable, the tub spout. Compatibility for these extra parts should also be checked with your existing valve.
/how-to-replace-a-shower-valve-5197461-10_reattach_23668-86d35b214a3849a796f94e0b38fab900.jpg)