How to Install LED Lights on Stair Risers
About This Project
This project involves installing low-voltage LED strip lights along the risers of a staircase to enhance visibility and aesthetics. It typically includes planning the layout, cutting and mounting LED strips, wiring them to a power source, and concealing the wiring for a clean finish.
Tools & Materials
Measuring Tape

Pencil

Painters Tape

Klein Tools Heavy-Duty Scissors with Free-Fall Handle 21010-6-SEN
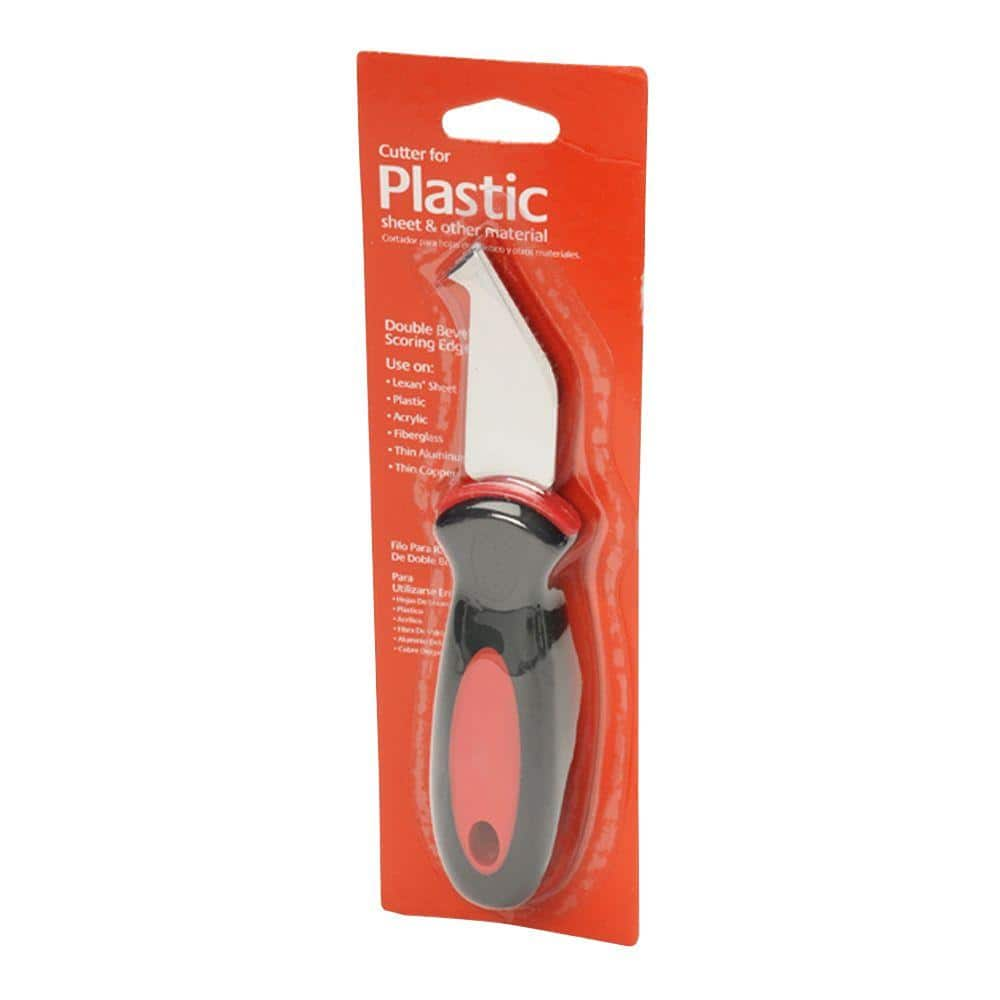
Utility Knife Plastic Sheet Cutting Tool GE-41

Armacost Lighting RibbonFlex Pro 32.8 ft. 12-Volt White Tape Strip Light 60 LEDs/m Soft White (2700K) 132250
Measuring Tape
For accurate measurements of plywood and components, ensuring proper assembly.
Pencil
Marks and draws with ease.
Painters Tape
Masks areas for precision painting.
Klein Tools Heavy-Duty Scissors with Free-Fall Handle 21010-6-SEN
These Free-Fall Snips feature high carbon steel blades to cut 19 AWG and 23 AWG electrical communication wire. They also strip 19 AWG and 23 AWG wire. The extended handle provides comfort and cutting leverage for wire cutting applications. The blades are made of high carbon steel blade (58 HRC) to maintain blade durability and sharpness. Serrated teeth allow for non-slip cutting action. The free-fall feature provides a looser fit.
Utility Knife Plastic Sheet Cutting Tool GE-41
The plastic sheet cutting knife is designed for use on LEXAN polycarbonate sheets and other plastic materials. It features a double-bevel scoring edge for clean, consistent cuts and a rounded handle that
Armacost Lighting RibbonFlex Pro 32.8 ft. 12-Volt White Tape Strip Light 60 LEDs/m Soft White (2700K) 132250
Armacost Lighting's RibbonFlex Pro LED Tape Light is the perfect LED light strip for low-voltage, energy-efficient accent lighting projects. These LED strip lights are designed to meet the layout and installation requirements of lighting professionals and feature high quality, professional-grade components that are longer lasting and create a premium look.12V strip lights are easy-to-install and feature 3M adhesive backing for a permanent hold. LED light tape is ideal for many applications including under cabinet lighting, tray ceiling lighting, toe kicks, RVs, boats, motor homes and commercial spaces. RibbonFlex Pro LED Tape Light is part of Armacost Lighting's premium-quality component-based system, designed for custom installations.
Steps

Plan LED Strip Layout
60 minutesBefore cutting or installing anything, meticulously plan where each LED strip will be positioned on the stair risers. Consider the visual effect and how the light will spread. Measure the width of each riser to determine the length of LED strip needed. Plan the path the wires will take from the last LED strip to the power source, aiming to conceal them as much as possible behind the risers, under the nosings, or along the wall. Mark the starting and ending points for each strip and the wire path with a pencil. This planning stage is crucial for a professional-looking installation and to avoid mistakes during cutting and wiring.
Watch: Plan Light Placement and Spacing
Cut LED Strips to Length
15 minutesReferencing the marks made during the planning phase, carefully cut the LED strip lights. Most LED strips have designated cut marks, usually indicated by a pair of scissors icon or copper pads. It is critical to cut only at these marks to avoid damaging the internal circuitry of the strip. Use sharp scissors or a utility knife for a clean cut. Ensure the cut is straight to allow for a proper connection later if using connectors.
Watch: Cut the LED Strip to Length
Prepare Riser Surface
20 minutesBefore applying the LED strips, thoroughly clean the surface of each stair riser. Use a degreaser or rubbing alcohol to remove any dust, dirt, oils, or old adhesive residue. For wood stairs, ensure the surface is smooth. If the risers are painted, ensure the paint is dry and well-adhered. A clean, dry, and smooth surface is essential for the adhesive backing of the LED strips to stick effectively and prevent premature detachment.
Watch: Prepare Staircase for LED Installation
Mount LED Strips
45 minutesPeel back a small section of the adhesive backing from the end of an LED strip. Carefully align the strip with your pencil marks on the riser. Press the strip firmly onto the surface, working from the starting point outwards and gradually peeling off the rest of the backing as you go. Ensure the strip is straight and lies flat against the riser. Repeat this process for all risers. For corners or bends, you may need to use specialized LED strip connectors or carefully bend the strip if it's a flexible type, though bending across the circuit board is generally not recommended. If the adhesive is not strong enough, consider using additional mounting clips or a suitable adhesive.
Watch: Install LED Strips
Wire LED Strips Together
75 minutesConnect the LED strips to create a continuous circuit. Depending on your LED strip type and the power supply, you will either connect them in series or parallel. For strips with integrated connectors, simply plug them end-to-end or use jumper wires to bridge gaps between risers. If soldering is required, strip the ends of the LED strips and the connecting wires, then solder them together, ensuring correct polarity (+ to +, - to -). Use heat-shrink tubing to insulate each connection. Route the wires behind the risers or along the wall as planned, securing them with staples or clips as you go to keep them tidy and prevent snagging.
Watch: Connect LED Strips (Plug-and-Play or Soldering)Connect to Power Source
30 minutesAt the end of the series of LED strips, you will have a main wire leading to the power source. Connect this wire to the low-voltage power supply (e.g., a 12V or 24V DC adapter). Ensure the polarity is correct: the positive wire from the LED strip must connect to the positive terminal of the power supply, and the negative wire to the negative terminal. Use appropriate connectors or solder the connection, and insulate it well with heat-shrink tubing or electrical tape. Ensure the power supply is rated for the total wattage of all your LED strips and is placed in an accessible yet unobtrusive location, such as near an existing outlet or a designated junction box.
Watch: Wiring and Power ConnectionConceal Wiring and Test
40 minutesOnce all connections are made and secured, carefully route and conceal any remaining visible wires. This might involve tucking them into small gaps, using wire channels, or securing them discreetly along the baseboard or wall. Ensure all wiring is safe, out of the way, and not a tripping hazard. After concealing the wiring, plug in the power supply or turn on the circuit breaker. Test all the LED strips to ensure they illuminate correctly and uniformly. If any sections do not light up, troubleshoot the connections starting from the power source backwards.
Watch: Testing and Final Adjustments