
How to Solder Copper Pipes for a Permanent, Watertight Joint
About This Project
This guide provides comprehensive, step-by-step instructions for creating a strong, permanent, and watertight seal between copper pipes and fittings using the soldering technique, also known as 'sweating a pipe'. The process involves meticulous preparation, cleaning, heating, and the application of solder to create a durable joint through capillary action.
Best for experienced DIYers and homeowners with some experience with basic plumbing knowledge and familiarity with power tools. Requires Oatey 9 in. x 12 in. Hands-Free Solder Heat Shield 314002 and Fire Gone 16 oz. A:B:C Multiple Use Fire Extinguisher Spray Suppressant fg-007-102 and MCR Safety BearKat Safety Glasses MCSCRWBK110.
Tools & Materials

AUTOCUT 1/2 in. Copper Pipe Tubing Cutter ATC12

Husky 1-5/8 in. Inner/Outer Reamer and Deburring Tool 410-248-0111
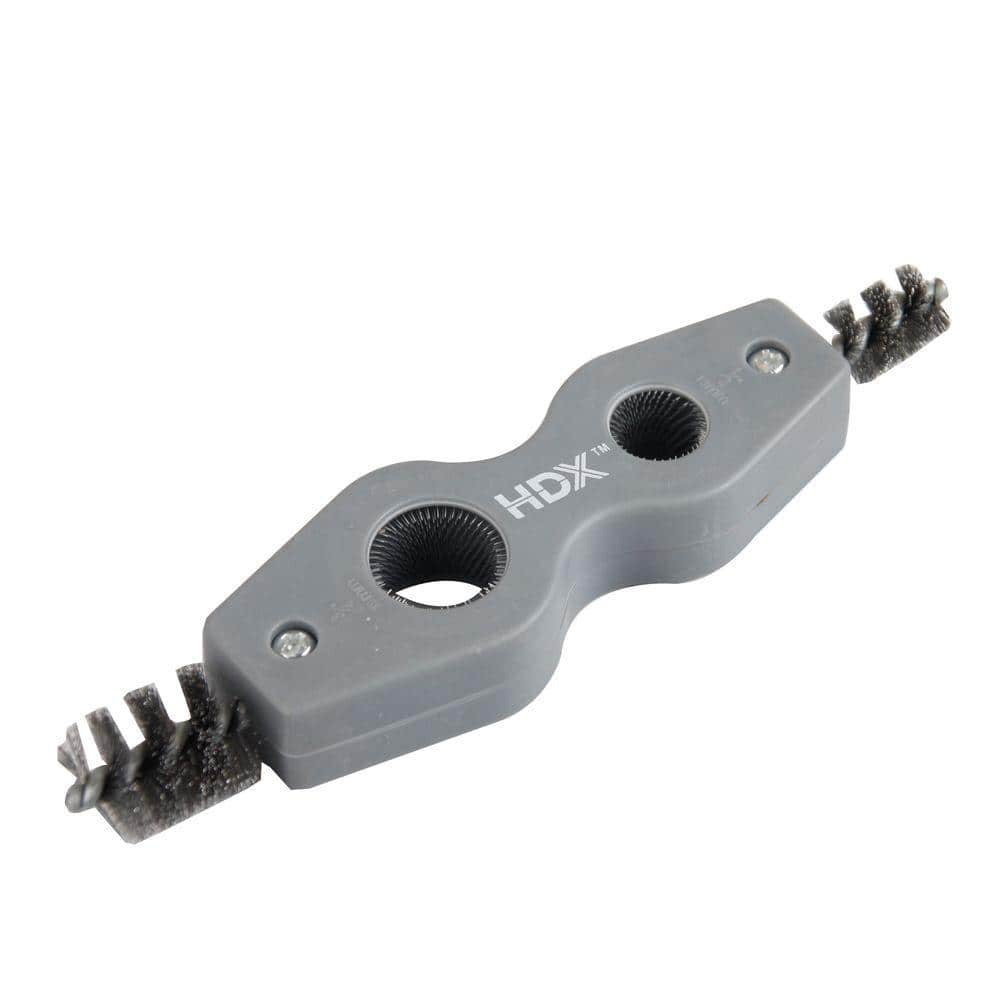
HDX 4-in-1 Fitting Brush 80-717-111

Flame King Multi-Purpose Propane Torch Wide Pencil Head for Soldering Welding YSNAX1-003
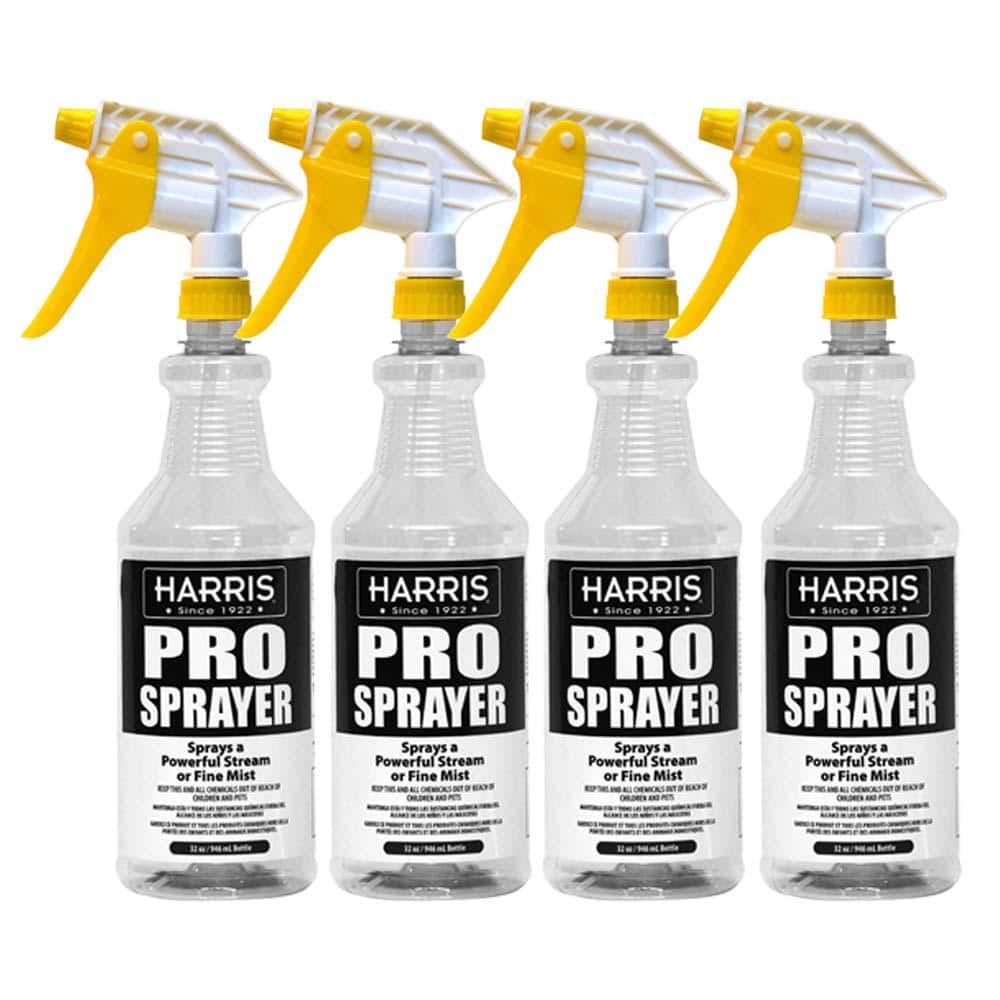
Harris Professional Spray Bottle (4-Pack) 4PRO-32PACK
Sungold Abrasives 3-2/3 in. x 9 in. Black Silicon Carbide Waterproof Assorted Grit Sandpaper Sheets (42-Pack) 46599
AUTOCUT 1/2 in. Copper Pipe Tubing Cutter ATC12
Autocut copper tubing cutters are a great tool to have when you don't have enough swing room to use a full-size tubing cutter. You can cut copper tubing with less than one inch of clearance or you can
Husky 1-5/8 in. Inner/Outer Reamer and Deburring Tool 410-248-0111
Husky's Inner/Outer Reamer removes burrs from the inside and outside of copper, steel, iron and brass piping and tubing from 1/8 in. up to 1- 5/8 in. diameter. It delivers easy, clean inside diameter reaming and outside diameter beveling. The reamer features a textured body for firm gripping. Precision-ground cutting blades result in smooth surfaces. Husky's Deburring Tool removes burrs from metal or plastic pipe edges resulting from cutting, drilling, grinding or milling tasks. Boasting a lightweight design, this contoured, hex-handled tool creates smooth surfaces for any project. The blades are easy to replace using the push button blade release. Includes two types of blades: the black deburrs aluminum, copper and PVC pipes while the silver deburrs brass and cast-iron pipes. Built to last and backed by the Husky lifetime warranty.
HDX 4-in-1 Fitting Brush 80-717-111
Flame King Multi-Purpose Propane Torch Wide Pencil Head for Soldering Welding YSNAX1-003
The Flame King YSNAX1-003 brass propane torch head is a basic pencil flame wide torch head for Multi-Purpose use. The torch produces a wide pencil flame for light work and includes a built-in flame control
Harris Professional Spray Bottle (4-Pack) 4PRO-32PACK
Harris pro 32 oz. (4-pack) sprayers spray a powerful stream or a fine mist. The bottles are chemically resistant to hold a variety of chemicals. Sprays household cleaners, liquid plant foods, insecticides,
Sungold Abrasives 3-2/3 in. x 9 in. Black Silicon Carbide Waterproof Assorted Grit Sandpaper Sheets (42-Pack) 46599
Sungold Abrasives wetordry sandpaper 9 in. x 11 in. sheets are manufactured to be submerged in water to soften them up for a superior finish, quick cut and ease of use. Can be used wet or dry for sanding
Steps

Prepare Work Area and Gather Tools
5 minsBegin by clearing the work area of any flammable materials such as wood scraps, insulation, or rags. Place a fire-resistant soldering shield behind the work area to protect surfaces like studs or joists from the torch flame. Ensure you have a fire extinguisher and a spray bottle filled with water within arm's reach. Lay out all your tools and materials, including the tubing cutter, deburring tool, sand cloth, wire fitting brush, flux, solder, and torch, so they are easily accessible.

Cut the Copper Pipe
2 minsMeasure and mark the desired length on the copper pipe. Position the tubing cutter on the mark, with the cutting wheel aligned perfectly. Tighten the knob on the cutter just until the wheel makes firm contact with the pipe. Rotate the cutter around the pipe, tightening the knob slightly (about a quarter turn) after each full rotation. Continue this process until the pipe snaps off cleanly. This method ensures a square cut, which is essential for a good fit inside the fitting.

Deburr and Clean Pipe and Fitting
5 minsAfter cutting, a small ridge or 'burr' will be left on the inside edge of the pipe. Use the triangular reamer on the back of the tubing cutter or a dedicated deburring tool to remove this ridge. Next, take a piece of sand cloth or an abrasive pad and vigorously scrub the outside of the pipe end (about 1 inch back from the end) until it is shiny and free of any oxidation or discoloration. Then, use a wire fitting brush to clean the inside of the copper fitting with the same vigor until it is also bright and shiny. Do not touch the cleaned surfaces with your bare hands, as skin oils can contaminate the joint.

Apply Soldering Flux
1 minUsing a small flux brush, apply a thin, even layer of soldering flux to the cleaned outer surface of the pipe end. Then, apply another thin layer of flux to the cleaned inner surface of the fitting. The flux is a chemical cleaner that prevents oxidation when the metal is heated and helps the solder flow evenly into the joint. Do not use an excessive amount of flux, as it can run inside the pipe and corrode the copper over time.

Assemble Pipe and Fitting
1 minImmediately after applying flux, push the pipe end straight into the fitting until it bottoms out completely. Give the pipe a quarter-turn twist to ensure the flux is spread evenly across both surfaces. Wipe away any excess flux that squeezes out of the joint with a clean rag. The joint is now ready for heat.

Heat the Joint
1 minUnroll about 8-10 inches of lead-free solder from its spool and bend the end at a 90-degree angle. Light your propane torch and adjust the flame to a steady blue cone. Begin heating the joint by directing the tip of the inner blue flame onto the middle of the fitting, not the pipe. Move the flame back and forth across the fitting to heat it evenly. For a 1/2-inch fitting, this should take about 30-60 seconds. You can test the temperature by briefly touching the tip of the solder to the joint seam on the side opposite the flame. If the solder melts instantly and flows, the joint is ready. The flux will often sizzle or smoke slightly just before the correct temperature is reached.

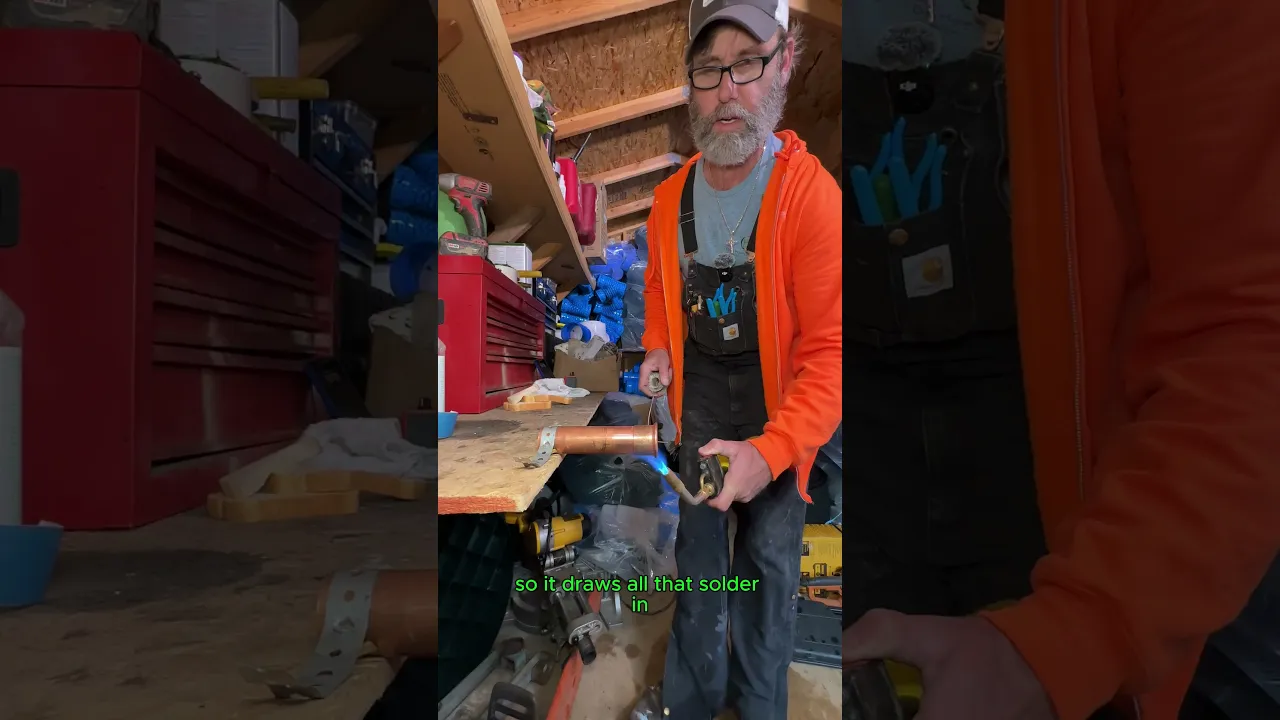
Apply Solder to the Joint
1 minOnce the fitting is hot enough to melt solder, remove the flame and immediately touch the tip of the solder to the seam where the pipe enters the fitting. Touch it to the bottom of the joint first if it's horizontal, then work your way up and around. Capillary action will pull the molten solder into the narrow gap between the pipe and fitting. You only need to feed about 1/2-inch of solder for a 1/2-inch joint. You will see a silver ring appear as the solder fills the joint. Once this ring is complete, the joint is filled. Remove the solder and let the joint cool.

Cool and Clean the Finished Joint
5 minsLet the newly soldered joint cool naturally for several minutes. Do not try to cool it rapidly by quenching it with water, as this can stress the joint and cause a fracture. Once it is cool to the touch, take a damp rag and thoroughly wipe down the joint and surrounding pipe to remove all excess flux residue. Water-soluble flux can be corrosive if left on the pipe, potentially causing pinhole leaks over time.

Inspect the Joint
1 minCarefully examine the entire circumference of the joint. A properly soldered joint will have a continuous, smooth, and shiny silver ring of solder visible at the edge of the fitting. There should be no gaps, pinholes, or clumps of solder. If you see any imperfections, the joint may be faulty and will likely leak. Unfortunately, the only reliable fix for a bad solder joint is to take it apart (by reheating it), clean everything thoroughly, and start the process over.
Common Problems
The fitting remains dangerously hot for several minutes. Do not handle it without pliers or gloves until it is completely cool.
Solution: To avoid this issue: Be mindful of this warning and take appropriate precautions.
Solder won't flow into the joint, creating a leaky connection.
Solution: Heat the fitting, not the pipe itself. The heat from the fitting will draw the solder into the joint.
The video shows the wall getting scorched. Always use proper heat shielding to prevent fire.
Solution: To avoid this issue: Be mindful of this warning and take appropriate precautions.
Joints fail if the copper pipe is heated too much before the brass valve body.
Solution: Heat the brass valve body more than the copper pipe, as brass takes longer to heat up.
Joints leak because solder doesn't flow into the gap when the pipe is heated instead of the fitting.
Solution: Heat the fitting, not the pipe. This allows capillary action to pull the solder into the joint correctly.
Cold joints: Solder won't flow into the joint without proper heat application.
Solution: The solder will follow the heat. By heating the fitting, you draw the solder in for a strong connection.
Ensure proper ventilation by opening windows or using a fan.
Solution: To avoid this issue: Be mindful of this warning and take appropriate precautions.
Frequently Asked Questions
Is soldering copper pipes truly a beginner project, and how long should I expect it to take for my first attempt?
While listed as beginner, soldering requires practice. The 'beginner' designation refers to the commonality and fundamental skills needed rather than inherent ease. For a first-timer, gathering tools, reading instructions, and doing a few practice joints before tackling a live pipe can easily extend the estimated 4 hours. Take your time to get each step right.
What are the most critical safety precautions I must take when using a propane torch for soldering, especially indoors?
Always wear safety glasses to protect against splashes and sparks. Ensure ample ventilation to disperse fumes from flux and solder; opening windows or using a fan is crucial. Keep a fire extinguisher or a bucket of water/damp rag nearby, and protect surrounding surfaces from heat and flame with a fire-resistant barrier like a flame protector mat or the listed cotton blanket. Never point the torch at yourself or flammable materials.
My solder isn't flowing into the joint properly, or it looks lumpy on the outside. What's the likely problem?
This usually indicates insufficient heating or improper cleaning. The pipe and fitting must be thoroughly cleaned and fluxed to allow capillary action. Ensure you're heating the fitting and pipe evenly until the copper is hot enough to melt the solder itself, rather than melting the solder with the torch flame directly. If the solder doesn't draw in, the joint isn't hot enough or is still dirty.
Do I absolutely need both listed tubing cutters (AUTOCUT and RIDGID), and what's the purpose of a reaming tool?
The AUTOCUT is great for quick, straight cuts in open areas, while the RIDGID close-quarters cutter is essential for tight spaces. Having both provides versatility for different situations. The reaming tool is critical for deburring the inside edge of the cut pipe, which removes burrs that can restrict water flow and prevent proper insertion into the fitting, hindering capillary action during soldering.
Are there any alternative, easier methods to join copper pipes for a permanent, watertight seal if I'm nervous about soldering?
Yes, 'push-to-connect' fittings, often called 'SharkBite' fittings, offer a solder-free alternative that can be faster and easier, especially for repairs. They create a watertight seal by simply pushing the pipe into the fitting. While easier, these fittings can be significantly more expensive than traditional copper fittings and typically require clean, burr-free pipe ends for a reliable connection.
Can I use any type of solder for plumbing, or is there a specific kind I need for copper pipes, especially for drinking water?
For plumbing, especially where potable water is involved, you must use lead-free solder, like the Oatey Safe Flo 1 lb. Lead-Free Silver Solder Wire listed. Older solders contained lead, which is now banned for plumbing applications due to health risks. Always check the label to ensure it's lead-free and suitable for potable water systems.
How can I tell if my soldered joint is truly watertight before turning the water back on and potentially causing a leak?
Visually inspect the entire circumference of the joint; the solder should appear as a smooth, continuous ring, indicating it was drawn fully into the joint. For added assurance, after the joints have cooled completely, you can perform a slow pressure test by gradually turning on the water and checking for any drips or seepage. It's also helpful to wipe the joint area clean so any slight leak is immediately visible.


