Faucet Replacement: A Step-by-Step DIY Guide
About This Project
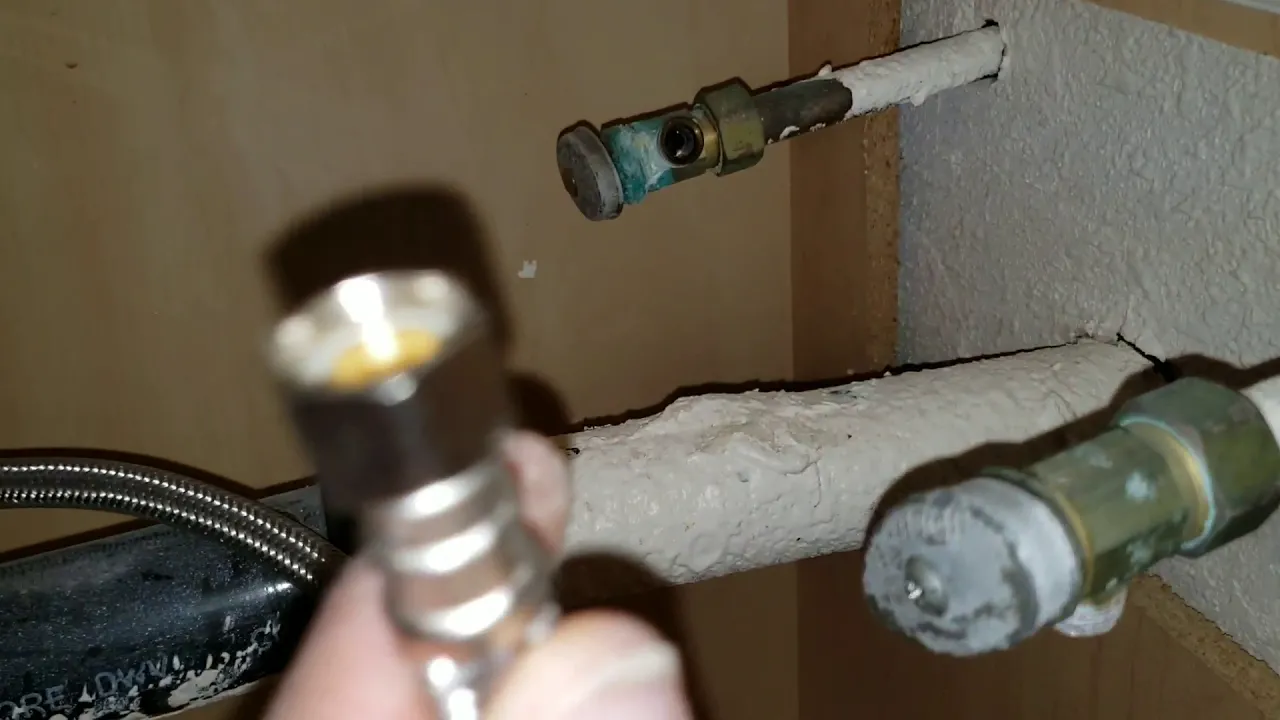
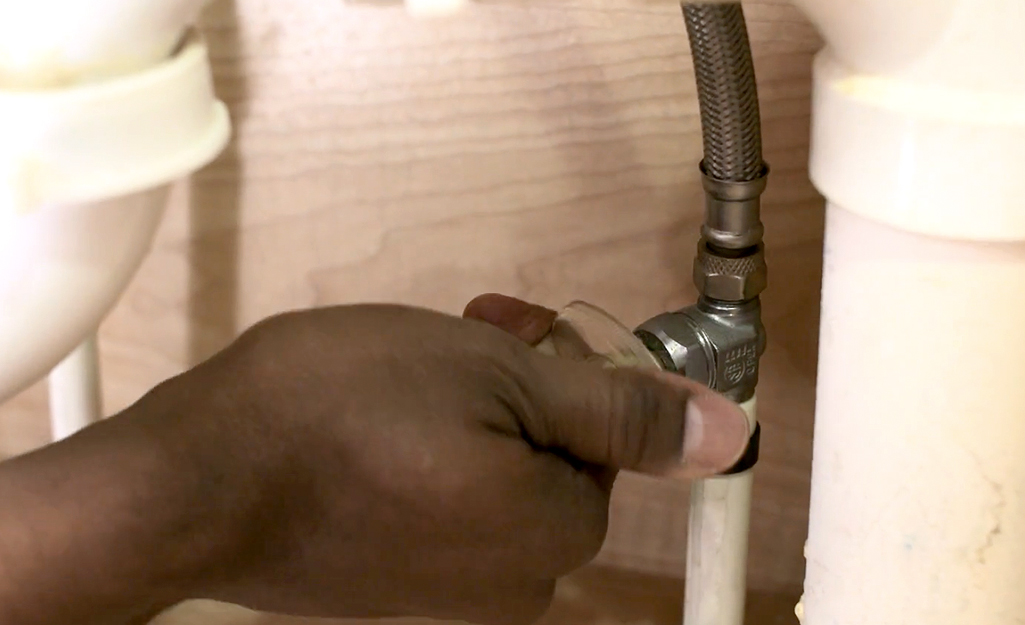
1. **Shut Off the Water Supply:** Turn off the hot and cold water supply valves under the sink. Turn on the faucet to release remaining water pressure. 2. **Disconnect the Old Faucet:** Disconnect the supply lines from the old faucet using an adjustable wrench. Remove the mounting nuts securing the faucet to the sink with a basin wrench. Have rags or a bucket handy for drips. Take photos for reinstallation reference. 3. **Install the New Faucet:** Follow the manufacturer's instructions. Connect the supply lines tightly, using a basin wrench or adjustable wrench to tighten mounting nuts. Test for leaks and re-tighten if necessary.
Best for experienced DIYers and homeowners with some experience.
Tools & Materials

Adjustable Wrench
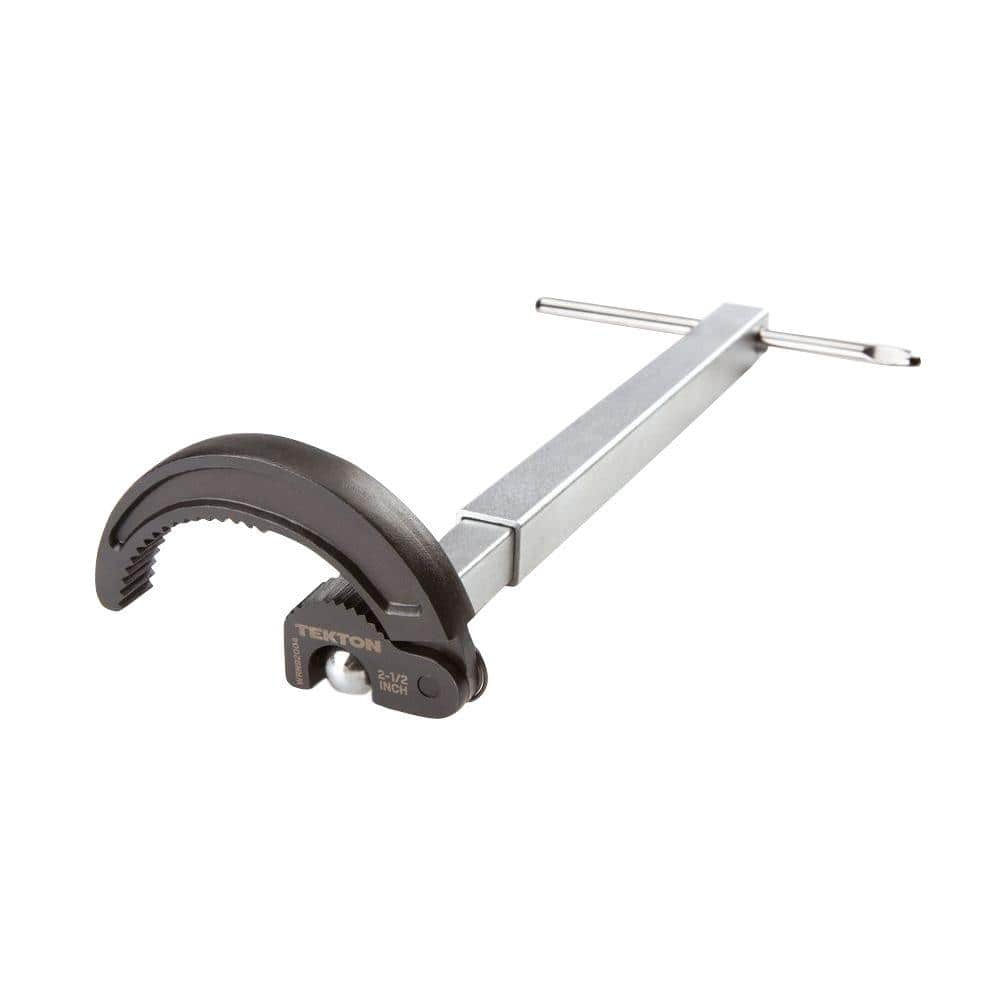
TEKTON 10 in. to 17 in. Telescoping 7/8 - 2-1/2 in. Basin Wrench WRN92004
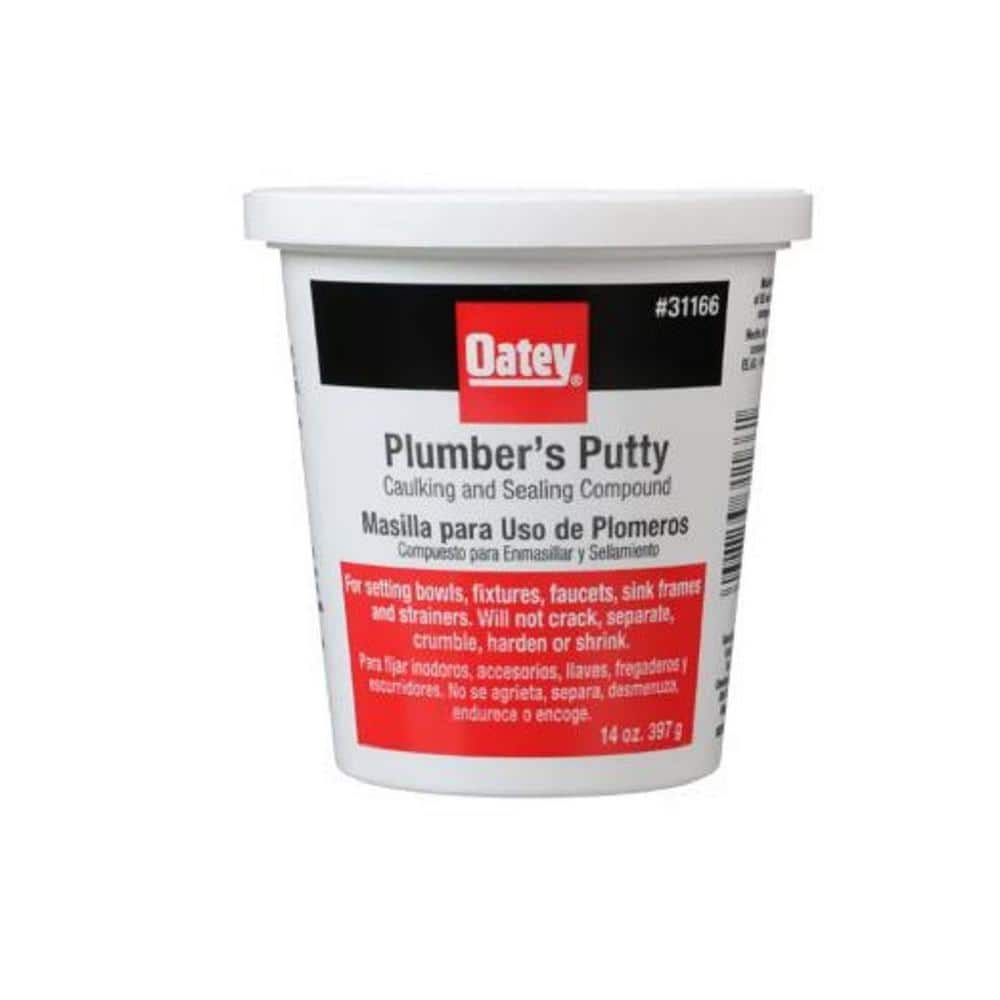
Oatey 14 oz. Plumber's Putty 311662
Adjustable Wrench
Fits various nut and bolt sizes with its adjustable jaw.
TEKTON 10 in. to 17 in. Telescoping 7/8 - 2-1/2 in. Basin Wrench WRN92004
Uniquely designed for easy, one-handed operation in confined areas, the TEKTON Telescoping Basin Wrench takes the frustration out of under-sink work. Ideal for larger nuts and retaining collars on faucets,
Oatey 14 oz. Plumber's Putty 311662
The Oatey 14 oz. Plumber's Putty is an easy-to-mold setting compound designed for use with stainless-steel sealing applications such as frames, faucets and strainer baskets. Not for use on plastic, marble,
Steps


Disconnect the Old Faucet
20 minsUsing an adjustable wrench, carefully disconnect the supply lines from the old faucet. Employ a basin wrench to loosen and remove the mounting nuts securing the faucet to the sink. Be prepared for some dripping; have rags or a bucket handy. Take photos for reference during reinstallation.

Install the New Faucet
30 minsFollow the manufacturer's instructions precisely for installing the new faucet. Carefully connect the supply lines, ensuring they are tightly fastened. Use a basin wrench (or an adjustable wrench where appropriate) to tighten mounting nuts, testing for leaks once completed. If leaks persist, gently re-tighten or check for damaged seals.
Common Problems
Water will spray everywhere if the main water supply isn't turned off.
Solution: If you cannot find local shut-off valves under the sink, you will need to shut off the main water supply to the house.
Lost a small faucet part down the drain?
Solution: Covering the drain is a simple step that can save you from the frustration of losing a small, essential part.
Leaky connections due to poor thread sealing.
Solution: For a better seal, wrap plumber's tape around the threads of the new faucet before installing it.
Do not overtighten the retaining nut, as this can damage the new cartridge or faucet body.
Solution: To avoid this issue: Be mindful of this warning and take appropriate precautions.
Overtightening can damage the connections.
Solution: To avoid this issue: Be mindful of this warning and take appropriate precautions.
Leaking connections after faucet replacement.
Solution: Use Teflon tape on threaded connections to ensure a watertight seal.
Frequently Asked Questions
Do I really need a basin wrench for this project, or can I use a standard adjustable wrench?
While an adjustable wrench can handle some tasks, a basin wrench (like the TEKTON WRN92004) is highly recommended. Its specialized design allows you to easily reach and tighten nuts in the tight, awkward space under the sink, making the process much smoother and preventing frustration, especially for beginners.
What should I do if the water supply valves under my sink are stuck, corroded, or leaking when I try to turn them off?
If your shut-off valves are stuck or leaking, do not force them, as this could cause a more significant leak. You might need to turn off the main water supply to your house to prevent flooding. This usually indicates that your shut-off valves need replacement, which is a separate project best addressed before installing a new faucet.
I've installed my new faucet, but it's dripping or leaking from the connections under the sink. What should I check first?
Leaks commonly occur if the supply line connections or mounting nuts aren't sufficiently tight. First, gently but firmly tighten all supply line nuts and mounting nuts under the sink with your wrenches, being careful not to overtighten and strip threads. If the leak persists, turn off the water, disassemble the connections, ensure all washers and O-rings are correctly seated, and reapply plumber's putty if applicable before re-tightening.
Is plumber's putty absolutely necessary, or can I use silicone caulk for sealing the new faucet to the sink?
Plumber's putty (like Oatey 311662) is the traditional choice for sealing the faucet base against the sink, creating a watertight seal that allows for easier removal in the future. Silicone caulk can also be used but creates a more permanent bond, making future faucet removal more challenging. Always check your new faucet's manufacturer instructions, as they may specify a preferred sealant or prohibit putty for certain sink materials.
The project summary says 'beginner' and '2 hours.' Is this realistic for someone who has never done this before?
Yes, the 'beginner' difficulty and '2 hours' estimate are realistic for most standard faucet replacements, assuming you have the right tools and encounter no unexpected issues. For a true DIY novice, it's wise to budget extra time, perhaps 3-4 hours, to account for learning and troubleshooting. Taking reference photos of the old setup before disconnecting anything will significantly help during reassembly.
What is the most common mistake a beginner might make during faucet replacement, and how can I avoid it?
The most common mistake is failing to completely shut off the water supply or not relieving residual pressure in the lines before disconnecting the old faucet, leading to unexpected water spills. Always ensure both hot and cold supply valves are fully closed and then turn on the old faucet to drain any remaining water before starting disconnection. Also, avoid cross-threading supply lines by hand-tightening them first.