
Shower Diverter Valve Repair & Replacement: A DIY Guide
About This Project
This DIY guide demonstrates how to repair or replace a shower diverter valve. Begin by shutting off the water supply to the shower. Remove the diverter valve handle(s) by first taking off any decorative caps, index buttons, or screw covers, and then unscrewing the handle screws. Next, remove the escutcheon plate surrounding the valve. If the valve has a sleeve, twist it out. Wrap plumber's tape around the threads of the new diverter valve if necessary (some valves utilize o-rings instead). Install the new valve, ensuring all connections are tight. Finally, turn the water supply back on and test for leaks. Verify that the diverter smoothly switches water flow between the showerhead and tub spout.
Best for experienced DIYers and homeowners with some experience.
Tools & Materials
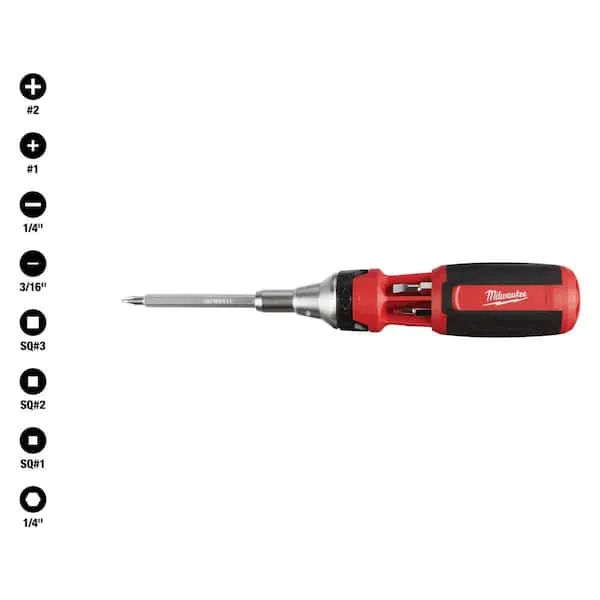
Screwdriver (Multi)
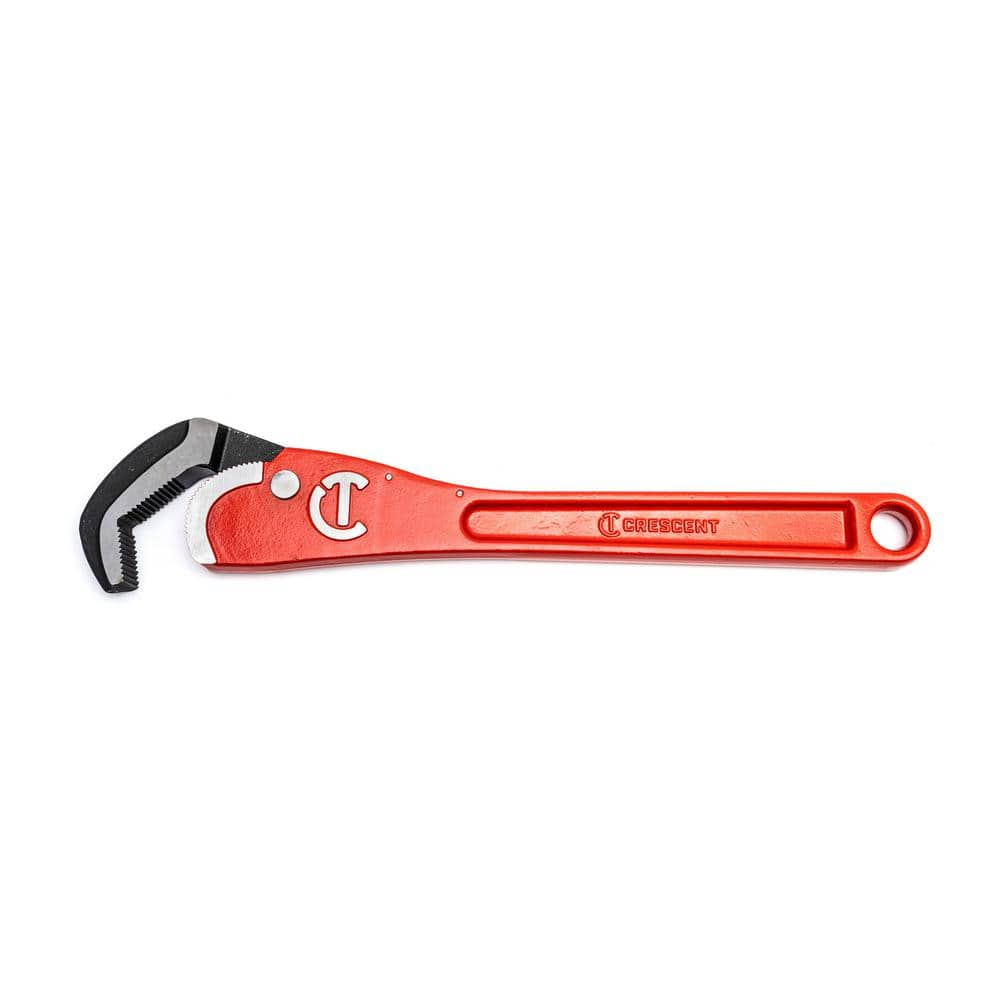
Crescent 16 in. Self Adjusting Pipe Wrench CPW16S
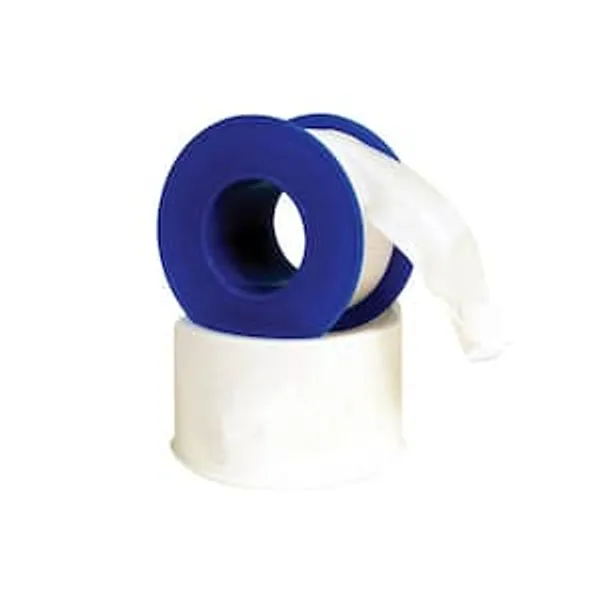
Plumbers Tape
Screwdriver (Multi)
Multiple bits for versatile use.
Crescent 16 in. Self Adjusting Pipe Wrench CPW16S
The Crescent Self-Adjusting Pipe Wrench features a unique head design that instantly grips and releases pipes and other types of fasteners with a fast ratcheting action. It is ideal for most surfaces including black iron, galvanized, PVC, and copper pipes, as well as nuts, bolts, and couplings. The spring-loaded head features a quick-grip and quick-release function that allows the wrench to be used with one hand.
Plumbers Tape
Ensures leak-proof pipe joints.
Steps

Shut Off the Shower's Water Supply
5 minsBefore you begin, safety first! Turn off the water supply to your shower. Locate the shut-off valves; these are typically near the shower itself, in a nearby closet, or even on the main water line. Turn the valves clockwise to stop the flow of both hot and cold water.

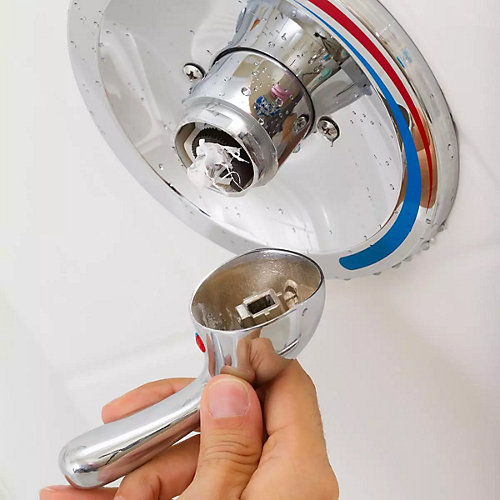
Remove the Shower Diverter Handles
10 minsCarefully remove the handles from your diverter valve. Begin by removing any decorative caps or index buttons (often using a small flathead screwdriver or putty knife). Then, locate and unscrew the handle screws, using the appropriate screwdriver (Phillips or flathead). Gently pull off the handles.


Install the New Shower Diverter Valve
30 minsInstall the new diverter valve, carefully following the manufacturer's instructions. If using Teflon tape (check manufacturer’s recommendations), wrap several turns around the threads to ensure a watertight seal. Securely tighten all connections, using a deep socket set or adjustable wrench if necessary. Some valves have O-rings, eliminating the need for Teflon tape.

Common Problems
Scratched or damaged diverter cap during removal.
Solution: Be gentle when prying off the cap to avoid scratching the plastic or chrome finish.
Prying the cap off the diverter valve without the notch can crack or bend the handle.
Solution: Use the small notch on the side of the cap to easily pry it off without damaging the handle.
Stuck shower handle due to mineral buildup can lead to a damaged valve stem if excessive force is used.
Solution: If the handle feels stuck due to mineral buildup, gently wiggle it back and forth while pulling. Avoid using excessive force to prevent damaging the valve stem.
Cap stuck and finish damaged during shower diverter removal.
Solution: If the cap is difficult to remove by hand, you can use a small flathead screwdriver with a cloth to protect the finish.
Sudden water surges can damage plumbing if the main valve is opened too quickly.
Solution: Turn the main water valve on slowly to prevent water hammer (a pressure surge) that could damage your plumbing.
If you see any leaks, turn off the water and check that the gaskets are properly seated and connections are tight.
Solution: To avoid this issue: Be mindful of this warning and take appropriate precautions.
Persistent leaks after shower diverter repair.
Solution: If a leak is found, turn the water off, tighten the connection slightly. If it still leaks, disassemble the connection, re-apply Teflon tape, and reassemble.
Frequently Asked Questions
What's the most critical first step for safety when starting a shower diverter repair or replacement?
The absolute first and most critical step is to shut off the main water supply to your house, or specifically to the shower. This prevents flooding and potential water damage, ensuring a safe work environment before you remove any components. Once off, briefly open the shower faucet to drain any residual water from the lines.
Besides a screwdriver and pipe wrench, are there any other tools or materials I might unexpectedly need for this project?
It's helpful to have a utility knife for removing old caulk around the escutcheon plate, a small wire brush for cleaning old threads, and maybe some plumber's putty or silicone sealant for sealing the escutcheon plate upon reinstallation. A flashlight can also be useful for inspecting tight spaces behind the wall, and a basin wrench might be needed for hard-to-reach nuts.
How challenging is a shower diverter valve replacement for a beginner, and how accurately should I budget the '3 hours' estimated time?
This project is generally beginner-friendly as it primarily involves unscrewing and re-screwing components, not extensive plumbing work. While 3 hours is a good estimate, allow extra time for unexpected issues like stubborn corroded screws or parts, or the need to retrieve a specific replacement part. Patience and careful observation are key to staying on track.
What are the most common mistakes DIYers make when installing a new diverter valve, and how can I avoid them?
A common mistake is not fully shutting off the water supply, leading to unexpected leaks. Another is overtightening plastic components, which can cause cracking, or undertightening threaded connections, leading to leaks. Always apply plumber's tape correctly (clockwise on male threads) and test for leaks thoroughly after installation by slowly turning the water back on and inspecting all connections.
My guide mentions both plumber's tape and O-rings. How do I know which one my diverter valve needs, and what happens if I use the wrong one?
Diverter valves with threaded connections typically require plumber's tape or pipe thread sealant to create a watertight seal. Valves that slide into place or connect with smooth pipes often rely solely on O-rings for sealing. Using plumber's tape where O-rings are designed to seal can prevent the O-ring from compressing properly, leading to leaks, and vice-versa.
I've installed the new diverter valve, but it's still leaking after I turned the water back on. What should be my first troubleshooting steps?
First, immediately shut off the water supply again. Then, carefully inspect all connections you worked on to ensure they are adequately tightened but not overtightened. Verify that any plumber's tape was applied correctly and that any O-rings are properly seated and undamaged. Sometimes, a slight adjustment or re-taping of a connection is all that's needed to resolve a small leak.