

How to Measure and Cut Stair Balusters to the Right Angle
About This Project
This project outlines the process of accurately measuring and cutting stair balusters to ensure a proper and safe fit, addressing the angle requirements for a finished staircase.
Tools & Materials

General Tools 5 in. Digital Reversible Angle Finder with Angle Lock and Large LCD Readout 822

Swanson 7 in. Speed Square, Rafter / Carpenter Square Layout Tool with Etched Markings and Blue Book T0101

Empire Polycast Protractor/Angle Finder 2791

Pencil
maocao hoom 35 in. W Retangular White Wood Writing Desk Computer Desk MZHACME-92604
Measuring Tape
General Tools 5 in. Digital Reversible Angle Finder with Angle Lock and Large LCD Readout 822
General Tools has grown to become the recognized industry leader for specialty hand tools and instruments. The 5 in. Digital Angle Ruler is ideal for finding angles in tight spots and with the lock angle
Swanson 7 in. Speed Square, Rafter / Carpenter Square Layout Tool with Etched Markings and Blue Book T0101
The Swanson Speed Square first made by Swanson's founder in 1925. This innovative tool is not only a rafter square or carpenter square, but it also combines 5 tools into 1: a try square, a miter square,
Empire Polycast Protractor/Angle Finder 2791
This Plastic Protractor/Angle Finder allows quick measurement and transfer of both inside and outside sloped angles. Made of plastic with brass hardware, this protractor is a multi-purpose tool.
Pencil
Marks and draws with ease.
maocao hoom 35 in. W Retangular White Wood Writing Desk Computer Desk MZHACME-92604
This stylish, minimalist desk is perfect for work, study or home work. It can be used as a computer desk, writing desk or study desk. 35 in.L long desktop provide ample storage space. Made from quality
Measuring Tape
For accurate measurements of plywood and components, ensuring proper assembly.
Steps

Measure Angle of Stair Slope
15 minutesUsing a digital angle finder or a speed square, measure the angle of the underside of the handrail where the balusters will attach. This angle is critical for ensuring the balusters sit flush against the handrail and the tread or riser. Record this measurement precisely. If using a speed square, you may need to transfer the angle to a protractor for a more accurate reading. For a consistent angle across all balusters, consider using a jig or a consistent reference point.
Watch: Determine Stair Railing Angle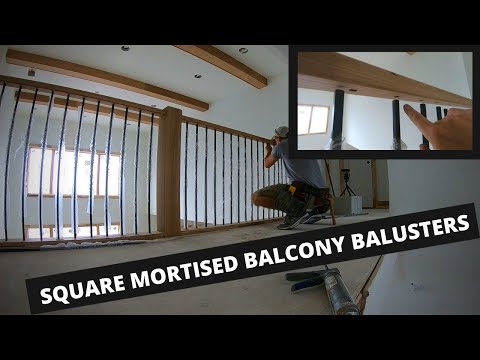
Determine Baluster Length
20 minutesOnce the stair slope angle is determined, you can calculate the required length of each baluster. Measure the vertical distance from the top of the tread or the riser to the underside of the handrail. Subtract the space needed for the baluster shoe or mounting bracket from this measurement. For angled cuts, the length will be the hypotenuse of a right triangle where one leg is the vertical rise and the other leg is the horizontal run, adjusted by the angle of the handrail. Alternatively, hold a tape measure vertically from the tread/riser to the handrail, then pivot it to match the handrail's angle and read the length. Ensure this calculation accounts for any bottom connectors or shoes.
Watch: Determine Baluster Length
Set Up Saw for Angled Cuts
15 minutesBased on the measured stair slope angle, set your miter saw or circular saw to the corresponding angle. If your baluster will attach to a flat tread and a sloped handrail, you will need to set a compound angle. Typically, this involves setting the miter angle to match the slope of the handrail and the bevel angle to create the necessary angle on the end of the baluster. Consult your saw's manual for setting compound angles. Ensure the saw is securely set and locked at the desired angle.
Watch: Mark and Cut Base RailCut Balusters to Length
60 minutesMark the determined length on each baluster. Place the baluster on the saw, ensuring it is securely clamped and aligned with your cut marks. Make the first angled cut. Carefully measure and mark the final length from the apex of the first cut. Position the baluster for the second angled cut, ensuring the angle corresponds to the angle of the tread or riser it will sit on. Execute the second cut. Repeat this process for all balusters, ensuring consistency in length and angle for each pair that attaches to the same stair.
Watch: Cut Balusters to Angle and Length
Test Fit Balusters
30 minutesBefore permanent installation, place each cut baluster in its intended position without adhesive or fasteners. Check that the top of the baluster sits flush against the underside of the handrail and the bottom rests securely on the tread or riser. Ensure there are no gaps and that the baluster is plumb (if applicable) and stable. Make any necessary minor adjustments by slightly trimming an angle or length if a baluster is slightly off. This step is crucial to avoid costly mistakes during final installation.
Watch: Measure and Mark Baluster Length

