
How to Solder Copper Pipes for a Permanent, Watertight Joint
About This Project
This guide provides comprehensive, step-by-step instructions for soldering copper pipes to create a strong, permanent, and watertight seal. The process involves meticulous preparation, cutting, cleaning, and heating of the copper pipe and fitting, followed by the application of solder to form the joint. Safety is a primary concern throughout the process, especially when working with an open flame.
Best for advanced DIYers and professionals with basic plumbing knowledge and familiarity with power tools. Requires First Alert General Purpose Fire Extinguisher 1-A:10-B:C - in Red FE1A10GOA and HDX Over the Glass Indoor Safety Glasses VS-265 and True Grip Large Tan Cowhide Leather Gloves 9323-26.
Tools & Materials
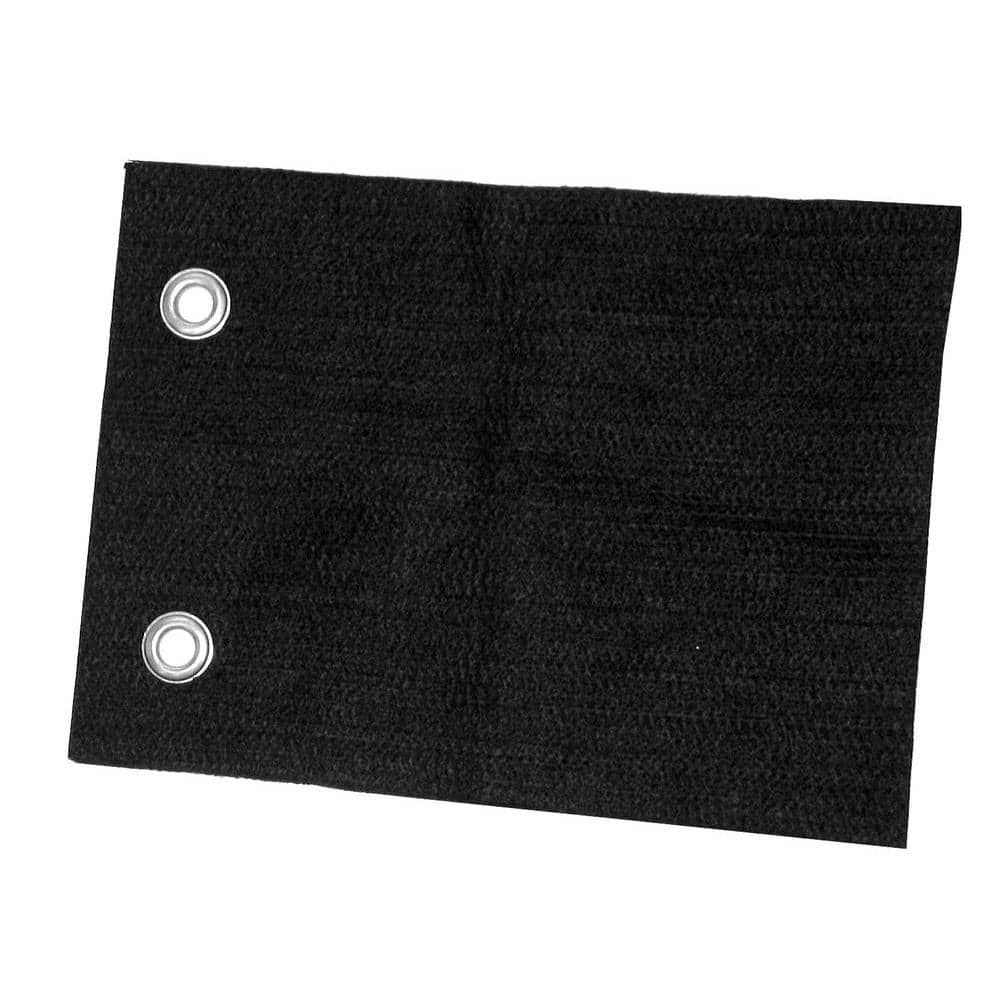
Oatey 9 in. x 12 in. Hands-Free Solder Heat Shield 314002
Half Gallon of Water
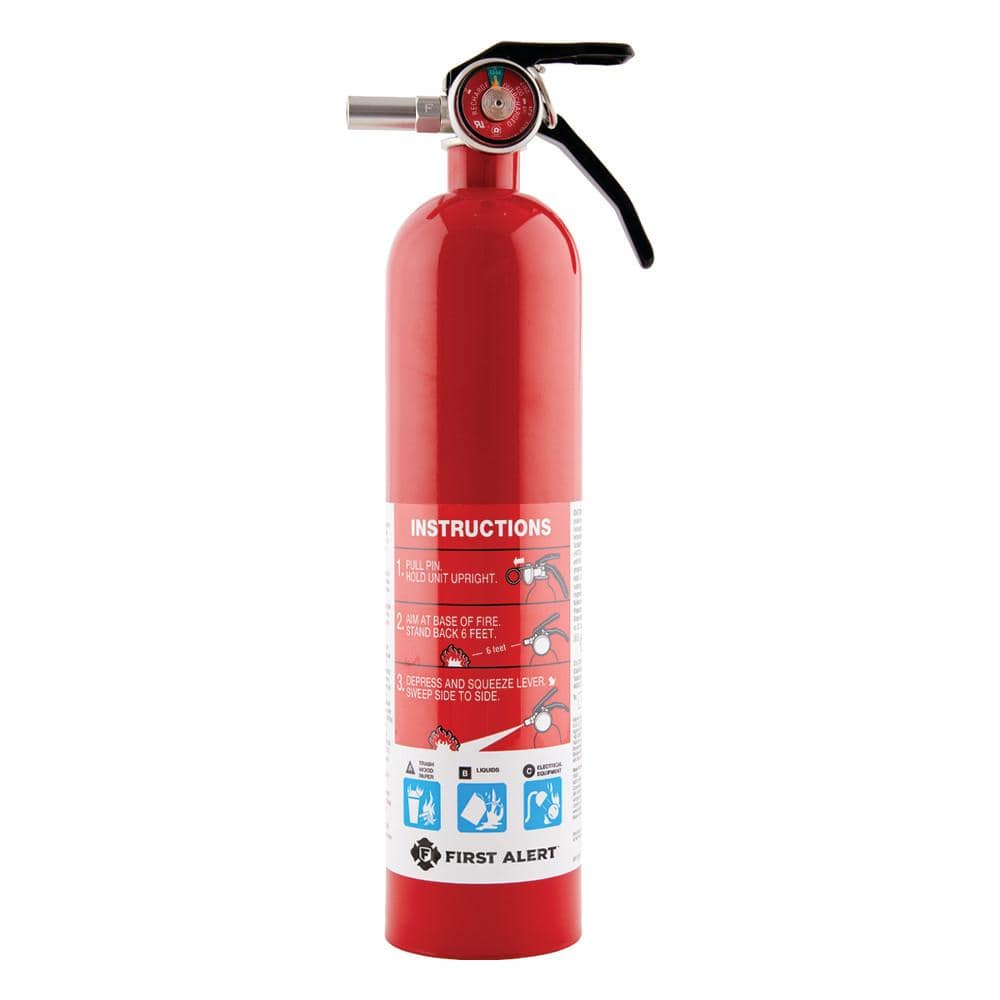
First Alert General Purpose Fire Extinguisher 1-A:10-B:C - in Red FE1A10GOA
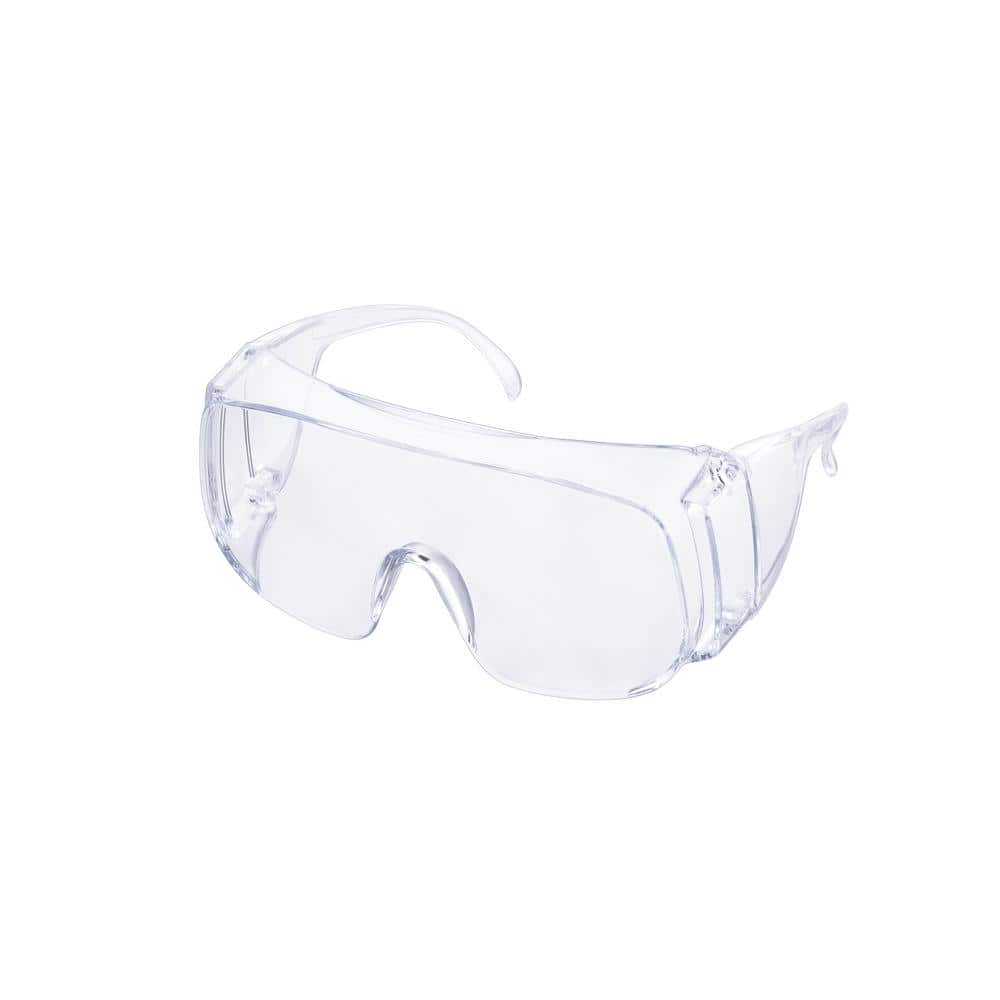
HDX Over the Glass Indoor Safety Glasses VS-265

True Grip Large Tan Cowhide Leather Gloves 9323-26
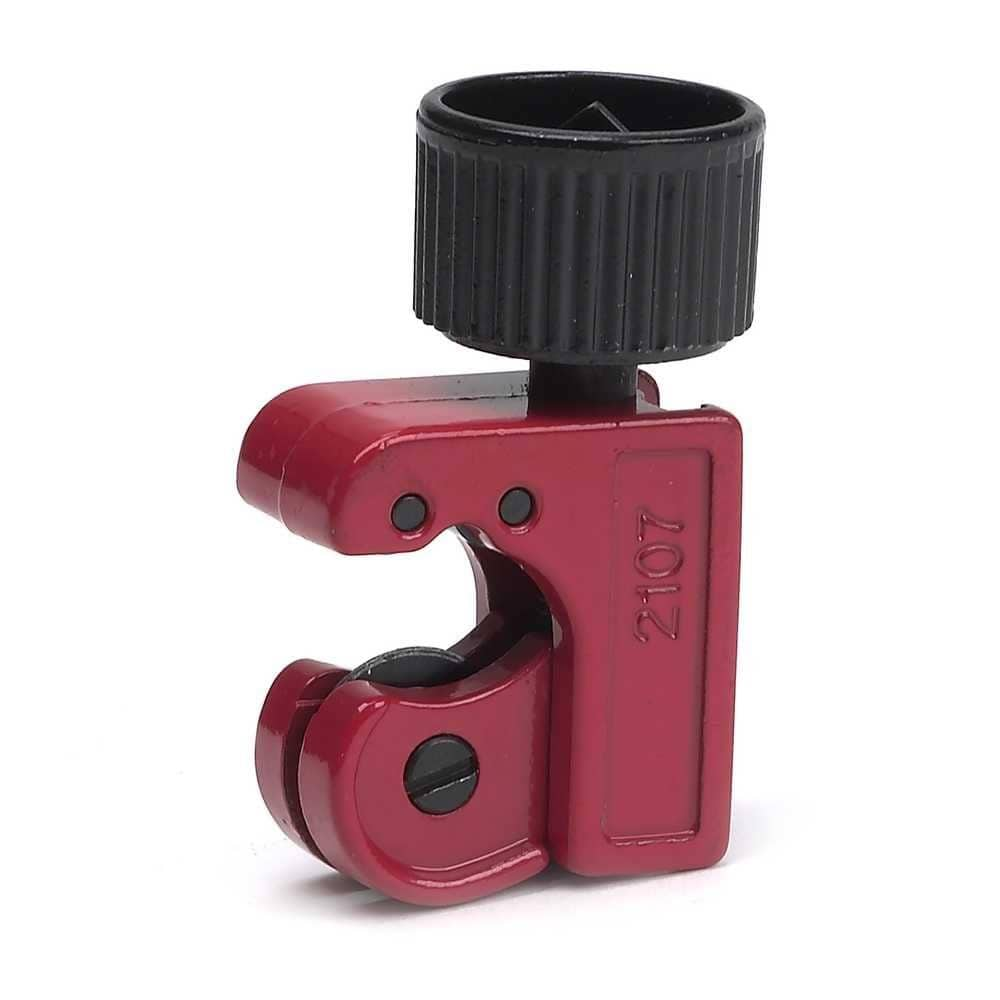
GEARWRENCH Mini Tubing Cutter 2107D
Oatey 9 in. x 12 in. Hands-Free Solder Heat Shield 314002
Oatey Flame Protector is a non-asbestos flame-retardant cloth that protects studs, walls, floors and other surfaces from flames and sparks when soldering. Made of oxidized polyacrylonitrile (OPAN) fibers,
Half Gallon of Water
Essential for life and countless tasks.
First Alert General Purpose Fire Extinguisher 1-A:10-B:C - in Red FE1A10GOA
A-B-C fire extinguisher designed for multi-purpose household use to fight wood, paper, plastic, flammable liquids and electrical fires. The commercial grade metal head is rechargeable and features an easy to read pressure Gauge. It comes with a plastic mounting bracket with strap for easy mounting and is U.S. Coast Guard approved for marine use when used with supplied bracket.
HDX Over the Glass Indoor Safety Glasses VS-265
Impact and scratch-resistant lenses absorb UV light Single piece polycarbonate frame suitable for use over prescription spectacles. Best suited for indoor applications Protects the eyes from particles,
True Grip Large Tan Cowhide Leather Gloves 9323-26
This glove is constructed of strong leather with a high level of abrasion resistance. It fits comfortably and snug to the wrist. The classic design allows superior movement and comfort.
GEARWRENCH Mini Tubing Cutter 2107D
Since our beginning, GEARWRENCH automotive specialty tools have been driven by innovation. From our first specialty tool, the Model-T valve spring lifter, to our latest ratcheting puller, we've built our reputation with tools that make tough jobs easy. Most of our products have been upgraded with new improved features like dual material handles designed for a more comfortable grip or dual dipped handles on pliers providing more cushion for your hands. GEARWRENCH automotive specialty tools are proudly made with the finest components under the most stringent manufacturing guidelines. Made for everyday use - guaranteed for life. Better tools mean easier, more efficient work so we constantly evaluate automotive engineering trends allowing us to consistently improve and enhance our tools to better fit professional hands. That's why they are the first choice for thousands of automotive technicians worldwide.
Steps

Preparation and Safety
15 minsBegin by ensuring your work area is safe. Shut off the main water supply to the house or the branch line you are working on. Open the lowest faucet in the system to drain all water from the pipes. Even a small amount of water will prevent the pipe from reaching the necessary temperature for soldering. Place a heat shield or fire-resistant blanket behind your work area to protect walls and other flammable materials. Keep a fire extinguisher and a bucket of water within arm's reach. Wear safety glasses to protect your eyes from flux spatter and leather gloves to protect your hands from heat.

Cut the Pipe
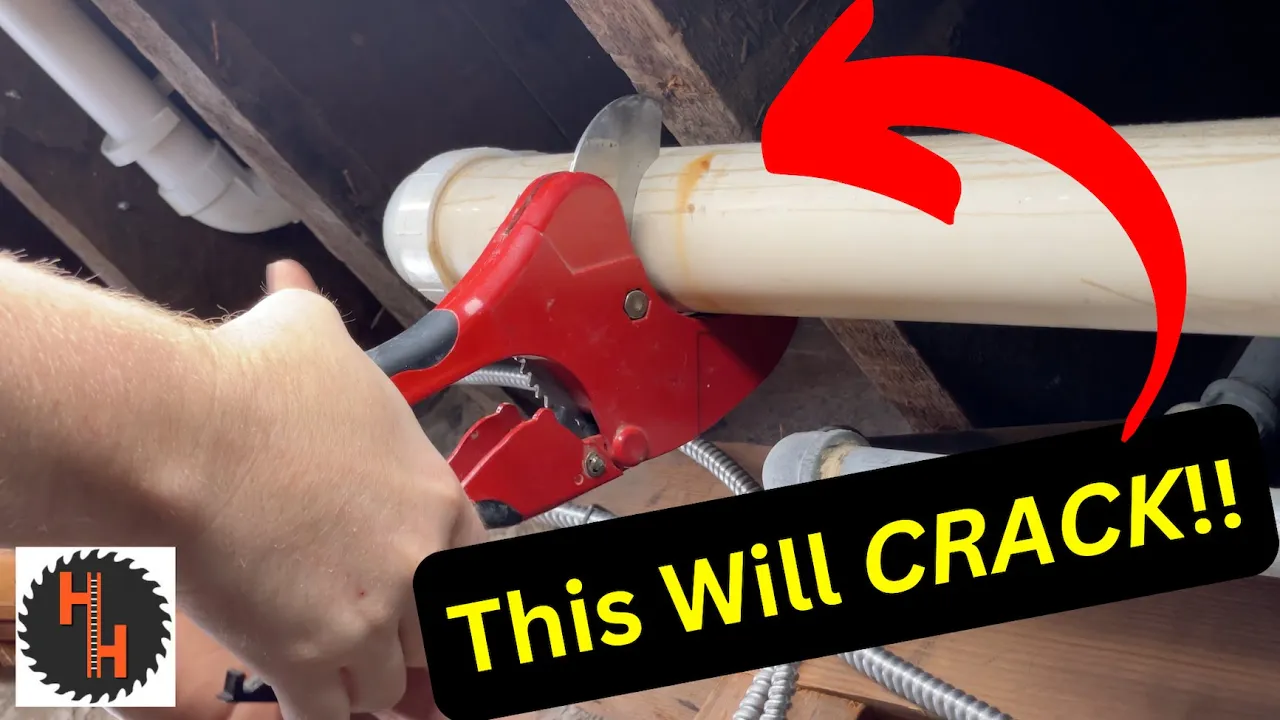
5 minsMeasure your copper pipe to the required length. Place the tubing cutter around the pipe at the marked location. Tighten the knob until the cutting wheel just makes contact with the pipe. Rotate the cutter around the pipe, tightening the knob slightly (about a quarter turn) after each full rotation. Continue this process until the wheel cuts completely through the pipe. This method ensures a clean, square cut which is essential for a proper fit inside the fitting.
Deburr the Pipe
2 minsAfter cutting, a small ridge or 'burr' will be present on the inside and outside edge of the pipe. This burr must be removed to ensure proper water flow and a snug fit. Use the triangular deburring tool, often attached to the back of the tubing cutter, to ream the inside of the pipe. A few twists will remove the inner burr. Then, use the blade or a file to smooth the outside edge.

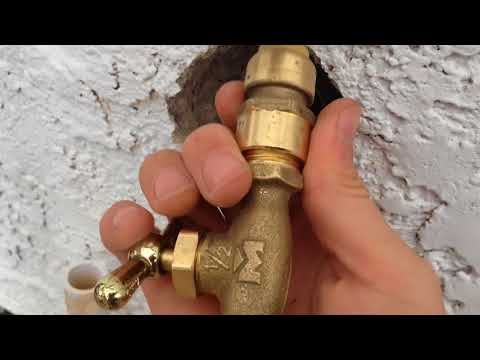
Clean the Pipe and Fitting
5 minsThis is the most critical step for a successful joint. Any contaminants like dirt or oil will prevent the solder from adhering. Use a strip of emery cloth or fine-grit sandpaper to thoroughly clean the outside of the pipe end that will go into the fitting. Sand it until the copper is bright and shiny, like a new penny, for about 1 inch from the end. Next, use a wire fitting brush to clean the inside of the fitting. Insert the brush and twist it several times until the inside surface is also bright and shiny. Do not touch the cleaned surfaces with your fingers, as oils from your skin can contaminate the joint.

Apply Flux
2 minsUsing a small brush (often supplied in the flux container), apply a thin, even layer of water-soluble soldering flux to the cleaned outside end of the pipe. Then, apply another thin layer to the cleaned inside of the fitting. The flux serves two purposes: it chemically cleans away any remaining oxidation when heated and helps the molten solder flow smoothly into the joint.


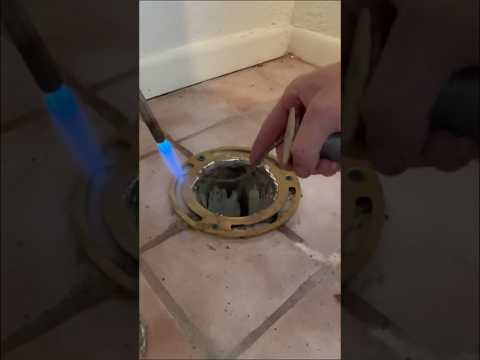
Heat the Joint
2 minsUnroll about 8-10 inches of solder from its spool and bend the first inch at a 90-degree angle for easier application. Light your propane or MAPP gas torch with a spark lighter. Adjust the flame to have a blue inner cone about 1-2 inches long. Begin heating the joint by applying the tip of the blue inner cone to the middle of the fitting. Do NOT heat the pipe directly. Move the flame around the entire circumference of the fitting to heat it evenly. The flux will begin to bubble and smoke, which is normal. In about 30-60 seconds, the copper will be hot enough to melt solder. You can test the temperature by briefly touching the solder to the joint on the side opposite the flame. If it melts instantly, the joint is ready.

Apply Solder
1 minOnce the fitting is hot enough, remove the flame and touch the tip of the solder to the point where the pipe meets the fitting. Touch it to the side of the joint opposite where you were just heating. Capillary action will suck the molten solder into the gap between the pipe and fitting. Continue feeding the solder into the joint as you move the solder tip around the seam until a bright, continuous silver ring appears around the entire joint. For a 1/2-inch pipe, you will only need about 1/2-inch of solder. Once the gap is filled, remove the solder.
Cool and Clean the Joint
5 minsAllow the joint to cool undisturbed for several minutes. Do not move or stress the joint while the solder is solidifying. Quenching the joint with water can stress the metal and cause a hairline fracture, leading to a leak. Once the joint has air-cooled enough to be safely touched, use a damp rag to wipe away any remaining flux residue from the outside of the pipe and fitting. This is important because flux is acidic and can cause corrosion over time.

Test the Joint for Leaks
10 minsAfter all joints have been soldered and have completely cooled, you can test your work. Ensure all faucets are closed. Slowly turn the main water supply back on. Listen for the sound of rushing water filling the pipes. Once they are full, carefully inspect each solder joint for any drips or leaks. Use a dry paper towel to wipe around each joint; even the smallest leak will show up as a wet spot on the paper. If a leak is found, the water must be shut off, the pipe drained, and the faulty joint must be disassembled, re-cleaned, and re-soldered.
Common Problems
Do not overheat the joint, as this can burn away the flux and prevent a good seal.
Solution: To avoid this issue: Be mindful of this warning and take appropriate precautions.
Heat the brass flange primarily; the heat will transfer to the lead. Overheating the lead will cause it to melt away.
Solution: To avoid this issue: Be mindful of this warning and take appropriate precautions.
Joint fails if solder is applied directly to the flame.
Solution: The solder should melt on contact with the hot metal, not from the direct flame of the torch.
Flux is acidic. Avoid getting it in your eyes.
Solution: To avoid this issue: Be mindful of this warning and take appropriate precautions.
Do not apply flux inside the fitting or pipe, as it can lead to long-term corrosion if not burned off completely.
Solution: To avoid this issue: Be mindful of this warning and take appropriate precautions.
Do not directly heat the brazing rod with the torch flame. The heat from the pipe and fitting should be sufficient to melt the rod for a proper bond.
Solution: To avoid this issue: Be mindful of this warning and take appropriate precautions.
Uneven solder flow leads to weak, leaky joints.
Solution: The filler material will flow towards the hottest part of the joint. Use this principle to guide the material completely around the pipe.
Frequently Asked Questions
What are the most critical safety precautions I need to take when soldering copper pipes?
Always wear safety glasses and gloves to protect from heat and flux. Ensure adequate ventilation, keep a fire extinguisher or bucket of water nearby, and use a heat shield (like the Oatey 9 in. x 12 in. Hands-Free Solder Heat Shield) to protect surrounding flammable materials from the torch flame and hot pipes.
Why is cleaning and deburring the pipe and fitting so crucial before applying flux and soldering?
Thorough cleaning with a fitting brush and sandpaper removes oxides and contaminants, which are essential for the solder to properly flow and adhere via capillary action. Deburring with a tool like the Husky 1-5/8 in. Inner/Outer Reamer ensures the fitting seats correctly and prevents turbulence in water flow, promoting a perfect solder joint.
How do I know I'm using enough solder, and what commonly causes a joint to leak after soldering?
You've used enough solder when you see a complete, continuous ring of solder around the joint's circumference, indicating full capillary fill. Leaks are often caused by insufficient or uneven heat application, improperly cleaned surfaces, or applying too little solder, which results in an incomplete or 'cold' joint.
Can I use a regular propane torch, or do I need a MAPP gas torch for soldering copper pipes?
While a basic propane torch might suffice for smaller pipes (1/2" - 3/4"), a MAPP gas torch (such as the Flame King High Intensity Propane Torch Head) provides a hotter flame. This is more efficient for larger pipes and quicker heating, reducing the risk of overheating the pipe or burning off the flux prematurely, which are common beginner mistakes.
Is soldering copper pipes truly a beginner-friendly project, and what's the biggest challenge for a first-timer?
Yes, it is considered beginner-friendly with some practice, as the process is sequential and repeatable. The biggest challenge for first-timers is often learning to apply the correct amount of heat evenly to the joint without overheating or underheating it, which directly impacts how well the solder flows.
Approximately how much time and initial cost should I expect for a small soldering project, like replacing a leaky valve?
For a beginner tackling a few joints, expect to spend 1-3 hours for preparation, soldering, and leak testing. Initial tool costs (torch, cutter, brushes, reamer, heat shield) can range from $50-$150, but materials like pipe, flux, and solder for a small repair are relatively inexpensive, often under $20-$30 per fix.
Are there any alternatives to soldering for joining copper pipes if I'm not comfortable using an open flame?
Yes, there are flame-free alternatives like press-fit fittings (e.g., SharkBite connectors) or mechanical compression fittings that can create watertight seals. While convenient, soldering often provides the most permanent and robust joint for long-term plumbing solutions when executed correctly.


