
How to Replace a Leaky Angle Stop (Shutoff Valve) Under Your Sink
About This Project
This guide provides verbose step-by-step instructions for replacing a leaky angle stop (shutoff valve) under a sink. The process involves shutting off the main water supply, removing the old compression-style valve from a copper pipe, cleaning the pipe, installing a new quarter-turn ball valve, and checking for leaks.
Best for advanced DIYers and professionals with basic plumbing knowledge.
Tools & Materials

Bucket
WYPALL L40 Towels, Dry Up Towels, 19-1/2 in. x 42 in., White, 200 Towels/Roll KCC05860

NITECORE 4000 Lumens USB-C LED Rechargeable Tactical Flashlight P20iX

THE CLEAN STORE Cleaning Terry Towels (50-Pack) 171

Adjustable Wrench

Unger 6 Gal. Heavy-Duty Plastic Bucket DB02
Bucket
Ideal for carrying or storing liquids.
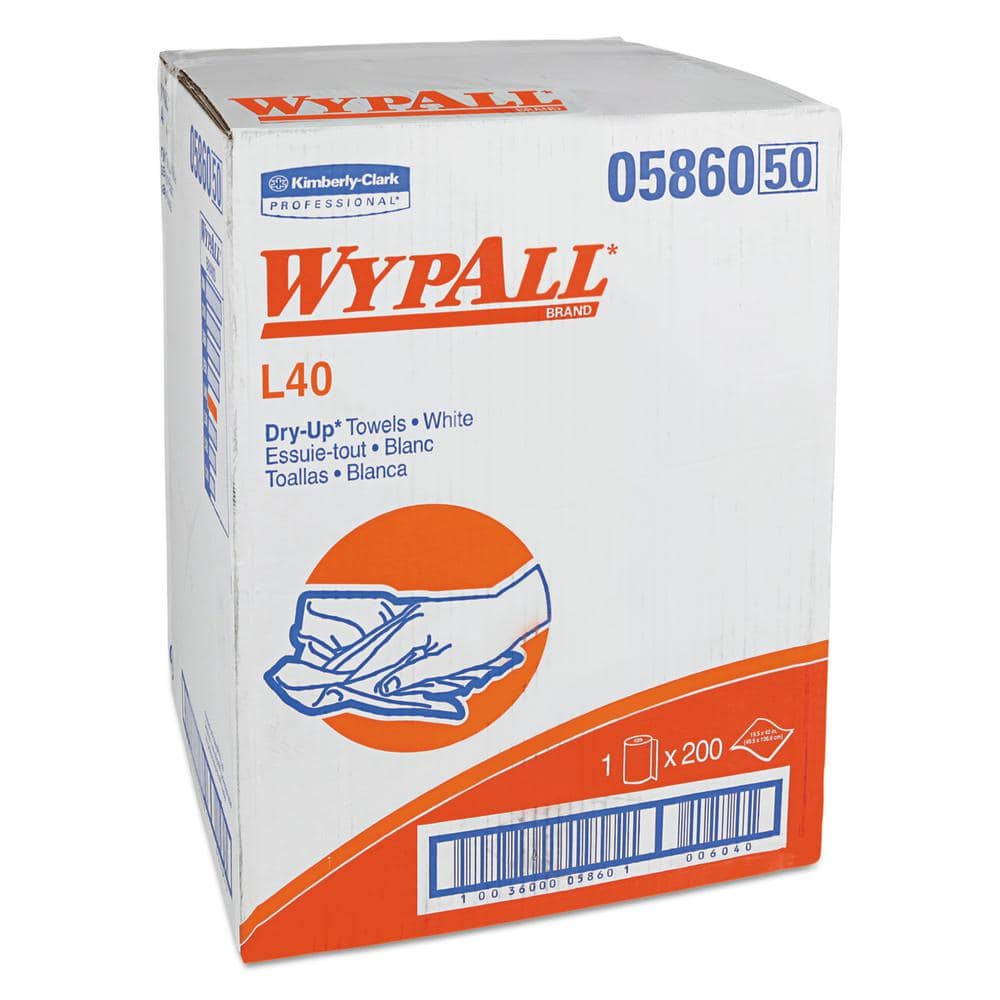
WYPALL L40 Towels, Dry Up Towels, 19-1/2 in. x 42 in., White, 200 Towels/Roll KCC05860
WYPALL L40 Wipers are effective wipers that absorb liquids lightning-fast. These wipes are made of bonded cellulose using DRC (double re-creped) technology for strength, softness and absorbency. As a wiping cloth, it soaks up liquids fast, but all you'll feel is softness, thanks to a plush, touchable outer layer. In fact, it's a popular choice for patient wiping in healthcare industries, for bathing and patient drying. These utility wipes are specially designed to absorb liquids, lubricants and oils (in restaurants for wiping counters, in mechanic shops, industrial and commercial factories and more), yet they're soft enough for use on face and hands. Experience the difference in superior absorbency and cleaning at your home or office today. Towel/Wipe Type: Dry Wipes; Application: Bathrooms; Material(s): Cloth-Like; Number of Plies: 1.
NITECORE 4000 Lumens USB-C LED Rechargeable Tactical Flashlight P20iX
The NITECORE P20iX is unrivaled when it comes to performance. NITECORE took the beloved P20i frame and maintained the compact size, ergonomics and doubled the power with 4 LEDs. This Xtreme high lumen
THE CLEAN STORE Cleaning Terry Towels (50-Pack) 171
Bulk Pack with 50 Towels is Ideal for Commercial Businesses, Home, Restaurants, Offices and More, Towels are Size: 12 in. x 12 in. Offers an Ideal Solution for Restaurants, Hotels, Bars, Home, Offices,
Adjustable Wrench
Fits various nut and bolt sizes with its adjustable jaw.
Unger 6 Gal. Heavy-Duty Plastic Bucket DB02
The Unger 6-Gallon Heavy-Duty Professional Cleaning Bucket holds more than 6 Gal. of liquid. The bucket can accommodate a scrubber up to 14 in. L. This bucket features measurement marks and 2-pour spouts
Steps

Shut Off Main Water Supply
10 minsThe first and most critical step is to completely shut off the water to your home. Locate your home's main water shutoff valve, which is typically found in the basement, a crawl space, or a utility closet near where the main water line enters the house. It will have either a wheel-style handle or a lever handle. Turn the handle clockwise until it is fully closed. To verify that the water is off, go to the sink you will be working on and turn on the faucet. The water flow should slow to a trickle and then stop completely. Leave the faucet open.

Drain the Line and Prepare the Workspace
5 minsWith the water off, open both the hot and cold handles on the faucet above the angle stop you are replacing. This action relieves any remaining water pressure in the pipes. Place a small bucket directly under the old angle stop to catch water that will drain from the line. Arrange several old towels or rags around the bucket to protect your cabinet from any spills.

Disconnect the Faucet Supply Line
10 minsUsing an adjustable wrench, grip the nut that connects the faucet supply line (the flexible or rigid tube going up to the faucet) to the outlet of the leaky angle stop. Turn the nut counter-clockwise to loosen it. Hold the valve body with your other hand to prevent it from twisting. Once the nut is loose, you should be able to unscrew it by hand. Pull the supply line away from the valve and tuck it out of the way. A small amount of water will drain out into your bucket.
Remove the Old Angle Stop
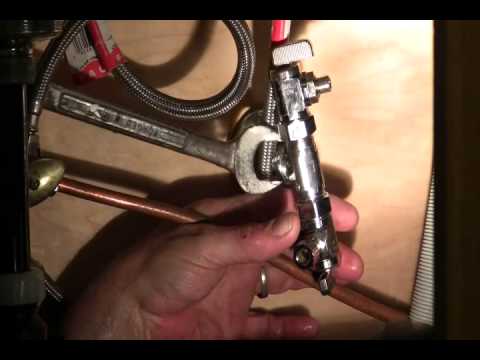
15 minsThis step requires two wrenches. Use one adjustable wrench or a pair of channel-lock pliers to grip the body of the old angle stop firmly. This is crucial to prevent the copper pipe from twisting, kinking, or breaking inside the wall. With a second adjustable wrench, grip the large compression nut that connects the valve to the pipe stub-out. Turn this nut counter-clockwise. It may be very tight and require significant force. Once you break it loose, you can unscrew it the rest of the way by hand. Slide the old valve straight off the pipe.
Clean and Prepare the Copper Pipe
15 minsOnce the old valve is off, inspect the copper pipe. You will see the old compression nut and a brass compression ring called a ferrule. Slide the old nut off. The ferrule must also be removed for a proper seal with the new valve. It can be stubborn. You may be able to carefully cut a slit in it with a utility knife (without cutting into the copper pipe) and pry it off. A dedicated ferrule puller tool is the safest method. Once the old parts are off, use emery cloth or fine-grit sandpaper to thoroughly clean the last inch of the copper pipe. It should be smooth and shiny, free of any corrosion, scale, or scratches. Wipe it clean with a dry rag.

Install the New Angle Stop
10 minsTake your new quarter-turn angle stop. Ensure the valve handle is in the 'off' position (perpendicular to the valve outlet). Unscrew the compression nut from the valve body. Slide the new nut onto the prepared copper pipe, with the threads facing you. Then, slide the new brass ferrule onto the pipe, ensuring its tapered end points towards the end of the pipe where the valve will sit. Push the new valve body firmly onto the pipe until it bottoms out against the ferrule. Slide the nut up and hand-tighten it onto the valve body. Now, use two wrenches again: one to hold the valve body steady and one to tighten the compression nut. Tighten the nut about one-half to one full turn past hand-tight. Do not over-tighten.

Reconnect Faucet Supply Line
5 minsAlign the faucet supply line with the outlet on the new angle stop. Thread the supply line's compression nut onto the valve's outlet by hand. Make sure it threads on smoothly to avoid cross-threading. Once it is hand-tight, use an adjustable wrench to give it another quarter to half-turn to snug it up. This connection does not need extreme force; the rubber cone seal inside the supply line nut creates the seal.

Turn Water On and Check for Leaks
15 minsThis is the moment of truth. Go back to the main water shutoff valve and turn it on slowly, opening it counter-clockwise all the way. Listen for any sounds of rushing water. Return to the sink and use a flashlight to meticulously inspect the new angle stop. Look for any signs of moisture or drips at both connections: where the valve meets the wall pipe and where the supply line connects to the valve. Use a dry paper towel to wipe down all connections, as this will make even the tiniest leak visible. If everything is dry, slowly turn the handle on the new angle stop a quarter-turn to the 'on' position (handle will be parallel to the outlet). Water should now be flowing to the faucet. Check the faucet for normal operation and perform one final leak check on all connections.
Common Problems
Small parts can fall down the drain during the repair.
Solution: Covering the drain is a simple step that can save you from the frustration of losing a small, essential part.
Ensure both hot and cold water valves are fully closed before proceeding.
Solution: To avoid this issue: Be mindful of this warning and take appropriate precautions.
Water sprays everywhere if the shut-off valve isn't fully closed.
Solution: Make sure the shut-off valves are completely closed.
Turn the water on slowly to avoid a sudden pressure surge that could stress the new connections.
Solution: To avoid this issue: Be mindful of this warning and take appropriate precautions.
Small leaks at pipe connections go undetected.
Solution: Run your finger along the bottom of each connection to feel for moisture, as small drips may not be immediately visible.
If you see any drips, immediately shut the water off and re-tighten the connection.
Solution: To avoid this issue: Be mindful of this warning and take appropriate precautions.
Turn the water back on slowly. A sudden burst of pressure could cause a loose connection to fail.
Solution: To avoid this issue: Be mindful of this warning and take appropriate precautions.
Frequently Asked Questions
This project is listed as 'beginner' difficulty, but involves water shut-off. Is it truly manageable for someone with no plumbing experience?
Yes, this project is very manageable for beginners provided you follow the steps carefully and patiently. The key is to ensure the main water supply is completely off before starting. Take your time, read all instructions before beginning, and don't hesitate to consult online videos if a step feels unclear.
What should I do if I can't locate or shut off my home's main water supply valve?
Locating and properly operating your main water shut-off valve is critical before starting. If you can't find it or it's stuck, do not force it. In such cases, it's best to contact a qualified plumber to assist with the shut-off or perform the repair to avoid potential major water damage.
The guide mentions installing a 'quarter-turn ball valve.' Why is this type recommended over a traditional multi-turn compression valve?
Quarter-turn ball valves are highly recommended because they offer superior durability and reliability. They are less prone to leaks over time and operate with a simple 90-degree turn, making them much easier to use and less likely to seize up than older multi-turn compression valves, especially in an emergency.
After installing the new angle stop and turning the water back on, what are the most common reasons it might still leak, and how do I fix them?
Common leaks usually stem from improper compression of the ferrule, a damaged ferrule, or a connection that isn't tight enough. Ensure the compression nut is snugly tightened (but not overtightened) and that the ferrule is correctly seated. If using a new supply line, confirm the washers are properly installed and the connection is secure.
Since this project involves water, how can I best prepare my under-sink cabinet to minimize water damage and mess?
Before starting, clear out everything from the cabinet. Line the bottom with old towels and place a bucket directly under the angle stop you'll be replacing to catch any residual water from the pipes. Having extra towels and paper towels handy will help manage spills quickly.
The steps mention 'Clean and Prepare the Copper Pipe.' How important is this step, and what's the best way to do it for a good seal?
Cleaning the copper pipe is crucial for achieving a leak-free seal. Any burrs, old residue, or corrosion can prevent the new compression fitting from sealing correctly. Use fine-grit sandpaper or emery cloth to thoroughly clean the pipe's exterior, ensuring it's smooth and shiny before installing the new valve.
The estimated time is 3 hours. Is this a realistic timeframe for a beginner, or should I budget more time?
Three hours is a realistic estimate for a beginner, assuming no significant issues arise, like a stubborn old valve or difficulty locating your main water shut-off. It's always wise to budget an extra hour or two as a buffer, especially for your first time, to allow for unexpected challenges or re-tightening connections.


