With all connections severed and mounting screws removed, the dishwasher is ready to be pulled out. Lay down a large piece of cardboard or a thick blanket on the floor to prevent scratches. The dishwasher may have adjustable feet at the front and rollers at the back. If it feels stuck, you may need to use a wrench to turn the screw-like feet counter-clockwise to lower the front of the unit slightly. Grasp the sides of the dishwasher door and gently begin to pull it straight out of the opening. You may need to wiggle it side-to-side. Be patient, as the insulation blanket or the feet can catch on the flooring or cabinet edges. Once clear, you have successfully removed the old dishwasher.
Step 1
⏱ 2 min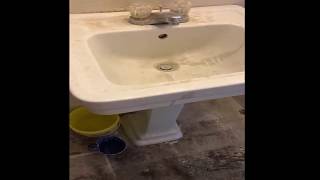
Preparation and Safety Shutdown
The first and most critical step is to ensure a safe working environment. Begin by locating the circuit breaker that supplies power to the dishwasher in your home's main electrical panel and switch it to the 'OFF' position. Next, clear out the cabinet under the kitchen sink to get access to the plumbing and electrical connections. Locate the hot water shut-off valve, which is typically a small, oval-handled valve connected to the hot water pipe leading to your faucet. Turn this valve clockwise until it is fully closed to stop the flow of water to the dishwasher. Place a bucket and several old towels under the sink and in front of the dishwasher to catch any water that will inevitably spill during the disconnection process.
Step 2
⏱ 2 min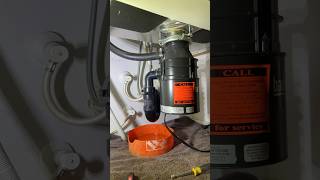
Disconnect the Drain Hose
Locate the flexible, ribbed drain hose that runs from the back of the dishwasher to the garbage disposal. It will be connected to a small inlet nipple on the side of the disposal unit, secured by a metal hose clamp. Position your bucket to catch any water. Using a flathead or hex screwdriver (depending on the clamp type), turn the clamp's screw counter-clockwise to loosen it. Once loose, gently wiggle and pull the drain hose off the disposal nipple. Be prepared for water trapped in the hose to drain out into your bucket. Tuck the hose into the bucket to continue draining.
Step 3
⏱ 2 min
Disconnect the Water Supply Line
Identify the flexible, braided stainless steel water supply line running from the hot water shut-off valve to the front-left corner of the dishwasher. You will disconnect the end attached to the dishwasher. First, remove the lower front access panel (kick plate) of the dishwasher, which is usually held by two screws. This will expose the connection point. Place a towel directly under the connection. The supply line connects to a 90-degree brass elbow fitting. Using an adjustable wrench, grip the nut on the supply line and turn it counter-clockwise to loosen and disconnect it from the elbow. More water will drip out, which the towel will catch. You can now push the water and drain lines back through the hole in the cabinet wall.
Step 4
⏱ 2 min
Disconnect the Electrical Supply
With the kick plate removed, you will see a small metal junction box where the house wiring connects to the dishwasher. First, and most importantly, use a non-contact voltage tester to confirm that the power is off by placing its tip near the wires entering the box. The tester should not light up or beep. Once confirmed, remove the screw holding the junction box cover. Inside, you will see three connections made with wire nuts: black (hot), white (neutral), and a bare copper or green wire (ground) attached to a green screw. Unscrew the wire nuts counter-clockwise to separate the house wires from the dishwasher wires. Loosen the ground screw to release the copper wire. Finally, loosen the metal cable clamp (strain relief) that secures the electrical cable to the junction box, and carefully pull the house wiring out of the box.
Step 5
⏱ 2 minDetach Dishwasher from Countertop
The dishwasher is secured in place by two metal mounting brackets that are screwed into the underside of the countertop. Open the dishwasher door fully. Look up at the top of the dishwasher opening to locate these brackets, one on each side. They are typically thin metal tabs with one or two screws going up into the countertop material. Using the appropriate screwdriver (usually a Phillips head), carefully remove these screws. Be mindful not to scratch the inner door panel with your screwdriver. Because your countertop is granite, these brackets are essential for stability, so note their position for the new installation.
Step 6
⏱ 2 minSlide Dishwasher Out
Step 6/6
Slide Dishwasher Out2 min