
How to Install a Pedestal Sink
About This Project
This guide provides comprehensive, step-by-step instructions for installing a pedestal sink. The process covers removing an old sink, preparing the wall with necessary support blocking, mounting the new faucet and drain assembly, securing the sink and pedestal, connecting the plumbing, and performing final checks for a leak-free installation.
Best for advanced DIYers and professionals with basic plumbing knowledge and familiarity with power tools. Requires Safety Glasses.
Tools & Materials
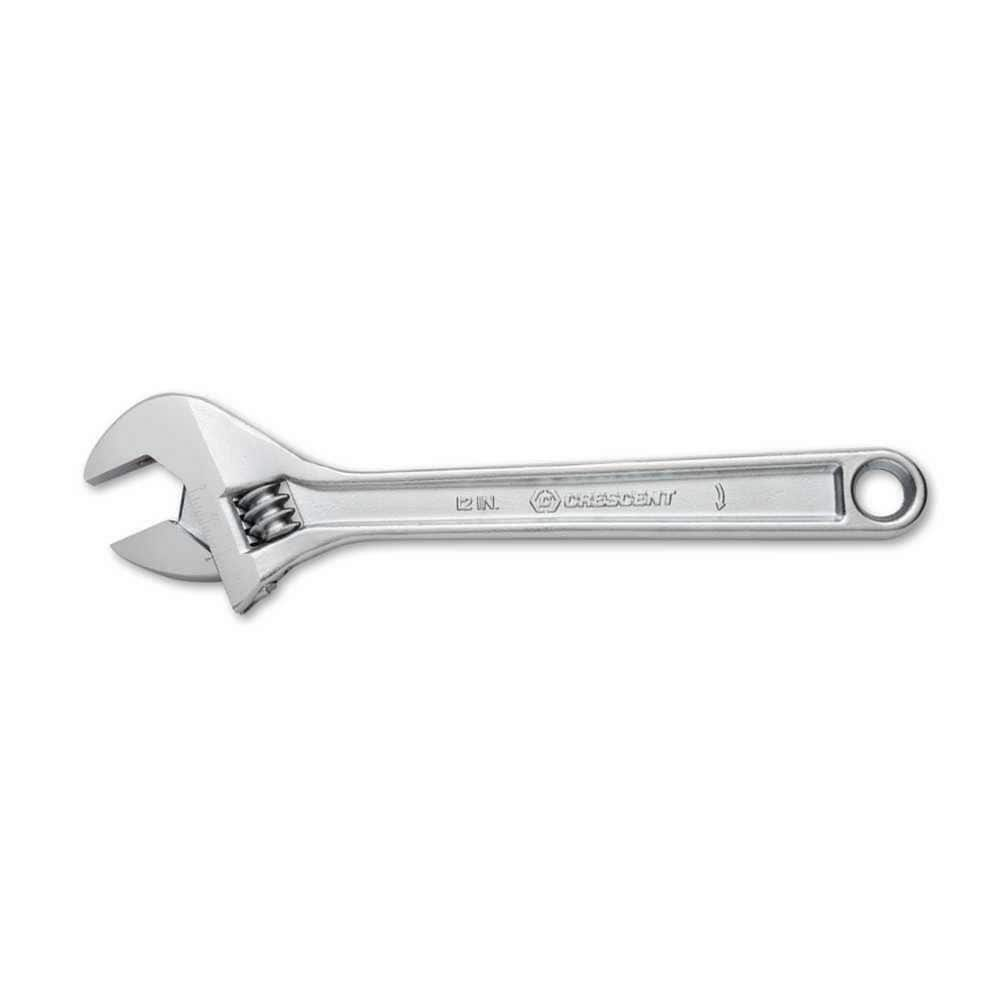
Crescent 12 in. Chrome Adjustable Wrench AC212VS
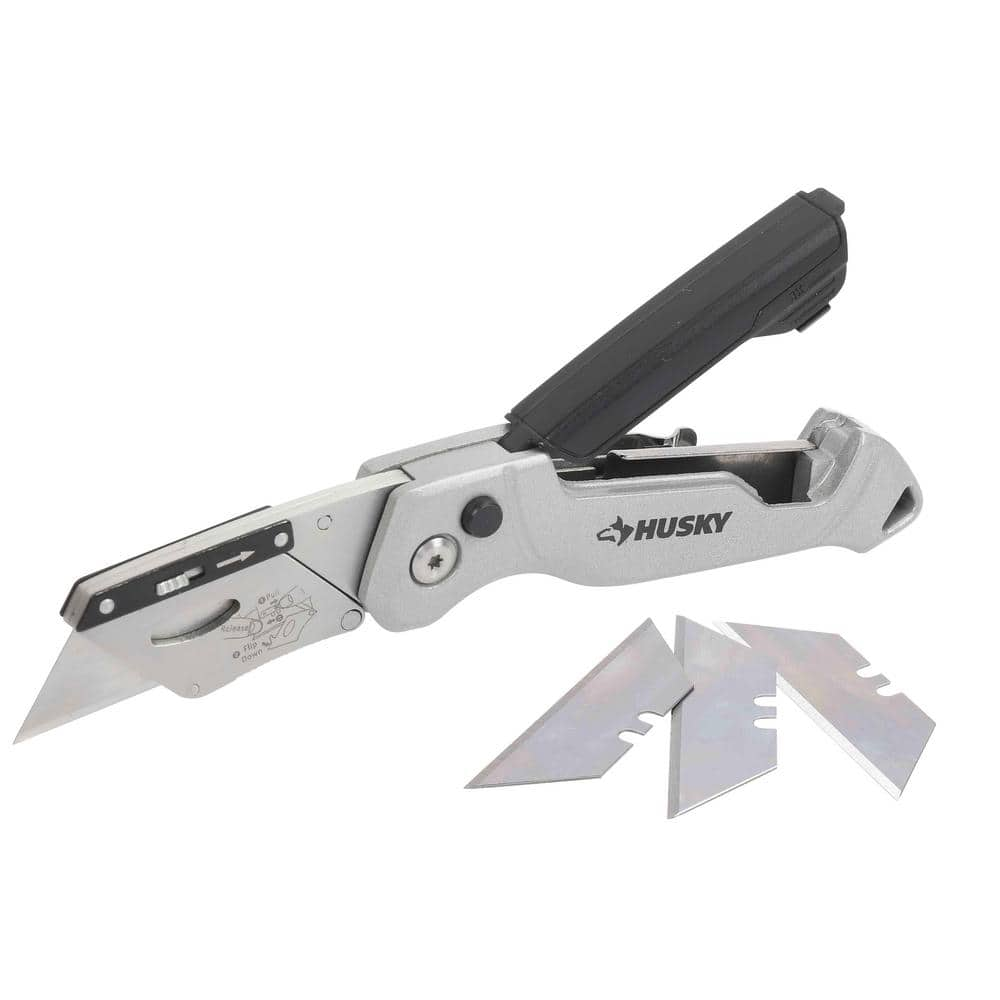
Husky Pro Utility Knife 00004
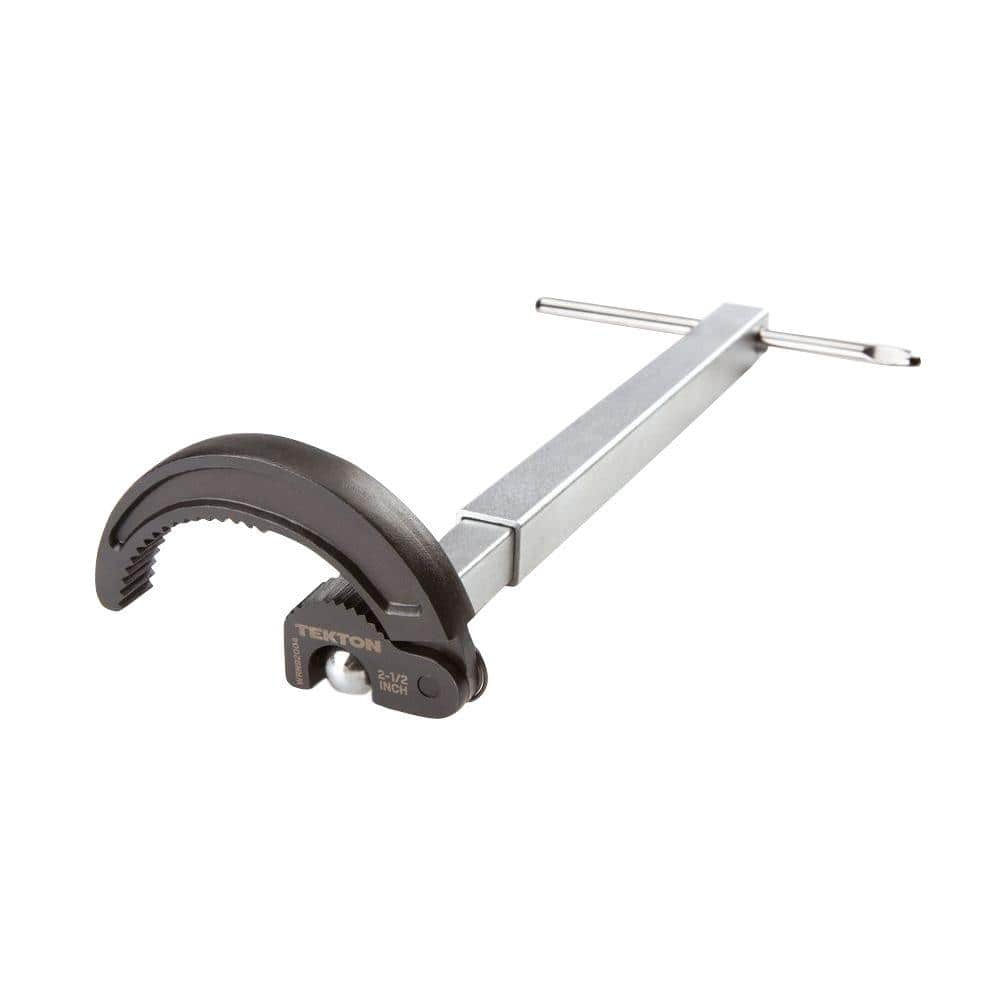
TEKTON 10 in. to 17 in. Telescoping 7/8 - 2-1/2 in. Basin Wrench WRN92004

Unger 6 Gal. Heavy-Duty Plastic Bucket DB02

Work Gloves
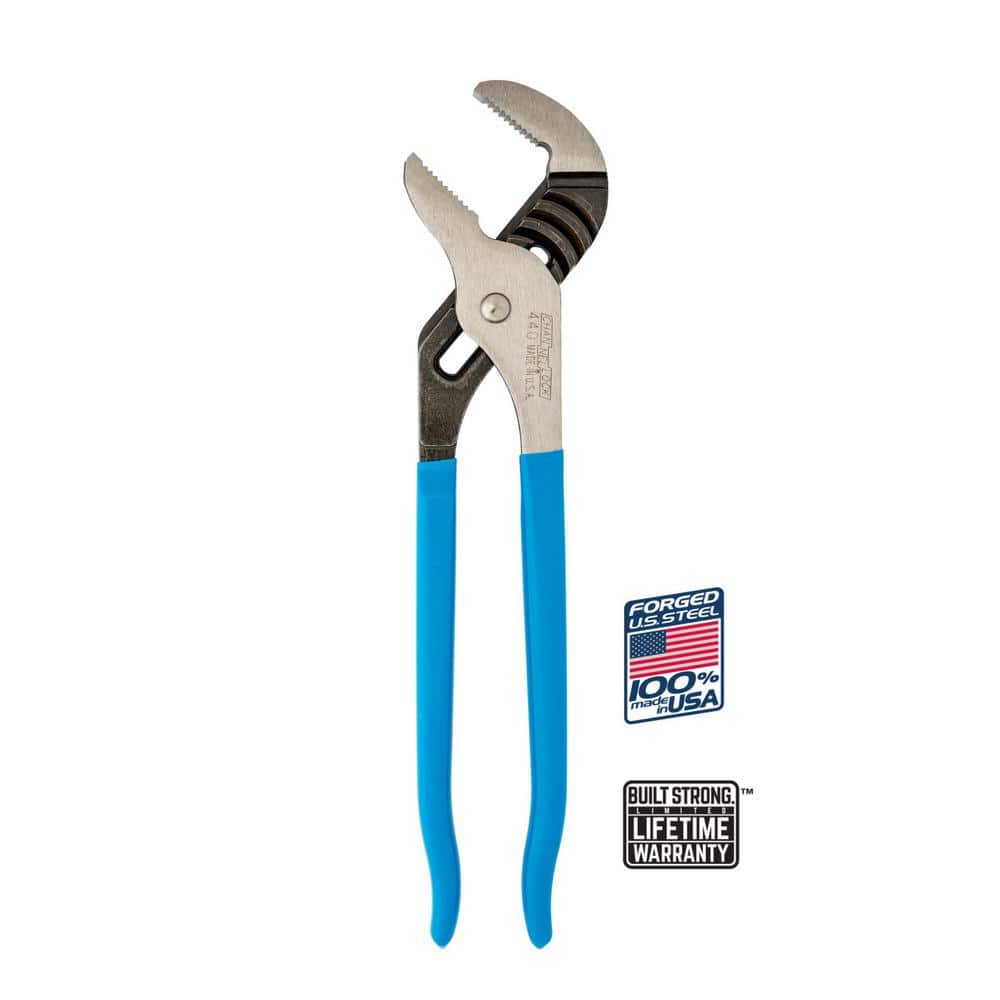
Channellock 12 in. Tongue and Groove Slip Joint Pliers 440
Crescent 12 in. Chrome Adjustable Wrench AC212VS
Since the introduction of the original Crescent wrench in the early 1900s, the Crescent brand has become synonymous with adjustable wrenches. Crescent Adjustable Wrenches feature a large knurl for easy
Husky Pro Utility Knife 00004
Offering a precise cut every time, Husky Pro Folding Utility Knife lets you easily adjust the blade to multiple angles to tackle a wide range of jobs. Aluminum die casting handle with plastic spraying
TEKTON 10 in. to 17 in. Telescoping 7/8 - 2-1/2 in. Basin Wrench WRN92004
Uniquely designed for easy, one-handed operation in confined areas, the TEKTON Telescoping Basin Wrench takes the frustration out of under-sink work. Ideal for larger nuts and retaining collars on faucets,
Unger 6 Gal. Heavy-Duty Plastic Bucket DB02
The Unger 6-Gallon Heavy-Duty Professional Cleaning Bucket holds more than 6 Gal. of liquid. The bucket can accommodate a scrubber up to 14 in. L. This bucket features measurement marks and 2-pour spouts
Work Gloves
Protects hands during tasks.
Channellock 12 in. Tongue and Groove Slip Joint Pliers 440
The Channellock 12 in. Straight Jaw Tongue and Groove Pliers are constructed with high-carbon C1080 steel. The tool is fashioned with laser heat-treated teeth that clamp down perpendicularly for strong,
Steps

Prepare Workspace and Remove Old Sink
45 minsBegin by turning off the water supply to the sink using the hot and cold shutoff valves located beneath it. If they are inoperable, you must shut off the main water supply to the house. Place a bucket under the P-trap to catch residual water. Use an adjustable wrench to disconnect the hot and cold water supply lines from the valves. Next, loosen the slip nuts on the P-trap and remove it. If replacing a vanity, use a utility knife to score the caulk seal along the backsplash and sides where it meets the wall. Disconnect any clips holding the old sink to the countertop, then carefully lift the old sink and vanity out of the bathroom. Clean the area thoroughly.

Install Wall Blocking for Support
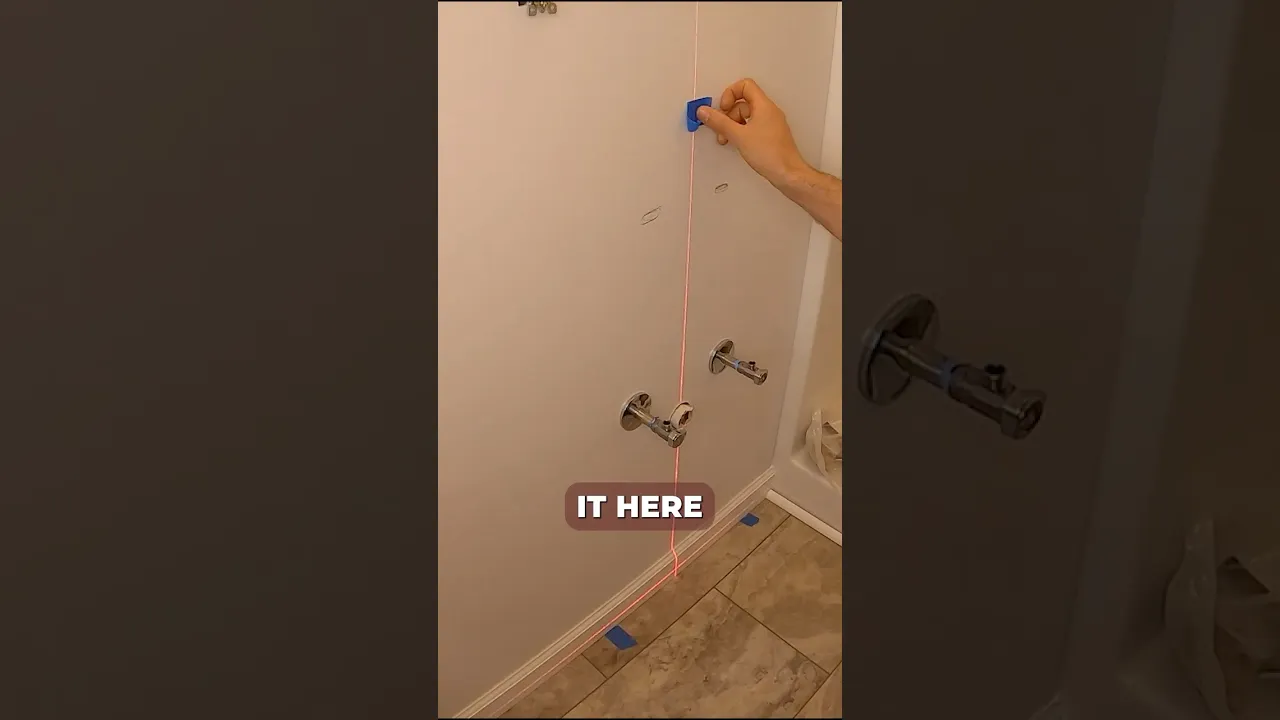
60 minsA pedestal sink requires solid backing in the wall for support. Use a stud finder to locate the studs on either side of your drain pipe. Use a level and pencil to draw a rectangle on the wall where the sink will be mounted. The top of this rectangle should be at your desired sink rim height (typically 34-36 inches). Carefully cut out this section of drywall using a drywall saw. Measure the distance between the studs and cut a piece of 2x8 lumber to fit snugly. Position this blocking horizontally between the studs, centered at the height where the sink's mounting holes will be. Secure the blocking by driving wood screws through the studs and into the ends of the 2x8 block.

Install Faucet and Drain Assembly
30 minsIt is much easier to install the faucet and drain before the sink is mounted. Place the sink basin upside down on a soft, protected surface like a towel or piece of cardboard. Following the manufacturer's instructions, insert the faucet through the mounting holes on the sink deck. From the underside, attach and tighten the mounting nuts. A basin wrench can be very helpful for tightening these nuts in the tight space. For the drain, apply a rope of plumber's putty around the underside of the drain flange. Insert the drain body through the drain hole from the top of the sink. From underneath, install the gasket and tighten the large locknut to secure it. Do not overtighten. Connect the pop-up drain linkage as per the instructions.

Dry Fit Sink and Mark Mounting Locations
20 minsAfter patching the drywall (a full finish is not necessary behind the sink), perform a dry fit. Place the pedestal base where it will be installed. With a helper, carefully set the sink basin on top of the pedestal. Push the entire assembly against the wall, ensuring the sink basin is centered over the pedestal and is level both front-to-back and side-to-side. Use a pencil to trace the outline of the pedestal base on the floor. Then, reach behind the sink and mark the locations for the mounting bolts on the wall through the holes in the back of the sink. Carefully remove the sink and pedestal.
Mount the Sink Basin and Secure Pedestal
30 minsAt the locations you marked on the wall for the sink basin, drill pilot holes into the wood blocking. The drill bit should be slightly smaller in diameter than the lag bolts that came with your sink. Move the pedestal into its final position, aligning it with the outline you traced on the floor. With your helper, lift the sink basin and carefully guide it onto the top of the pedestal, aligning the mounting holes with the pilot holes you drilled in the wall. Insert the lag bolts with their washers through the mounting holes. Use a socket wrench to tighten the bolts, alternating between them to apply even pressure. Tighten until the sink is snug against the wall but do not overtighten.

Connect Water Supply and Drain Lines
30 minsNow, connect the plumbing. Attach the flexible water supply lines from the faucet inlets down to the corresponding hot and cold shutoff valves. Hand-tighten the nuts, then use a wrench to give them an additional quarter- to half-turn. Do not overtighten. Next, assemble the P-trap. Connect the tailpiece extension to the bottom of the sink's drain assembly if needed. Attach the P-trap to the tailpiece and the drain stub-out in the wall. The slip nuts on the P-trap are designed to be hand-tightened only. Ensure all gaskets are properly seated before tightening.

Test for Leaks and Apply Caulk
25 minsWith all connections made, it's time to test your work. Place a dry rag or paper towel under each connection point to make leaks easier to spot. Turn the shutoff valves on slowly, starting with cold then hot. Carefully inspect the supply line connections at both the valve and the faucet for any drips. Turn the faucet on and let the water run. Check all the P-trap connections for leaks. Fill the sink basin completely with water, then release the pop-up drain. Watch the entire drain assembly for leaks as the large volume of water flows through. If you find a small leak, try tightening the connection slightly. Apply a thin, neat bead of kitchen and bath silicone caulk around the base of the pedestal where it meets the floor, and also along the back edge of the sink where it meets the wall. Smooth the bead with a wet finger.
Common Problems
Ensure that the slip-joint washers are installed with the tapered side facing the direction of the fitting it is sealing against.
Solution: To avoid this issue: Be mindful of this warning and take appropriate precautions.
Leaky connections occur if gaskets aren't seated correctly in slip nuts.
Solution: Double-check that the rubber gaskets are properly seated inside the slip nuts before tightening to ensure a watertight seal.
Leaky connections result from improper washer orientation.
Solution: Ensure that the beveled side of the slip-joint washers faces the direction of the threads to create a proper seal.
Hand-tighten the plastic slip nuts first, then give them a final quarter-turn with pliers. Over-tightening can crack the nuts or damage the threads.
Solution: To avoid this issue: Be mindful of this warning and take appropriate precautions.
Do not leave the area unattended immediately after turning the water back on. Stay and observe the new fittings for several minutes.
Solution: To avoid this issue: Be mindful of this warning and take appropriate precautions.
Do not skip this step. A small, slow drip can go unnoticed and cause significant water damage over time.
Solution: To avoid this issue: Be mindful of this warning and take appropriate precautions.
Lag bolts won't seat properly and wood blocking splits without pilot holes.
Solution: Pre-drilling a pilot hole makes it easier to drive the lag bolts and prevents the wood blocking from splitting.
Frequently Asked Questions
Why is wall blocking necessary for a pedestal sink, and what type of wood should I use?
Wall blocking provides crucial structural support for the sink basin, which often doesn't have a vanity beneath it and must bear its own weight. Use a sturdy piece of lumber like 2 in. x 8 in. Prime Lumber, ensuring it's securely fastened horizontally between wall studs to prevent the sink from pulling away from the wall over time.
The project estimates 12 hours; what factors contribute to this longer installation time for an intermediate project?
The 12-hour estimate accounts for several factors beyond simple assembly, including the time-consuming process of removing an old sink and potentially repairing the wall. Locating studs, installing robust wall blocking, and carefully running new PEX water lines can add significant time. Additionally, waiting for caulk to cure before final use is essential for a leak-free finish.
What are the most critical steps to ensure a leak-free plumbing connection for my new pedestal sink?
Always apply thread sealant tape (Teflon tape) to all threaded pipe connections before tightening. For the PermaFLOW ABS Slip Joint P-Trap, ensure all slip-joint nuts are hand-tightened, then given an additional quarter turn with Channellock pliers. Double-check all connections by running water and visually inspecting thoroughly for any drips before proceeding to caulk.
How do I ensure the sink basin and pedestal are perfectly level and securely mounted to prevent wobbling?
During the 'Dry Fit' step, use a level to mark precise mounting locations for the basin, ensuring it's plumb and level before drilling. Secure the basin firmly to the wall blocking using #10 3” wood screws. Position the pedestal directly beneath the basin's drain tailpiece, using shims if necessary to achieve perfect stability on uneven floors.
Are there any specialized tools or materials listed that are absolutely critical for a successful pedestal sink installation, especially for a beginner?
Yes, a Zircon StudSensor HD35 Stud Finder is essential for accurately locating studs for the wall blocking, and the Milwaukee Jab Saw is crucial for precise drywall cuts. For plumbing, the PLUMBFLEX PEX A Non-Barrier Pipe, specific PermaFLOW ABS Slip Joint P-Trap, and TEKTON Adapter/Reducer Set are critical for making proper water supply and drainage connections.
What should I do if the new faucet seems loose or wobbly after installation onto the sink basin?
A wobbly faucet usually indicates that the mounting nut beneath the sink basin isn't sufficiently tight. Use an adjustable wrench, like the Crescent 12 in., or a basin wrench if space is limited, to firmly tighten the large nut securing the faucet to the sink. Ensure the faucet's rubber gasket is properly seated before tightening to provide a good seal and prevent rotation.
When and where exactly should I apply the GE Advanced Silicone 2 Caulk, and how long does it need to cure?
Apply the GE Advanced Silicone 2 Caulk around the perimeter where the sink basin meets the wall, and optionally where the pedestal meets the floor, after all plumbing connections have been tested for leaks. Use the Husky 10 oz. Caulk Gun for a smooth, even bead. Silicone caulk typically requires at least 24 hours to fully cure before direct exposure to water.


