
How to Convert a 3-Handle Shower Faucet to a Single-Handle Valve
About This Project
This project involves replacing an outdated three-handle shower faucet system (hot, cold, and diverter) with a modern, code-compliant single-handle pressure-balancing or thermostatic valve. The process requires accessing the plumbing within the wall, removing the old valve body, re-plumbing the hot and cold water lines and the shower riser to a new single valve, and then patching the wall and installing the new faucet trim.
Best for advanced DIYers and professionals with basic plumbing knowledge and familiarity with power tools. Requires Oatey 9 in. x 12 in. Hands-Free Solder Heat Shield 314002 and AMEREX 2-A:10-B:C 5 lbs. ABC Dry Chemical Fire Extinguisher B500T.
Tools & Materials
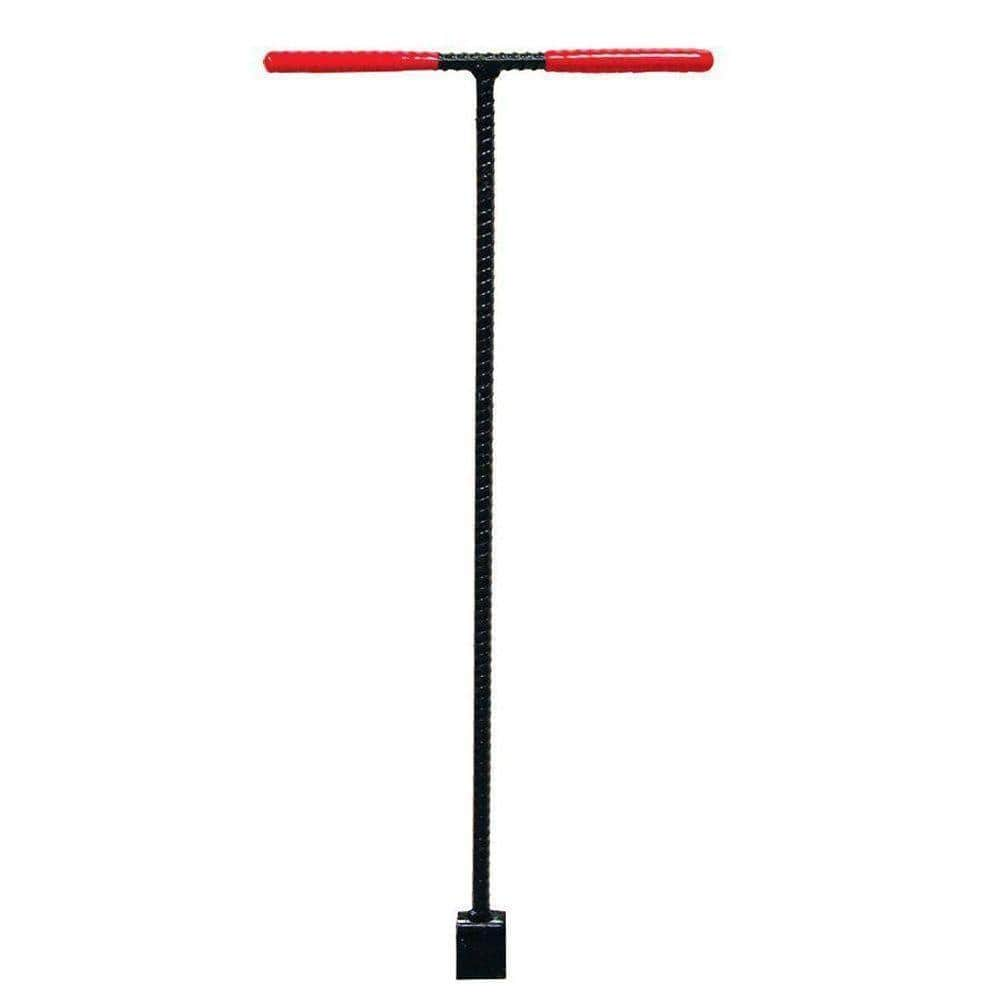
36 in. Solid Steel Water Meter Valve Key with Grips 410-303-0111

Adjustable Wrench

Zircon StudSensor HD55 Stud Finder 65945
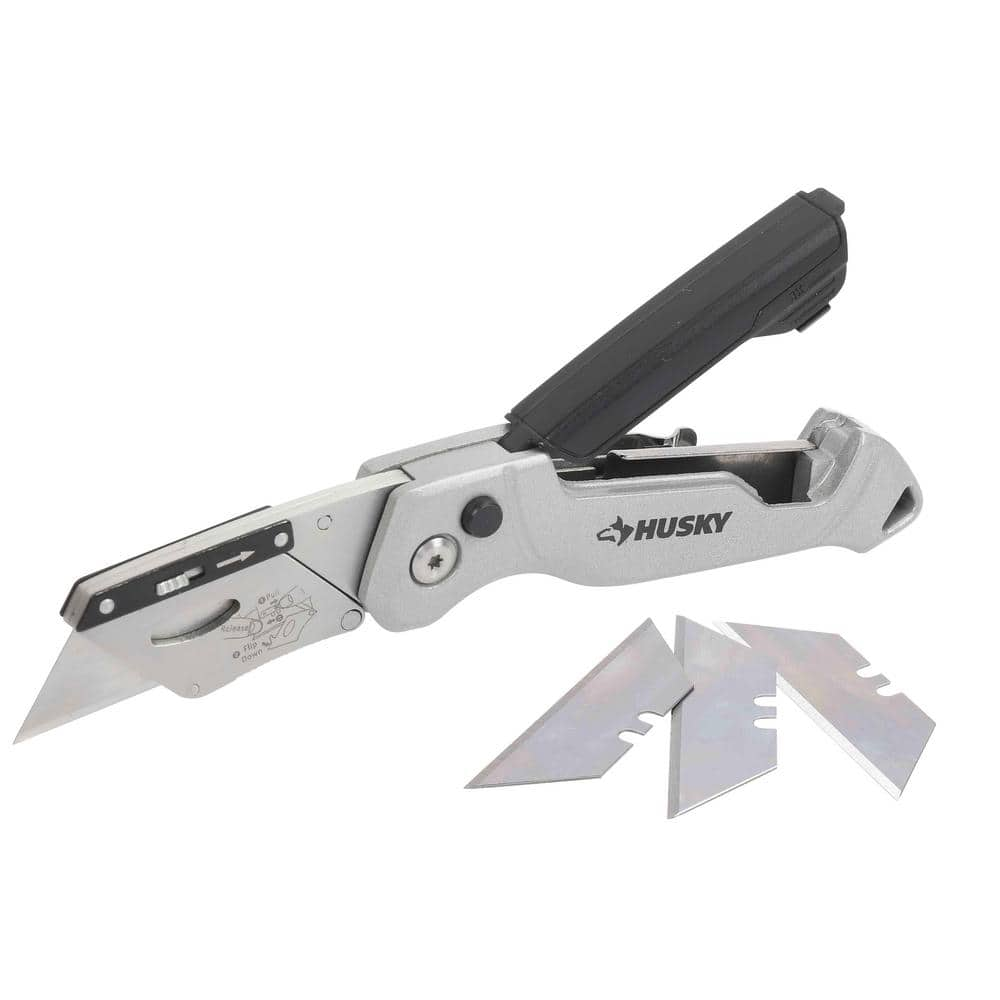
Husky Pro Utility Knife 00004

Milwaukee Folding Jab Saw with 6 in. 8TPI SAWZALL Drywall Blade with Thin Metal Cutting SAWZALL Reciprocating Saw Blades (7-Piece) 48-22-0307-48-00-5186
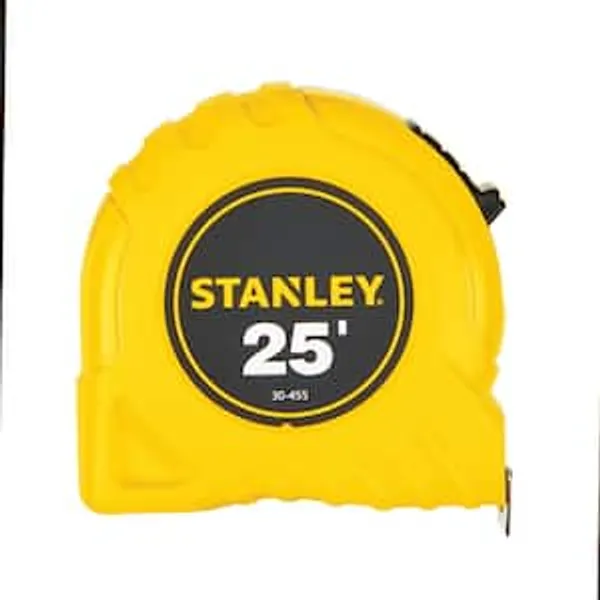
25 ft. Tape Measure
36 in. Solid Steel Water Meter Valve Key with Grips 410-303-0111
This water meter valve wrench turns on and off the main water supply valve for a house or building. Its extended 36 in. length is ideal for reaching into shallow meter/valve boxes that are less than 30
Adjustable Wrench
Fits various nut and bolt sizes with its adjustable jaw.
Zircon StudSensor HD55 Stud Finder 65945
The StudSensor HD55 deep-scanning stud finder features an enhanced LCD display, with Target Spotlight, that illuminates on-screen when you've found the edge of a stud. Select from 2 stud scan modes to
Husky Pro Utility Knife 00004
Offering a precise cut every time, Husky Pro Folding Utility Knife lets you easily adjust the blade to multiple angles to tackle a wide range of jobs. Aluminum die casting handle with plastic spraying
Milwaukee Folding Jab Saw with 6 in. 8TPI SAWZALL Drywall Blade with Thin Metal Cutting SAWZALL Reciprocating Saw Blades (7-Piece) 48-22-0307-48-00-5186
Our Milwaukee Folding Jab Saw fits all 6 in. Sawzall blades for quick cutting into multiple materials. The slide lock design offers the fastest blade change to increase productivity on the jobsite. The
25 ft. Tape Measure
Measure with precision and ease.
Steps

Shut Off Water Supply
15 minsThe first and most critical step is to completely shut off the water to your entire home. Locate the main water shutoff valve, typically found in the basement, a crawl space, or near the water meter. Turn the handle clockwise until it is fully closed. To ensure the lines are depressurized and drained, open the faucet at the highest point in your house (like an upstairs bathroom) and the lowest point (like a basement sink or outdoor spigot) to let all the water drain out.

Create an Access Panel
30 minsTo access the plumbing, you will need to create an opening in the wall behind the shower. Use a stud finder to locate the studs on either side of the plumbing area. Mark a rectangular area for your access panel, typically about 12-16 inches wide and tall enough to comfortably work. Use a utility knife to score the outline, and then use a drywall saw to carefully cut out the panel. Set the removed piece of drywall aside, as you can use it to patch the wall later.

Remove Old Faucet Trim
20 minsOn the shower side, remove the old faucet trim. Pry off the caps on the handles to expose the screws. Use a screwdriver to remove the screws and pull the handles off. You may need a handle puller if they are corroded and stuck. Next, unscrew the chrome sleeves (escutcheons) from the wall. Finally, unscrew the tub spout. If it doesn't unscrew, it may be a slip-on type secured by a small set screw on the underside; use an Allen wrench to loosen it.

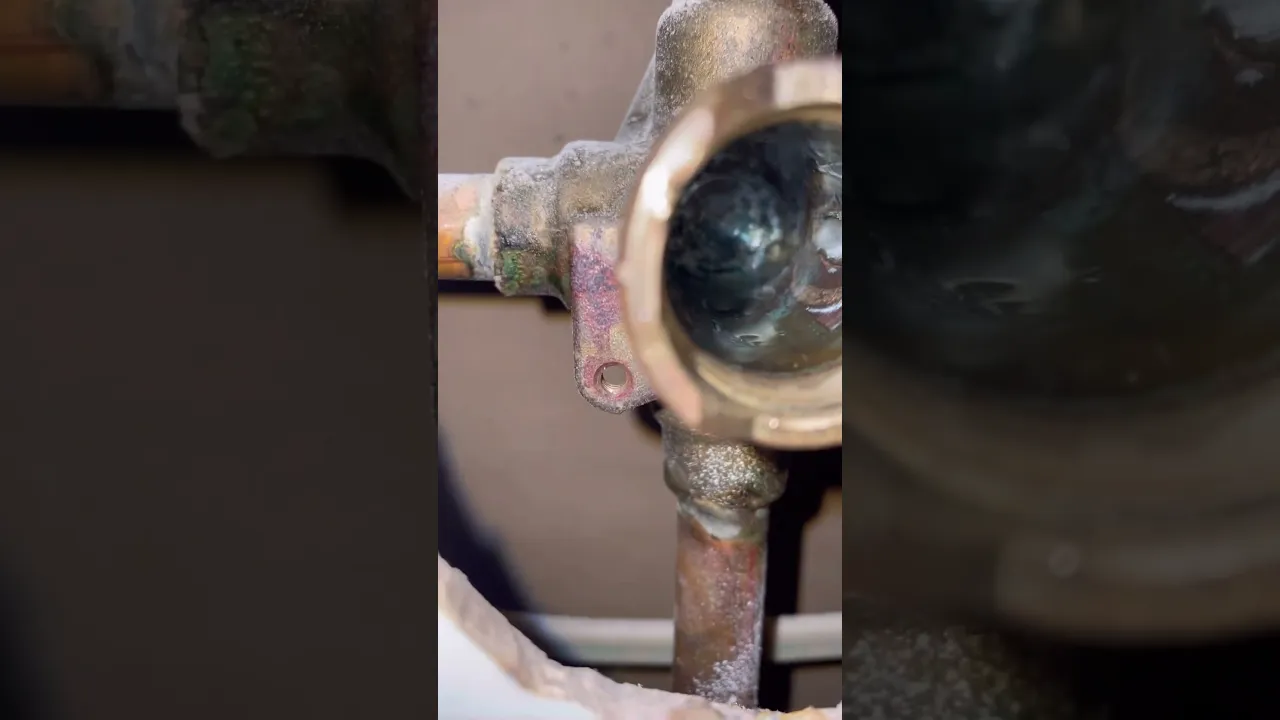
Remove Old Valve Body
45 minsFrom the access panel, identify the old 3-handle valve body. It will have a hot inlet, a cold inlet, and two outlets (one for the tub spout, one for the shower riser). Use a mini tubing cutter to cut the hot and cold copper pipes and the pipe leading up to the showerhead. You may need to remove any screws or straps securing the old valve body to the wall framing. Once all pipes are cut and fasteners are removed, carefully maneuver the old valve assembly out of the wall cavity.

Prepare for New Valve Installation
1 minPrepare to install the new valve. You will likely need to add a new wood support block (a piece of 2x4 lumber) between the wall studs for mounting the new valve. Secure the 2x4 with deck screws. Following the new valve's instructions, determine the correct setback from the front of the wall studs. This is critical for the trim to fit correctly. Dry-fit the new valve and the necessary copper pipes and fittings (couplings, 90-degree elbows) to connect the existing hot, cold, and shower riser pipes to the new valve. You will also cap the tub spout port on the new valve if you are doing a shower-only installation, or run a new pipe down to the tub spout if applicable. Cut all new pieces of copper pipe to length with the tubing cutter.

Solder and Install New Valve
1 minWith all pieces cut and dry-fit, it's time to solder. Disassemble your dry-fit connections. Thoroughly clean the inside of each fitting and the outside of each pipe end with a wire fitting brush and emery cloth until the copper is shiny. Apply a thin, even layer of flux to all cleaned surfaces. Reassemble the pipes and fittings. Remove the plastic cartridge from the valve body to prevent heat damage. Use a propane torch to heat the joint evenly. When the flux sizzles, touch the lead-free solder to the joint on the side opposite the flame. The heat will draw the solder into the joint, creating a seal. You will see a silver ring appear when the joint is full. Solder all connections. Once cool, securely mount the valve body to the 2x4 brace.

Test for Leaks
30 minsThis is a moment of truth. Re-install the valve cartridge that you removed before soldering. Ensure the valve is in the 'off' position. Go to the main water shutoff and turn it on SLOWLY. Listen for any sounds of rushing water. Go back to the access panel and meticulously inspect every single soldered joint for any signs of dripping or moisture. Use a dry paper towel to wipe each joint to make it easier to spot even the smallest leak. If you find a leak, you must shut off the water, drain the lines, and re-solder the faulty joint. Leave the water on for at least 15-20 minutes to be certain everything is watertight.

Install Remodel Plate and Trim
30 minsOnce you are confident there are no leaks, you can install the new faucet trim. On the shower side, slide the large remodel plate (or escutcheon) over the valve stem. This plate is designed to cover the old hot and cold handle holes. Secure it to the wall or valve body according to the manufacturer's instructions, often with long screws. Apply a thin bead of silicone caulk around the top and sides of the plate, leaving the bottom open to allow any moisture to escape. Slide on the handle and secure it with its set screw. Install the new tub spout and shower head.
Repair Access Panel
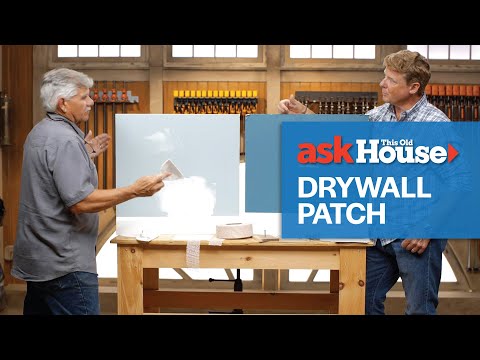
1 minNow you will repair the access hole. You may need to add small wood cleats behind the edges of the drywall opening to provide a surface for screws. Place the piece of drywall you originally cut out back into the hole and secure it to the cleats with drywall screws. Apply drywall tape over the seams. Using a drywall knife, apply several thin coats of joint compound over the tape, feathering the edges with each coat to blend it with the surrounding wall. Allow each coat to dry completely and sand lightly between coats until the patch is smooth and level.

Prime, Paint, and Clean Up
1 minWith the wall patch fully dry and sanded smooth, the final step is to finish the surface. Apply a coat of primer over the patched area to seal the joint compound and ensure the paint adheres evenly. Once the primer is dry, apply one or two coats of paint to match the rest of the wall. After the paint has dried, clean up your work area, remove any tools and debris, and your shower faucet conversion is complete.
Common Problems
Losing small faucet parts during the conversion.
Solution: Place all small parts like screws and the handle cap in a safe place, such as a small bowl or the sink drain (with the stopper closed), to avoid losing them.
Lost screws during faucet conversion lead to incomplete installation and a non-functional shower.
Solution: Keep all screws and small parts in a container to avoid losing them.
Sudden water pressure can cause leaks and damage pipes.
Solution: Turn the water supply on slowly to allow air to escape from the pipes and to catch any major leaks before full pressure is applied.
Scratched finishes and loose connections result from overtightening or overtightening with a bare wrench.
Solution: Hand-tighten the shower head and tub spout first, then use a wrench with a cloth to protect the finish for the final quarter-turn.
When turning the water back on, do so slowly to allow air to escape the pipes and to check for slow leaks before they become major problems.
Solution: To avoid this issue: Be mindful of this warning and take appropriate precautions.
Handle won't stay on, flange pops out.
Solution: The handle itself is what holds this type of flange in place; no additional screws or retainers are needed.
Identify and work around existing utilities like electrical wires to avoid hazards and complications.
Solution: To avoid this issue: Be mindful of this warning and take appropriate precautions.
Frequently Asked Questions
Given this project's intermediate difficulty and 12-hour estimate, what core skills should a DIYer possess before attempting this shower valve conversion?
You'll need solid basic plumbing knowledge, including cutting pipes and making secure connections (soldering or PEX crimping). Experience with drywall repair, such as cutting, patching, taping, and mudding, is also essential for finishing the wall access. Patience and attention to detail are key to avoid leaks and ensure a professional finish.
Beyond common household tools, what specific specialized tools or equipment are absolutely necessary to successfully complete the plumbing and wall repair steps?
For plumbing, you'll need a pipe cutter (copper or PEX, depending on your choice), soldering torch and supplies or a PEX crimping tool, and a stud finder to locate framing. For wall repair, a utility knife for precise drywall cuts, a joint knife for mudding, and appropriate safety gear like eye protection and a dust mask are crucial.
What are the most critical safety precautions DIYers must take when working with water lines and opening up a shower wall?
Always shut off the main water supply to your home before starting any plumbing work. Use a non-contact voltage tester to check for hidden electrical wires before cutting into walls. Wear appropriate personal protective equipment, including safety glasses, gloves, and a dust mask, especially when dealing with old pipes or drywall dust.
What are the most common mistakes DIYers make during the re-plumbing phase of this conversion, and how can they be avoided to prevent costly leaks?
A common mistake is inadequate preparation of pipe surfaces or improper soldering/crimping, leading to leaks. Ensure all connections are clean, properly fluxed (if soldering), and fully seated. Another error is not adequately supporting the new valve within the wall; secure it firmly to framing to prevent movement and strain on the connections.
Can PEX plumbing be used as an alternative to copper pipes for this conversion, and does it simplify the process for a DIYer?
Yes, PEX tubing is an excellent alternative to copper for this conversion and can significantly simplify the process for DIYers. PEX is more flexible, easier to cut, and requires crimp or clamp connections rather than soldering, reducing the need for specialized heat tools and making it less prone to leak errors for beginners.
The project mentions creating and repairing an access panel. What are best practices for making an access panel that is both functional for future maintenance and aesthetically discreet?
Plan the access panel location carefully to be as inconspicuous as possible, ideally in an adjacent closet or another room. Ensure it's large enough for comfortable future access to the valve. Frame the opening properly for structural integrity and create a flush-fitting panel that can be easily removed, using discreet latches or magnets, then finish it to match the surrounding wall.


