
How to Clear a Grease-Clogged Kitchen Drain
About This Project
This guide provides instructions to clear a grease-clogged kitchen drain using a combination of hot water, degreasing agents, and mechanical methods like removing and cleaning the P-trap and using a drain snake for deeper clogs.
Best for experienced DIYers and homeowners with some experience with basic plumbing knowledge and familiarity with power tools. Requires MCR Safety BearKat Safety Glasses MCSCRWBK110 and Safety gloves and BBQ Dragon Extreme Heat Resistance BBQ Gloves BBQD240.
Tools & Materials

Bucket

Towel
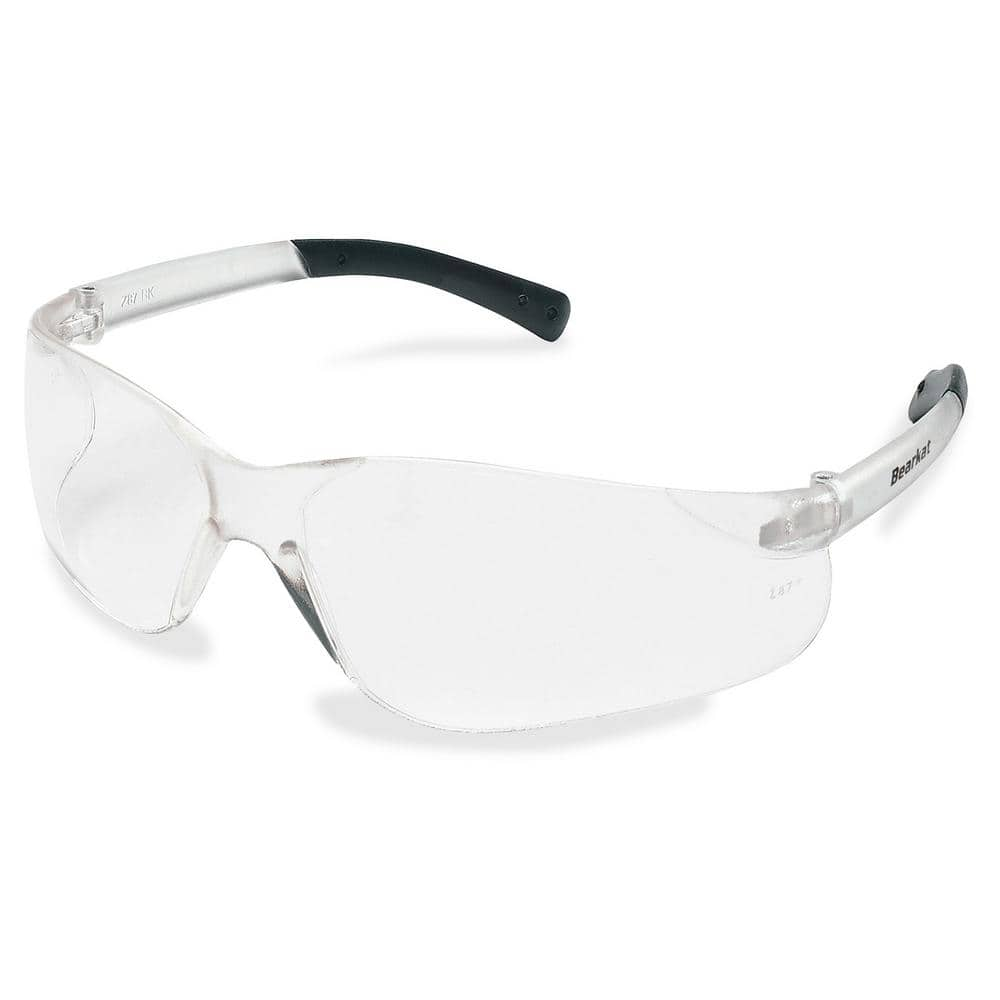
MCR Safety BearKat Safety Glasses MCSCRWBK110

Safety gloves

Pennington 18.5 in. Large Heavy Rimmed Terra Cotta Clay Pot 100043002
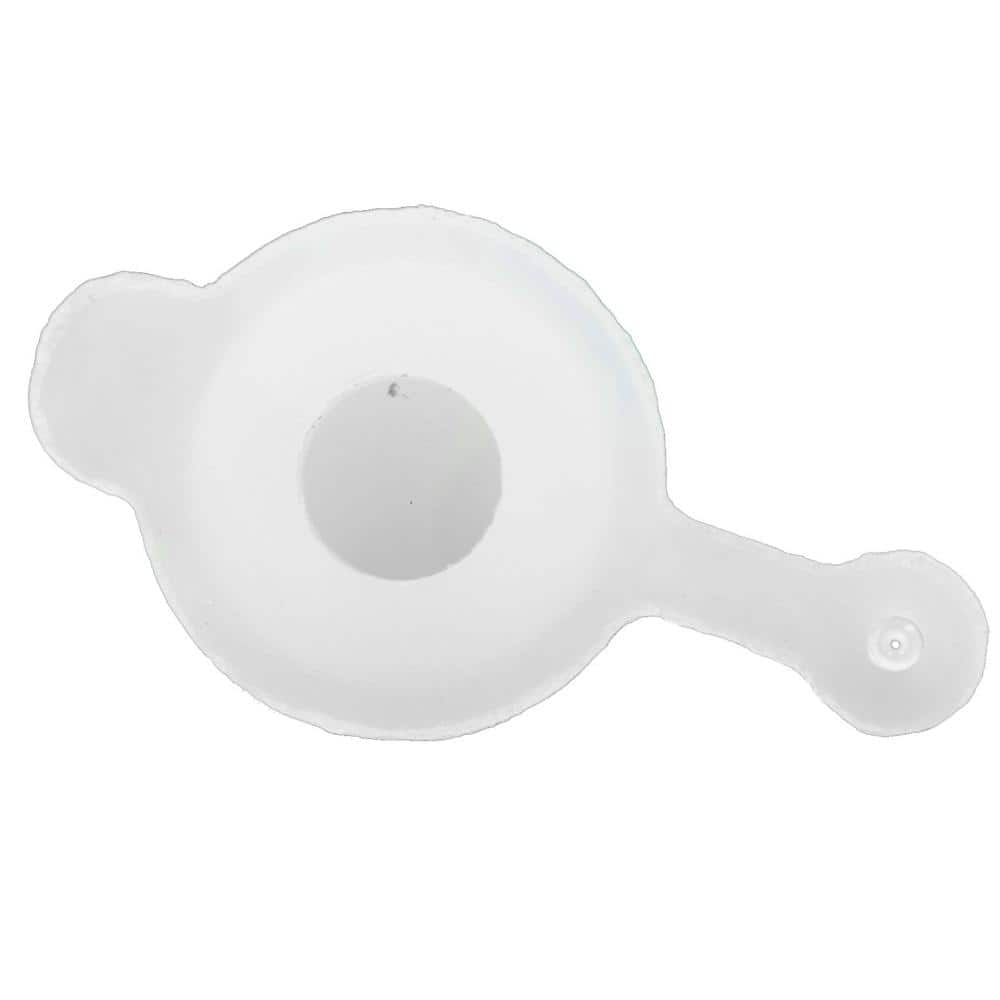
Hessaire Universal Drain Plug 6017081
Bucket
Ideal for carrying or storing liquids.
Towel
Absorbs moisture and dries surfaces.
MCR Safety BearKat Safety Glasses MCSCRWBK110
Safety glasses feature a well thought-out construction that combines the best in safety, comfort and affordability. Your vision is unobstructed by the 1-piece wraparound lens which, by its tight fit, provides for maximum safety. Flexible temples enhance your comfort during extended use. Nonslip rubber head grips are notched for a clip-on breakaway cord.
Safety gloves
Shields hands from potential harm.
Pennington 18.5 in. Large Heavy Rimmed Terra Cotta Clay Pot 100043002
The 18.5 in. Terra Cotta Heavy Rimmed Pot is crafted with porous terra cotta that allows plants' roots to breathe. The drainage hole prevents the flower pot from overwatering, promoting plant health. Terra cotta will develop a beautiful patina color over time. Please note: This item is handmade and dimensions may vary slightly, but no more than 1-half inch from the specifications provided. Terra cotta pots and saucers of the same size will be best paired together. For example, the 6 in. pot should be paired with the 6 in. saucer and the 10 in. pot should be paired with the 10 in. saucer. Pots, saucers, and pot feet are all sold separately.
Hessaire Universal Drain Plug 6017081
Hessaire offers the most complete aftermarket service parts to keep your cooler (and air-conditioners) going for years. Whether for replacement part or warranty part, our on-line and store distributors
Steps
Prepare Workspace and Safety
10 minsBegin by clearing everything out from the cabinet under your kitchen sink to give yourself ample room to work. Lay down several old towels to protect the cabinet base from water spills. Place a bucket directly under the P-trap (the U-shaped section of pipe) to catch water and debris. For your safety, put on a pair of safety glasses to protect your eyes from splashes and a pair of waterproof gloves.
Attempt a Natural Degreasing Flush
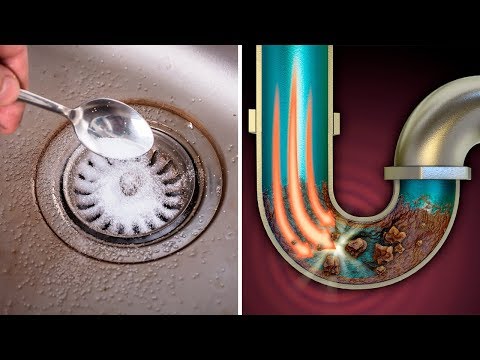
30 minsFor a mild grease clog, this non-invasive method can work. Boil a large pot of water. Pour about half of it slowly down the drain to start melting the grease. Immediately follow with a half-cup of baking soda and a mixture of one cup of white vinegar and one cup of hot water. You'll hear fizzing as the reaction occurs. Place a drain plug over the opening and let it sit for 15-20 minutes. Finally, flush the drain with the remaining boiling water. Note: Be cautious with boiling water if you have PVC pipes; very hot tap water is a safer alternative.

Disassemble and Clean the P-Trap
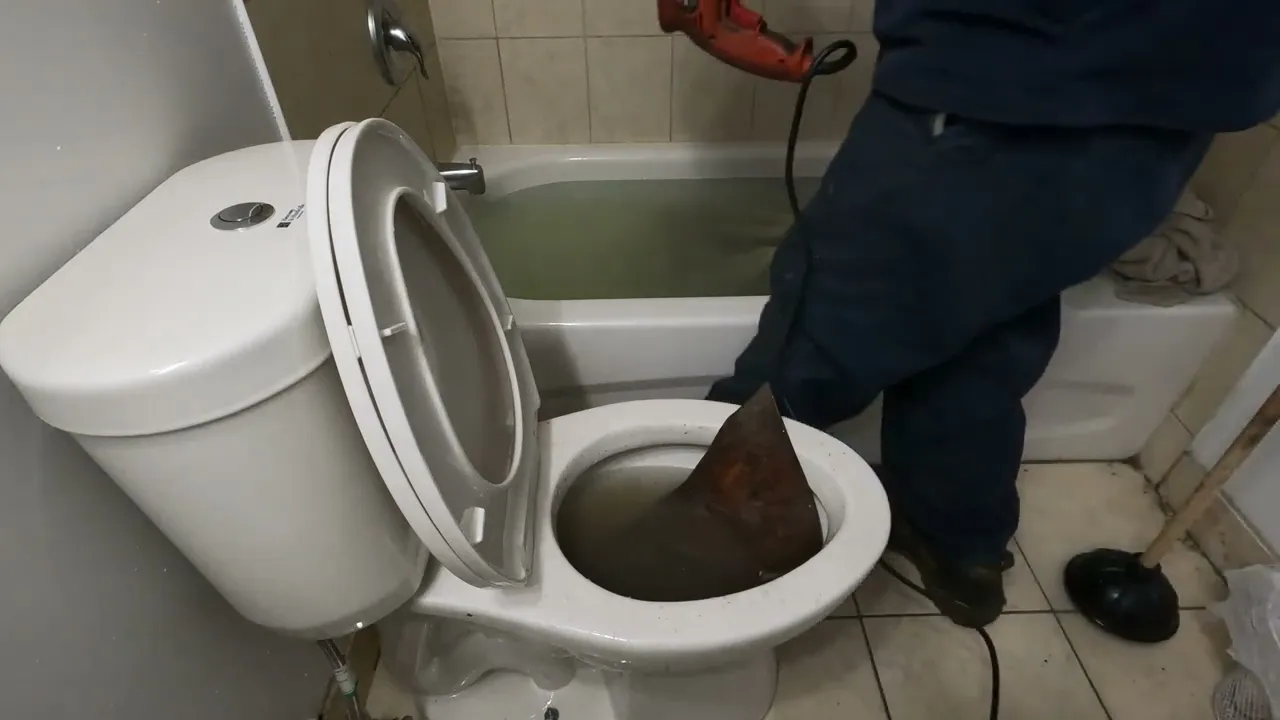
30 minsIf the flush fails, the clog is likely lodged in the P-trap. Confirm your bucket is in position. The P-trap is held by two large slip nuts. Grip one nut with channel-lock pliers or an adjustable wrench and turn it counter-clockwise to loosen. A slight turn is usually enough to then unscrew it by hand. Repeat for the other nut. Gently lower the trap and empty its contents into the bucket. Take the trap to another sink or use a hose outside to clean it thoroughly with a bottle brush and hot, soapy water. Scrape out all grease and grime.

Snake the Drain Line
30 minsWith the P-trap removed, you have direct access to the drain line entering the wall (the trap arm). If you suspect the clog is further down, this is your chance to clear it. Insert the head of a small drain snake (or hand auger) into the pipe. Push the cable in until you feel resistance, which is likely the clog. Tighten the locking screw on the auger's handle and begin turning the crank clockwise while applying gentle forward pressure. You'll feel the snake working its way through the grease. Once the resistance lessens, you have likely broken through. Retract the snake, wiping the cable with a rag as you pull it out to minimize mess.

Reassemble and Leak Test
15 minsCarefully re-position the clean P-trap, ensuring any new or existing washers are properly seated. Screw the slip nuts back on by hand first to prevent cross-threading. Once they are hand-tight, use the channel-lock pliers to give them a final quarter to half-turn. Do not over-tighten, as this can crack the plastic nuts and cause leaks. Once reassembled, turn the hot water tap on and let it run for a few minutes to test the drainage and check for any leaks at the connections you tightened. Place a dry paper towel under the trap to easily spot any small drips.
Common Problems
Do not over-tighten the PVC nuts, as they can crack. Hand-tight plus a quarter-turn with a wrench is usually sufficient.
Solution: To avoid this issue: Be mindful of this warning and take appropriate precautions.
The drain may leak if not properly sealed.
Solution: Fill the sink with water and then release it to put the drain under pressure, which is a good way to test for leaks.
The pop-up stopper won't go back in or the drain won't seal properly.
Solution: When re-inserting the pop-up stopper, make sure the hole at the bottom faces the back of the sink so the pivot rod can pass through it.
Check carefully for leaks at all connections after turning the water back on.
Solution: To avoid this issue: Be mindful of this warning and take appropriate precautions.
Do not overtighten the slip nuts, as this can damage the plastic threads or the pipe.
Solution: To avoid this issue: Be mindful of this warning and take appropriate precautions.
As the narrator mentioned breaking his pipe, be gentle. Plastic fittings can crack if you apply too much force. Hand-tight plus a quarter turn with pliers is often enough for reassembly.
Solution: To avoid this issue: Be mindful of this warning and take appropriate precautions.
Forcing a drain auger can damage pipes or get it stuck.
Solution: If you feel resistance, don't force it too hard. Gently work the auger back and forth while rotating to navigate bends or break up the clog.
Frequently Asked Questions
How long should I expect this project to take, and what's the estimated cost if I need to buy some of the tools?
For a beginner, clearing a grease clog typically takes 1-2 hours. If you need to purchase essential tools like a drain snake and pliers, expect an initial investment of approximately $50-$100, plus the cost of degreasing soap and gloves.
What are the most crucial safety precautions for this project, especially when dealing with greasy clogs?
Always wear heavy-duty latex gloves to protect your hands from grease and dirty water. Ensure your workspace is well-ventilated, and have plenty of old rags and paper towels ready for spills. Never mix different chemical drain cleaners, as this can create dangerous fumes.
Are there any alternative tools I can use if I don't have specialty items like the specified V-jaw pliers or a specific drain brush?
While specific tools make the job easier, you can often substitute. Any adjustable wrench or standard tongue-and-groove pliers can work for the P-trap nuts. For cleaning inside the P-trap, an old toothbrush or bottle brush can be used if a specialty drain brush isn't available. A sturdy bucket is essential for catching water.
I cleaned my P-trap, but the drain is still slow. What should I do next?
If cleaning the P-trap doesn't fully resolve the clog, it indicates the grease blockage is further down the drain line. Your next step should be to use the drain snake (auger) to reach and break up the obstruction deeper in the pipe. Make sure to feed it slowly and retract it carefully.
Why does the guide recommend natural degreasing agents and mechanical methods over chemical drain cleaners?
Chemical drain cleaners often contain harsh substances that can damage pipes, especially older ones, and are less effective against solid grease clogs. They can also create dangerous fumes and splashes. Natural degreasing agents like dish soap, combined with hot water and mechanical removal, are safer, more environmentally friendly, and generally more effective for grease buildup.
What are the best ways to prevent future grease clogs in my kitchen sink?
To prevent future grease clogs, never pour cooking oil or grease down the drain; collect it in a container and dispose of it in the trash. Use a sink strainer to catch food particles, and regularly flush your drain with very hot water and a squirt of dish soap to help break down any accumulating grease.


