Flooring & Tiling
About This Project
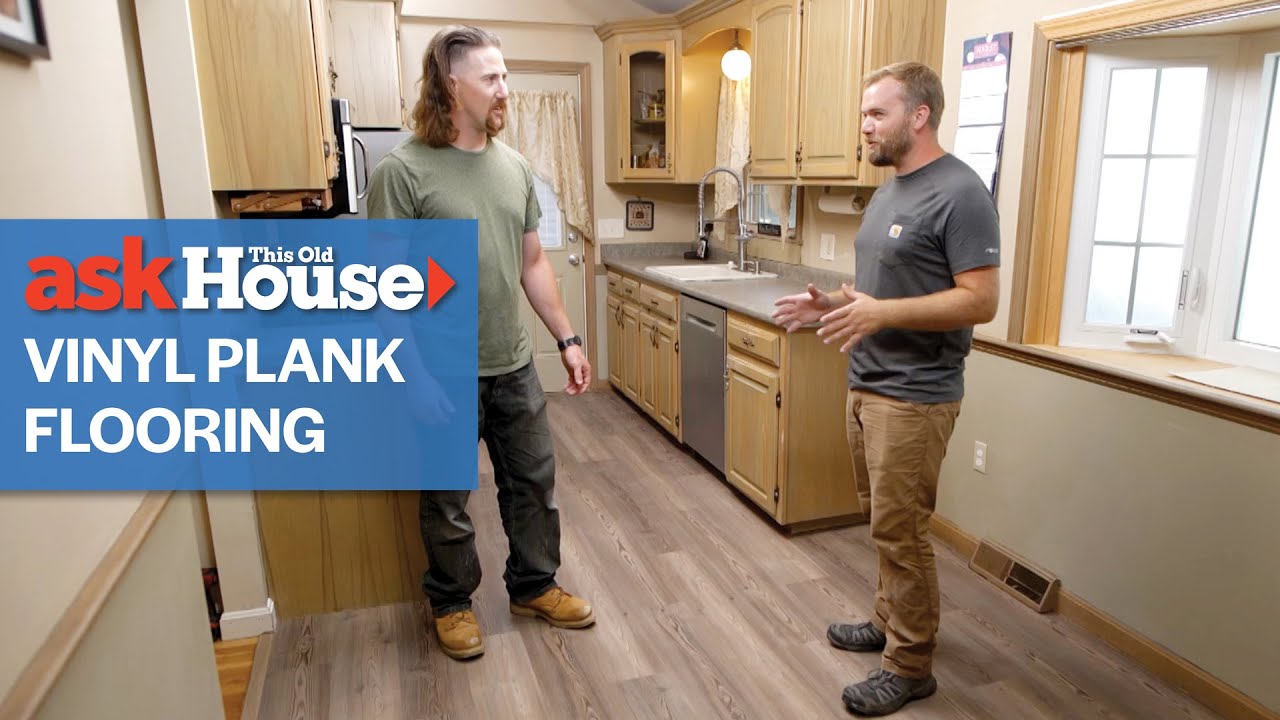
This project outlines the process of selecting, preparing, and installing new flooring or tile in a residential space. It covers assessment of the existing surface, material selection, subfloor preparation, installation techniques, and finishing touches.
Tools & Materials

Retractable Utility Knife 99735
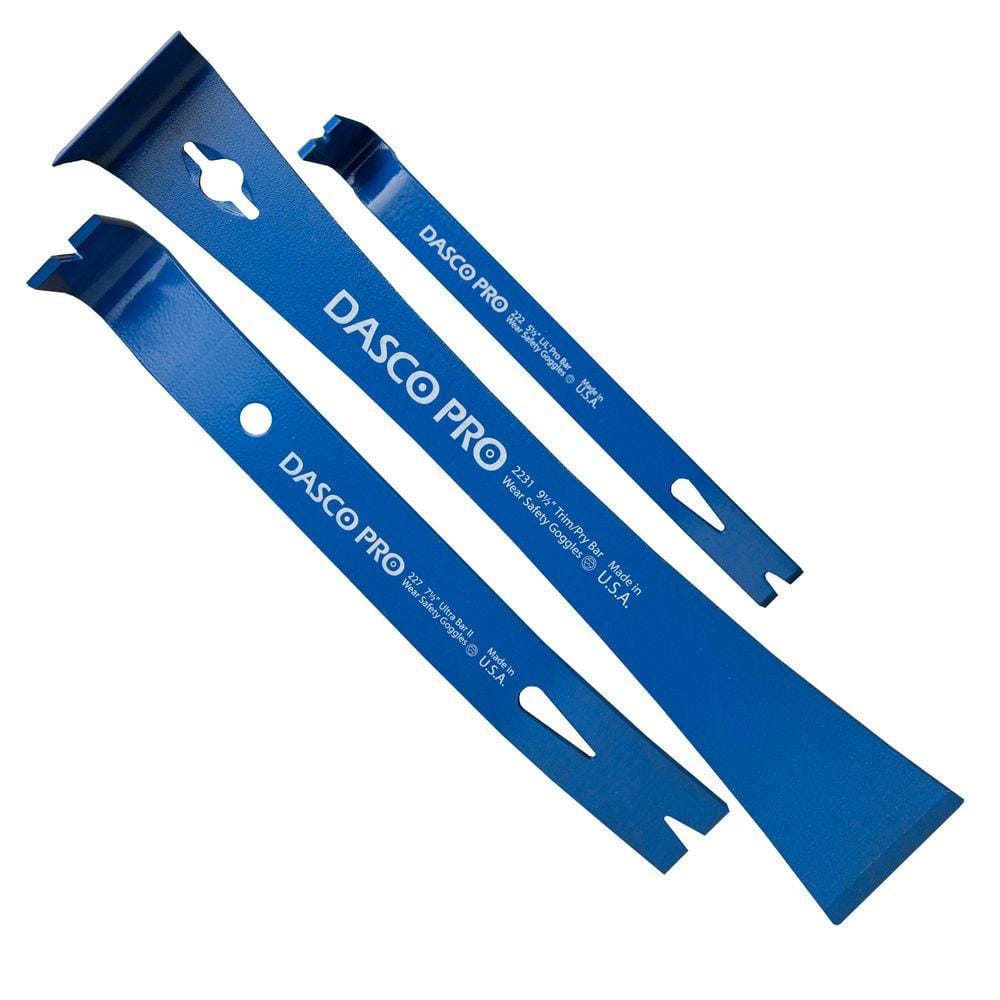
Dasco Pro Pry Bar Set (3-Piece) 91

25 ft. Tape Measure
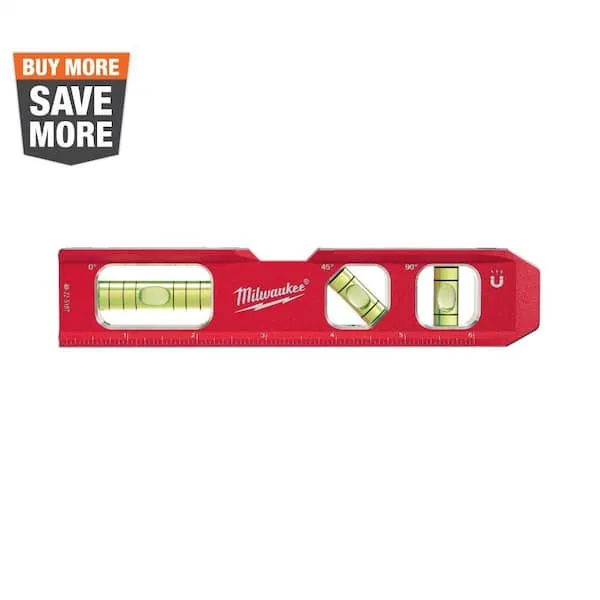
Level

Gardner Bender #2 Phillips and 3/16 Standard Insulated Screwdriver Set (2-Piece) SCE-3262

Husky 22OZ. MILLED STEEL FRAMING HAMMER SUO-010
Retractable Utility Knife 99735
The Unbranded Retractable Utility knife provides the utmost in convenience and safety. It is both lockable and retracts when not in use. Designed with a comfort grip handle and includes 3 extra utility
Dasco Pro Pry Bar Set (3-Piece) 91
The Dasco Pro 3-Piece Pry Bar Set is well suited to a wide variety of prying and scraping applications. This bar kit includes three popular small bar styles that are perfect for do-it-yourselfers and pros alike. Designed in a compact size that fits just about anywhere, these bars work great for prying trim and molding, scraping excess paint, opening paint cans and pulling nails.
25 ft. Tape Measure
Measure with precision and ease.
Level
Ensures surfaces are just right.
Gardner Bender #2 Phillips and 3/16 Standard Insulated Screwdriver Set (2-Piece) SCE-3262
Hand tools are a part of every toolbox. With exclusive features for safety, durability, reliability and life strength, Gardner Bender hand tools offer superior performance on every job. This screwdriver
Husky 22OZ. MILLED STEEL FRAMING HAMMER SUO-010
The 22 oz. ripping hammer with milled face features a forward weight design to create more force with each swing, reducing the amount of blows needed to accomplish each task. This grip conforms with ergonomics
Steps
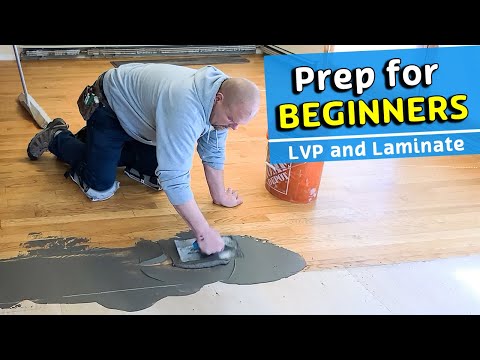
Assess Existing Floor
60 minutesCarefully examine the existing flooring material for any signs of wear, damage, or water intrusion. Check the subfloor's condition by looking for loose boards, squeaks, or any soft spots that indicate rot or structural weakness. Measure the floor to ensure it is level within the manufacturer's tolerance for the new flooring. Identify any transitions to other flooring types and plan how they will be handled.
Watch: Assess Floor Imperfections
Remove Existing Flooring and Trim
180 minutesStarting in a corner, use a pry bar and utility knife to lift and remove the existing flooring. For materials like vinyl or linoleum, scoring the surface can make removal easier. If removing carpet, cut it into manageable strips. Carefully pry off baseboards and trim, trying not to damage the walls. If trim is to be reused, mark its location and orientation.
Watch: Demolish Existing Flooring Layers
Prepare the Subfloor
240 minutesSweep and vacuum the subfloor thoroughly to remove all dust, debris, and loose particles. Fill any low spots with a floor leveling compound, following the manufacturer's instructions for mixing and application. Sand down any high spots or uneven areas using a floor sander or hand sanding. Ensure all nails or screws are flush with the subfloor surface or removed. For wood subfloors, check for any loose or squeaky boards and secure them with screws.
Watch: Prepare Subfloor
Acclimate Flooring Materials
10 minutesTransport the new flooring materials into the room where they will be installed. Unpack the boxes or bundles, but do not remove the flooring from its packaging unless manufacturer instructions specify otherwise. Allow the flooring to sit undisturbed for the period recommended by the manufacturer, typically 48-72 hours, to acclimate to the ambient conditions of the room. This prevents expansion or contraction issues after installation.
Watch: Acclimate Laminate Flooring
Lay Out Flooring
45 minutesDetermine the starting wall. For most flooring, it's recommended to start along the longest, straightest wall. Lay out the first few rows of flooring perpendicular to the direction of the main light source in the room (e.g., a window) to minimize the visibility of seams. Dry-lay a few planks or tiles to visualize the pattern and ensure a pleasing arrangement, especially around doorways or irregular shapes.
Watch: Plan Flooring Layout & Establish Start Point
Install First Row of Flooring
90 minutesPlace the first plank or tile against the starting wall. Use spacers between the flooring and the wall to maintain a consistent expansion gap, as recommended by the manufacturer (typically 1/4 to 1/2 inch). If using a click-lock system, connect the second piece to the first, ensuring a tight seam. For glued-down flooring, apply adhesive according to the manufacturer's instructions before placing the planks.
Watch: Lay the First Row of PlanksContinue Laying Rows
360 minutesContinue installing rows, staggering the end joints of the planks or tiles to create a random pattern. The recommended stagger is usually at least 6 inches. Use a tapping block and mallet (for click-lock or tongue-and-groove systems) to ensure tight connections between planks. For glued-down systems, continue applying adhesive and placing flooring as per the manufacturer's instructions. Cut the last plank in each row to fit, remembering to account for the expansion gap.
Watch: Continue Laying and Cutting Planks
Cut Around Obstacles
120 minutesMeasure and mark the flooring material for cuts around doorways, heat vents, plumbing, or cabinets. Use a jigsaw or oscillating multi-tool for intricate cuts. For pipes, cut a hole slightly larger than the pipe diameter to accommodate expansion. Use a template if needed for complex shapes. Ensure cuts are precise to minimize gaps.
Watch: Custom Cuts for Obstacles
Install Final Row
60 minutesMeasure the remaining gap for the final row, remembering to subtract the expansion gap from the measurement. Cut the flooring planks or tiles to fit this width. Often, the locking mechanism on the edge needs to be removed or trimmed to allow the planks to be slid into place. Use a pull bar to gently draw the final row tight against the previous row and the wall.
Watch: Install the Final Flooring Row
Install Transition Strips and Trim
120 minutesInstall transition strips (e.g., reducers, t-molding) where the new flooring meets different flooring types or at exterior doorways. Secure them according to manufacturer instructions, often involving screws or adhesive. Reinstall baseboards or apply new trim around the perimeter of the room. Ensure the trim covers the expansion gap. Nail or adhesive the trim in place, being careful not to puncture the new flooring.
Watch: Install Baseboards and Trim
Clean Up and Final Inspection
60 minutesSweep and vacuum the newly installed floor thoroughly to remove any dust, sawdust, or adhesive residue. Wipe down the surface with a cleaner recommended by the flooring manufacturer. Inspect the entire floor for any loose planks, scratches, or imperfections. Ensure all transition strips and trim are securely in place. Remove any protective films or coverings.
Watch: Final Inspection and CleanupCommon Problems
After installing new flooring, you notice soft spots, squeaks, or uneven areas, or even cracks in harder materials like tile. This usually means the subfloor wasn't flat enough.
Solution: Unfortunately, this often requires removing the newly installed flooring from the affected area. Then, you'll need to carefully assess the subfloor. If it's a minor dip, a patching compound can be used. For larger unevenness, self-leveling underlayment (like "Custom Building Products LevelQuik RS") must be applied according to its instructions. Allow it to cure completely, then reinstall your flooring.
Prevention: Before laying any new flooring, thoroughly inspect your subfloor for any dips, humps, or loose boards. Use a long level (like your "Level" tool) or a straight edge to identify uneven areas. Repair or replace damaged subfloor sections. If significant unevenness exists, apply a self-leveling compound as directed by the manufacturer to create a perfectly flat surface.
Your newly installed flooring (especially wood, laminate, or some vinyl) starts to buckle up, cup downwards, or develops noticeable gaps between planks shortly after installation.
Solution: If buckling is severe, you might need to carefully remove some planks and check for insufficient expansion gaps around the perimeter. If gaps appear, they might be filled with color-matched caulk or putty, but this is often a cosmetic fix for an underlying issue. In severe cases, the flooring may need to be removed, allowed to acclimate longer, and then reinstalled.
Prevention: Always "acclimate" your flooring materials (like "Forest Floor White Oak Thick Printed Wood Grain Interlocking EVA Foam Flooring Gym Mat") by bringing them into the installation room and letting them sit, unopened, for the time recommended by the manufacturer (often 48-72 hours) before installation. This allows the material to adjust to the room's temperature and humidity, preventing expansion or contraction issues later. Also, ensure you leave the recommended expansion gap (usually 1/4 to 1/2 inch) around the perimeter of the room and against any fixed obstacles.
Parts of your flooring, especially vinyl planks or tiles, don't adhere properly to the subfloor, leading to loose pieces, lifted edges, or an overall unstable feel.
Solution: Carefully lift the affected planks or tiles. Using a putty knife ("Husky 2 in. Metal Durable Construction Putty Knife"), scrape off any old, dried adhesive from both the flooring and the subfloor. Clean the subfloor thoroughly. Then, reapply the appropriate adhesive ("Henry 647 PlumPro 1 Gal. Luxury Vinyl Tile and Plank Flooring Adhesive" or "Henry 356 1 Qt. Multi-Purpose Flooring Adhesive") according to the manufacturer's instructions, paying close attention to spread rate and "open time" (how long to wait after spreading adhesive before placing flooring). Press the flooring firmly into place.
Prevention: Always use the adhesive recommended by the flooring manufacturer and ensure it's compatible with your subfloor. Read the adhesive instructions carefully regarding temperature, humidity, spread rate, and "open time" or "tack time" (the time you need to wait after spreading the adhesive before placing the flooring for optimal bond). Make sure the subfloor is clean, dry, and free of dust or debris before applying adhesive.
While removing old flooring or trim with tools like pry bars ("Dasco Pro Pry Bar Set," "Husky Pry Bar Set"), you accidentally hit a pipe, electrical wire, or cause significant damage to the subfloor.
Solution: Immediately stop work. If you've hit a water pipe, turn off the main water supply. If it's an electrical wire, turn off power at the circuit breaker. For any utility damage, it's best to call a qualified professional (plumber, electrician) for repair, as improper fixes can be dangerous. For severe subfloor damage, you may need to cut out and replace a section of the subfloor before proceeding with new installation.
Prevention: Before you start demolition, try to understand what might be under your floor. Be especially cautious near walls where plumbing and electrical lines often run. Use pry bars carefully and methodically. If you encounter unexpected resistance, investigate rather than forcing it. When using hammers ("Husky 22OZ. MILLED STEEL FRAMING HAMMER") or other striking tools, be mindful of what's below. Always wear safety glasses and work gloves ("Work Gloves," "Safety Glasses") to protect against flying debris and sharp edges.
After laying several rows of flooring, you notice the lines are not straight, or the entire floor is drifting off square, leading to awkward cuts at walls or an unprofessional appearance.
Solution: If you catch it early, you might be able to gently shift the first few rows into alignment before the adhesive fully sets or the interlocking planks are too deeply set. If a significant portion is laid crooked, you may need to remove the flooring back to the straightest point, clean the subfloor, and re-lay the rows.
Prevention: The first row is crucial! Don't assume your walls are perfectly straight. Use a tape measure ("25 ft. Tape Measure") to find the longest wall, and then snap a chalk line across the room, offset by the width of your first plank plus your expansion gap. Use this chalk line as your guide for installing the first row. Use spacers to maintain consistent expansion gaps along the walls. Regularly check your alignment with a straight edge or level ("Level") as you lay the first few rows.
Your flooring pieces have jagged edges, splintering, or inconsistent gaps around obstacles, doorways, or at the final wall, leading to wasted material and a less professional finish.
Solution: For minor jagged cuts, trim can sometimes hide imperfections. For larger, unsightly gaps or badly damaged pieces, you'll need to recut a new piece of flooring. Save scrap pieces for smaller cuts.
Prevention: Always measure twice and cut once. Use a sharp utility knife ("Retractable Utility Knife 99735," "Utility Knife Plastic Sheet Cutting Tool GE-41") and a straight edge for precise scoring or cutting. For complex shapes around obstacles, create a template out of paper or cardboard first. Practice cutting on scrap pieces if you're unsure. Make sure your cutting surface is stable. When cutting interlocking flooring, cut with the finished side up for most saws, or finished side down when scoring with a utility knife, to minimize splintering.
Frequently Asked Questions
This project is listed as 'beginner' but has an estimated time of '10 days.' What makes it take so long, and is it truly suitable for a beginner?
The '10 days' often accounts for important steps like material acclimation, subfloor drying times, and working at a steady, beginner-friendly pace. While individual steps like measuring and cutting require patience and precision, they don't demand advanced skills. Breaking the project into manageable daily tasks makes it very approachable for DIY novices.
Why is subfloor preparation so important, and what are common issues to look out for before installing new flooring?
A properly prepared subfloor is critical for the longevity and aesthetic of your new floor. Unevenness, moisture, or movement in the subfloor can lead to squeaks, gaps, or even damage to your new flooring over time. Check for loose boards, significant height variations, and any signs of moisture damage, addressing these thoroughly before installation.
The materials list mentions interlocking EVA foam flooring. Are the steps provided suitable for other types of flooring, like traditional tile or hardwood?
While the project specifically lists EVA foam, many core steps like existing floor removal, subfloor preparation, and general layout principles apply to various flooring types. However, installing traditional tile or hardwood would require different specialized tools (e.g., a wet saw for tile, a flooring nailer for hardwood) and specific adhesives or fastening methods not detailed here.
What are the most essential tools for this flooring project, especially for someone on a budget?
Beyond common household items, a reliable retractable utility knife for precise cuts, a sturdy pry bar set for efficient removal of old flooring and trim, and an accurate tape measure are crucial. A level is also important for subfloor assessment. Investing in these key items will contribute significantly to a successful outcome.
What are some common mistakes beginners make during flooring installation, and how can they be avoided?
A common mistake is not allowing new flooring materials to properly acclimate to the room's humidity and temperature, which can lead to expansion or contraction issues later. Rushing subfloor preparation can result in an uneven or unstable finished floor. Always plan your layout carefully to avoid awkward narrow cuts or seams in high-traffic areas.
What safety precautions should I take when removing old flooring and installing new materials?
Always wear safety glasses to protect your eyes from flying debris, especially when prying up old materials or cutting new ones. Gloves will protect your hands from splinters and cuts. If using adhesives, ensure the area is well-ventilated to avoid inhaling fumes, and consider a dust mask during demolition or sanding.
How important are transition strips and trim, and when should they be installed in the project timeline?
Transition strips are essential for creating a smooth, safe transition between different flooring types or between rooms, and they also protect the edges of your new floor. Trim and baseboards are critical for concealing the necessary expansion gaps around the room's perimeter, providing a clean, finished aesthetic. Both are typically installed as final finishing touches after the main flooring is laid.