Install a Bathroom Sink: Plumbing & Height Guide
About This Project
This project provides a comprehensive guide to installing a bathroom sink, emphasizing the importance of understanding plumbing diagrams and ensuring correct sink height. The steps involve: 1) **Understanding Your Bathroom Plumbing Diagram:** Identify all components and symbols on the diagram to ensure accurate sink placement and connection. 2) **Precise Sink Height Marking & Measurement:** Measure and mark the desired sink height (31-34 inches) on the wall, verifying with manufacturer's instructions and the plumbing diagram for clearance. Additional information related to checking plumbing codes and dry fitting is also provided.
Best for experienced DIYers and homeowners with some experience.
Tools & Materials

25 ft. Tape Measure
Aspen Creative Corporation 8 in. x 11 in. Grey Hardback Drum/Cylinder Lamp Shade 31029
25 ft. Tape Measure
Measure with precision and ease.
Aspen Creative Corporation 8 in. x 11 in. Grey Hardback Drum/Cylinder Lamp Shade 31029
Aspen Creative offers a 1 pack of drum shaped lamp shades with spider fitter. Made with grey colored textured fabric. The lamp shade dimensions are 8 inch top, 8 inch bottom, 11 inch height. This lamp
Steps

Understanding Your Bathroom Plumbing Diagram
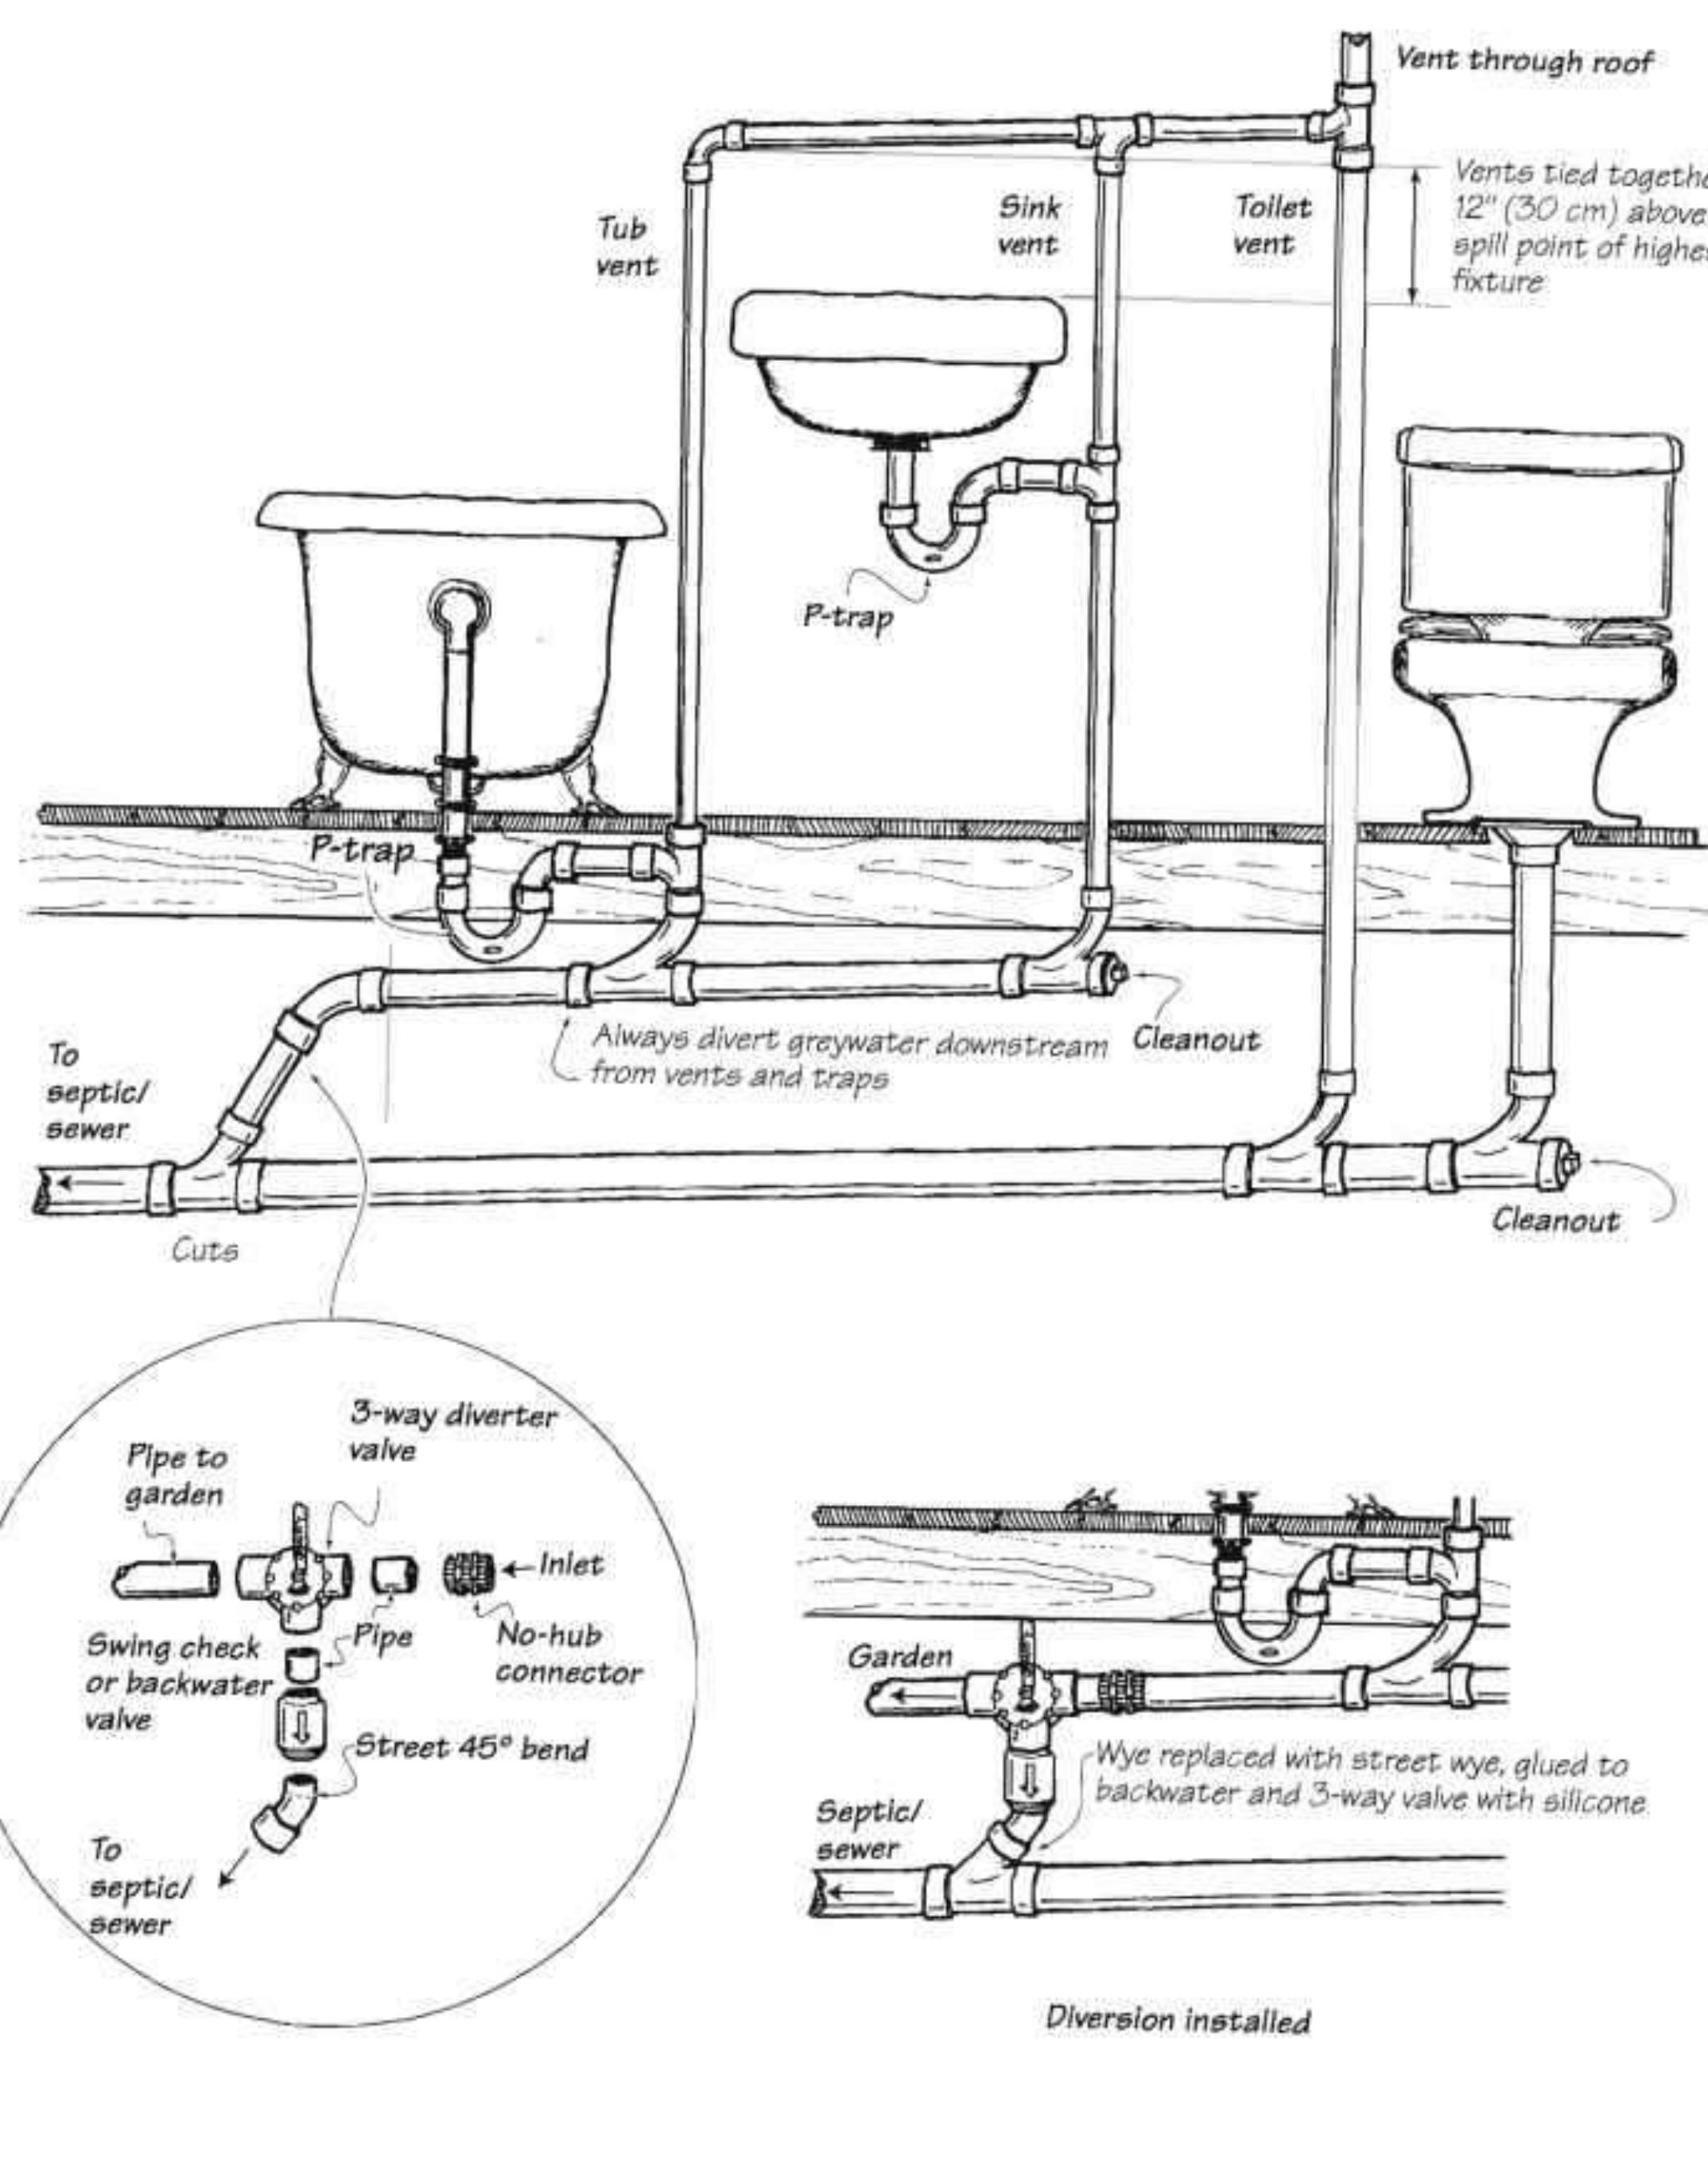
15 minsBefore you begin, thoroughly review your bathroom's plumbing diagram. Identify key components: hot and cold water supply lines, drain lines, P-trap, vent pipe, shut-off valves, and the sink's connection points. Pay close attention to the symbols used for each component. This understanding is crucial for accurate sink placement and connection.
Watch: Connect Plumbing and Finalize Installation
Precise Sink Height Marking & Measurement
15 minsMeasure and mark the desired sink height on the wall. The standard height is 31-34 inches from the finished floor to the sink's top rim. Always check the sink manufacturer's instructions for their specific recommendations. Double-check this height against your plumbing diagram to ensure enough clearance for plumbing connections beneath the sink. Careful measurement prevents costly mistakes later.
Watch: Position the Sink for MeasurementCommon Problems
Improper AAV installation can lead to drain backups and sewer gas odors.
Solution: The AAV must be installed vertically and be the highest point of the new drain assembly under the sink.
Do not overtighten the plastic slip nuts on the P-trap, as they can crack easily. Hand-tight plus a quarter-turn with pliers is usually sufficient.
Solution: To avoid this issue: Be mindful of this warning and take appropriate precautions.
Hand-tighten connections first, then give them a final quarter-turn with a wrench to avoid over-tightening and cracking the plastic nuts.
Solution: To avoid this issue: Be mindful of this warning and take appropriate precautions.
Scratched or damaged decorative sink components during installation.
Solution: Wrapping your tools with tape can help protect decorative parts.
Don't overtighten.
Solution: To avoid this issue: Be mindful of this warning and take appropriate precautions.
Incorrect cuts due to unverified sink, faucet, and disposal specs.
Solution: These measurements are a general guide. Always confirm the requirements for your specific sink, faucet, and garbage disposal model before making final cuts.
Sink not level or gaps at the wall lead to inaccurate measurements.
Solution: Make sure the basin is level and pushed firmly against the wall to get an accurate measurement.
Frequently Asked Questions
Beyond a tape measure, what other essential tools will I need for this bathroom sink installation?
You'll typically need adjustable wrenches for plumbing connections, plumber's putty or silicone sealant for watertight seals, a level for proper alignment, and a drill with appropriate bits for mounting. A stud finder is also crucial if you're attaching a vanity or wall-mount sink to ensure secure fastening.
What are the most important safety precautions I should take before starting this sink installation?
Always shut off the main water supply to the bathroom or house before starting any plumbing work to prevent flooding. Ensure you are aware of any electrical outlets nearby and turn off power if needed, and wear eye protection when cutting or drilling. Be mindful of the weight of the sink or vanity when lifting.
What are some common mistakes beginners make during sink installation, and how can I avoid them?
A frequent error is not thoroughly understanding your specific plumbing diagram, leading to connection issues. Neglecting to 'dry fit' all components before final assembly can result in leaks or improper alignment. Always double-check your height markings against manufacturer instructions and local codes before making permanent cuts or attachments.
The project is rated 'beginner' and 3 hours. Is this realistic for someone with no plumbing experience?
While rated 'beginner' and estimated at 3 hours, a first-timer should allocate more time, perhaps 4-6 hours, for unexpected challenges or extra trips to the hardware store. Thoroughly reviewing your plumbing diagram and practicing dry fitting will significantly reduce frustration and help you complete the project successfully.
Why is it important to check local plumbing codes before installing a new sink, and how do I do that?
Local plumbing codes ensure your installation is safe, functional, and up to standard, preventing issues like improper drainage or contaminated water. Contact your city or county's building department or a licensed plumber to review specific requirements and obtain any necessary permits before starting your project.
Are there alternative sink height considerations for users with specific needs, or is 31-34 inches standard?
While 31-34 inches is a common height range for adult-use bathroom sinks, alternative heights are important for accessibility. For ADA compliance, the top of the countertop should be no higher than 34 inches. You might also consider lower heights for children's bathrooms, always prioritizing comfort and function for the primary users.
What hidden costs or materials should I budget for beyond the sink itself for this project?
Beyond the sink, budget for new supply lines, shut-off valves, and a P-trap, as these are often replaced during installation to ensure longevity and prevent leaks. Don't forget consumables like plumber's putty, silicone caulk, and any specific mounting hardware not included with your new sink or vanity.