
How to Unclog a Double Kitchen Sink
About This Project
This guide provides a comprehensive, step-by-step process for unclogging a double-basin kitchen sink. It covers the simplest methods like using a plunger and progresses to more involved techniques such as cleaning the P-trap and using a drain snake. The instructions are tailored for a common scenario involving a garbage disposal.
Best for advanced DIYers and professionals with basic plumbing knowledge. Requires MCR Safety BearKat Safety Glasses MCSCRWBK110.
Tools & Materials

Unger 6 Gal. Heavy-Duty Plastic Bucket DB02
FRESHFOLDS Combed Cotton Absorbent Textured 6 Piece Towel Set EC100755
Goodyear Rubber
MCR Safety BearKat Safety Glasses MCSCRWBK110
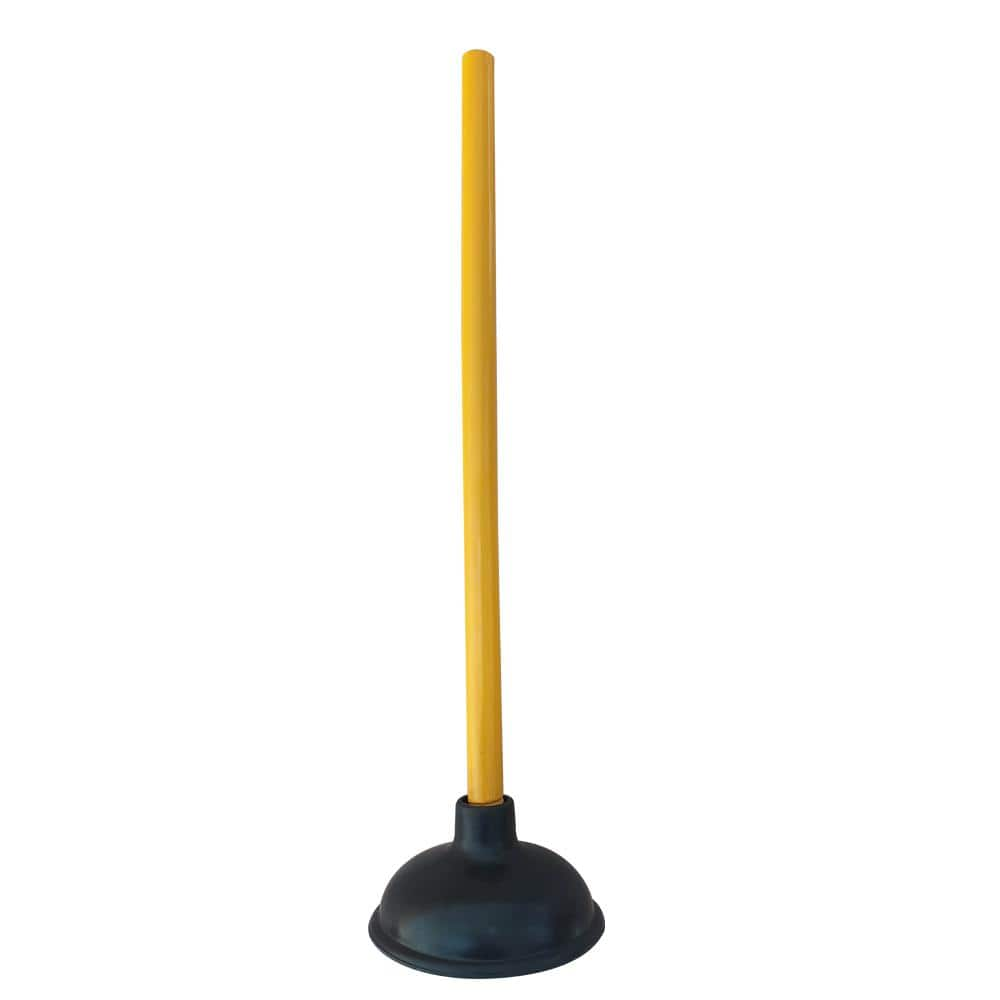
HDX Sink and Drain Plunger 178039
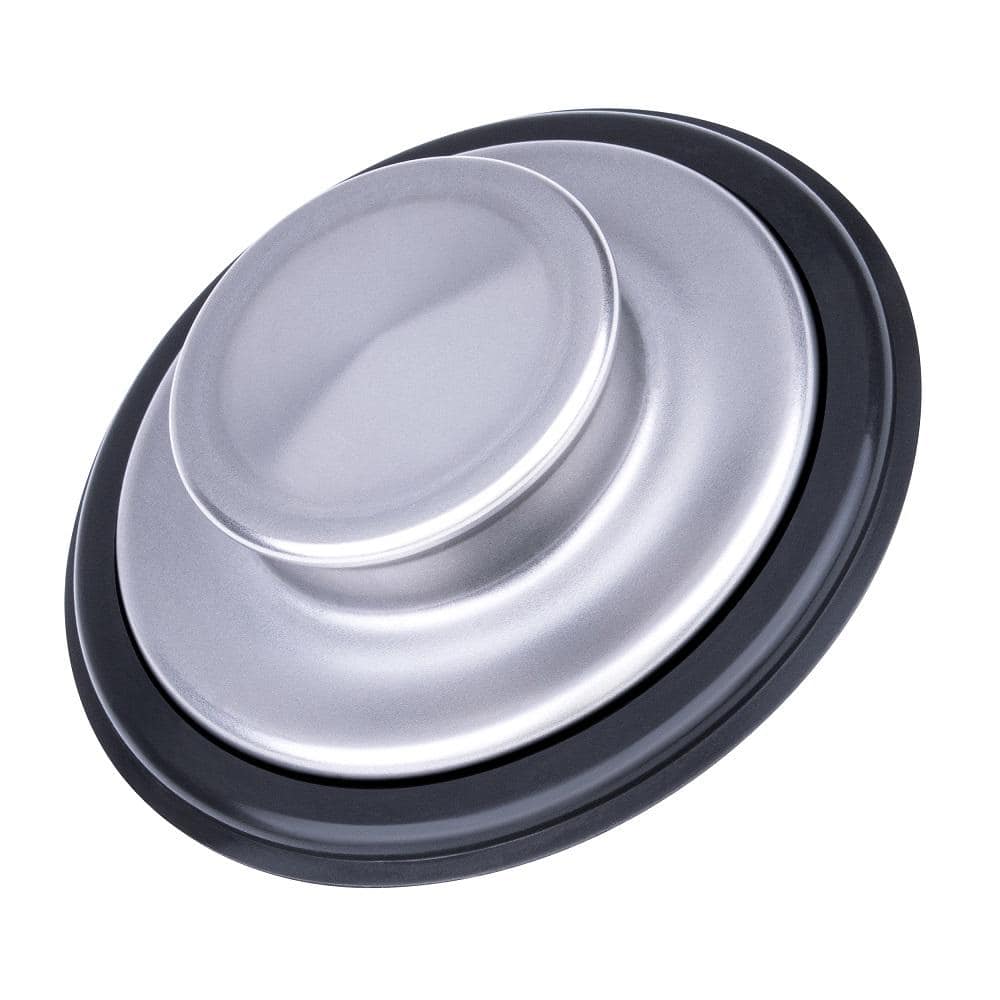
Everbilt Universal Sink Stopper for Garbage Disposals in Stainless Steel 22-0001G-00
Unger 6 Gal. Heavy-Duty Plastic Bucket DB02
The Unger 6-Gallon Heavy-Duty Professional Cleaning Bucket holds more than 6 Gal. of liquid. The bucket can accommodate a scrubber up to 14 in. L. This bucket features measurement marks and 2-pour spouts
FRESHFOLDS Combed Cotton Absorbent Textured 6 Piece Towel Set EC100755
Versatile, stylish, and functional are only a few ways to describe these bath towels. These towels are made with long cotton fibers that are looped to create a soft feel while still offering optimal absorbency
Goodyear Rubber
The Goodyear Rubber
MCR Safety BearKat Safety Glasses MCSCRWBK110
Safety glasses feature a well thought-out construction that combines the best in safety, comfort and affordability. Your vision is unobstructed by the 1-piece wraparound lens which, by its tight fit, provides for maximum safety. Flexible temples enhance your comfort during extended use. Nonslip rubber head grips are notched for a clip-on breakaway cord.
HDX Sink and Drain Plunger 178039
5 in. great for clearing clogged sinks, showers and tubs. Durable rubber force cup and wooden handle offer extended use. Affordable and easy to use for optimal unclogging.
Everbilt Universal Sink Stopper for Garbage Disposals in Stainless Steel 22-0001G-00
The universal sink stopper will stop water and unwanted items from entering your sink drain. Made from high quality stainless steel and flexible rubber. Fits standard 3-1/2 in. sink drains and is easy
Steps

Prepare the Work Area
10 minsBegin by clearing everything out from under the kitchen sink to give yourself ample room to work. Place a large bucket directly under the P-trap (the U-shaped section of pipe) to catch any water or debris that will spill out. Lay down several old towels around the bucket to absorb any splashes and keep your cabinet floor dry. It is also wise to put on safety glasses and rubber gloves to protect yourself from dirty water and potential bacteria.

Use a Plunger
15 minsThe first mechanical attempt should be with a sink plunger. If one side of your sink has a garbage disposal, plunge that side. Use a wet rag or a sink stopper to completely seal the drain opening of the other sink basin. This is crucial as it forces the pressure from the plunger down the drain instead of up into the other sink. Fill the basin you are plunging with 3-4 inches of water to allow the plunger to form a good seal. Place the plunger cup over the drain and pump it up and down vigorously for about 20-30 seconds. Pull the plunger away quickly to see if the water rushes down the drain. If not, repeat a few times.

Clean the P-Trap
30 minsIf plunging fails, the clog is likely in the P-trap. Position your bucket directly beneath the trap. The P-trap is held in place by two large slip nuts, one connecting it to the sink's vertical tailpiece and the other connecting it to the horizontal drain arm going into the wall. Loosen these nuts by turning them counter-clockwise. You should be able to do this by hand; if they are too tight, use a pair of channel-type pliers. Once the nuts are loose, carefully wiggle the P-trap downwards and pull it free. Empty its contents (water and gunk) into the bucket. Clean the inside of the trap thoroughly with a brush and hot water in another sink or outside with a hose.

Snake the Drain Line
45 minsIf the P-trap was not the source of the clog, the blockage is further down the drain line. Take your drain snake (or drain auger) and insert the auger end into the drain arm pipe that leads into the wall. Push the snake cable into the pipe until you feel resistance. Once you hit the clog, lock the cable clamp and begin turning the handle clockwise while applying gentle forward pressure. This will either break up the clog or allow the auger to hook onto it. You may need to push and pull the cable a few times. If you feel the snake has hooked the clog, pull it back out of the pipe slowly, bringing the debris with it. Clean the auger tip and repeat if necessary.

Reassemble and Test for Leaks
15 minsOnce you are confident the clog is cleared, you can reassemble the plumbing. Re-attach the clean P-trap, making sure any gaskets are properly seated. Hand-tighten the slip nuts onto the threads of the tailpiece and drain arm. Ensure they are threaded correctly and not cross-threaded. Once hand-tight, use your channel-type pliers to give each nut a final quarter-turn to create a snug seal. Do not overtighten. Place a dry towel under the reassembled trap and turn on the hot water faucet in the sink. Let it run for a few minutes to flush out any remaining debris and to test your connections for leaks. Check the slip nuts carefully for any drips.
Common Problems
The water inside the P-trap will likely have a foul odor. Be prepared.
Solution: To avoid this issue: Be mindful of this warning and take appropriate precautions.
Water overflows or spills onto the counter during plunging.
Solution: Have paper towels ready to plug the sink drain temporarily and for cleanup.
Stripped or cracked slip nuts prevent easy drain disassembly.
Solution: If the slip nuts are too tight to loosen by hand, use channel-lock pliers, but be careful not to apply too much force and crack the plastic.
If you've poured any chemicals down the pipe, don't open the trap unless your eyes and hands are protected.
Solution: To avoid this issue: Be mindful of this warning and take appropriate precautions.
Be prepared for water to spill as soon as the seals are broken. Loosen the nuts slowly.
Solution: To avoid this issue: Be mindful of this warning and take appropriate precautions.
The P-trap is designed to hold water to block sewer gases, so expect water to spill out when it is removed.
Solution: To avoid this issue: Be mindful of this warning and take appropriate precautions.
Water spills everywhere when removing the P-trap.
Solution: Have a bucket and rags ready before loosening the P-trap, as there will always be water inside it.
Frequently Asked Questions
Do I need to buy all the specialized tools, especially the drum auger, to unclog my double kitchen sink?
Not necessarily for every clog. Start with simpler tools like the HDX Sink and Drain Plunger. If that doesn't work, cleaning the P-trap requires basic pliers and a bucket. The Plumber's Choice 25 ft. Drum Auger is only needed for deeper, more stubborn clogs further down the drain line.
What are the most critical safety precautions I should take, especially since my double sink has a garbage disposal?
The absolute most critical step is to always disconnect power to the garbage disposal at the circuit breaker before performing any work near or inside the drain, even if you're working on the non-disposal side. Additionally, wear Heavy Duty Latex Gloves to protect your hands from grime and potential drain cleaner residue if any was previously used.
How long should a beginner expect this project to take, and is it genuinely a 'beginner' difficulty project?
For a simple clog cleared with a plunger, it might take 15-30 minutes. If you need to clean the P-trap, allocate 1-2 hours for setup, cleaning, and reassembly. Snaking a deeper clog can extend the project to 2-3 hours for a beginner. It's beginner-friendly in terms of steps, but patience and attention to detail are key.
When I try to plunge one side of my double sink, water just backs up into the other basin. How can I fix this?
This is a very common issue with double sinks due to shared drainage. To create effective suction with the plunger, you must completely seal off the drain opening of the non-clogged sink. Use a Universal Sink Stopper or have a helper firmly press a wet rag over the opening while you plunge the affected side.
Can I use a chemical drain cleaner to unclog my kitchen sink instead of these manual methods?
It is generally not recommended to use chemical drain cleaners, especially in kitchen sinks with garbage disposals. They can be ineffective against common kitchen grease clogs, damage plastic pipes or disposal components, and pose a significant safety hazard if they don't work and you later resort to manual cleaning.
I've tried plunging and cleaning the P-trap, but the sink is still clogged. What should I do next?
If simpler methods have failed, the clog is likely further down the main drain line. Your next step is to use The Plumber's Choice 25 ft. Drum Auger (drain snake) to reach and break up the obstruction. Ensure you clear out any standing water before snaking for better access and to minimize mess.


