
How to Secure a Wobbly Toilet with Shims
About This Project
This guide provides step-by-step instructions for diagnosing and fixing a wobbly toilet using plastic shims. The process involves checking the closet bolts first, then inserting and trimming shims to stabilize the toilet, and finally sealing the base with caulk for a clean, secure finish.
Best for homeowners and DIY enthusiasts with basic plumbing knowledge. Requires Safety Glasses and FIRM GRIP Large ANSI A5 Cut Resistant Gloves 79007-06.
Tools & Materials
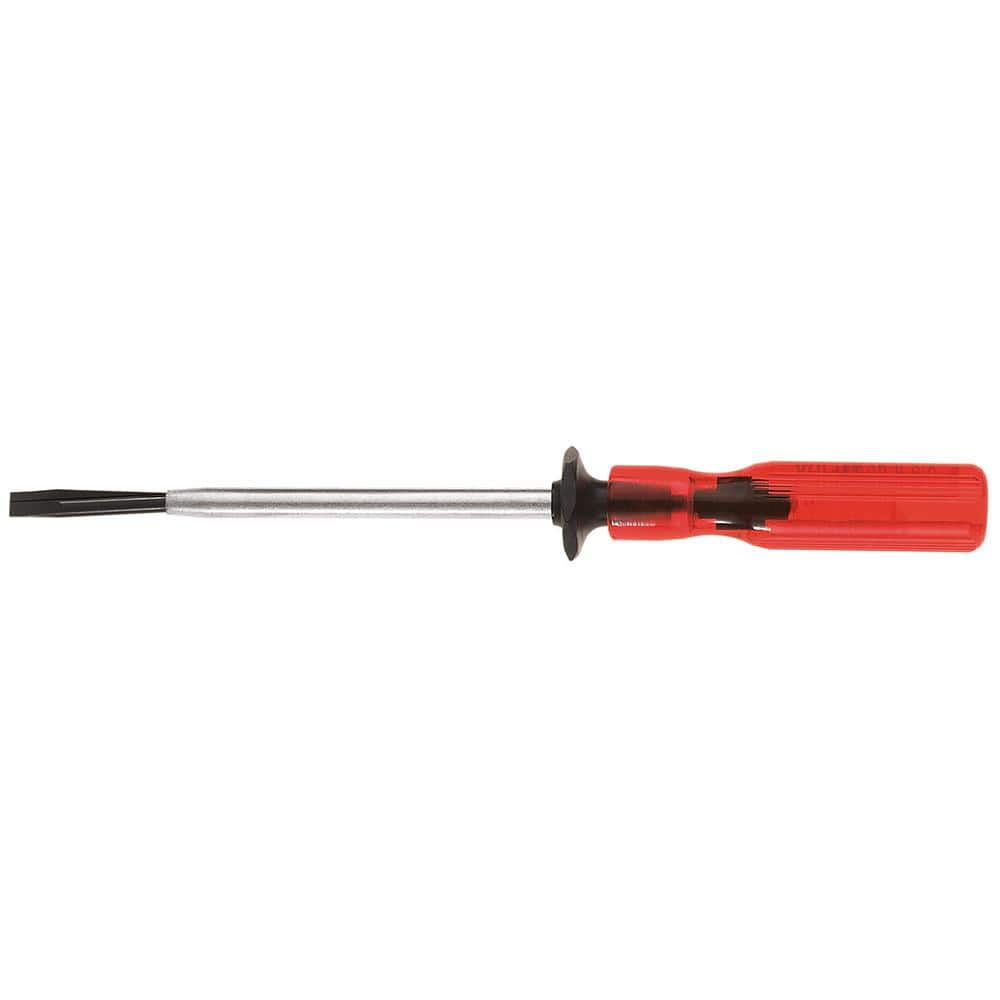
Klein Tools 3/16 in. Slotted Screw-Holding Flat Head Screwdriver with 3 in. Round Shank K23

Adjustable Wrench

Putty knife
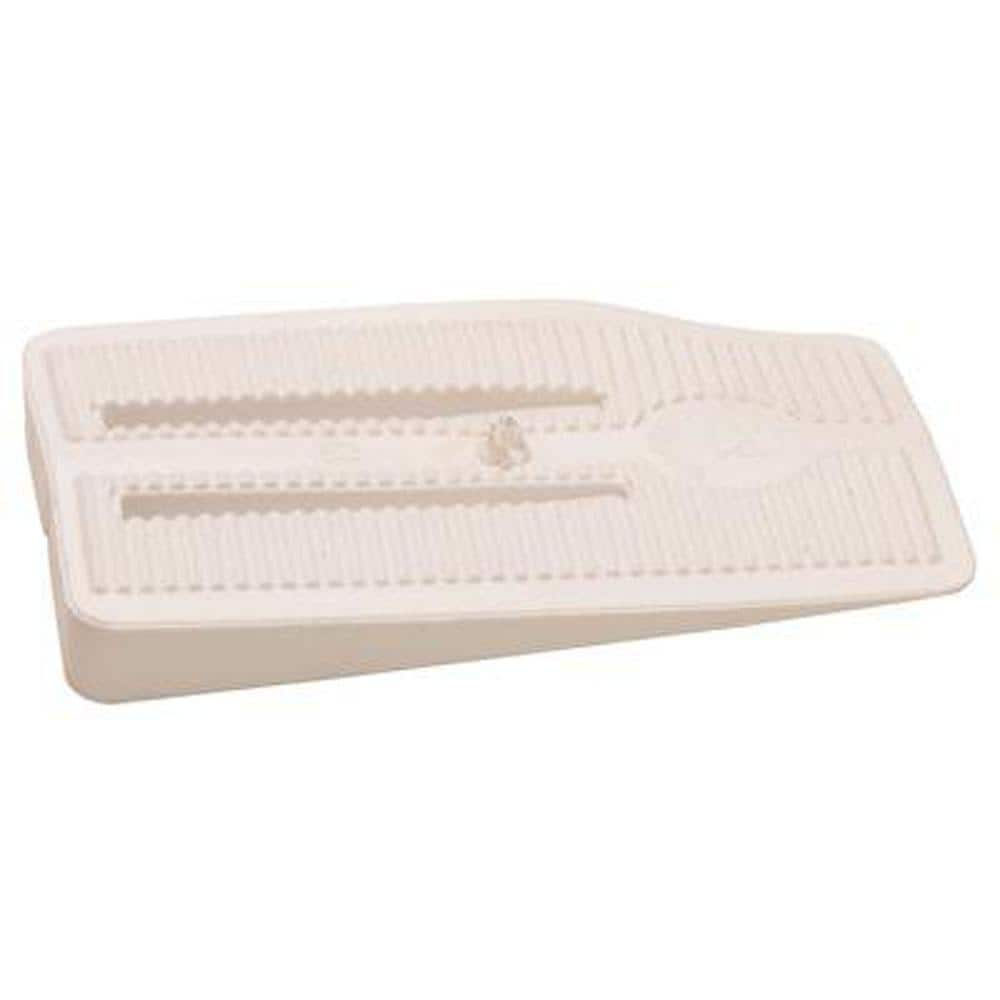
Sioux Chief Wedge-It Soft PVC Toilet Shim 460-20
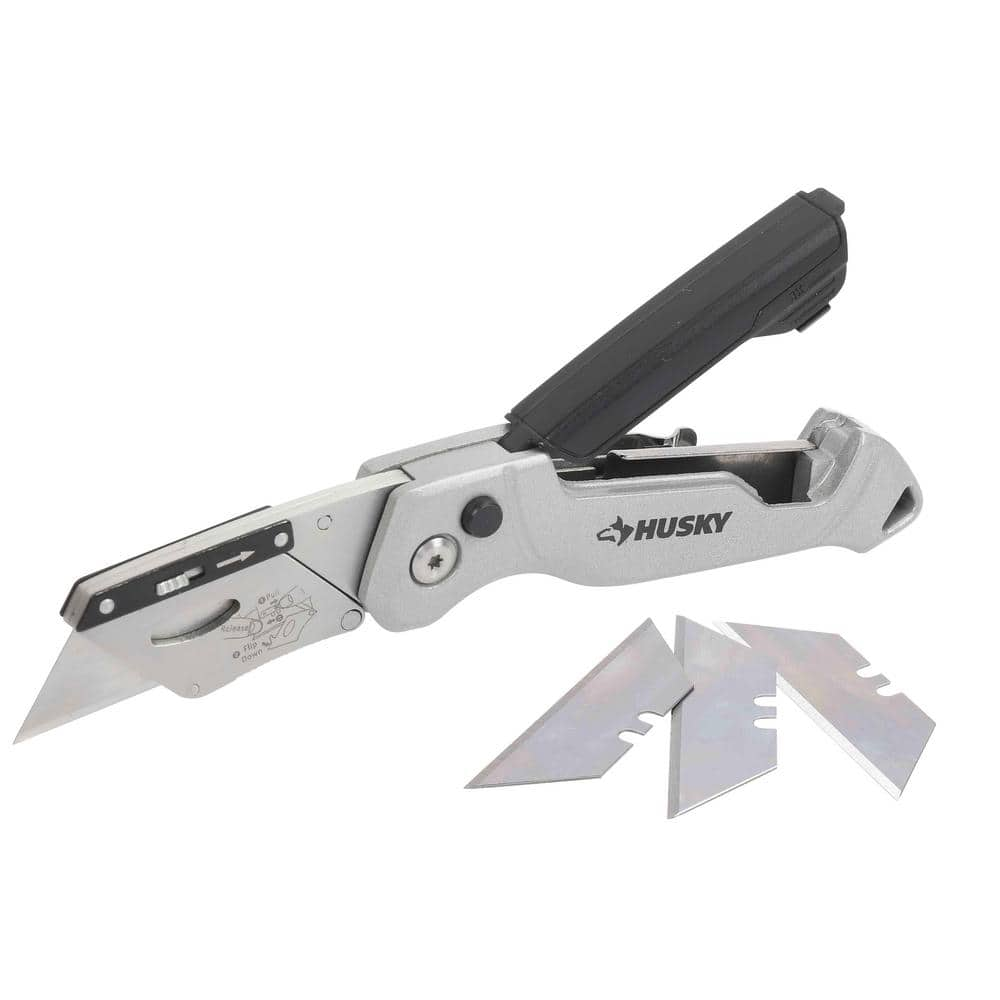
Husky Pro Utility Knife 00004

Safety Glasses
Klein Tools 3/16 in. Slotted Screw-Holding Flat Head Screwdriver with 3 in. Round Shank K23
Getting that screw to stay put while you get it in place is much easier with Klein's Slotted Screw-Holding screwdriver. Positive gripping action holds, starts, and drives slotted screws in awkward, hard-to-reach
Adjustable Wrench
Fits various nut and bolt sizes with its adjustable jaw.
Putty knife
Spreads putty with its flat blade.
Sioux Chief Wedge-It Soft PVC Toilet Shim 460-20
Wedge-It is a multi-purpose stability wedge. Available in Stiff polypropylene or soft PVC. This product has dozens of uses.
Husky Pro Utility Knife 00004
Offering a precise cut every time, Husky Pro Folding Utility Knife lets you easily adjust the blade to multiple angles to tackle a wide range of jobs. Aluminum die casting handle with plastic spraying
Safety Glasses
Keeps eyes safe from potential hazards.
Steps

Check and Tighten Closet Bolts
5 minsBefore using shims, first check if the wobble is caused by loose closet bolts. Locate the two plastic caps on the base of the toilet, one on each side. Carefully pry these caps off using a small flathead screwdriver or a putty knife. Underneath, you will find a nut and a washer on a bolt. Use an adjustable wrench to gently tighten the nut. Alternate between the left and right sides, tightening each one a little at a time to apply even pressure. Tighten them until they are snug, but do not overtighten, as this can easily crack the porcelain toilet base. After snugging them down, try to rock the toilet. If it's still wobbly, proceed to the next step.
Identify Gaps for Shims
5 minsWith the toilet centered over the floor flange, gently rock it back and forth and side to side to determine where the gaps are between the toilet base and the tile floor. Make a mental note of the locations and approximate size of the gaps. This is where you will insert the shims. For best results, have another person sit on the closed toilet lid to apply weight, which compresses the wax ring and simulates normal use. This ensures you are shimming for the toilet's final seated position.
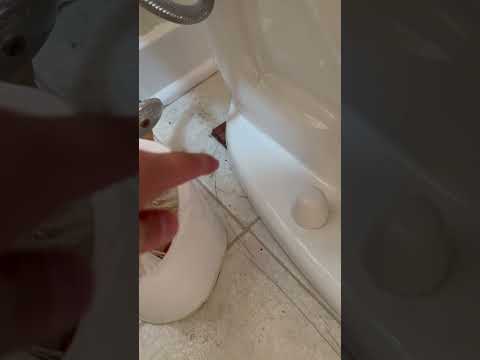
Insert Toilet Shims
5 minsTake the plastic toilet shims and firmly push them into the gaps you identified. Slide the thin end in first. Add shims around the toilet base as needed until the toilet sits firmly on the floor and does not rock or wobble in any direction. Some shims are designed to be stackable if you have a larger gap. Push them in by hand; you should not need a tool. Be careful not to force them in so hard that you lift the toilet, as this can break the wax ring seal.

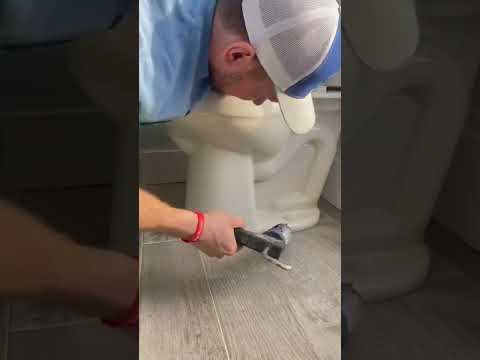
Trim Excess Shim Material
5 minsOnce the toilet is stable and all shims are in place, you need to trim the excess material for a clean look. Take a sharp utility knife and press the blade firmly against the porcelain base of the toilet. Carefully score the shim multiple times where it protrudes. Once scored, you should be able to easily snap off the excess piece by bending it up or down. Be very careful not to let the knife slip and scratch the toilet or the floor.

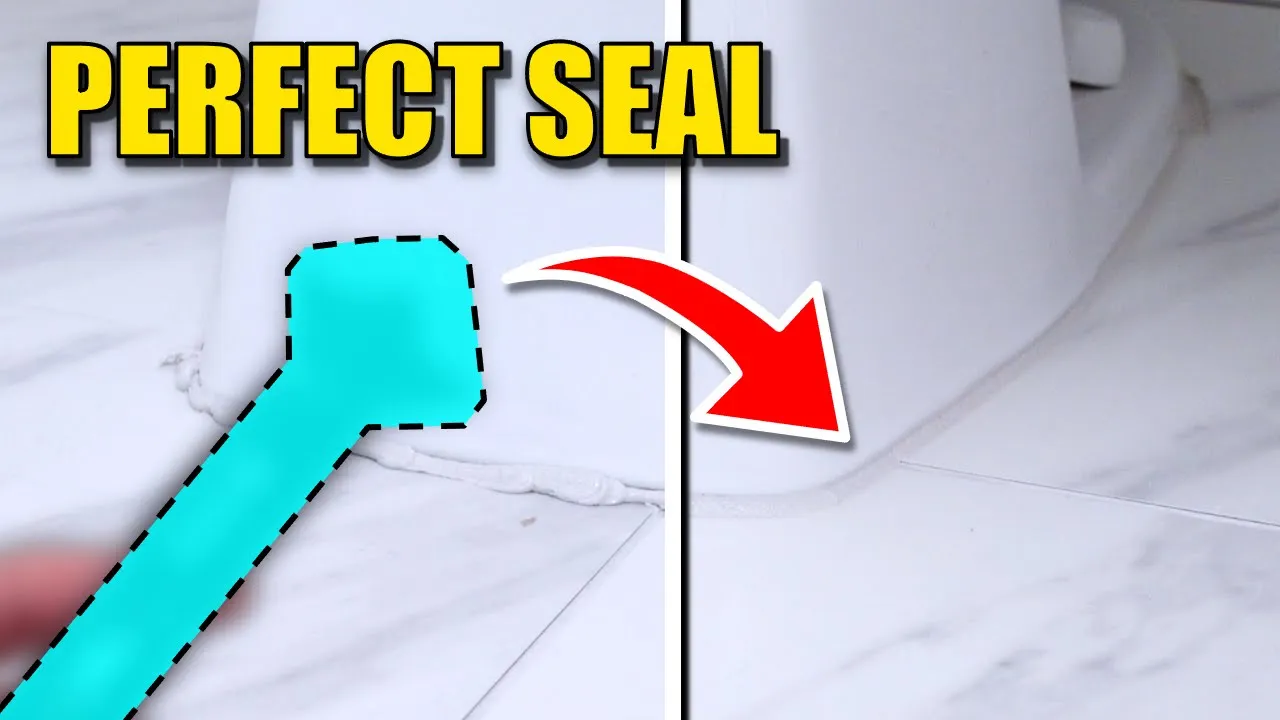
Seal the Base with Caulk
10 minsThe final step is to seal the base of the toilet. Load a tube of kitchen and bath caulk or tub and tile sealant into a caulking gun. Cut the tip of the tube at a 45-degree angle to create a small opening. Apply a continuous, even bead of caulk around the perimeter of the toilet base where it meets the floor. This will hide the trimmed shims and prevent water and dirt from getting underneath. Remember to leave a 1-inch gap at the very back of the toilet to allow water to escape in case of a future leak. Use a caulk finishing tool or a wet finger to smooth the bead for a professional-looking finish. Wipe up any excess caulk with a paper towel or rag.
Common Problems
Caulk dries, making cleanup difficult.
Solution: Clean up any messes while the caulk is still wet. Once it dries, it is much harder to remove.
Leaking toilets go unnoticed until significant damage occurs.
Solution: Leaving a gap in the caulk at the back is a crucial step for early leak detection.
Uneven caulk bead ruins the finished look.
Solution: Apply steady pressure on the tube to ensure a consistent bead size.
Remember to leave a gap at the rear of the toilet to allow for leak detection.
Solution: To avoid this issue: Be mindful of this warning and take appropriate precautions.
Do not overtighten the bolts, as this can crack the porcelain base of the toilet. Tighten until snug.
Solution: To avoid this issue: Be mindful of this warning and take appropriate precautions.
Push the shims in using only your fingers. Do not use a hammer, as this can lift the toilet off the wax ring and cause a leak.
Solution: To avoid this issue: Be mindful of this warning and take appropriate precautions.
Visible shims detract from the toilet's appearance.
Solution: Try to place the shims in less visible areas, like the back of the toilet, for a cleaner look.
Frequently Asked Questions
How do I know if my wobbly toilet needs shims or a more serious repair?
Shims are ideal for minor rocking caused by uneven flooring or a slight gap at the base. If the wobbling is significant, accompanied by leaks, or if the toilet moves freely from the floor, you might have loose flange bolts, a damaged wax ring, or a compromised subfloor, which requires more extensive repair than just shims.
Is this project truly 'beginner' level, and can it realistically be completed in 2 hours?
Yes, securing a wobbly toilet with shims is a beginner-friendly DIY task. Most of the time is spent diagnosing, inserting shims, and applying caulk. With the recommended tools and materials, a novice can typically complete it within the estimated 2 hours, assuming no unexpected issues like a broken flange.
Do I need to buy all the specific tools listed, or are there acceptable alternatives?
While the listed tools like a utility knife and adjustable wrench are highly recommended for efficiency and safety, some generic equivalents can work. For example, a basic screwdriver set can replace the specialized flathead, and any sharp utility knife will trim shims. However, a good caulk gun is essential for a clean, professional finish.
What are the most common mistakes to avoid when shimming a toilet, and how do I prevent them?
A common mistake is overtightening closet bolts, which can crack the toilet base. Another is not checking all sides for gaps, leading to uneven shimming. Prevent this by gently hand-tightening bolts first, then incrementally shimming around the entire base until the toilet is stable, ensuring even contact.
Why is caulking the toilet base important after shimming, and won't it just crack if the toilet moves again?
Caulking seals the toilet base to prevent water, urine, and odors from collecting underneath, which can lead to unsanitary conditions or subfloor damage. If the toilet is properly stabilized with shims and the closet bolts are secure, the caulk will create a durable seal without cracking, as the toilet should no longer wobble.
Can I use wood shims instead of the recommended plastic ones for this project?
While wood shims can provide temporary stability, plastic or composite shims like the Sioux Chief Wedge-It are strongly recommended for toilets. Wood shims can absorb moisture, rot, and compress over time, leading to the toilet becoming wobbly again. Plastic shims are waterproof and more durable for a long-lasting fix.


