
How to Replace a Two-Handle Bathroom Faucet
About This Project
This guide provides comprehensive, step-by-step instructions for removing an old two-handle bathroom faucet and installing a new one, including the associated pop-up drain assembly. The process involves preparing the workspace, shutting off the water supply, disconnecting and removing the old hardware, cleaning the sink surface, and correctly installing, connecting, and testing the new faucet and drain to ensure a leak-free result.
Best for advanced DIYers and professionals with basic plumbing knowledge and familiarity with power tools. Requires MCR Safety BearKat Safety Glasses MCSCRWBK110.
Tools & Materials

Unger 6 Gal. Heavy-Duty Plastic Bucket DB02

Better Trends Hugo Collection 20 in. x 60 in. Gray 100% Cotton Runner Bath Rug BAHG2060GRY

Coast HL7 305 Lumens Focusing LED Headlamp 19273

Adjustable Wrench
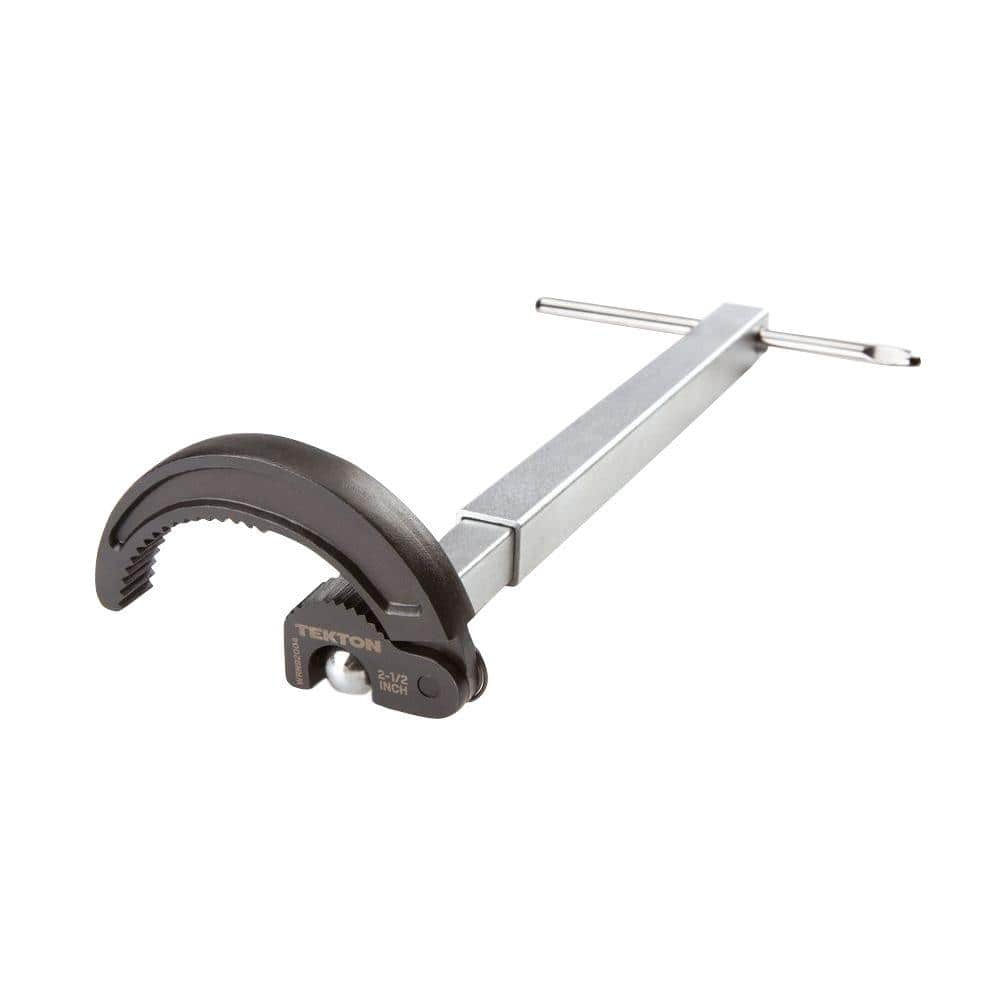
TEKTON 10 in. to 17 in. Telescoping 7/8 - 2-1/2 in. Basin Wrench WRN92004

Bucket
Unger 6 Gal. Heavy-Duty Plastic Bucket DB02
The Unger 6-Gallon Heavy-Duty Professional Cleaning Bucket holds more than 6 Gal. of liquid. The bucket can accommodate a scrubber up to 14 in. L. This bucket features measurement marks and 2-pour spouts
Better Trends Hugo Collection 20 in. x 60 in. Gray 100% Cotton Runner Bath Rug BAHG2060GRY
The epitome of luxury and class goes well with Better Trends and again they are offering you a classy collection of rugs. This collection of Hugo bath rugs have all the qualities and features that anyone
Coast HL7 305 Lumens Focusing LED Headlamp 19273
Love our Pure Beam Focusing System. The HL7 Headlamp gives you the ability to shine an ultra-wide flood beam and then quickly twist the bezel to a long reaching spot beam with transition halo so that you can be ready for anything. With our Variable Light Control Technology onboard you have the ability to adjust the light output with the control lever to any point between the lowest low and the highest high so you can have highly personalized output and runtimes. With Coasts commitment to quality, the HL7 Headlamp is impact resistant, weather resistant and its LED is virtually unbreakable. The HL7 Headlamp is backed by Coasts lifetime warranty against defects in materials and workmanship. Tested and rated to ANSI/FL1 standards.
Adjustable Wrench
Fits various nut and bolt sizes with its adjustable jaw.
TEKTON 10 in. to 17 in. Telescoping 7/8 - 2-1/2 in. Basin Wrench WRN92004
Uniquely designed for easy, one-handed operation in confined areas, the TEKTON Telescoping Basin Wrench takes the frustration out of under-sink work. Ideal for larger nuts and retaining collars on faucets,
Bucket
Ideal for carrying or storing liquids.
Steps

Preparation and Water Shutoff
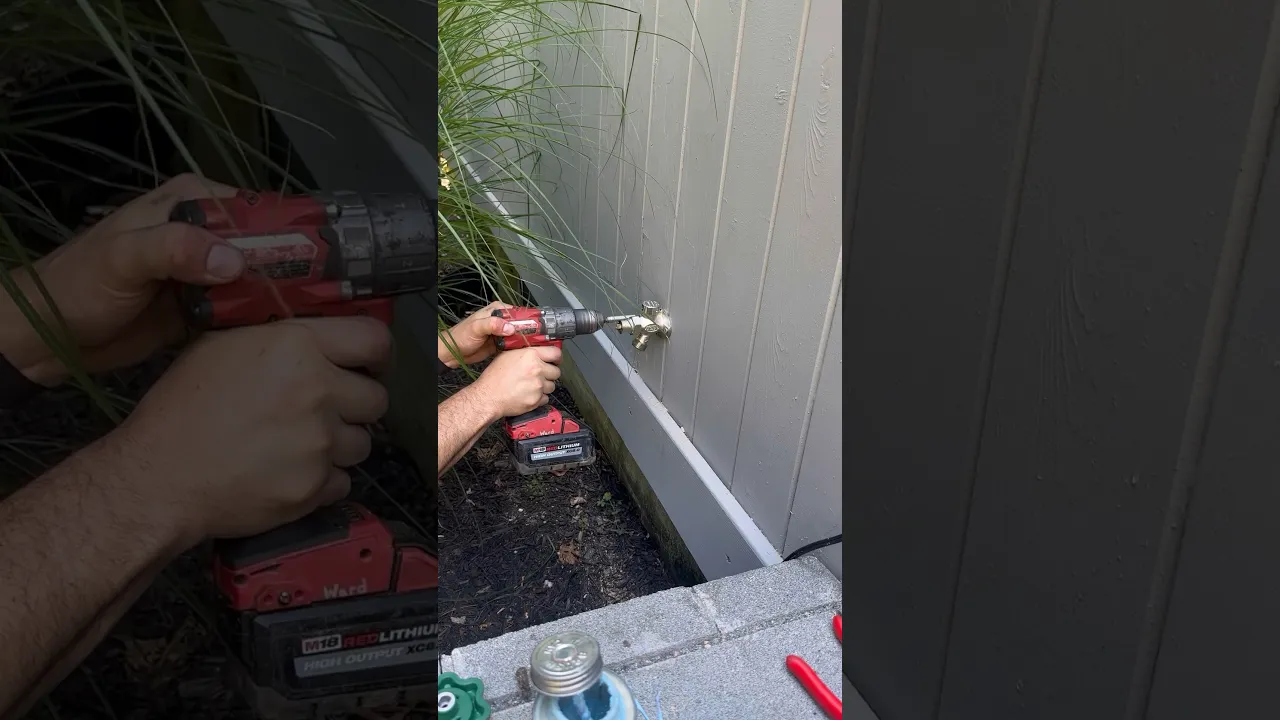
10 minsBegin by clearing everything out from under the sink cabinet to give yourself ample working space. Place a bucket and some old rags or towels under the P-trap and water supply lines to catch any residual water that will spill during disconnection. Turn off the hot and cold water supply by turning the handles on the shutoff valves clockwise until they are fully closed. Once the valves are closed, turn on the old faucet to relieve any pressure in the lines and confirm that the water is completely off.

Disconnect Water Supply Lines
15 minsUsing an adjustable wrench or basin wrench, carefully loosen the coupling nuts that connect the hot and cold water supply lines to the threaded tailpieces on the bottom of the old faucet. Turn the nuts counter-clockwise. Be prepared for a small amount of water to drip out into the bucket. Once the nuts are loose, you can usually unscrew them the rest of the way by hand.

Disconnect Pop-Up Drain Linkage
10 minsLocate the pop-up drain's lift rod mechanism. You will see a horizontal pivot rod connected to the drain pipe with a clip. Squeeze the spring clip to release the horizontal rod from the lift rod strap. Then, using channel-lock pliers, unscrew the retaining nut that holds the pivot rod in the drainpipe and pull the rod out. The pop-up stopper can now be lifted out from the top of the sink.

Remove the Old Faucet
20 minsThis is often the most challenging step. From underneath the sink, use a basin wrench to loosen and remove the mounting nuts that secure the old faucet to the sink deck. These nuts can be plastic or metal and are often corroded and difficult to access. Turn them counter-clockwise to loosen. Once the nuts are removed, you can lift the old faucet assembly straight up and out of the sink from above.

Remove the Old Drain Assembly
15 minsWith the faucet removed, focus on the old drain. From underneath the sink, use channel-lock pliers to unscrew the large slip nut connecting the drain tailpiece to the P-trap. Then, unscrew the large mounting nut that holds the drain flange against the sink. Once this nut is removed, push up on the drain assembly from below and pull the old drain flange out from the top of the sink basin.
Clean Sink Surface
10 minsWith all old hardware removed, thoroughly clean the top surface of the sink where the faucet base and drain flange were located. Use a plastic putty knife to gently scrape away any old, hardened plumber's putty or sealant residue. Avoid using metal scrapers that could scratch the sink's finish. Follow up with a non-abrasive cleaner and a rag to ensure the surface is perfectly clean and dry for a good seal with the new components.

Install New Faucet
20 minsFirst, place the gasket or base plate (included with the new faucet) onto the sink. Carefully feed the new faucet's tailpieces and mounting studs down through the holes in the sink deck. From underneath, slide on any supplied washers and thread the mounting nuts onto the studs. Hand-tighten the nuts first to position the faucet correctly from above, then use the basin wrench or supplied tool to snug them down securely. Do not overtighten.

Install New Drain Assembly
20 minsCheck your faucet instructions: some modern drains use a rubber gasket instead of putty. If putty is required, roll a rope of plumber's putty about 1/4-inch thick and place it under the lip of the new drain flange. Insert the flange into the sink drain hole from above. From below, slide the rubber gasket and mounting nut onto the drain body and tighten it firmly by hand, then give it a final quarter-turn with channel-lock pliers. Clean any excess putty that squeezes out. Insert the pivot rod through the hole in the drain, making sure it passes through the hole in the stopper. Attach the lift rod and strap, and test the pop-up mechanism.

Connect New Water Supply Lines
15 minsConnect your new (or existing) flexible supply lines to the hot and cold faucet tailpieces. The connections are typically hand-tightened, then given a final quarter-turn with an adjustable wrench. Do not overtighten. Connect the other end of the supply lines to the corresponding hot and cold shutoff valves in the same manner. Ensure the hot line connects to the left side of the faucet and the cold to the right.

Turn on Water and Check for Leaks
15 minsBefore turning the water on, double-check that all connections are snug. Unscrew the aerator from the tip of the new faucet spout to prevent any debris from clogging it. Place a rag over the spout opening. Slowly turn the water back on at the shutoff valves. Let the water run for a minute to flush any sediment out of the lines. While the water is running, use a flashlight to meticulously inspect every connection point for leaks: at the shutoff valves, at the faucet tailpieces, and around the drain assembly. If you find a leak, turn the water off and gently tighten the connection another 1/8 to 1/4 turn. Once you are certain there are no leaks, turn the water off, screw the aerator back on, and your project is complete.
Common Problems
Water sprays everywhere when turning the water back on.
Solution: Have a second person inside to watch the new connections for leaks when you first turn the water on.
Leaky faucet after replacement due to improperly seated O-rings.
Solution: Ensure O-rings and seals are clean and properly seated during reassembly to prevent leaks.
Turn the water on slowly to avoid a sudden high-pressure burst in case of a loose connection.
Solution: To avoid this issue: Be mindful of this warning and take appropriate precautions.
Stuck faucet nuts prevent easy removal.
Solution: Most can be loosened by hand, but if necessary, use an adjustable wrench.
Twisting and damaging plumbing when disconnecting water lines.
Solution: Use two wrenches when disconnecting water lines—one to hold the shut-off valve steady and one to turn the nut—to prevent twisting and damaging the plumbing.
Leaky drains or difficulty cleaning the stopper.
Solution: A fixed stopper provides a tighter seal, while a removable one is easier to clean.
Difficulty seeing and reaching faucet parts can lead to incorrect assembly or damage.
Solution: Use a flashlight to get a clear view of all the components.
Frequently Asked Questions
How long should a beginner expect to spend replacing a two-handle bathroom faucet and drain?
For a beginner, this project typically takes 2-4 hours, assuming no major complications like seized nuts. The difficulty is rated as 'beginner' because it involves straightforward steps, but patience is key, especially when working in tight under-sink spaces.
Are there any essential tools I might not already have that are crucial for this faucet replacement?
Yes, a basin wrench (like the Husky 1-1/2 in. Quick-Release Telescoping Basin Wrench) is invaluable for reaching and loosening nuts in tight spaces under the sink. You'll also want a quality adjustable wrench, tongue and groove pliers (Channellock 442), and a reliable flashlight (Panther Vision FLATEYE F-310) for visibility.
What are the critical preparation steps and safety precautions before I start disconnecting anything?
Always begin by shutting off both the hot and cold water supply valves under the sink, then turn on the old faucet to relieve pressure and drain residual water. Have a bucket (Unger 6 Gal. Heavy-Duty Plastic Bucket) and a rag (Better Trends Hugo Collection Bath Rug) ready to catch any spills and protect your cabinetry.
What are the most common reasons for leaks after installing a new faucet or drain, and how can I prevent them?
Leaks often occur from loose supply line connections or improper sealing of the drain assembly. Ensure all connections are hand-tightened, then given an additional quarter to half turn with a wrench. For the drain, properly apply plumber's putty (Oatey 14 oz. Plumber's Putty) around the flange before seating it.
My old faucet nuts are completely stuck or corroded; what's the best way to loosen them?
Apply a penetrating oil like KROIL Penetrating Oil Liquid to the stubborn nuts and let it sit for 15-30 minutes. Then, use your basin wrench or tongue and groove pliers to apply steady, firm pressure. Avoid excessive force that could damage pipes or fixtures.
Is plumber's putty always the best choice for sealing the drain, or are there other options?
Plumber's putty (Oatey 14 oz. Plumber's Putty) is excellent for creating a watertight seal under the drain flange for most sinks, especially ceramic. However, for certain delicate or porous countertop materials, a silicone sealant might be preferred as it doesn't stain. Always check your new faucet's instructions for specific recommendations.


