

How to Replace a Submersible Sump Pump
About This Project
This project involves safely disconnecting and removing an old submersible sump pump from a sump pit, preparing and installing a new pump, connecting it to the existing discharge plumbing, and testing its operation to ensure it effectively prevents basement flooding.
Best for experienced DIYers and homeowners with some experience with basic plumbing knowledge. Requires Klein Tools Non Contact Voltage Tester Pen, 50 1000V AC (NCVT1PR) NCVT1PR.
Tools & Materials

G & F Products 1628 L 100% Waterproof Winter Gloves for Outdoor Cold Weather 1628L
MCR Safety BearKat Safety Glasses MCSCRWBK110
Klein Tools Non Contact Voltage Tester Pen, 50 1000V AC (NCVT1PR) NCVT1PR
Milwaukee 8 in. x 3/8 in. Slotted Flat Head Screwdriver with Cushion Grip MT209

Unger 6 Gal. Heavy-Duty Plastic Bucket DB02

HANDS ON Men's Micro Fleece Gloves, Anti-Slip Grip, Thinsulate Lined, 100% Waterproof CT8500
G & F Products 1628 L 100% Waterproof Winter Gloves for Outdoor Cold Weather 1628L
This glove is not only made of double coating on the outside. Even the Glove shell itself(the black inner part ) is also made of double layers. The first layer is 15 g nylon gloves shell and the 2nd which
MCR Safety BearKat Safety Glasses MCSCRWBK110
Safety glasses feature a well thought-out construction that combines the best in safety, comfort and affordability. Your vision is unobstructed by the 1-piece wraparound lens which, by its tight fit, provides for maximum safety. Flexible temples enhance your comfort during extended use. Nonslip rubber head grips are notched for a clip-on breakaway cord.
Klein Tools Non Contact Voltage Tester Pen, 50 1000V AC (NCVT1PR) NCVT1PR
Klein Tools Non-Contact Voltage Tester detects standard voltage in cables, cords, circuit breakers, lighting fixtures, switches, non tamper-resistant outlets and wires. A bright green LED indicates the
Milwaukee 8 in. x 3/8 in. Slotted Flat Head Screwdriver with Cushion Grip MT209
The Milwaukee® 3/8" Slotted 8" Cushion Grip Screwdrivers (USA) are manufactured to give the professional the best-fitting screwdriver with max grip. These screwdriver tips are custom machined to deliver
Unger 6 Gal. Heavy-Duty Plastic Bucket DB02
The Unger 6-Gallon Heavy-Duty Professional Cleaning Bucket holds more than 6 Gal. of liquid. The bucket can accommodate a scrubber up to 14 in. L. This bucket features measurement marks and 2-pour spouts
HANDS ON Men's Micro Fleece Gloves, Anti-Slip Grip, Thinsulate Lined, 100% Waterproof CT8500
Stay warm with this HANDS ON - Premium Micro Fleece Glove, features a Polyvinyl/Rubberized Reinforced Anti-slip Grip on Entire Palm and Thumb. Designed with a durable 100% polyester Micro Fleece outer
Steps

Disconnect Power and Prepare the Area
10 minsThe first and most critical step is to ensure your safety by completely disconnecting the sump pump from its power source. Unplug the pump's power cord from the wall outlet, which should be a GFCI outlet. If the pump is hardwired, locate the correct circuit breaker in your home's main electrical panel and switch it to the 'OFF' position. To be absolutely certain the power is off, use a non-contact voltage tester to check the cord or wiring. Once power is confirmed off, remove the lid from the sump pit to gain access.
Disconnect the Discharge Pipe
15 minsLocate the check valve or rubber coupling on the vertical discharge pipe above the pump. A check valve prevents water from flowing back into the pit. Place a bucket nearby to catch water. Using a flathead screwdriver or a nut driver, loosen the two metal band clamps on the rubber coupling that connects the pump's pipe to the main drain line. Once loosened, you can gently pull the pipes apart. Be prepared for water to spill out from the section of pipe above the check valve.

Remove the Old Pump
10 minsWith the plumbing disconnected, firmly grasp the old pump by its carrying handle. Do not lift it by the power cord or the float switch, as this can cause damage. Lift the pump straight up and out of the sump pit. It will be heavy and full of residual water and sludge. Immediately place the old pump into a large bucket or onto a prepared plastic sheet to prevent dripping dirty water onto your floor.

Prepare New Pump and Clean Pit
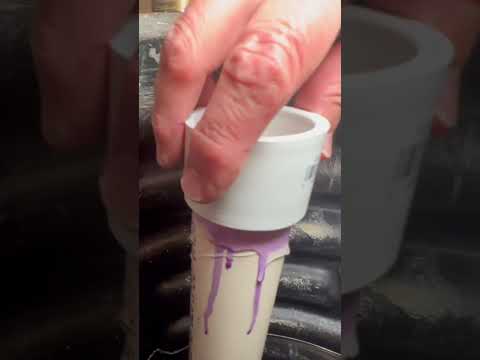
20 minsBefore installing the new pump, take the opportunity to clean the sump pit. Use a wet/dry vac or a scoop to remove any gravel, mud, and debris from the bottom of the pit. Unpack your new sump pump and review the manufacturer's instructions. Take the new threaded male PVC adapter and wrap its threads with 3 to 4 layers of Teflon tape. Apply the tape in a clockwise direction as you face the open end of the fitting. This ensures the tape tightens as you screw the fitting in. Hand-thread the adapter into the pump's discharge port, then use channel-lock pliers to give it a final one or two turns until it's snug. Do not over-tighten, as this can crack the plastic housing.
Install New Pump and Connect Piping
30 minsCarefully lower the newly prepared pump into the center of the pit. Ensure the pump is sitting flat on the bottom and that its float switch has ample room to move up and down without hitting the pit walls. Measure and cut the vertical PVC pipe to the correct length to fit between the new pump's adapter and the existing discharge line, accounting for the height of the new check valve. It's best to install a new check valve. A new valve typically includes two rubber couplings and four clamps. Slide the clamps and couplings onto the pipe ends. Insert the check valve, making sure the flow-direction arrow points UP, away from the pump. Position the valve and couplings, then firmly tighten all four band clamps with a screwdriver or nut driver.
Test the Pump Operation
15 minsWith the installation complete, it's time to test. Plug the pump's power cord back into the GFCI outlet. Use a hose or buckets to slowly pour water into the sump pit. As the water level rises, it will lift the float switch. When the float reaches its activation height, the pump should turn on with a hum. Watch as it quickly pumps the water out of the pit. The pump should shut off automatically as the float switch drops with the water level. During this test, carefully inspect all the connections, especially around the new check valve, for any signs of leaks.
Finalize and Secure
10 minsOnce you have successfully tested the pump and confirmed there are no leaks, you can finalize the installation. Neatly arrange the power cord, ensuring it is clear of the float switch's path of travel. Use plastic zip ties to secure the power cord to the side of the discharge pipe to keep it tidy and prevent it from getting tangled. Finally, place the lid securely back on top of the sump pit to complete the job.
Common Problems
The pump may start abruptly when the float is lifted. Keep hands and loose clothing away from the pump's intake.
Solution: To avoid this issue: Be mindful of this warning and take appropriate precautions.
Pump fails to turn on or off, causing basement flooding.
Solution: You can manually test the float switch by lifting it up to ensure the pump turns on and then releasing it to ensure it turns off.
Ensure the outlet is a Ground Fault Circuit Interrupter (GFCI) outlet for safety in potentially wet locations.
Solution: To avoid this issue: Be mindful of this warning and take appropriate precautions.
The outlet for a sump pump should always be a Ground Fault Circuit Interrupter (GFCI) outlet for safety.
Solution: To avoid this issue: Be mindful of this warning and take appropriate precautions.
Always use a GFCI outlet for sump pumps to protect against electrical shock.
Solution: To avoid this issue: Be mindful of this warning and take appropriate precautions.
The sump pump won't turn on or off correctly if the float switch is obstructed.
Solution: Double-check that the float switch can move fully up and down without hitting the pump or the side of the pit.
Pump won't turn on or off, flooding the basement.
Solution: Double-check the float switch's path of travel before finalizing the pump's position.
Frequently Asked Questions
What is the single most critical safety precaution I must take before starting to replace my submersible sump pump?
Always disconnect power to the sump pump circuit by unplugging it or turning off the dedicated breaker at your electrical panel. This prevents accidental electrocution, especially since you'll be working with an electrical appliance in a potentially wet environment. Confirm the power is off using a voltage tester if you're unsure.
The project is listed as 'beginner' and 6 hours. Can I really complete this if I'm new to DIY, and what factors might make it take longer?
Yes, a beginner can successfully replace a sump pump, but taking your time is key. Factors like rusted or seized discharge pipe connections, a very dirty sump pit requiring extensive cleaning, or unexpected plumbing modifications can extend the project beyond 6 hours. Having all your tools and materials ready beforehand will help streamline the process.
Besides the listed tools, are there any other specialized items or tools that would make replacing the sump pump easier or more efficient?
While the listed tools cover the basics, a shop vacuum can be incredibly useful for thoroughly cleaning out a dirty sump pit before installing the new pump. Additionally, a hacksaw or reciprocating saw might be more effective than a PVC cutter if you encounter old, rigid, or difficult-to-reach piping that needs to be cut.
How do I ensure I select the correct replacement submersible sump pump for my existing pit and discharge system?
Before purchasing, measure your old pump's dimensions (height, width), horsepower (HP), and discharge pipe diameter (commonly 1.25" or 1.5"). Also, note the type of float switch (tethered or vertical). Matching these specifications will ensure your new pump fits properly in the sump basin and connects easily to your existing plumbing.
What is a common mistake beginners make during sump pump installation that can lead to improper operation or future issues?
A common mistake is not ensuring the float switch has full, unobstructed movement within the sump pit. If the float gets stuck against the pit wall, the pump may fail to turn on, leading to flooding, or it may not turn off, causing the pump to run continuously and burn out. Always test the float manually several times before securing the pit cover.
My existing sump pump discharge pipe is old galvanized steel. Can I connect my new PVC-compatible pump directly, or should I replace the old plumbing as well?
It is highly recommended to replace old galvanized steel discharge piping with PVC when installing a new pump. Steel pipes can rust, corrode, and restrict water flow, compromising the new pump's efficiency. You'll need appropriate transition fittings (e.g., a galvanized-to-PVC adapter) and plumber's tape or sealant to ensure a watertight connection.
After installing the new pump, what's the most effective way to thoroughly test its operation before securing the pit cover and considering the job done?
To thoroughly test, fill the sump pit with several gallons of water using a bucket (like the Unger 6 Gal. Heavy-Duty Plastic Bucket DB02). Observe that the float switch activates the pump, the water discharges effectively through the pipe, and the pump shuts off cleanly once the water level drops below the 'off' point. Repeat this two or three times to confirm consistent operation.


