
How to Replace a Leaky Angle Stop (Shutoff Valve) Under Your Sink
About This Project
This guide provides detailed instructions for replacing a leaky angle stop valve, typically found under a sink, which controls water flow to the faucet. The process involves shutting off the main water supply, removing the old compression-style valve from a copper pipe, and installing a new quarter-turn ball valve to ensure a reliable, leak-free connection.
Best for advanced DIYers and professionals with basic plumbing knowledge.
Tools & Materials

MOEN Flo 1 in. Smart Water Monitor and Automatic Water Shut Off Valve 900-006

Adjustable Wrench

Unger 6 Gal. Heavy-Duty Plastic Bucket DB02

Channellock 10 in. Tongue and Groove Plier 430

Rag
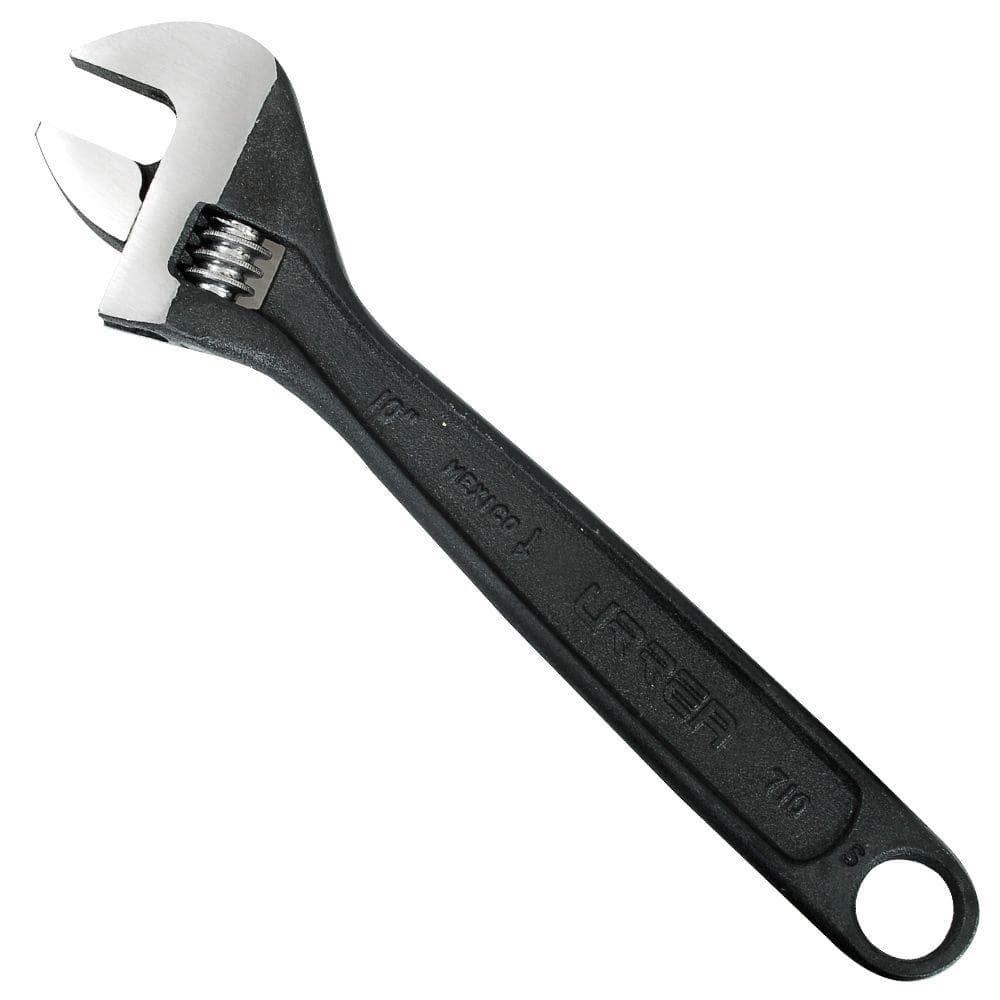
URREA 24 in. Long Black Finish Adjustable Wrench 724S
MOEN Flo 1 in. Smart Water Monitor and Automatic Water Shut Off Valve 900-006
Bring smart plumbing to your home with the Flo Smart Water Monitor and Shutoff. The Smart Water Monitor and Shutoff is a smart home water security system that provides 24/7 protection by monitoring for
Adjustable Wrench
Fits various nut and bolt sizes with its adjustable jaw.
Unger 6 Gal. Heavy-Duty Plastic Bucket DB02
The Unger 6-Gallon Heavy-Duty Professional Cleaning Bucket holds more than 6 Gal. of liquid. The bucket can accommodate a scrubber up to 14 in. L. This bucket features measurement marks and 2-pour spouts
Channellock 10 in. Tongue and Groove Plier 430
The Channellock 10 in. Straight Jaw Tongue and Groove Pliers are constructed with high-carbon steel and fashioned with laser heat-treated teeth for strong, nonslip jaw action. Undercut tongue-and-groove
Rag
Handy for cleaning or wiping tasks.
URREA 24 in. Long Black Finish Adjustable Wrench 724S
Adjustable wrenches are versatile tools because the size of their opening can be changed by openeing or closing a moveable jawusing an adjustable thumbwheel system, which makes it possible to tighten or loosen almost any type of nut or bolt.
Steps

Shut Off Main Water Supply
10 minsFirst, you must shut off the water to your entire home. Locate the main water shutoff valve, which is typically found in a basement, crawl space, or utility closet near where the water service line enters the house. Turn the valve handle clockwise until it is fully closed. To relieve pressure and drain the water from the system, open the faucets at the highest point (e.g., an upstairs bathroom) and lowest point (e.g., a basement sink) in your home and let them run until water stops flowing.

Disconnect Faucet Supply Line
5 minsPlace a bucket directly under the angle stop you intend to replace to catch any residual water left in the supply line. Keep several rags handy to clean up any spills. Use a pair of channel-lock pliers or an adjustable wrench to loosen the coupling nut that connects the flexible faucet supply line to the top outlet of the angle stop. Turn the nut counter-clockwise. Once loose, finish unscrewing it by hand and gently pull the supply line away from the valve.

Remove Old Angle Stop
10 minsTo remove the old angle stop from the copper pipe stub-out, you must use two wrenches. Grip the body of the angle stop valve firmly with one adjustable wrench to hold it stationary. Use a second, larger adjustable wrench to grip the large compression nut at the back of the valve (where it connects to the wall pipe). Turn the second wrench counter-clockwise to loosen the nut. This two-wrench technique is crucial to prevent the copper pipe from twisting inside the wall. Once the nut is loose, you can unscrew it completely and slide the entire valve off the pipe.

Clean and Prepare Pipe Stub-Out
15 minsAfter removing the valve, the old compression nut and a small brass ring called a ferrule will be left on the copper pipe. The nut will slide off, but the ferrule will be compressed tightly onto the pipe and must be removed. The best tool for this is a dedicated ferrule puller, which removes it without damaging the pipe. Alternatively, you can carefully cut a slot into it with a small hacksaw or Dremel (being extremely careful not to cut into the copper pipe) and then pry it off. Once the ferrule is removed, use a piece of emery cloth or fine-grit sandpaper to thoroughly clean the end of the copper pipe, removing any oxidation or debris until it is bright and smooth. Wipe it clean with a rag.

Assemble New Angle Stop on Pipe
5 minsTake your new quarter-turn angle stop and disassemble it. Slide the new compression nut onto the cleaned copper pipe first, with its threads facing outwards. Then, slide the new ferrule onto the pipe, making sure the tapered end of the ferrule points towards the end of the pipe (where the valve will go). Push the body of the new angle stop firmly onto the end of the pipe until it bottoms out against the ferrule. Slide the nut and ferrule forward to meet the valve body and hand-tighten the compression nut to hold everything in place.

Tighten New Valve Connection
5 minsWith the new valve hand-tight, use the two-wrench technique again. Hold the valve body stationary with one adjustable wrench. With the second wrench, tighten the compression nut clockwise. A good rule is to tighten it one full turn past hand-tight. You will feel the ferrule bite into the copper pipe. Do not overtighten. The connection should be snug and secure, not excessively forced.

Reconnect Faucet Supply Line
5 minsAlign the flexible faucet supply line with the threaded outlet on the top of the new angle stop. Screw the coupling nut onto the valve's threads by hand until it is snug. Then, use an adjustable wrench or channel-lock pliers to give the nut a final quarter- to half-turn to secure it. These supply lines typically have a rubber cone washer inside that creates the seal, so overtightening is not necessary and can damage the washer.

Restore Water and Test for Leaks
15 minsThe final step is to test your work. Ensure the new angle stop is in the closed position (handle perpendicular to the water line). Close all the faucets you opened earlier. Go to your main water shutoff and turn it on slowly, turning it counter-clockwise until fully open. Return to the sink and use a flashlight and a dry paper towel to inspect every connection point on the new valve for any signs of moisture or dripping. Wipe everything down and check again after a minute. If all is dry, slowly turn the handle on the new angle stop to the open position (parallel to the water line). Let the water run at the faucet to purge any air from the line. Check one last time for any leaks around the valve handle, compression nut, and supply line connection.
Common Problems
Ensure the valve body is pushed all the way onto the pipe before tightening to ensure the ferrule is set in the correct position.
Solution: To avoid this issue: Be mindful of this warning and take appropriate precautions.
Be careful not to damage the surrounding area or pipes.
Solution: To avoid this issue: Be mindful of this warning and take appropriate precautions.
Stuck nut prevents removal of old angle stop.
Solution: If necessary, use a small handsaw or ferrule puller to remove the nut.
Rough pipe edges can cause new fittings to leak.
Solution: If there are any rough spots or burrs on the pipe, you can use emery cloth to smooth them out before installing the new fitting.
Leaky connection due to improper ferrule placement or sealant on compression fittings.
Solution: Ensure the ferrule is oriented correctly with the tapered end facing the valve body. Do not use pipe dope or Teflon tape on compression fittings.
The valve is installed backward, making it difficult to turn on/off.
Solution: Make sure the valve is oriented in a convenient direction for operation.
Do not cut into the threads of the male pipe adapter, as this will damage it and require replacement of that pipe section.
Solution: To avoid this issue: Be mindful of this warning and take appropriate precautions.
Frequently Asked Questions
What specific tools are absolutely essential for this project, and can I get by without the larger wrenches listed?
You'll definitely need a bucket and rags for water, a tongue and groove plier (like Channellock) or an adjustable wrench (smaller sizes are usually sufficient for the valve itself), and sandpaper to clean the pipe. While a larger wrench might be listed, a standard 10-12 inch adjustable or tongue-and-groove plier is typically adequate for most angle stop connections.
Why is it crucial to replace an old compression-style valve with a new quarter-turn ball valve, and what's the main benefit?
Older compression valves are prone to leaks and can become difficult to fully shut off over time. Replacing it with a quarter-turn ball valve provides a much more reliable, leak-proof seal and allows for quick, effortless water shut-off with just a 90-degree turn, simplifying future maintenance.
How can I ensure I properly clean and prepare the pipe stub-out to prevent future leaks?
After removing the old valve, use fine-grit sandpaper (like the 220 grit listed) to thoroughly clean any mineral deposits or rough spots from the copper pipe stub-out. The goal is a smooth, shiny surface to ensure the new valve's compression ring forms a tight, leak-free seal.
What are the most common mistakes a beginner might make during this project, especially regarding tightening the new valve?
A common mistake is overtightening the new compression nut, which can damage the compression ring or pipe. Tighten the nut hand-tight, then use a wrench for an additional half to one full turn until snug. Avoid brute force; the goal is a secure, not crushed, seal.
Is shutting off the main water supply mandatory, and what are the risks if I try to skip this step?
Yes, shutting off the main water supply is absolutely mandatory for this project. Skipping this step risks significant water damage and flooding under your sink and potentially throughout your home, as the old leaky valve cannot be relied upon to stop the flow completely during removal.
The project is rated 'beginner' with an estimated 3 hours. Is this a realistic timeframe, and what takes up most of that time?
Three hours is a realistic estimate for a beginner, allowing ample time for preparation, unexpected issues, and careful work. The most time-consuming parts often include locating and shutting off the main water supply, thoroughly cleaning the pipe stub-out, and meticulously testing for leaks after installation.


