
How to Replace a Kitchen Sink Faucet
About This Project
This guide provides comprehensive, step-by-step instructions for removing an old kitchen sink faucet and installing a new one. The process involves turning off the water supply, disconnecting the old hardware, cleaning the sink surface, mounting the new faucet, connecting the new water lines, and thoroughly checking for leaks.
Best for advanced DIYers and professionals with basic plumbing knowledge.
Tools & Materials

Unger 6 Gal. Heavy-Duty Plastic Bucket DB02

Towel

Scott Rags in A Box in White (200-Shop Towels per Box) 75260
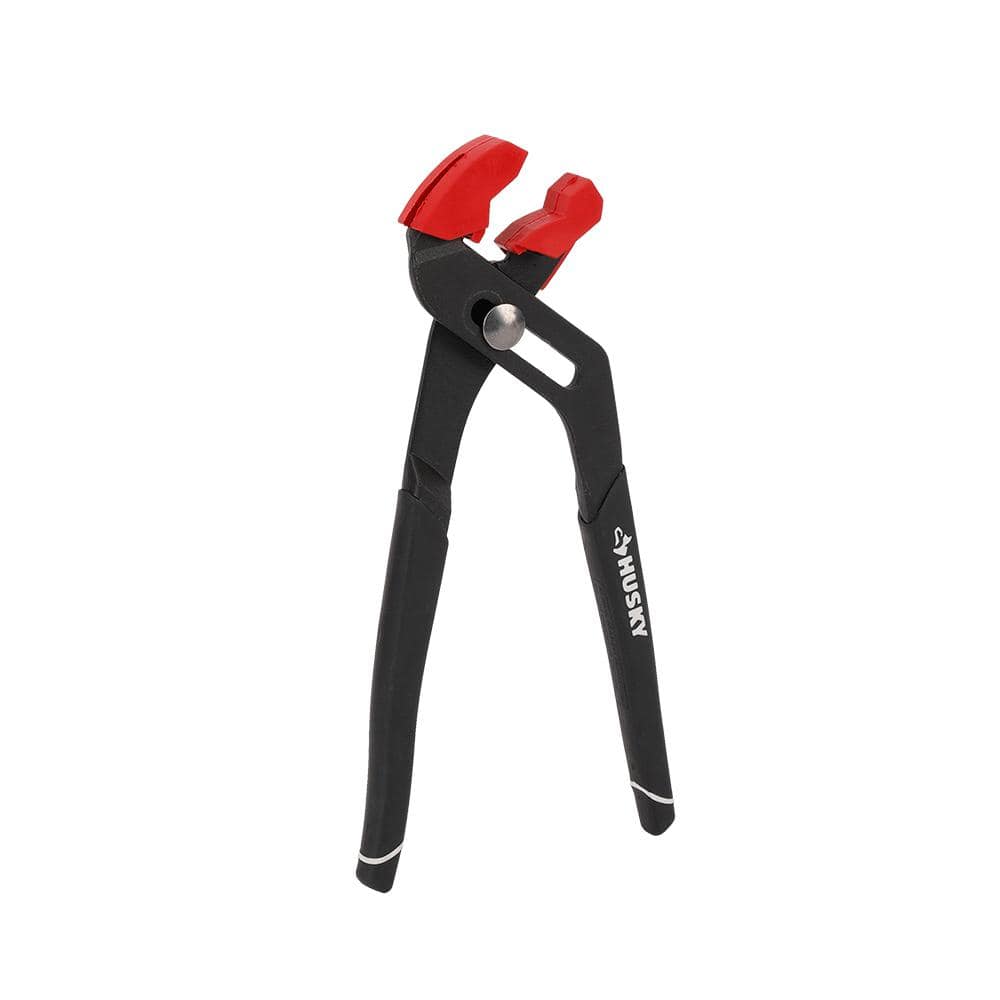
Husky 10 in. Soft Jaw Pliers 17PL0308

Coast HL7 305 Lumens Focusing LED Headlamp 19273

Adjustable Wrench
Unger 6 Gal. Heavy-Duty Plastic Bucket DB02
The Unger 6-Gallon Heavy-Duty Professional Cleaning Bucket holds more than 6 Gal. of liquid. The bucket can accommodate a scrubber up to 14 in. L. This bucket features measurement marks and 2-pour spouts
Towel
Absorbs moisture and dries surfaces.
Scott Rags in A Box in White (200-Shop Towels per Box) 75260
When you have tough jobs to tackle, you can trust Scott Rags in a Box, All-Purpose. These white disposable towels are made of cellulose fibers with a latex binder for thickness, absorbency, and strength.
Husky 10 in. Soft Jaw Pliers 17PL0308
Husky's 10 in. Soft Jaw Pliers are equipped with soft jaw caps for use on fashion plumbing fixtures. The plastic caps keep the jaws from marring the surface. They feature dual material handles for comfortable
Coast HL7 305 Lumens Focusing LED Headlamp 19273
Love our Pure Beam Focusing System. The HL7 Headlamp gives you the ability to shine an ultra-wide flood beam and then quickly twist the bezel to a long reaching spot beam with transition halo so that you can be ready for anything. With our Variable Light Control Technology onboard you have the ability to adjust the light output with the control lever to any point between the lowest low and the highest high so you can have highly personalized output and runtimes. With Coasts commitment to quality, the HL7 Headlamp is impact resistant, weather resistant and its LED is virtually unbreakable. The HL7 Headlamp is backed by Coasts lifetime warranty against defects in materials and workmanship. Tested and rated to ANSI/FL1 standards.
Adjustable Wrench
Fits various nut and bolt sizes with its adjustable jaw.
Steps

Prepare the Work Area
10 minsBegin by completely clearing the area under the kitchen sink. Remove all cleaning supplies, baskets, and other items to create a clear and accessible workspace. Lay down several old towels to absorb any water that will inevitably drip during the process. Place a bucket directly under the water supply connections and faucet P-trap to catch water.

Turn Off Water Supply
5 minsLocate the two water shutoff valves under the sink, one for hot water (typically on the left) and one for cold water (typically on the right). Turn the handles clockwise until they are fully closed. If they are stiff, you may need pliers to get them started, but be gentle. Once closed, go to the top of the sink and turn the old faucet handle to the 'on' position. This will release any remaining water pressure in the lines. A small amount of water will trickle out and then stop, confirming the water supply is off.

Disconnect Water Supply Lines
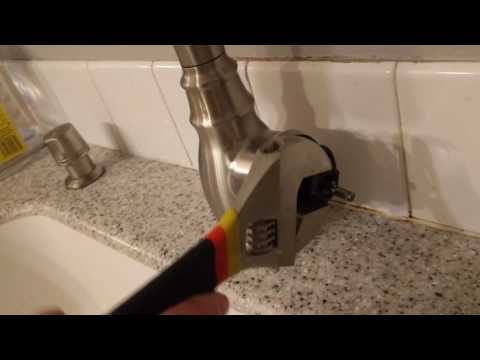
15 minsWith the bucket in position, use an adjustable wrench or basin wrench to disconnect the water supply lines. First, loosen the nuts connecting the flexible supply lines to the shutoff valves. Expect a small amount of water to drain into the bucket. Next, reach up behind the sink basin and disconnect the other end of the supply lines from the faucet's threaded tailpieces. This is where a basin wrench is invaluable due to the tight space.

Remove the Old Faucet
20 minsFrom underneath the sink, use the basin wrench to loosen and remove the mounting nuts that secure the old faucet to the sink deck. These can be metal or plastic and are often corroded. If they are stuck, apply penetrating oil. Once the nuts and any washers or brackets are removed, go to the top of the sink. Gently pull the old faucet assembly straight up and out of the mounting holes. You may need to use a putty knife to gently pry it up if it's stuck down with old plumber's putty or caulk.

Clean the Sink Surface
10 minsWith the old faucet removed, thoroughly clean the sink surface around the mounting holes. Use a plastic putty knife or a non-abrasive scraper to remove any residual plumber's putty, silicone caulk, or mineral deposits. Follow up with an all-purpose cleaner and a rag or sponge to ensure the area is perfectly clean and dry. A clean surface is essential for a good seal with the new faucet.

Mount the New Faucet
15 minsUnpack your new faucet and identify all the parts. If your sink has three holes and the faucet only requires one, first place the gasket and then the escutcheon (deck plate) over the holes. Following the manufacturer's directions, carefully feed the faucet's water lines and threaded shank through the center hole. From underneath, slide the rubber gasket, followed by the metal washer and mounting nuts, onto the faucet's shank. Hand-tighten the nuts to secure the faucet. Check the faucet's alignment from above before giving the nuts a final tightening with the basin wrench or supplied tool until snug.

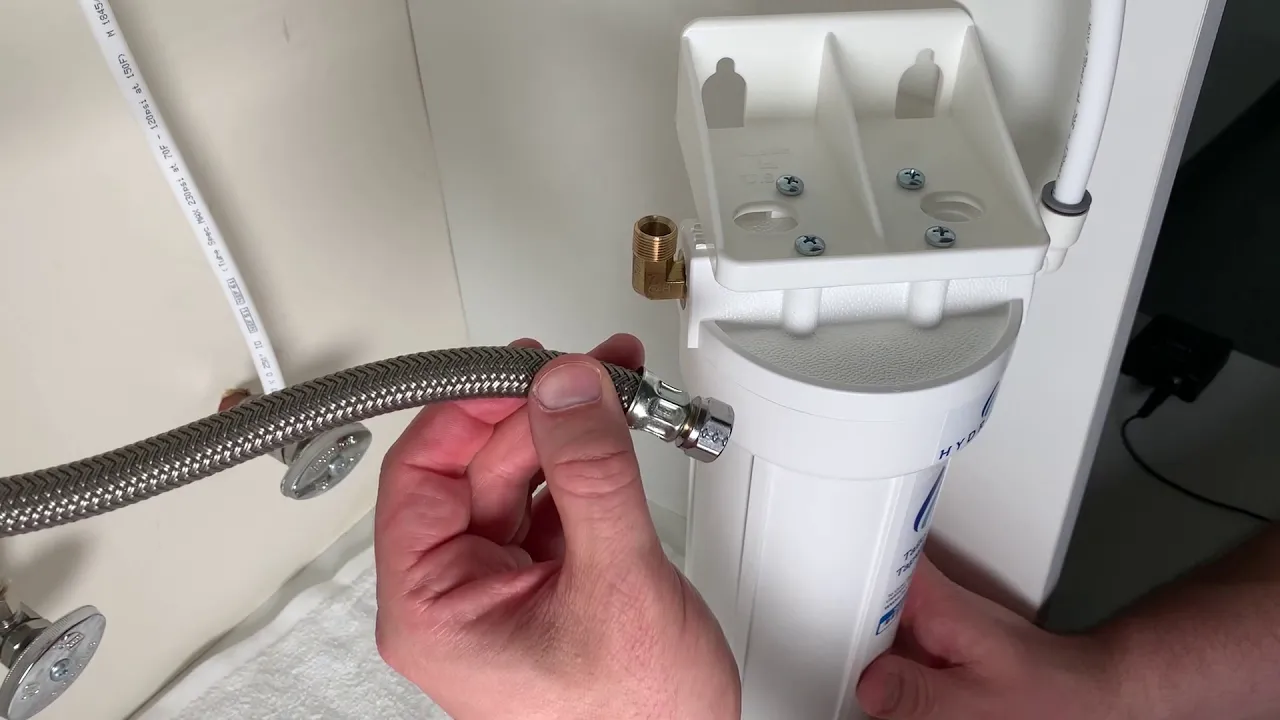
Connect New Water Supply Lines
10 minsAttach the faucet's integrated hot and cold supply lines to the corresponding shutoff valves. The hot line is typically marked with a red indicator and connects to the left valve. The cold line is marked blue and connects to the right. Screw the connection nuts on by hand until they are finger-tight. Then, use an adjustable wrench to give them an additional quarter- to half-turn. Be careful not to overtighten, as this can damage the gaskets inside the fittings and cause a leak.

Connect Sprayer Hose and Weight
5 minsFor a pull-down faucet, you must connect the sprayer hose. Locate the main outlet hose coming down from the faucet body. Connect the flexible sprayer hose to this outlet; it will often be a quick-connect fitting that simply clicks into place. Find the included counterweight and clamp it onto the sprayer hose at the location indicated in the instructions (usually marked with a sticker on the hose). This weight is what retracts the sprayer head back into the faucet spout.

Turn On Water and Check for Leaks
10 minsThis is the most critical step. Slowly turn both the hot and cold water shutoff valves counter-clockwise to open them fully. Immediately check for any leaks at all connection points: where the supply lines meet the shutoff valves, and where they connect to the faucet's tailpieces. Use a dry paper towel or your dry fingers to wipe each connection joint. Any moisture indicates a leak that needs to be addressed by slightly tightening the connection or by disconnecting, checking the gasket, and reconnecting.
Final Test and Cleanup
10 minsFrom the top of the sink, turn the faucet handle on and test its operation. Cycle between hot and cold water, and verify they are connected correctly. Pull out the sprayer head and test its function and spray patterns. Let the water run for a minute to flush any debris from the lines. After the test, turn the faucet off and perform one final, thorough leak check under the sink. Once you are confident there are no leaks, clean up your tools, remove the bucket and towels, and place your items back in the cabinet.
Common Problems
Turn the water on slowly to avoid a sudden surge of pressure that could cause a weak connection to fail.
Solution: To avoid this issue: Be mindful of this warning and take appropriate precautions.
Faucet valve twists and breaks under pressure.
Solution: You can use a backup wrench on the valve body to prevent it from twisting if the connection is very tight.
Difficulty reaching faucet nuts leads to an inability to remove or install the faucet.
Solution: A basin wrench is specifically designed for reaching these difficult nuts and is highly recommended for this step.
Water will drip from the disconnected lines, even with the valves closed.
Solution: To avoid this issue: Be mindful of this warning and take appropriate precautions.
Water spills onto the floor during faucet replacement.
Solution: Place a small bucket or a towel directly under the connections to keep the floor dry.
Tight spaces make faucet nuts impossible to reach and loosen.
Solution: The basin wrench's long handle provides the leverage needed in the cramped space behind the sink bowl.
Make sure the water is completely shut off to avoid water damage.
Solution: To avoid this issue: Be mindful of this warning and take appropriate precautions.
Frequently Asked Questions
What specialized tools are essential for replacing a kitchen faucet, especially for a beginner?
A basin wrench (like the TEKTON or Husky models listed) is crucial for reaching and loosening nuts in tight spaces under the sink. An adjustable wrench is also a must-have for supply lines. A sturdy bucket will catch drips and keep your workspace clean.
What's the most critical safety step before I start, and what should I do if old connections are corroded and won't loosen?
Always turn off the water supply to the sink, either at the shut-off valves under the sink or the main house valve. If connections are stuck, apply penetrating oil, let it sit, and use a basin wrench with steady pressure. Avoid excessive force to prevent stripping or damaging pipes.
The project estimates 4 hours, but I'm a complete beginner. Is this realistic, and what could make it take longer?
For a complete beginner, it's wise to budget 6-8 hours. Old, corroded parts, extremely tight working spaces, or unexpected plumbing issues can significantly extend the installation time. Don't rush; taking your time prevents costly mistakes.
After installing the new faucet, I'm noticing drips or leaks. What are the most common culprits I should check?
First, ensure all water supply lines are securely tightened to the faucet and the shut-off valves, but don't overtighten plastic nuts. Next, check if the mounting nuts under the sink are snug and that the faucet's base gasket is properly seated and compressed against the sink surface, preventing leaks from above.
Is it really necessary to clean the sink surface thoroughly before installing the new faucet?
Yes, a thoroughly clean and dry sink surface is critical. Remnants of old putty, sealant, or grime can prevent the new faucet's gasket or O-ring from forming a watertight seal, leading to leaks around the base of the faucet. Use a degreaser like ECOS Pro Orange Plus for best results.
My under-sink cabinet is very cramped. Are there any tricks for working in such a tight space?
A good basin wrench is invaluable for cramped spaces. Consider using a headlamp for better visibility and clear out everything from the cabinet before you begin. Patience is key; take frequent breaks and work slowly to avoid dropping parts or stripping nuts.
What's the best way to prevent water damage during the project, especially when disconnecting old lines?
Always have a bucket directly under the old connections when you disconnect them, as there will be residual water. Lay down plenty of old towels or absorbent wipes, like WYPALL L40 or Dry Up Towels, in the cabinet base to catch any spills and prevent water damage to your cabinetry.


