
How to Repair a Leaky Faucet Base (Single Handle)
About This Project
This guide provides comprehensive, step-by-step instructions for diagnosing and repairing a common plumbing issue: a leak at the base of a single-handle faucet. The process involves shutting off the water, disassembling the faucet, identifying and replacing worn-out O-rings or seals, cleaning the components, and reassembling everything correctly.
Best for experienced DIYers and homeowners with some experience with basic plumbing knowledge.
Tools & Materials

Towel

Unger 6 Gal. Heavy-Duty Plastic Bucket DB02
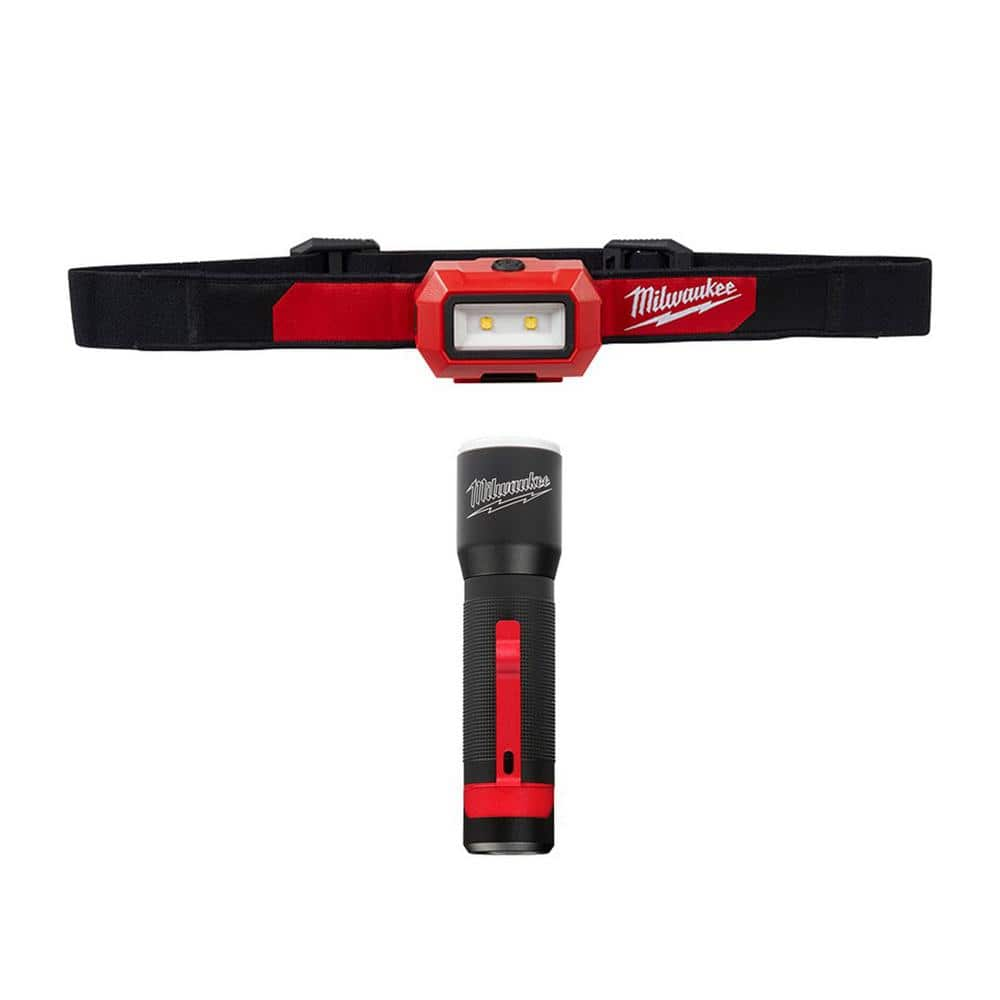
Milwaukee 350 Lumens LED Headlamp With 325 Lumens LED Aluminum Flashlight 2103-2107
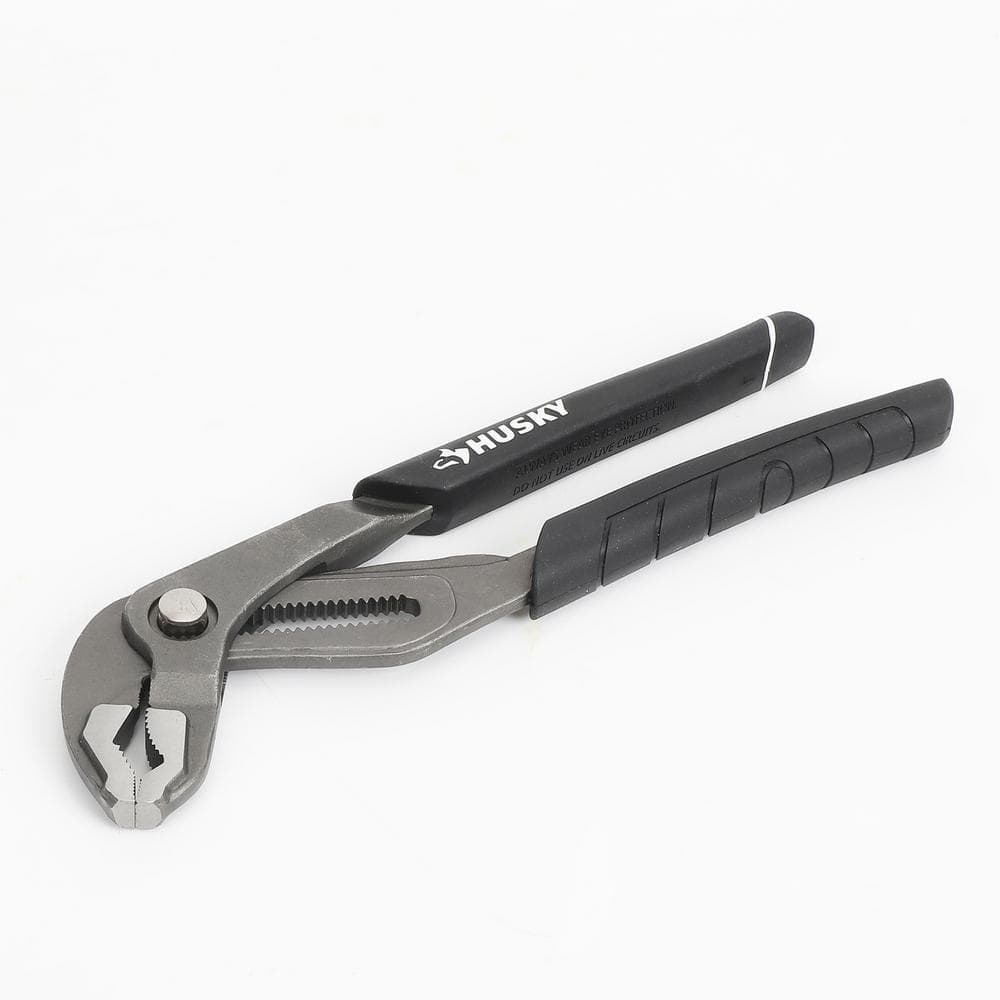
Husky 10 in. Quick Adjusting Groove Joint Pliers with Curved Jaw 90141
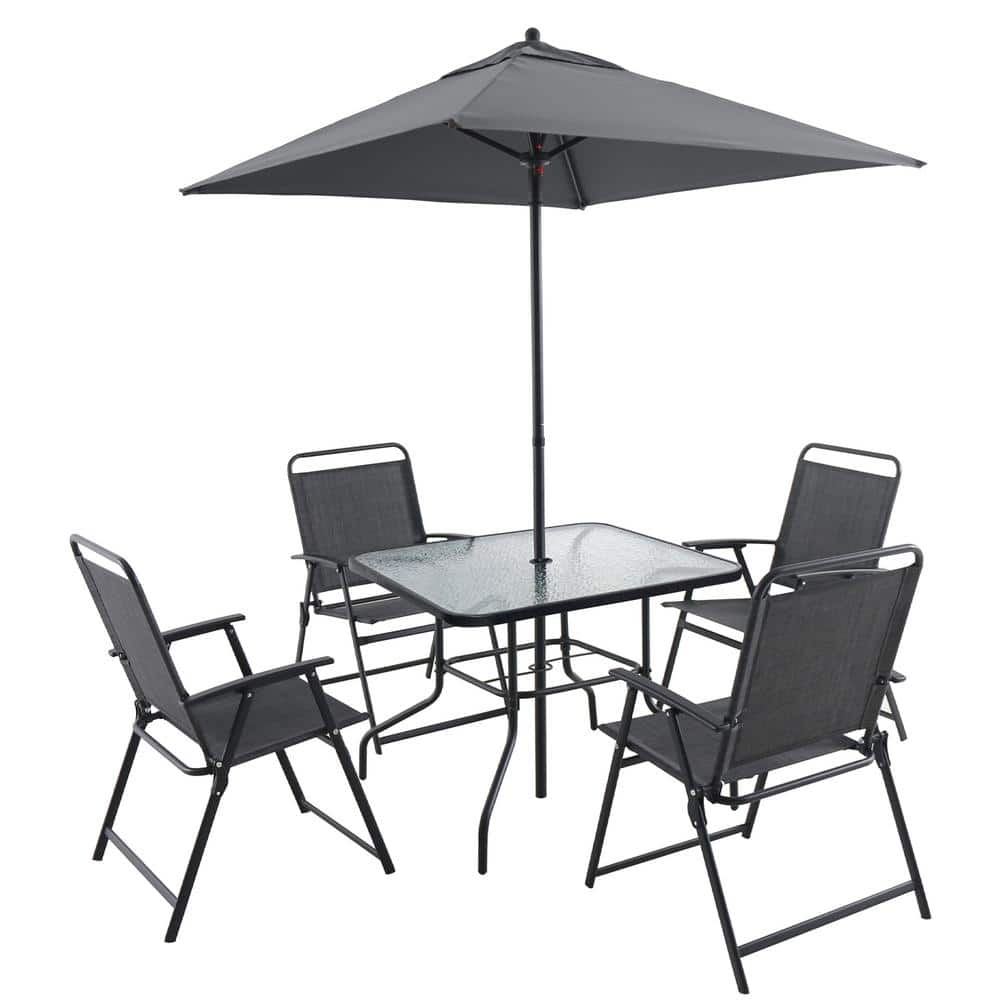
Anvil Black 5-Piece Metal Outdoor Dining Set Patio Bistro Set Table and Chair Set with Umbrella FY-W2089135482
Klein Tools 3/16 in. Slotted Screw-Holding Flat Head Screwdriver with 3 in. Round Shank K23
Towel
Absorbs moisture and dries surfaces.
Unger 6 Gal. Heavy-Duty Plastic Bucket DB02
The Unger 6-Gallon Heavy-Duty Professional Cleaning Bucket holds more than 6 Gal. of liquid. The bucket can accommodate a scrubber up to 14 in. L. This bucket features measurement marks and 2-pour spouts
Milwaukee 350 Lumens LED Headlamp With 325 Lumens LED Aluminum Flashlight 2103-2107
The Milwaukee Headlamp is more compact for all day comfort and delivers 350 Lumens of TRUEVIEW High Definition output in a wide flood beam. The LED headlamp is optimized to be lightweight and compact with a strap made from a washable, sweat absorbing microfiber, providing all-day comfort when worn on the forehead. The headlamp light's impact-resistant housing is built to withstand the toughest conditions. It survives drops and is IP54 rated for water and dust resistance. With 7 different tilt positions, users can direct the light by pivoting the light head. The Milwaukee headlamp has 3 light output modes to manage brightness and runtime, giving users up to 28 hours of runtime. The headlamp includes four clips for secure attachment to hard hats while users are on the jobsite. This headlamp is covered by a limited lifetime warranty. The Milwaukee 325L Focusing Flashlight delivers 325 Lumens of TRUEVIEW High Definition Output and is a Brighter, More Durable Everyday Flashlight.
Husky 10 in. Quick Adjusting Groove Joint Pliers with Curved Jaw 90141
The Husky quick adjusting groove joint pliers are easier to adjust for the perfect fit. At the touch of a button, the jaws can be moved to quickly fit a fastener without having to guess which the appropriate
Anvil Black 5-Piece Metal Outdoor Dining Set Patio Bistro Set Table and Chair Set with Umbrella FY-W2089135482
The 5-Pieces outdoor dining set with umbrella sounds like a great addition to any patio or outdoor space. The set includes a patio table with an umbrella and 4-chairs, providing comfortable seating for
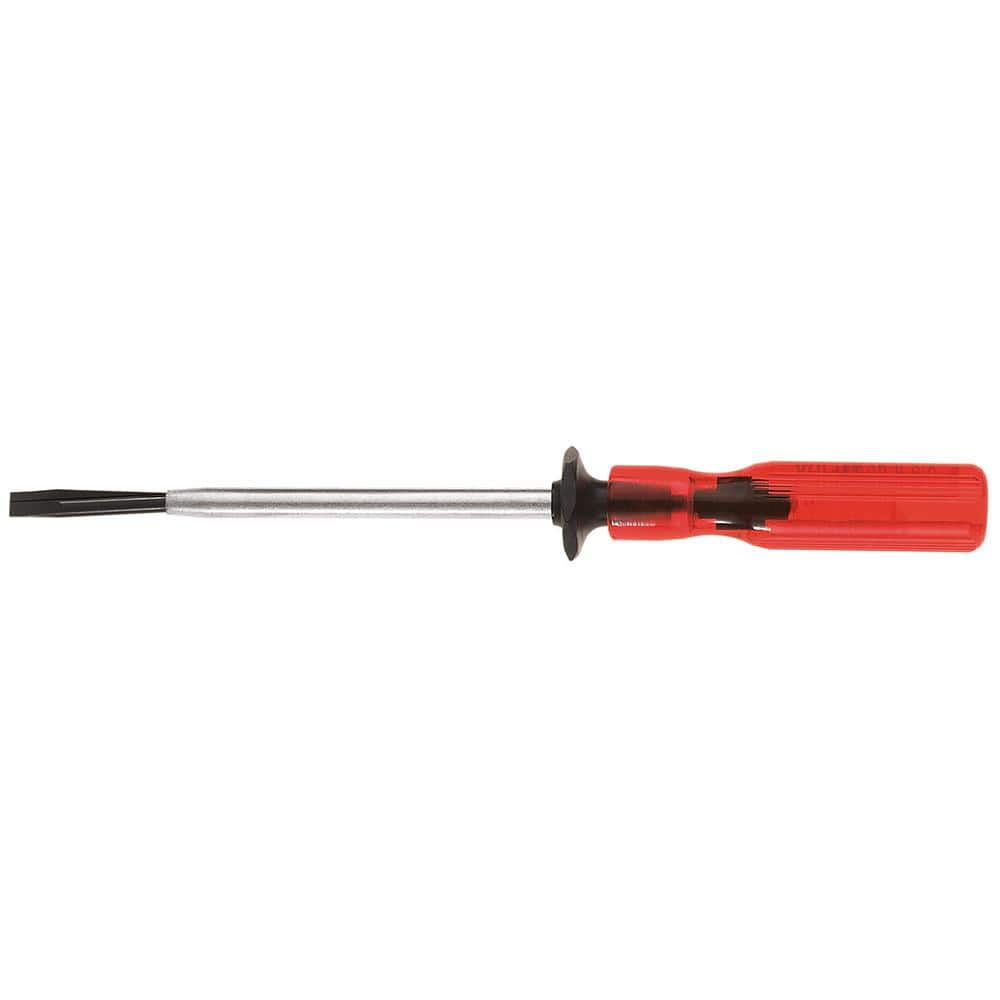
Klein Tools 3/16 in. Slotted Screw-Holding Flat Head Screwdriver with 3 in. Round Shank K23
Getting that screw to stay put while you get it in place is much easier with Klein's Slotted Screw-Holding screwdriver. Positive gripping action holds, starts, and drives slotted screws in awkward, hard-to-reach
Steps

Shut Off Water Supply & Prepare Work Area
5 minsBefore beginning any work, locate the hot and cold water shutoff valves, typically found in the cabinet directly beneath the sink. Turn the handles clockwise until they are fully closed. To confirm the water is off, turn the faucet handle to the 'on' position; any remaining water in the line will trickle out, and then the flow should stop completely. Lay a towel in the sink basin to protect the surface and to catch any small parts you might drop. Gather all the tools and supplies you will need for the job to have them within reach.

Remove the Faucet Handle
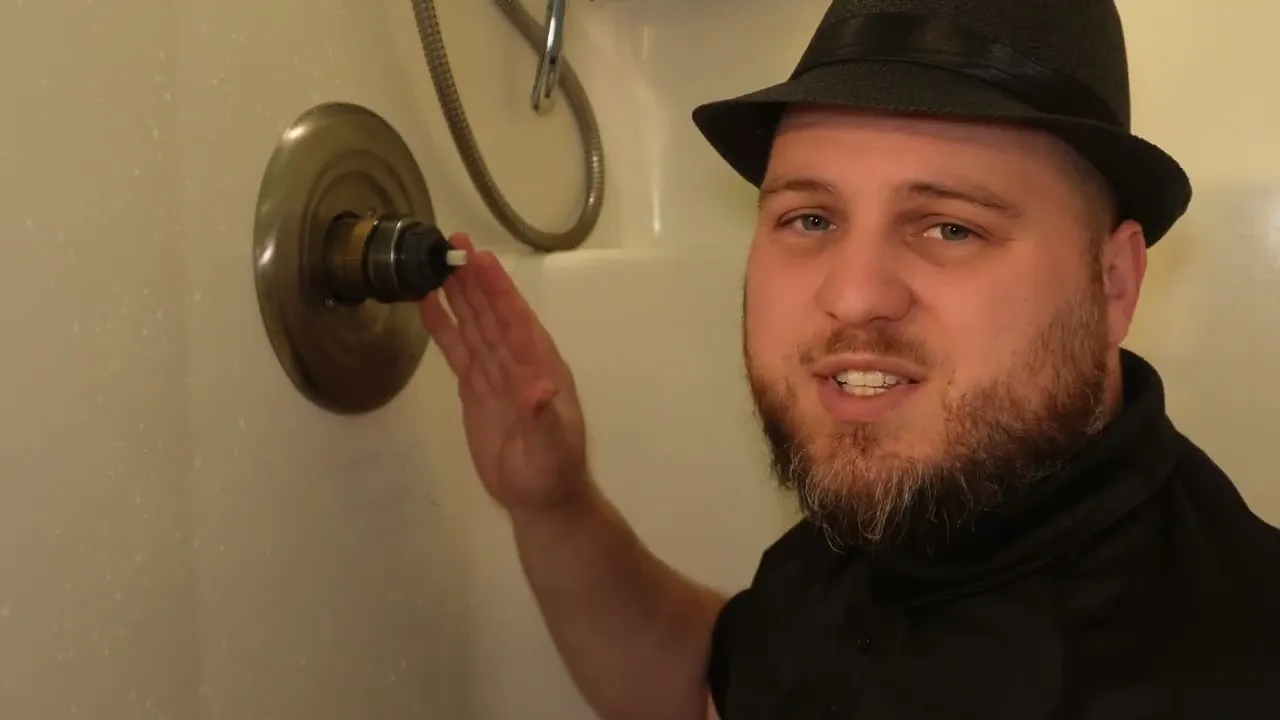
5 minsExamine the faucet handle to find how it is attached. Most single-handle faucets have a small set screw, which is often hidden behind a decorative cap marked with a red/blue hot/cold symbol. Use a small, flat-head screwdriver or a utility knife to gently pry this cap off. Inside, you will see the set screw. Select the correct size Allen wrench from your set and turn the screw counter-clockwise to loosen it. It only needs to be loosened enough to allow the handle to be removed; you do not need to take the screw all the way out. Once loose, lift the handle straight up and off the faucet's valve stem.

Remove Cap and Spout
10 minsWith the handle removed, you will see a decorative dome-shaped cap covering the top of the faucet body. This cap is usually threaded on. Try to unscrew it by hand first. If it is too tight, wrap a cloth or rag around the cap to protect its finish, then use a pair of slip-joint pliers to grip it and turn it counter-clockwise. Once the cap is removed, you will expose the faucet's cartridge and the top of the spout assembly. You can now grasp the spout and pull it straight up, wiggling it slightly from side to side if it's snug. This will lift the spout off the main faucet body.

Replace the Spout O-Rings
15 minsAfter lifting off the spout, you will see several grooves on the faucet body that hold rubber O-rings. These O-rings create the seal that allows the spout to swivel without leaking. Use a small pick tool or a flat-head screwdriver to carefully dig into and pry the old O-rings out of their grooves. Take the old O-rings with you to the hardware store to ensure you get exact replacements, or use the ones from a faucet-specific repair kit. Before installing the new ones, clean the grooves on the faucet body and the inside of the spout with a cloth, using a small amount of white vinegar to dissolve any hard water deposits. Apply a thin layer of plumber's grease to the new O-rings; this lubricates them, making reassembly easier and protecting them from tearing. Carefully stretch and roll the new O-rings into their designated grooves.

Reassemble the Faucet
10 minsReassemble the faucet by following your disassembly steps in reverse order. First, slide the spout back down over the newly installed O-rings onto the faucet body. You should feel it seat firmly. Next, place the decorative cap back over the top of the faucet and screw it on. Hand-tighten it firmly, and if necessary, give it a very slight final snug with your cloth-wrapped pliers, but be careful not to overtighten. Finally, place the handle back on top of the valve stem, ensuring it is oriented correctly. Tighten the set screw with your Allen wrench until it is snug, and then push the decorative cap back into place on the handle.

Restore Water and Test for Leaks
5 minsWith the faucet fully reassembled, you can now test your repair. Go back to the shutoff valves under the sink and turn them counter-clockwise slowly to restore the water supply. Open them all the way. Check for any immediate, major leaks. If none are present, turn the faucet handle on and let the water run. Swivel the spout from side to side and move the handle to mix hot and cold water. With a dry paper towel or your fingers, carefully check the base of the spout and the area where the faucet meets the sink for any signs of water. If it remains dry after a minute of operation, the leak is fixed.
Common Problems
Ensure you are turning off the cold water valve, not the hot water valve.
Solution: To avoid this issue: Be mindful of this warning and take appropriate precautions.
Place a towel or small bucket under the connections before disconnecting them to catch any residual water in the lines.
Solution: To avoid this issue: Be mindful of this warning and take appropriate precautions.
Water may drip from the disconnected line, so place a towel or small bucket underneath.
Solution: To avoid this issue: Be mindful of this warning and take appropriate precautions.
Ensure the water is fully shut off before disconnecting any lines to prevent flooding.
Solution: To avoid this issue: Be mindful of this warning and take appropriate precautions.
Ensure both hot and cold valves are fully closed. If they don't shut off completely, you may need to shut off the main water supply to the house.
Solution: To avoid this issue: Be mindful of this warning and take appropriate precautions.
Damaged threads or faucet body from over-tightening the collar.
Solution: Hand-tightening the collar should be sufficient. Over-tightening with a tool can damage the threads or the faucet body.
Failure to properly lubricate the O-rings can cause them to pinch or tear during reassembly, which will result in the faucet leaking again.
Solution: To avoid this issue: Be mindful of this warning and take appropriate precautions.
Frequently Asked Questions
Do I really need all the specific tools listed, like the bent pick or screw-holding screwdrivers?
While specific tools like a bent pick (e.g., TEKTON 90-Degree Bent Pick) make removing O-rings much easier and prevent damage, a small flathead screwdriver or sturdy tweezers can sometimes work in a pinch. The screw-holding screwdriver is helpful for not dropping tiny screws into the sink, but any appropriately sized screwdriver will function. An adjustable wrench is essential for loosening nuts and is non-negotiable.
What's the absolute most critical safety precaution for this faucet repair?
The most critical step is always to **completely shut off the water supply** to the faucet before beginning any disassembly. This prevents accidental floods and potential water damage to your home. After shutting off the hot and cold water valves, open the faucet briefly to relieve any residual water pressure and drain remaining water from the lines.
How long should a beginner expect this repair to take, and what's the typical cost?
For a beginner, this project typically takes 1 to 2 hours, including the initial diagnosis, repair, and clean-up. The cost is usually very low, as you're primarily purchasing an O-ring kit (like the DANCO 200-Piece O-Ring Kit) or a faucet repair kit, which typically costs between $5 and $20. This makes it a very cost-effective DIY fix compared to hiring a professional plumber.
What if I replace the O-rings, but the faucet still leaks from the base?
If the leak persists after replacing the O-rings, first double-check that all new O-rings are correctly seated, not twisted, and adequately lubricated with plumber's grease. Sometimes, the issue isn't just the O-rings but a damaged faucet cartridge or housing, which may need replacement. Ensure all connections are tightened snugly, but avoid overtightening, which can crack components.
Can I just use any O-rings, or do I need the specific DANCO kit mentioned?
While the DANCO 200-Piece O-Ring Kit offers a wide assortment for various applications, you can often find individual O-rings at hardware stores. The most important thing is to match the original O-rings' size (diameter and thickness) and material (usually rubber or silicone) precisely to ensure a proper, lasting seal. Bringing the old O-rings with you to the store is highly recommended for an accurate match.
My single-handle faucet leaks from the base only when the water is turned on. Is this repair still relevant?
Yes, a leak from the base that occurs specifically when the water is turned on is a classic symptom of worn-out O-rings or seals within the faucet body or at the base of the spout. This repair directly addresses those components, making it very relevant to your issue. Disassembling the faucet as described in the guide will allow you to pinpoint and replace the failing seal causing the leak.


