
How to Remove an Old Bathtub for a Bathroom Remodel
About This Project
This guide provides a comprehensive, step-by-step process for safely and effectively removing an old bathtub as part of a bathroom remodel. The instructions cover everything from initial preparation and shutting off the water supply, to disconnecting the plumbing fixtures, demolishing the surrounding walls, detaching the tub, and finally, removing the tub from the space, with a specific focus on handling a heavy cast iron model.
Best for advanced DIYers and professionals with basic plumbing knowledge and familiarity with power tools. Requires MCR Safety BearKat Safety Glasses MCSCRWBK110 and Husky Large Heavy Duty Glove 67812-06 and 3M P100 Household Respirator 65021HA1-C.
Tools & Materials
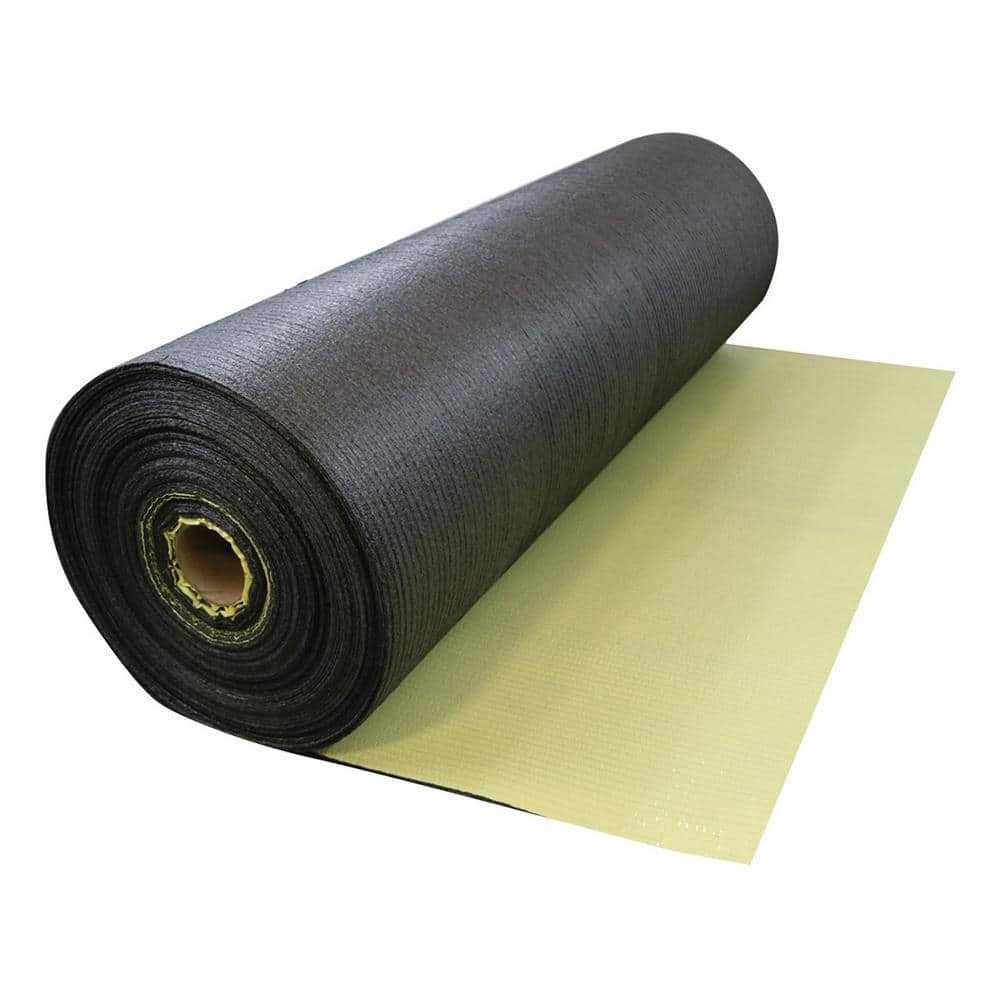
MP Global Products Cover 800 sq.ft. Professional Grade Poly Surface Floor Protection Film CR4835800
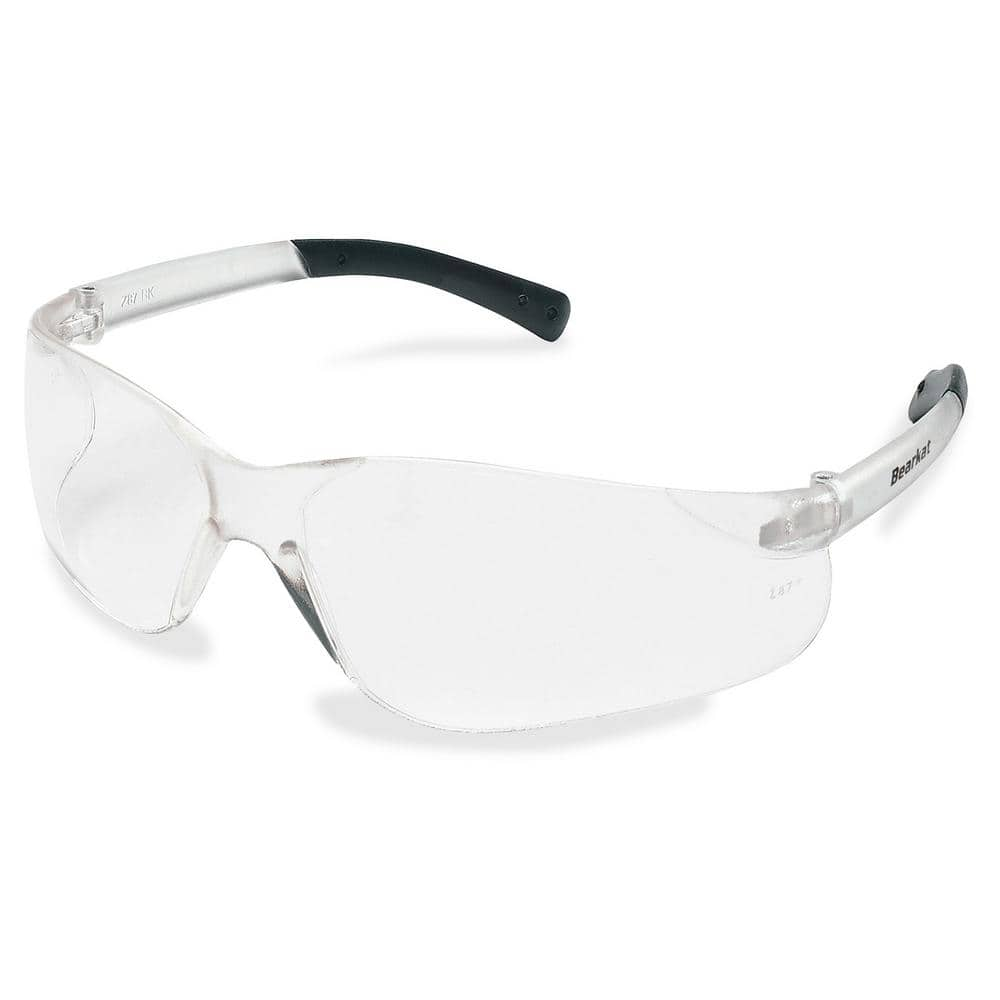
MCR Safety BearKat Safety Glasses MCSCRWBK110

Husky Large Heavy Duty Glove 67812-06
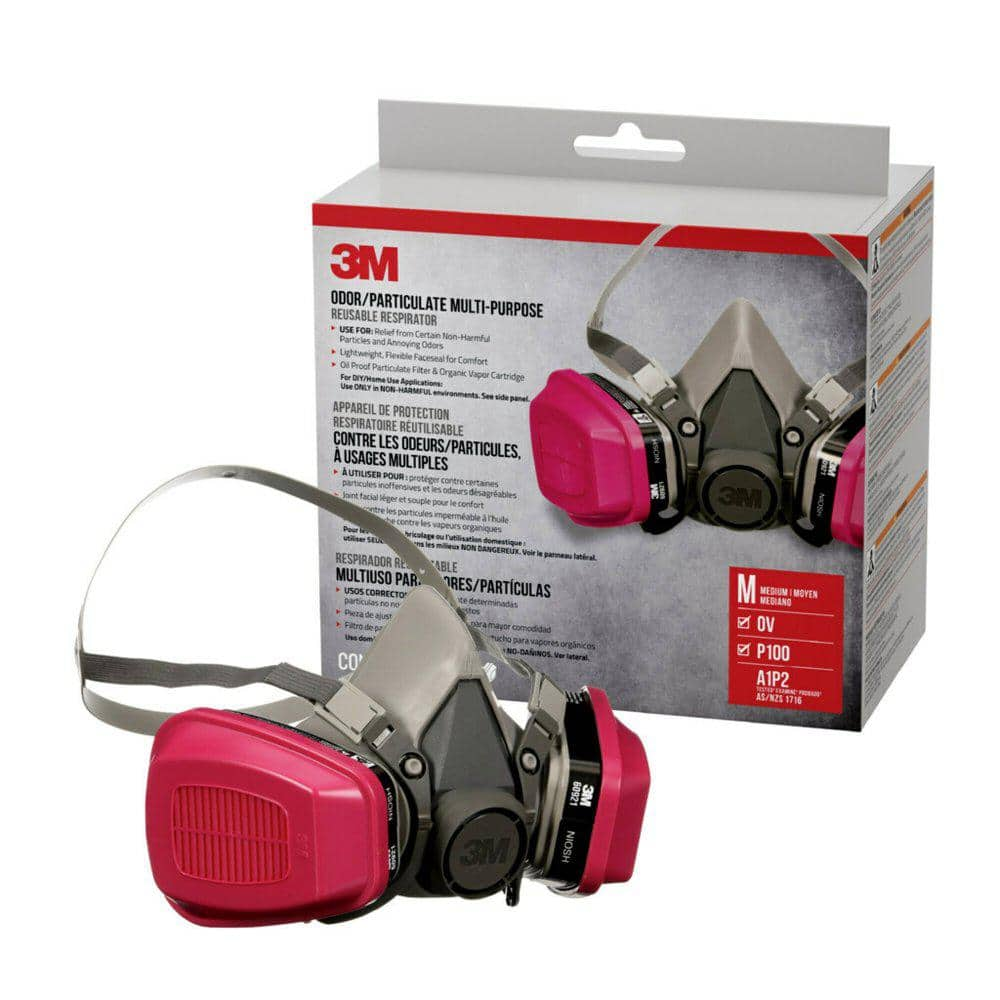
3M P100 Household Respirator 65021HA1-C
Anvil Yellow 3-Piece Metal Indoor Outdoor Bistro Set, Patio Foldable Round Table and Chairs Set FY-W1586P143143

DEWALT Phillips Screwdriver Set (10-Piece) DWHT65201
MP Global Products Cover 800 sq.ft. Professional Grade Poly Surface Floor Protection Film CR4835800
OnGuard PE provides surface protection for newly installed floors to prevent scratching and denting. OnGuard PE is breathable and will release moisture under the surface and resist surface spills and water spots on the top of the film surface. Prevents damage to your floor during construction.
MCR Safety BearKat Safety Glasses MCSCRWBK110
Safety glasses feature a well thought-out construction that combines the best in safety, comfort and affordability. Your vision is unobstructed by the 1-piece wraparound lens which, by its tight fit, provides for maximum safety. Flexible temples enhance your comfort during extended use. Nonslip rubber head grips are notched for a clip-on breakaway cord.
Husky Large Heavy Duty Glove 67812-06
Husky Heavy Duty Mechanic Gloves are form-fitting and highly breathable while offering maximum protection. The knuckle and back of hand padding is designed to offer natural hand movement with maximum protection. The synthetic leather palm provides superior durability, and also has printed non-slip silicone for a secure grip. The glove also features a double reinforced neoprene padded palm that protects from both abrasions and vibration fatigue.
3M P100 Household Respirator 65021HA1-C
The 3M Odor/Particulate Multi-Purpose Reusable Respirator 65021 helps filter out the particles and certain odors, while providing comfort with adjustable features. The cartridges sit swept back for a larger field of view, and the reusable design can last from one project to the next. Give yourself the 3M Odor/Particulate Multi-Purpose Reusable Respirator 65021 for projects on your to-do list.
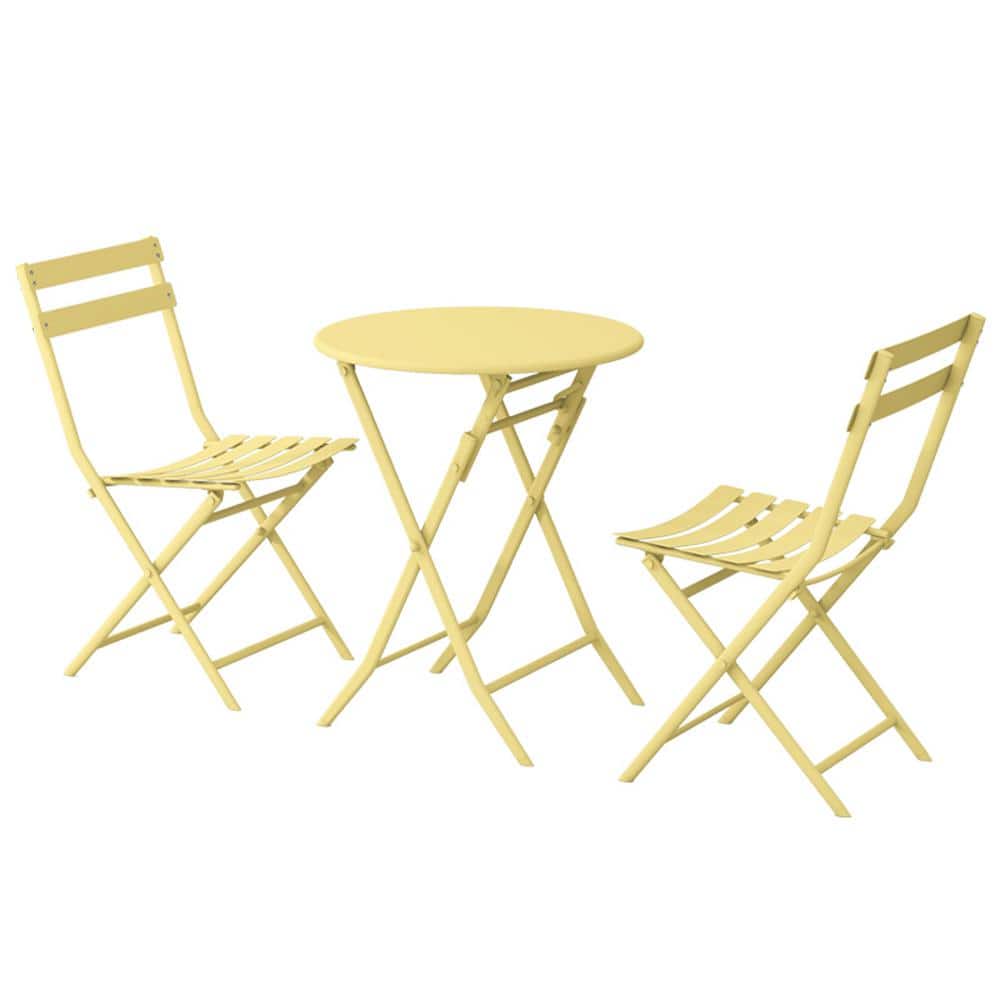
Anvil Yellow 3-Piece Metal Indoor Outdoor Bistro Set, Patio Foldable Round Table and Chairs Set FY-W1586P143143
Enjoy friendly conversation and a cappuccino with the Indoor/Outdoor 3-Piece Bistro Set. This Garden 3-piece folding patio set, featuring 2-dining chairs and 1-dining table. With its simple and practical
DEWALT Phillips Screwdriver Set (10-Piece) DWHT65201
The DEWALT 10 pieas. Screwdriver Set includes a variety of handle sizes and tip types to help you complete a number of fastening projects. The steel bars are chrome-plated for corrosion resistance, while
Steps
Preparation and Safety
30 minsThe first and most critical step is to prepare the work area and ensure safety. Turn off the main water supply to the house or the shutoff valves for the bathroom. Open the tub faucet to drain any residual water. Lay down protective coverings like thick cardboard or ram board on the bathroom floor. Equip yourself with all necessary Personal Protective Equipment (PPE), including safety glasses, heavy-duty work gloves, and a dust mask or respirator to protect against dust and debris.
Remove Faucet Trim and Spout
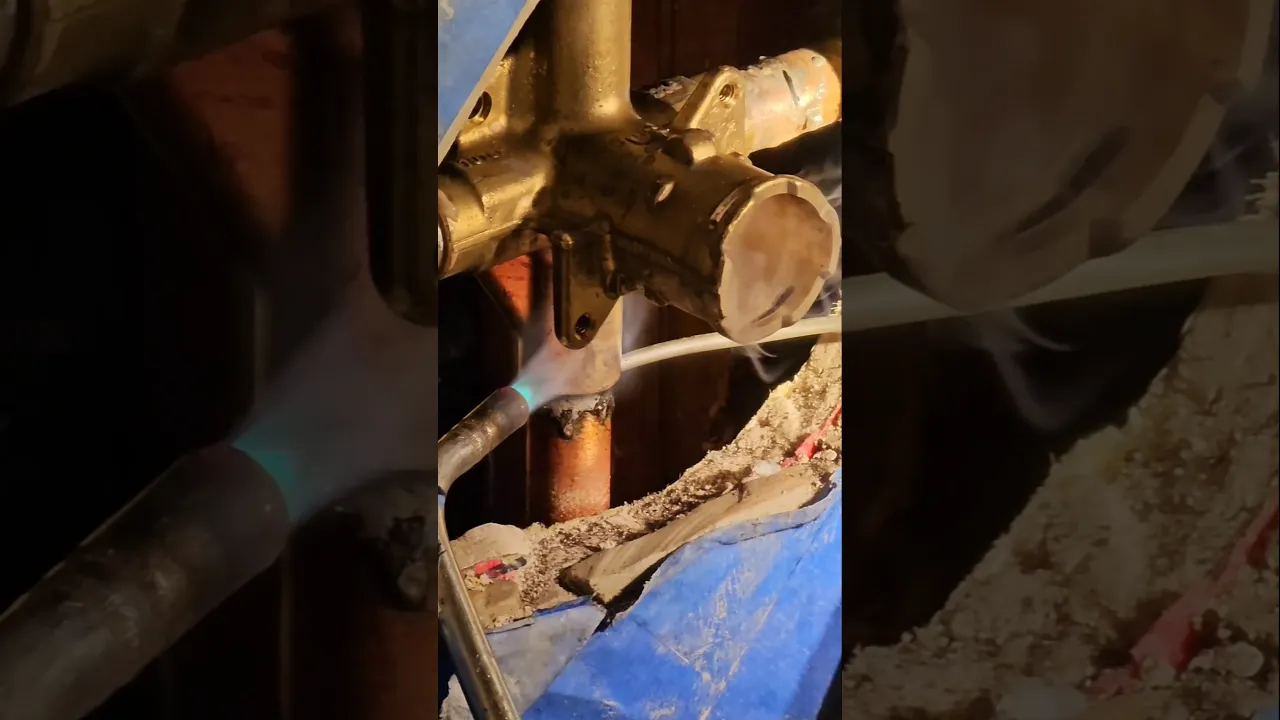
30 minsBegin the plumbing disconnection by removing the faucet handles, trim plates (escutcheons), and the tub spout. Faucet handles are typically held by a small set screw, which can be removed with an Allen wrench or a Phillips head screwdriver. The escutcheons may be screwed on or simply caulked in place and can be pried off gently with a putty knife. The tub spout usually unscrews counter-clockwise, though some models have a set screw on the underside that must be loosened first.
Access and Disconnect Drain Plumbing
1 minTo disconnect the tub drain, you must first access the drain and overflow assembly (waste and overflow). Since there is no access panel, you'll need to create one. Go to the wall behind the tub's faucet and drain, and cut a 12x12 inch or larger hole in the drywall between two studs. Use a drywall saw for this. Once you can see the plumbing, use a tub drain wrench (also called a drain key) inserted into the drain crossbars from inside the tub to unscrew the drain shoe. Then, from the access hole, unscrew the slip nuts on the overflow pipe and the P-trap to completely disconnect the drain assembly from the tub.
Remove the Wall Surround
1 minWith the plumbing disconnected, you must now remove the wall material covering the tub's mounting flange. For tile walls, this means demolition. Use a hammer or small sledgehammer to break up the tiles. Start a few inches above the tub and work your way up. It's often easiest to remove at least 6-8 inches of tile and the backer board (drywall or cement board) behind it, all the way down to the wall studs. A pry bar will help remove larger chunks of tile and backer board. A reciprocating saw with a demolition blade can be used to make clean cuts through the drywall/backer board above the demolition area.
Detach Tub from Studs
30 minsOnce the wall is open and the tub's nailing flange is exposed, you need to detach the tub from the wall studs. Look closely along the top edge of the flange for the nails or screws that secure it to the studs. Use a pry bar or the claw of a hammer to pull out the nails. If screws were used, back them out with a drill or impact driver. If the fasteners are rusted or inaccessible, use a reciprocating saw with a metal-cutting blade to cut through them by sliding the blade between the flange and the stud.
Lift and Position the Tub for Removal
45 minsThis is the most physically intensive step. With the tub fully disconnected, use a pry bar and wooden blocks to begin lifting the tub. Wedge the pry bar under the front edge and use a block as a fulcrum to lift it slightly. Slide more blocks underneath to hold it up. Work your way around the tub, lifting and blocking until it's raised a few inches off the floor and free from the wall alcove. The goal is to 'walk' it out from the wall. At this point, you have two options: get help to carry the extremely heavy tub out, or break it up for easier removal.
Break Up and Remove the Cast Iron Tub
30 minsFor a cast iron tub, the safest removal method is often to break it into manageable pieces. After moving the tub to the center of the room (on top of your floor protection), cover it completely with a few old, heavy blankets. This is crucial for containing the shards of porcelain and iron. Wearing your full PPE, strike the tub firmly in the center with a sledgehammer. It will take several hard blows. The porcelain will shatter first, followed by the cast iron cracking. Break it into 3-4 pieces. These pieces can then be carried out of the house individually.
Common Problems
Stripped or lost set screws can prevent tub removal.
Solution: The set screw only needs to be loosened, not completely removed.
Using a pipe wrench can damage the spout's finish. Only use it on fixtures you are discarding.
Solution: To avoid this issue: Be mindful of this warning and take appropriate precautions.
The spout is slippery and could scratch surrounding surfaces during removal.
Solution: Use a towel to get a better grip on the spout and to avoid scratching the finish.
Be careful not to apply excessive force that could damage the pipe inside the wall.
Solution: To avoid this issue: Be mindful of this warning and take appropriate precautions.
Spout won't budge, and you can't find a set screw to loosen it.
Solution: If your spout has no set screw, it probably twists off.
The bathtub spout is stuck and won't budge.
Solution: If the spout is stuck, you may need to gently wiggle it back and forth to break it free from any old caulk or mineral buildup.
Cast iron is brittle but heavy. Wear safety glasses and gloves. The porcelain enamel will shatter into sharp pieces.
Solution: To avoid this issue: Be mindful of this warning and take appropriate precautions.
Frequently Asked Questions
How difficult is removing a heavy cast iron bathtub, and is it a DIY project for an intermediate skill level?
Removing a cast iron tub is definitely an intermediate-level DIY project due to its immense weight and the demolition involved. The most challenging part is safely breaking up the tub and maneuvering the heavy, sharp pieces without injury or damage. Proper planning and safety gear are paramount for success.
What are the absolute essential safety precautions and protective gear needed when breaking up and removing a cast iron tub?
Safety is critical. Always wear P100 household respirators (like the 3M P100), MCR Safety BearKat safety glasses, heavy-duty work gloves, and sturdy closed-toe boots. Ensure the work area is clear of trip hazards, and use proper lifting techniques for even small, heavy pieces of cast iron.
Besides a sledgehammer, what other specialized or unexpected tools will I definitely need for disconnecting plumbing and breaking up the tub?
For plumbing, you'll need a Husky Double Ended Tub Drain Wrench and Channellock 12 in. V-Jaw Tongue and Groove Pliers. For surrounding walls and potential support structures, a Milwaukee Folding Jab Saw with 8TPI SAWZALL blades or a reciprocating saw with DIABLO 12 in. 6/9 TPI Demo Demon blades will be invaluable. A Zircon StudSensor HD55 Stud Finder is also crucial for locating studs.
How much time should I allocate for removing a cast iron bathtub, and can I realistically complete it in a single weekend?
Plan for at least a full weekend, or possibly even two full days, especially if you're working alone or are new to demolition. The most time-consuming steps are often the meticulous preparation, the strenuous process of breaking up the tub, and carefully maneuvering the heavy pieces out of the bathroom. Don't rush these steps to ensure safety.
What are some common mistakes DIYers make when removing an old tub, especially a heavy cast iron one, and how can I avoid them?
A common mistake is neglecting proper floor protection (like TRIMACO FloorShell or MP Global Products Floor Protection Film) or not having a clear disposal plan for the heavy cast iron pieces beforehand. Another pitfall is inadequate personal protective equipment, leading to injuries. Always prioritize safety and thorough preparation to avoid these issues.
Is there an alternative to breaking up a cast iron tub if I'd prefer to remove it in one piece, and what's the catch?
Removing a cast iron tub in one piece is technically possible but incredibly challenging due to its weight (often 300-500+ pounds). It usually requires multiple strong individuals, specialized lifting equipment, and careful planning to avoid damaging floors, walls, or door frames during removal. For most DIYers, breaking it up is the more practical and safer approach.


