
How to Install a Two-Handle Shower Valve
About This Project
This guide provides comprehensive, step-by-step instructions for removing an old two-handle shower valve and installing a new one. The process involves accessing the plumbing within the wall, cutting and preparing pipes, soldering the new valve into place, testing for leaks, and installing the final trim. This task requires intermediate to advanced plumbing skills, particularly copper pipe soldering.
Best for advanced DIYers and professionals with basic plumbing knowledge and familiarity with power tools. Requires Safety Glasses and Safety gloves and Oatey 9 in. x 12 in. Hands-Free Solder Heat Shield 314002.
Tools & Materials
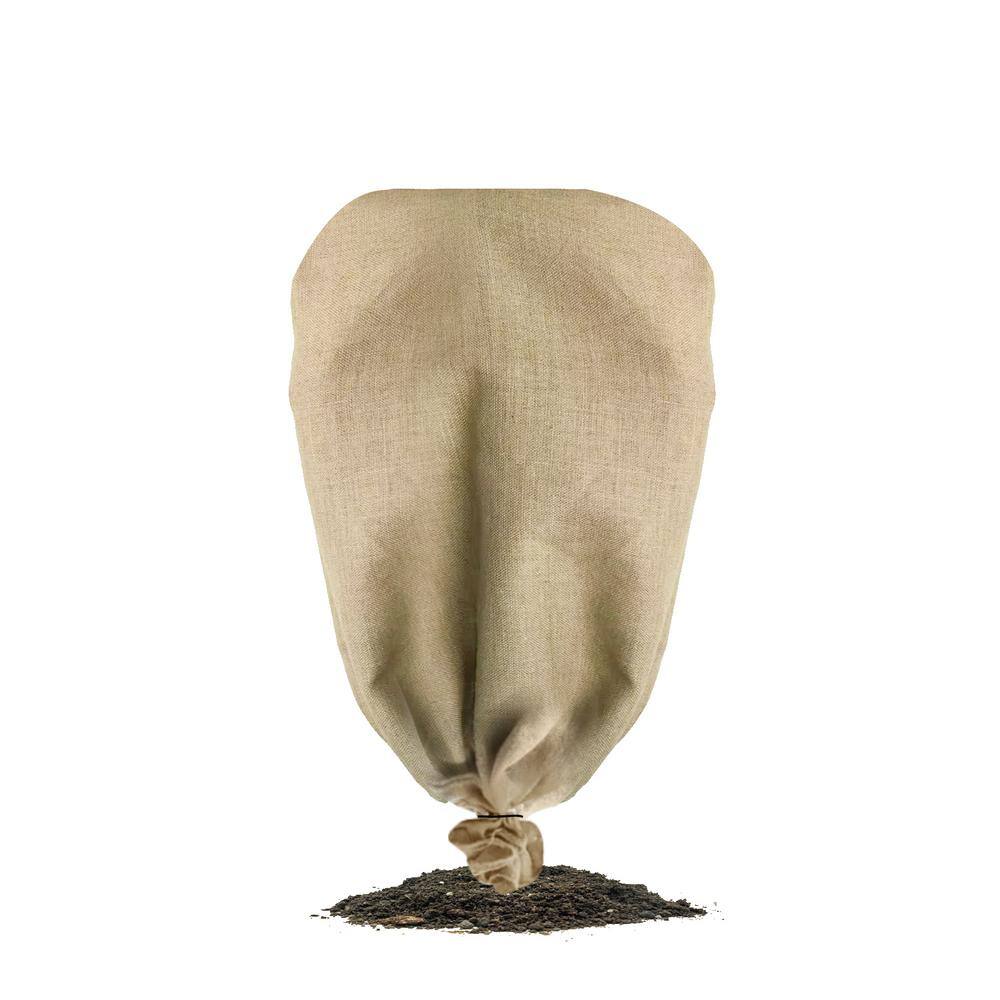
Agfabric 45 in. x 15 ft. 6.2 oz. Burlap Fabric Winter Plant Cover DIY Garden Cloth for Frost and Snow Protection PCBLN2104515
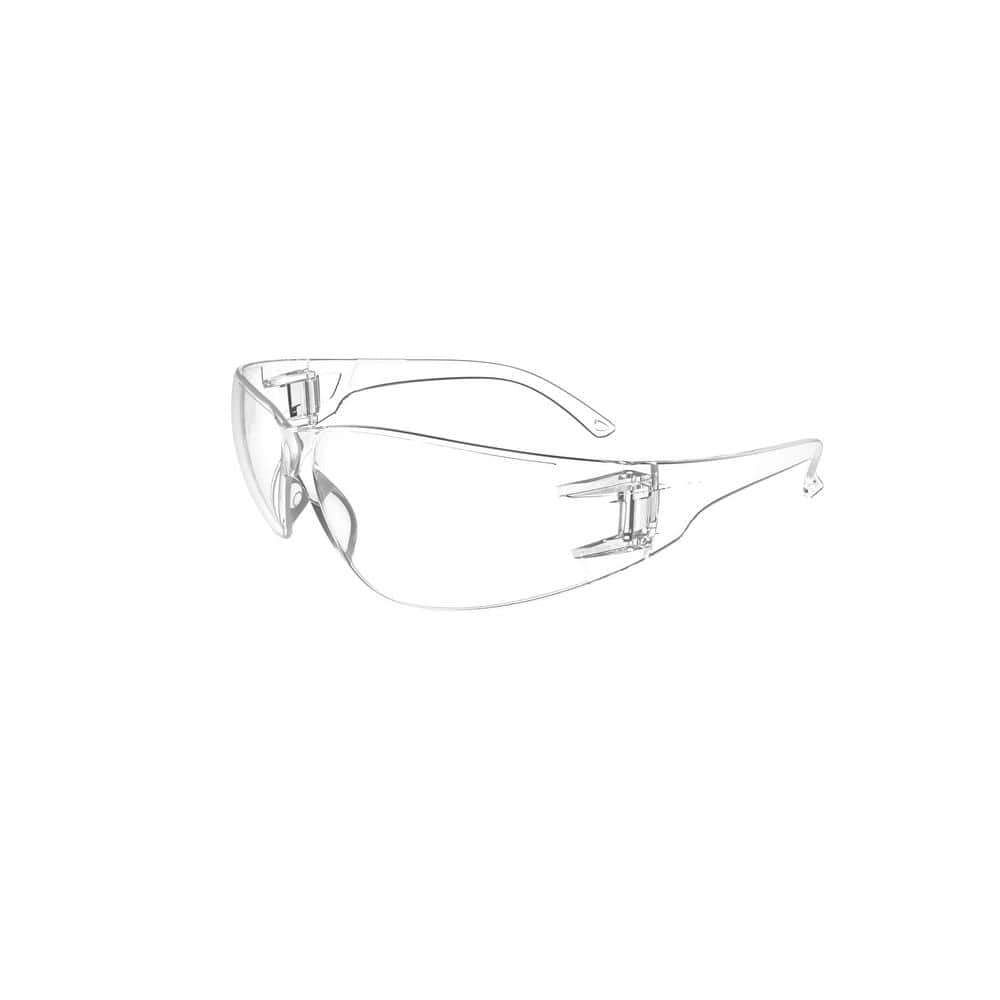
HDX Indoor Safety Glasses Clear (1-Pack) VS-9300, clear

FIRM GRIP Heavy Duty Large Glove 55297-06
Screwdriver

DEWALT 1-1/2 in. Stud Finder DW0150
ANGELES HOME 18 in. Garden Heavy-Duty Rotary Push Tine for Soil Aeration GT8CK-8029
Agfabric 45 in. x 15 ft. 6.2 oz. Burlap Fabric Winter Plant Cover DIY Garden Cloth for Frost and Snow Protection PCBLN2104515
Agfabric natural burlap is Ideal for Winter plant cover DIY. You can use burlap to insulate plants during Winter to protect them from frost or insects. The large rolls can be freely cut to the size you
HDX Indoor Safety Glasses Clear (1-Pack) VS-9300, clear
Indoor safety glasses with anti-scratch lenses absorb UV lights and protect the eyes from particles, airborne debris and most commonly encountered eye hazards. Strong wraparound, light weight PC lens offer great and comfortable eye protection for indoor projects. Meet the requirements of ANZI Z87.1.
FIRM GRIP Heavy Duty Large Glove 55297-06
Firm Grip Heavy Duty gloves are reinforced in all the right places to keep you protected in the shop or on the jobsite during high-impact tasks. Providing complete back-of-hand protection with hard knuckle
Screwdriver
A tool used to turn screws.
DEWALT 1-1/2 in. Stud Finder DW0150
This Center Sensor Stud Finder has a detection depth of 1-1/2 in. for wood and metal. Traditional stud sensors locate the edge of the stud, but our new product locates the center for a more efficient read, even when held at an angle. Plus, it is constantly calibrating to save time during use. An audible alert and directional LED arrows clearly notify you once the stud is located and you can easily mark the center of the stud with the center marking channel.
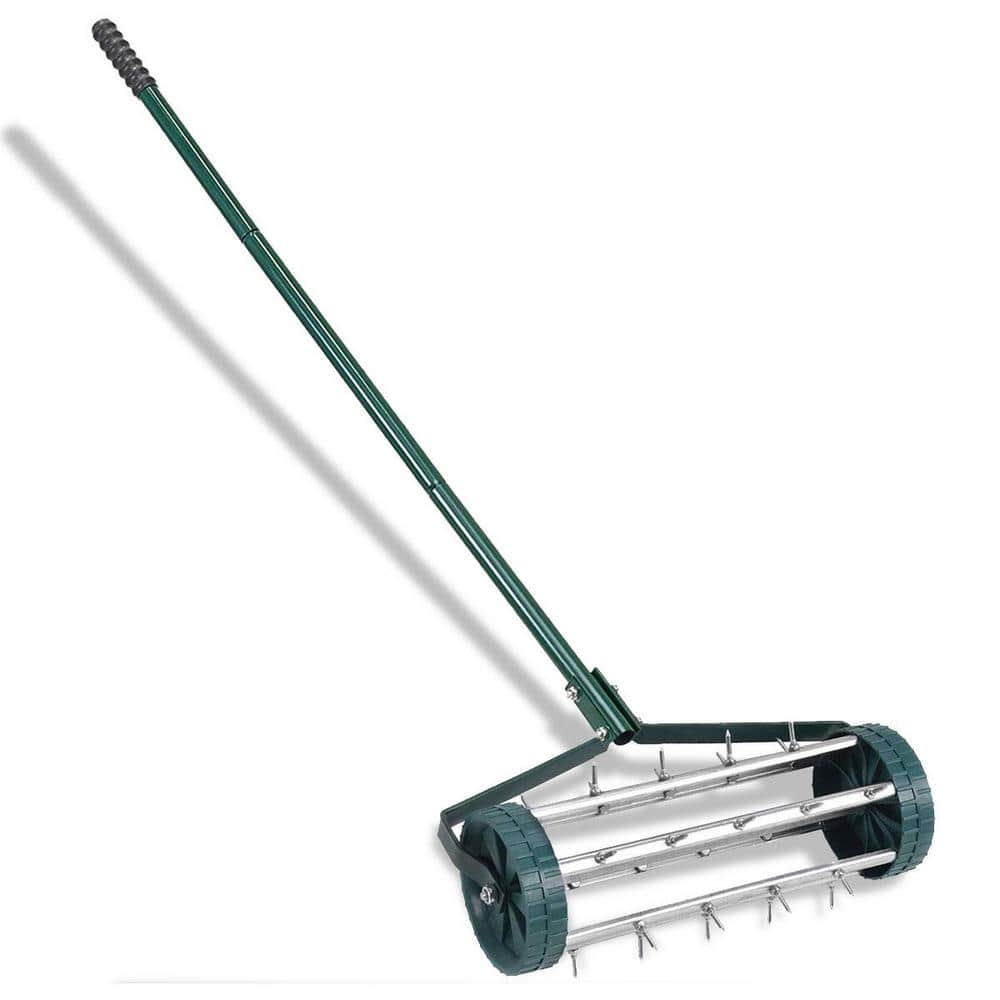
ANGELES HOME 18 in. Garden Heavy-Duty Rotary Push Tine for Soil Aeration GT8CK-8029
This rolling lawn perforator features 1.2 in. L tine spikes that roll deeper into the ground. As a result, the soil becomes loosened and water, oxygen and nutrients easily diffuse into the soil pores.
Steps

Preparation and Safety
30 minsBegin by ensuring a safe and prepared work area. Locate the main water shut-off valve for the house and turn it completely off. To drain the remaining water from the system, open the faucet at the lowest point in the house (like a basement sink) and the shower faucet you are replacing. Lay down a drop cloth in the tub or shower base to protect the surface from scratches and debris. Gather all necessary tools and materials, and put on your safety glasses and work gloves.

Gain Access to the Valve
45 minsTo access the valve, you must create an opening in the wall. First, remove the old handles and trim plate (escutcheon). Use a stud finder to locate the studs on either side of the valve. Mark a rectangular cutting area around the valve that is large enough to work in, typically about 12x12 inches. If working with tile, use an angle grinder with a diamond blade to carefully cut along your marked lines. Go slow to avoid cracking adjacent tiles. Once the tile and underlying backer board are cut, use a pry bar to gently remove the section and expose the old valve and surrounding pipes.

Remove Old Shower Valve
30 minsWith the old valve exposed, you can now remove it. Identify the hot supply, cold supply, shower riser (to the shower head), and tub spout pipes. Using a tubing cutter, make clean, straight cuts on all four copper pipes connected to the valve body. Ensure you leave enough pipe extending from the wall (at least a few inches) to connect the new valve. Once all pipes are cut, the old valve body should be free to be removed from the wall cavity.

Prepare Pipes for Installation
20 minsProper pipe preparation is essential for a leak-free solder joint. Take a deburring tool and insert it into the end of each cut pipe, rotating it to remove the sharp inner burr created by the cutter. Then, use sand cloth or an emery cloth to thoroughly clean and polish the outside of the pipe ends (about 1 inch back from the end) and the inside of the new copper fittings until the copper is bright and shiny. This removes any oxidation and surface contaminants that could prevent the solder from flowing properly.

Assemble and Solder New Valve
60 minsBefore soldering, remove the plastic cartridges from the new valve body to prevent them from melting. Dry-fit the valve with short pieces of copper pipe and fittings (like couplings) to ensure everything lines up. Once satisfied, disassemble it. Using a brush, apply a thin, even coat of flux to the cleaned exterior of the pipe ends and the cleaned interior of the fittings. Reassemble the joints. Place your heat shield behind the work area to protect the wood studs. Using a propane torch, heat the fitting, not the pipe. When the flux sizzles and the copper changes color slightly, touch the lead-free solder to the edge of the joint. The heat from the fitting will melt the solder and capillary action will draw it into the joint, creating a complete seal. You will see a silver ring appear around the seam. Repeat for all connections.

Secure Valve and Test for Leaks
30 minsBefore closing the wall, the valve must be secured. Install a 2x4 wood brace (stringer) horizontally between the wall studs, positioning it so you can anchor the valve body to it. Use a level and tape measure to ensure the valve is plumb and set at the correct depth from the finished wall surface (check manufacturer specs for this dimension). Secure the valve to the brace with screws. Once the solder has cooled completely, reinstall the valve cartridges. Go to the main water supply and turn it back on VERY SLOWLY. Return to the shower and meticulously inspect every solder joint for any sign of a leak or drip. Use a dry paper towel to wipe each joint, as this will reveal even the tiniest amount of moisture.

Install Trim and Handles
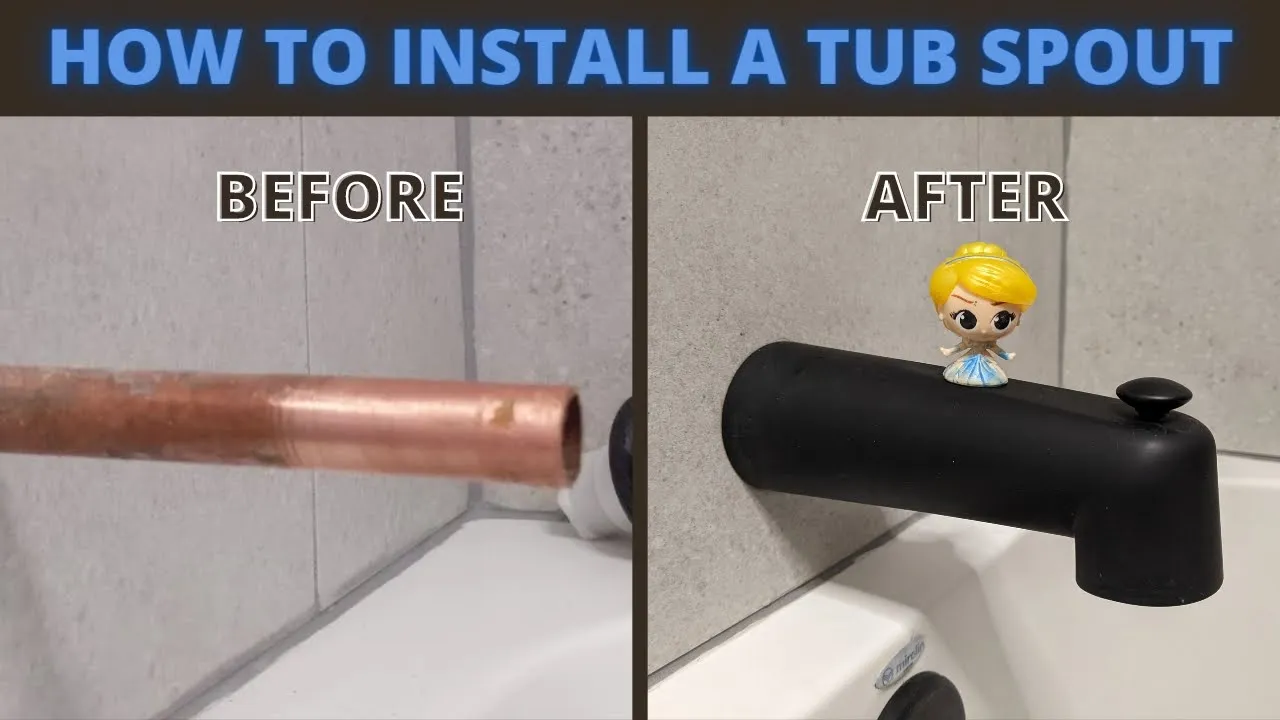
45 minsAfter confirming there are no leaks and the wall has been repaired (a separate process of installing backer board, tile, and grout), you can install the final trim. Slide the escutcheon plates over the valve stems and onto the wall. Apply a bead of silicone caulk around the top and sides of the escutcheons where they meet the tile to create a watertight seal, leaving the bottom unsealed to allow any moisture to escape. Attach the handles to the valve stems and tighten their set screws using an Allen key. Screw on the new tub spout and shower head, using Teflon tape on the threads of the pipe nipples to ensure a good seal.
Common Problems
Failure to turn off power and water can lead to electric shock and water damage.
Solution: To avoid this issue: Be mindful of this warning and take appropriate precautions.
Difficulty reaching mounting screws behind the sink.
Solution: A long Phillips screwdriver makes it easier to reach the mounting screws behind the sink.
Difficulty accessing shower valve plumbing due to limited clearance.
Solution: Using a low-profile pan can make it easier to fit under the plumbing.
If you cannot find or operate the shutoff valves under the sink, you will need to shut off the main water valve for the entire house.
Solution: To avoid this issue: Be mindful of this warning and take appropriate precautions.
Water spills can create slippery floors and damage surrounding materials.
Solution: Keep a towel handy to clean up any spills immediately.
Forgetting the original pipe configuration leads to incorrect reassembly.
Solution: Taking a photo of the plumbing setup before you start is a great way to remember how everything connects.
Removing and installing a shower valve without an access panel is extremely difficult.
Solution: Having an access panel simplifies the removal of the old valve and installation of the new one immensely.
Frequently Asked Questions
What are the most critical skills and tools required for this project, especially for a beginner?
The most critical skill is copper pipe soldering, as the new valve needs to be securely joined. Essential tools include a pipe cutter (like the AUTOCUT 1/2 in. Copper Pipe Tubing Cutter), a soldering torch kit, flux, solder, and safety glasses (HDX Indoor Safety Glasses). Practice soldering on scrap pipe if you're new to it.
How can I ensure I don't cause water damage or other issues during installation?
Always shut off the main water supply to your house before starting any plumbing work. After soldering, pressurize the system and carefully inspect all new connections for leaks before closing up the wall. Use Kleenex Paper Towels to dab around joints and confirm they are completely dry.
What's a realistic timeframe and difficulty level I should expect for this shower valve replacement?
This project is rated intermediate due to the necessary soldering and gaining access to the plumbing within the wall. For an experienced DIYer, it might take 4-6 hours, but beginners should budget a full day (8+ hours) to account for learning, careful work, and potential troubleshooting.
Are there alternatives to soldering the new shower valve if I'm not comfortable with a torch?
Yes, you can use push-to-connect (e.g., SharkBite) or PEX crimp fittings as alternatives to soldering. These methods require different tools like a PEX crimper or just the specific fittings themselves. While often quicker, they can be more expensive than traditional copper soldering and may result in a bulkier installation.
What are common mistakes to avoid, particularly regarding securing the valve and preventing leaks?
A common mistake is not properly securing the valve body, which can lead to movement and trim issues or even leaks. Ensure the valve is firmly mounted to a wood block or bracing within the wall using #10 3” Wood Screws before soldering. Also, always double-check each solder joint for full, even coverage to prevent pinhole leaks.
How do I safely access the plumbing inside the wall without damaging electrical wires or existing structures?
Use a stud finder (like the DEWALT 1-1/2 in. Stud Finder DW0150) to locate wall studs and identify a safe area for cutting out the drywall. Always assume electrical wires or other pipes might be present; make shallow, careful cuts with a utility knife or jab saw until you can visually inspect behind the wall.


