
How to Clear a Grease-Clogged Kitchen Drain
About This Project
A comprehensive guide to clearing a kitchen sink drain clogged with grease. This process starts with simple home remedies like boiling water and a baking soda/vinegar solution, then progresses to more involved mechanical methods such as using a plunger, manually cleaning the P-trap, and finally employing a drain snake for deeper blockages. The instructions are tailored for a completely blocked double kitchen sink with a garbage disposal.
Best for experienced DIYers and homeowners with some experience with basic plumbing knowledge and familiarity with power tools. Requires Tracker Safe 5-1/2 in. x 9-3/4 in. Elastic 3-Magazine Holder for Gun Safe PE3 and Rubber-Cal and Nexgrill Heat Resistant Grilling Gloves with Silicone Grip 530-0025N.
Tools & Materials

Bucket
Tracker Safe 5-1/2 in. x 9-3/4 in. Elastic 3-Magazine Holder for Gun Safe PE3

Rubber-Cal
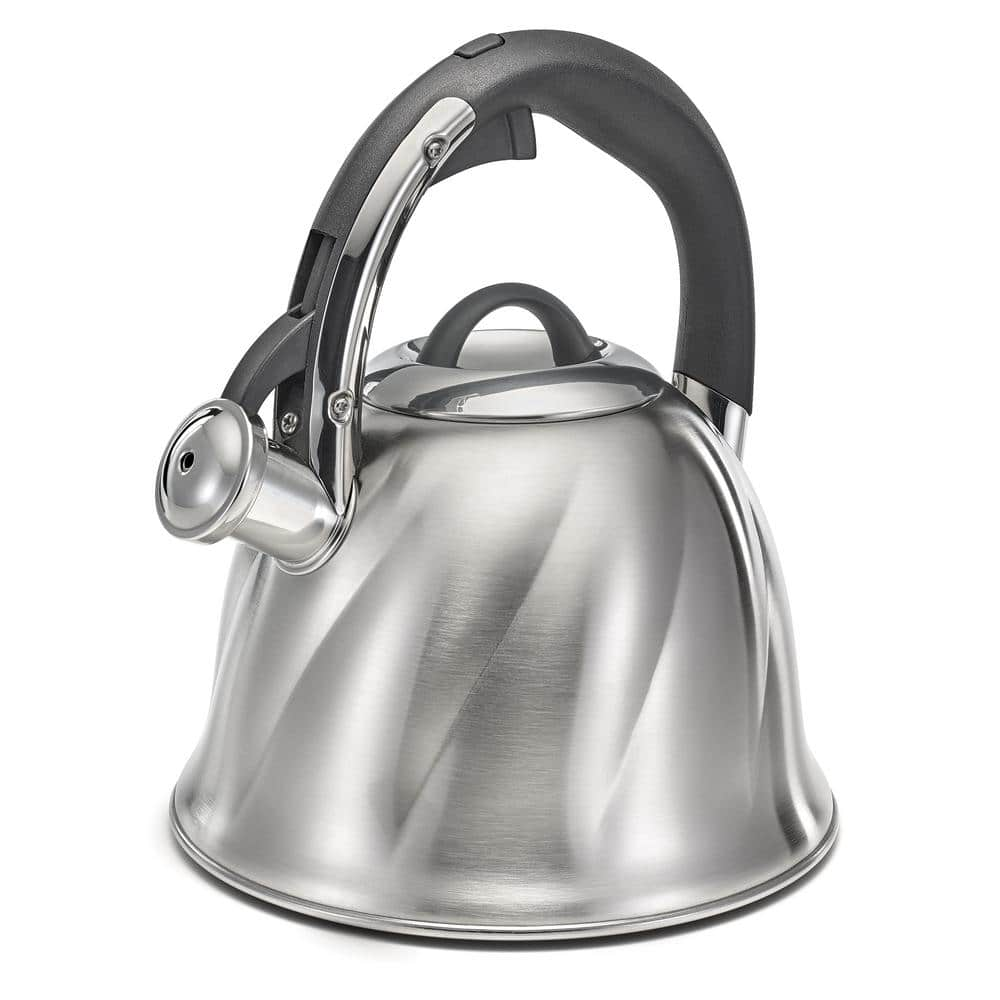
Polder 10-Cup Bell Stainless Steel Tea Kettle KTH-133-47RM
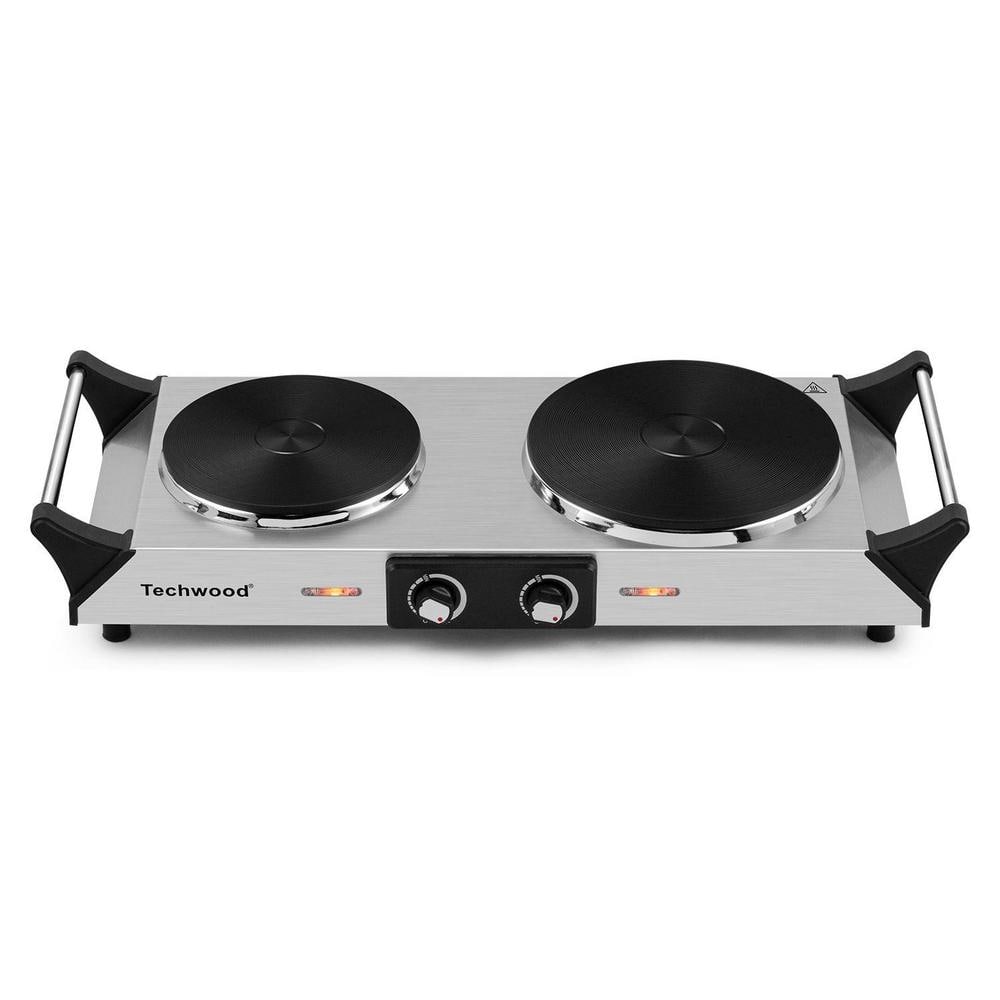
Elexnux Portable 2-Burner 7.4 in. Silver Electric Stove 1800-Watt Hot Plate with Anti-Scald Handles FYDQESXY3203S
Water
Bucket
Ideal for carrying or storing liquids.
Tracker Safe 5-1/2 in. x 9-3/4 in. Elastic 3-Magazine Holder for Gun Safe PE3
The Tracker Safe PE3 is a must have safe accessory. It can hold 3 pistol magazines OR 3 AR style magazines. It can be placed anywhere there is carpet, i.e., back of safe doors, inside walls of safes, cars, trucks, etc. Keep your pistol magazines ready and organized with the Tracker Safe PE3. The PE3 pocket is constructed of strong durable nylon fabric on the front and the back is fully covered in Velcro. In the center is a thick plastic core that gives the PE3 its rigidity. The individual pistol magazine holders are made with thick elastic that holds the magazine(s) firmly in place. The elastic stretches to fit most pistol magazines on the market. Please test your safe's carpet for compatibility with Velcro.
Rubber-Cal
Add a welcoming and beautiful aesthetic to your double doorway with this set of two double doormats. Included in this affordable set is the beautiful
Polder 10-Cup Bell Stainless Steel Tea Kettle KTH-133-47RM
The fast heating Bell Whistling Kettle combines function and style in an iconic brushed stainless-steel design. This kettle features a non-slip handle and integrated spout trigger. A great addition to
Elexnux Portable 2-Burner 7.4 in. Silver Electric Stove 1800-Watt Hot Plate with Anti-Scald Handles FYDQESXY3203S
Make your life easy and portable with our cooking plate. This handy and portable appliance offers exceptional convenience in a dorm room, apartment, while traveling, or as an extra cooking aide in your
Water
Essential for life and countless tasks.
Steps

Prepare the Work Area
5 minsBefore starting any work, prepare your workspace. Put on safety goggles to protect your eyes from splashes and rubber gloves to keep your hands clean and protected. Clear out everything from the cabinet under the kitchen sink to give yourself ample room to work. Place an empty bucket directly beneath the U-shaped pipe (the P-trap) to catch any water or debris that will spill during the process.

Attempt Boiling Water Flush
15 minsBring a large pot or kettle of water to a rolling boil. Carefully carry the boiling water to the sink and slowly pour it directly down the clogged drain. If you have a double sink, pour it down the side with the garbage disposal. Pour the water in two or three stages, waiting a minute between each pour. The intense heat can sometimes be enough to melt the solidified grease, allowing it to be flushed down the pipe.

Apply Baking Soda and Vinegar Solution
30 minsIf boiling water doesn't work, try a natural chemical reaction. First, remove as much standing water from the sink as possible. Pour about one cup of baking soda directly into the drain opening. Follow this with one cup of white vinegar. The mixture will immediately begin to fizz and bubble. Place a drain stopper or a wet rag over the drain opening to contain the reaction and direct its force downwards into the clog. Let it sit for 15-30 minutes. Finally, flush the drain with another large pot of boiling water.

Plunge the Drain
10 minsIf the drain is still clogged, use a cup plunger. For a double sink, you must seal the other drain opening completely. Use a wet rag or a drain stopper to plug the non-clogged side. If you have a garbage disposal, plunge that side. Run a few inches of water into the sink to allow the plunger to form a seal. Place the cup plunger over the drain and press down firmly to create a tight seal. Vigorously pump the plunger up and down for about 30 seconds. Pull the plunger off quickly to break the seal. The alternating pressure and suction can dislodge the clog.

Disassemble and Clean the P-Trap
30 minsIf plunging fails, the clog is likely in the P-trap. With your bucket positioned underneath, use a pair of channel-lock pliers to loosen the two large slip nuts holding the curved P-trap in place. You may be able to loosen them by hand. Once loose, unscrew them the rest of the way and gently pull the trap downwards. Be ready for water and sludge to spill into the bucket. Take the P-trap to another sink or outside, empty its contents, and use a bottle brush or a bent wire coat hanger to scrub out all the grease and debris. Rinse it thoroughly, then reinstall it, making sure any washers are properly seated. Hand-tighten the nuts first, then give them a final quarter-turn with the pliers.

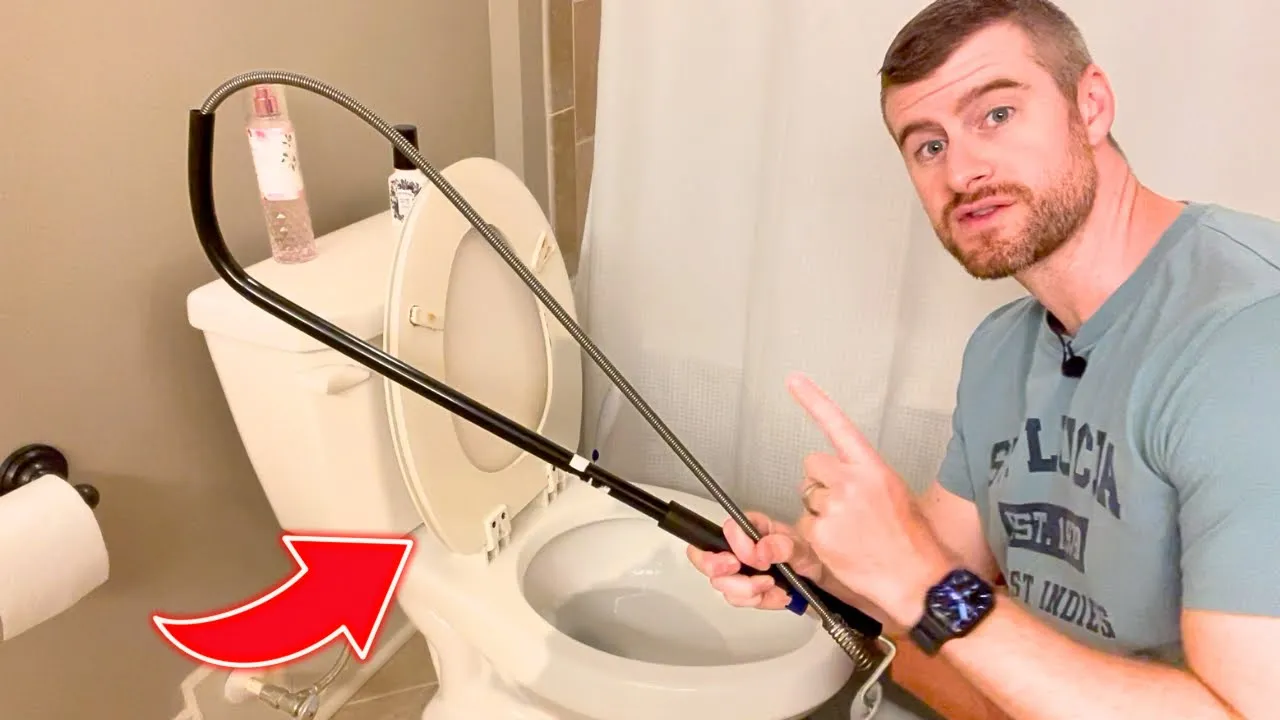
Snake the Drain Line
25 minsIf the P-trap was clear, the blockage is further down the line. With the P-trap removed, insert the end of a drain snake (or auger) into the drainpipe that goes into the wall (the trap arm). Push the snake into the pipe until you feel resistance. Lock the cable in place and slowly turn the crank clockwise. This rotational motion will either break up the clog or allow the corkscrew tip to grab onto it. Continue to push forward and rotate. If you grab the clog, pull the snake back out slowly, cleaning the cable with a rag as you go. Repeat until the pipe is clear.

Reassemble and Test for Leaks
10 minsOnce you believe the clog is cleared, reattach the P-trap if you removed it. Ensure the slip nuts are snug but not over-tightened. Remove all tools and the bucket from the sink basin and cabinet. Turn on the hot water tap and let it run at full pressure for several minutes. This will flush out any remaining grease or debris from the line. While the water is running, carefully inspect all the pipe connections you worked on, especially the P-trap slip nuts, to check for any drips or leaks. Dry the connections with a rag and check again to be sure.
Common Problems
Water splashes out of the sink when clearing a grease clog.
Solution: If the water level is close to the lip, scoop out some liquid before you begin to avoid splashing.
Pushing grease can lodge it deeper in the pipes.
Solution: The goal is to use suction to pull the blockage back into the bowl, not push it through the trap.
Plunger won't create suction if the sink isn't deep enough.
Solution: Make sure there's enough water in the sink to cover the cup of the plunger.
Plunger won't work effectively if the sink is full of water.
Solution: If the sink is completely clogged, remove some water before plunging.
A poor seal prevents effective plunging, leaving the drain clogged.
Solution: Add petroleum jelly to the rim of the plunger to create a better seal.
A weak or ineffective plunger won't dislodge stubborn grease clogs.
Solution: It's all about the plunger. A good quality plunger will provide much better results.
Plunging is ineffective because air escapes through the overflow.
Solution: Blocking the overflow is a critical step for effective plunging in a bathtub.
Frequently Asked Questions
What if the boiling water and baking soda solution doesn't completely clear the grease clog in my double kitchen sink?
If initial home remedies fail, it's time to move to mechanical methods. For a double sink, start by plunging the drain that is experiencing the clog, ensuring the other side is sealed off with a stopper. If that doesn't work, proceed to disassembling and cleaning the P-trap, as grease often accumulates there before deeper blockages.
Is it safe to use chemical drain cleaners for a grease clog, especially with a garbage disposal present?
It's strongly advised against using chemical drain cleaners, especially with a garbage disposal. They can corrode pipes, damage the disposal's components, and create hazardous fumes or splash-back. This guide focuses on safer, more effective mechanical methods for clearing grease clogs.
What specific safety precautions should I take when working under my kitchen sink to clear a drain?
Always wear protective eyewear and waterproof gloves to shield against dirty water or potential splashes. Ensure the work area is well-lit and place a bucket directly under the P-trap before loosening any pipes to catch residual water and debris. Critically, disconnect power to the garbage disposal at the breaker before working on it or any connected pipes.
How difficult is this project for a beginner, and how much time should I expect it to take?
This project is rated as 'beginner' difficulty. While it involves several steps and some specific tools, each action is straightforward. Expect to spend 1-3 hours, depending on the severity and location of the clog and your comfort level with basic plumbing tasks, assuming you have most tools on hand.
What tools are absolutely essential if I don't have everything listed, and are there any I definitely shouldn't improvise?
A bucket, plunger, and tongue and groove pliers are essential for basic P-trap removal and plunging. While you can improvise a drain snake with a coat hanger for very shallow clogs, a proper drain auger is highly recommended for deeper blockages to prevent pipe damage and ensure effectiveness. Don't improvise on safety gear like protective eyewear.
My double sink has a garbage disposal on one side. How does that affect clearing the clog and which drain do I work on first?
If the clog affects the disposal side, try running the disposal briefly first to see if it clears any food debris. When plunging, always seal the non-clogged sink basin with a stopper to create proper suction in the affected drain. If the clog is deeper, you'll likely need to access the P-trap connected to the disposal, after ensuring its power is disconnected.
After clearing the clog and reassembling everything, what's the best way to prevent future grease blockages?
To prevent future grease clogs, always wipe excess grease and food scraps from pans into the trash before washing. Never pour cooking oils, fats, or coffee grounds down the drain. Periodically flush your drain with a kettle of boiling water or a baking soda/vinegar solution as a proactive maintenance measure.


