
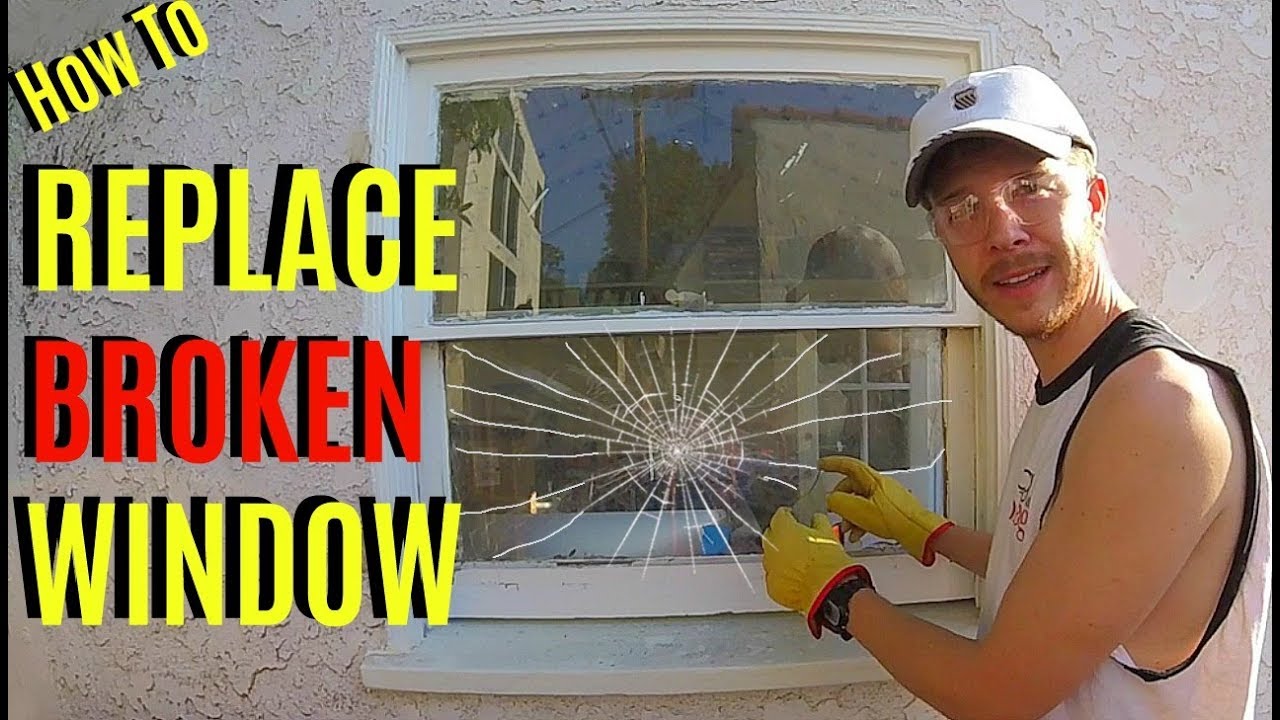
Window Repair
About This Project
This project outline covers common DIY window repair tasks, focusing on addressing issues like drafts, broken glass, and damaged sashes. It provides a high-level overview of assessment, repair methods, and finishing touches.
Tools & Materials

Defiant 2000 Lumens LED Slide-to-Focusing Aluminum Flashlight 90706

Warner ProGrip 1-1/4 in. Flex Putty Knife 29990
Measuring Tape

Safety gloves

Safety Glasses
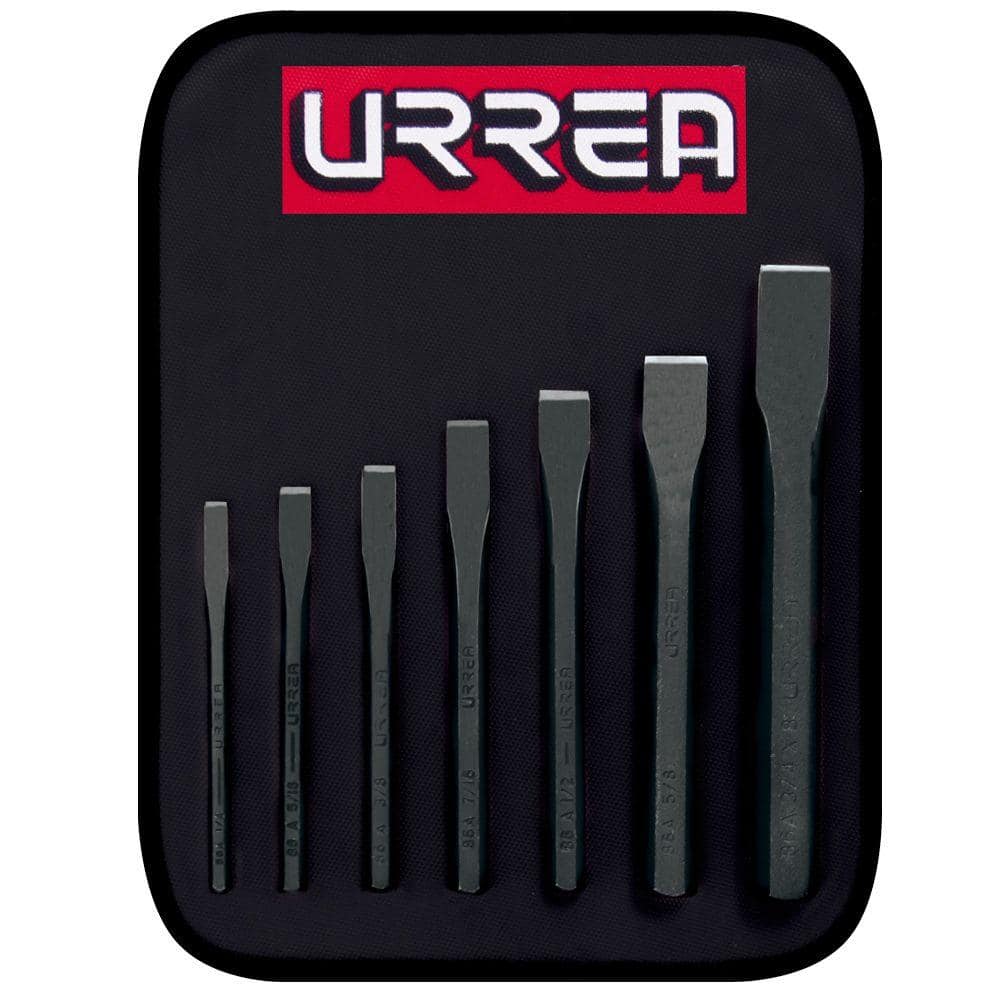
URREA 1/4 in. to 3/4 in. Chisel Set (7-Piece) 86B
Defiant 2000 Lumens LED Slide-to-Focusing Aluminum Flashlight 90706
This Defiant 2000-Lumens LED Slide-to-Focusing Aluminum Flashlight features high- powered LED chips to emit up to 2000-Lumens of light, illuminating your work area and beyond. Its tough aluminum material
Warner ProGrip 1-1/4 in. Flex Putty Knife 29990
Flex blade that works great with heavier spackles and compounds. Standard carbon steel hollow-ground blade to provide consistent flex and proper stiffness. Professional quality tool. Tapered handle design
Measuring Tape
For accurate measurements of plywood and components, ensuring proper assembly.
Safety gloves
Shields hands from potential harm.
Safety Glasses
Keeps eyes safe from potential hazards.
URREA 1/4 in. to 3/4 in. Chisel Set (7-Piece) 86B
Chisels are tools specially designed for removing, cutting, or breaking materials softer than the chisel tip, such as concrete, stone, welding slag, brass, untreated steel, nuts bolts, studs, etc. They
Steps

Assess Window Damage
30 minutesBegin by thoroughly examining the entire window unit. Look for any visible cracks, chips, or missing pieces in the glass panes. Check the window sash for rot, warping, or loose joints. Inspect the weatherstripping for signs of wear, such as cracking, tearing, or compression, which can indicate air leaks. Also, assess the condition of the frame and any hardware like locks or hinges. Document all findings to plan the repair strategy.
Watch: Inspect Window Frame for Structural Damage and Water Intrusion
Prepare for Glass Replacement
60 minutesIf replacing glass, begin by carefully removing any remaining broken glass. Use a putty knife to gently pry out larger pieces. For smaller shards and old glazing compound, use a chisel or stiff brush. Once all loose glass is removed, scrape away all old putty, sealant, and paint from the sash rebate (the groove where the glass sits). A stiff wire brush or sandpaper can be used to ensure the rebate is clean, smooth, and free of debris. Wipe down the rebate with a tack cloth or damp rag to remove fine dust.
Watch: Remove Old Glazing Putty
Install New Glass Pane
75 minutesMeasure the opening precisely after cleaning the rebate. Order or cut a new glass pane to fit. Carefully place the new glass pane into the cleaned rebate. Ensure it is centered and has even spacing all around. Insert glazing points every 6-8 inches around the perimeter to hold the glass securely in place. Next, apply glazing compound (putty) around the edge of the glass, pressing it firmly into the gap between the glass and the sash. Smooth the compound with a putty knife to create a neat, beveled edge, ensuring it extends slightly over the glass and onto the sash for a good seal.
Watch: Install the New Glass Pane
Repair Damaged Sash Components
90 minutesFor minor rot or cracks in the sash, carefully excavate the damaged wood using a chisel or utility knife until you reach sound wood. Clean the area thoroughly. If dealing with rot, use a wood hardener to stabilize the remaining wood. Then, fill the void with a durable exterior-grade wood filler or epoxy filler, packing it in firmly. For loose joints, you may need to carefully disassemble them, clean them, apply exterior wood glue, and re-clamp them until dry. If you had to add significant filler, allow it to cure fully according to the product's instructions. Once cured, sand the repaired areas smooth and flush with the surrounding wood.
Watch: Frame and Sill Repair
Replace Weatherstripping
45 minutesCarefully peel or cut away the old weatherstripping from the window sash and frame. Use a putty knife or scraper to remove any adhesive residue. Clean the channels or surfaces where the new weatherstripping will be applied. Select the appropriate type of weatherstripping (e.g., vinyl, foam, or felt) that matches the original or provides a suitable seal. Measure and cut the new weatherstripping to length. Starting at a corner, press the new weatherstripping firmly into place, ensuring it creates a snug fit without being overly compressed, which can hinder window operation. For adhesive-backed types, peel the backing as you go. For compression seals, ensure even pressure is applied.
Watch: Install New Weatherstripping
Paint and Finish Repairs
60 minutesAfter all repairs to the sash and frame are completed, and any wood filler or glue has fully cured, it's time for finishing. Lightly sand any rough spots or edges of the repaired areas to ensure a smooth surface. Wipe away all dust with a tack cloth or damp rag. Apply a coat of high-quality exterior primer to the repaired sections, feathering the edges into the surrounding paint. Allow the primer to dry completely according to the manufacturer's recommendations. Then, apply one or two coats of exterior-grade paint, matching the original color and finish of the window. Ensure even coverage and smooth brush strokes for a professional look.
Watch: Prime and Paint SashCommon Problems
Accidentally cutting yourself on broken glass or the sharp edges of new glass during handling or installation.
Solution: Immediately stop work. Apply pressure to the wound with a clean cloth. Clean the cut with soap and water if it's minor. For deeper cuts or those that won't stop bleeding, seek medical attention immediately. Properly dispose of all broken glass.
Prevention: Always wear heavy-duty work gloves (like GORILLA GRIP Small Glove or similar) and safety glasses when handling broken or new glass. Use a drop cloth (Drop Cloth) to collect shards. Work slowly and deliberately, never rushing the process. Use the putty knife or chisel to carefully pry out stubborn pieces, keeping hands clear of sharp edges.
Damaging the window sash (wood frame) with the putty knife or chisel while removing old glazing compound or paint.
Solution: For minor dents or chips, clean the area and use J-B Weld KwikWood Filler Epoxy to fill the damaged spot. Allow it to cure completely, then sand smooth with sandpaper (Various Grit) before priming and painting. For larger gouges, you might need to use a chisel to clean out the damaged wood and then carefully glue in a small, custom-cut piece of wood using Titebond Ultimate Wood Glue, allowing it to dry fully before sanding.
Prevention: Use the Warner ProGrip Flex Putty Knife and URREA Chisel (1/4 in. to 3/4 in. Chisel Set) with light, controlled pressure. Angle the tools carefully away from the wood sash. Score old paint and caulk lines with a Box Cutter before prying to help release old materials without damaging the wood underneath. Avoid using excessive force.
The new glass pane doesn't fit properly (too large, too small, or not sitting level), leading to gaps, drafts, or difficulty closing the window.
Solution: If the glass is too large, you'll need to carefully remove it (if already installed) and either get a new pane cut to the correct size or try to gently sand down the edges if it's only a very slight oversized fit (exercise extreme caution, wear gloves and glasses). If the glass is too small, you'll need to get a new pane. If it's not sitting level, remove the glazing compound and glazing points, adjust the position, and re-secure, ensuring it's square within the opening before reapplying compound.
Prevention: Measure the window opening multiple times (at different points) using a Measuring Tape before ordering glass. 'Measure twice, cut once' applies here. Always dry-fit the new glass pane into the sash without any glazing compound or glazing points first to confirm the fit before proceeding with installation. Ensure the sash rebate is clean and free of debris.
New glazing compound (putty) cracks, shrinks, or doesn't adhere properly to the glass or sash after it dries, creating gaps and allowing drafts.
Solution: Carefully scrape out the cracked or failed glazing compound using a putty knife. Clean the area thoroughly with the HDX Carbon Wire Brush and ensure it's dry and free of debris. Reapply fresh glazing compound, ensuring a consistent bead and proper adhesion to both the glass and the wood sash. Smooth it carefully with the putty knife.
Prevention: Ensure both the glass and the wood sash are clean, dry, and free of dust, old paint, or grease before applying glazing compound. If the wood is very porous, a thin coat of primer (BEHR Multi-Surface Primer and Sealer) might help adhesion. Apply the glazing compound at an appropriate temperature (check product instructions), avoiding extreme cold or heat, which can affect curing.
Paint applied over repaired sash components (wood filler or new wood) peels, bubbles, or shows uneven texture.
Solution: Scrape off all peeling or bubbling paint using a putty knife. Sand the entire repaired area and surrounding wood with sandpaper (Various Grit) until smooth and dull. Clean off all sanding dust thoroughly. Apply one or two coats of high-quality primer (BEHR Interior/Exterior Multi-Surface Primer and Sealer) before applying your final paint (Glidden Premium High Gloss or BEHR MARQUEE Satin Enamel).
Prevention: Always ensure wood filler (J-B Weld KwikWood) and wood glue (Titebond Ultimate Wood Glue) are completely cured and dry according to manufacturer instructions before sanding. Thoroughly sand all repaired surfaces smooth. Always apply a primer coat (BEHR Interior/Exterior Multi-Surface Primer and Sealer) before painting, especially over repairs or new wood, to ensure good adhesion and a uniform finish. Do not paint in high humidity or direct sunlight if possible.
After replacing weatherstripping, drafts are still present, or the window is now difficult to close or latch.
Solution: If drafts persist, carefully inspect the newly installed M-D Building Products Vinyl Gasket Weatherseal for any gaps or areas where it's not making good contact. You might need to add small sections of weatherstripping to specific drafty spots or adjust the existing strips. If the window is hard to close, the weatherstripping might be too thick; try replacing it with a thinner profile, or remove it and re-evaluate if the sash itself is warped or out of square. If the sash is warped, more extensive wood repair might be needed.
Prevention: Before purchasing, carefully measure the gap between the sash and the window frame when the window is closed to select the correct thickness and type of M-D Building Products Vinyl Gasket Weatherseal. Clean the surface where the weatherstripping will be applied to ensure good adhesion. Install it evenly and test the window's operation (opening and closing) as you go, making small adjustments to ensure a snug but not overly tight fit.
Frequently Asked Questions
What are the most important safety precautions to take when replacing broken window glass?
Always wear thick work gloves and safety glasses to protect against sharp glass shards. Use a drop cloth to collect debris and avoid touching broken edges with bare hands. Dispose of old glass properly by wrapping it securely in cardboard and labeling it before placing it in the trash.
Do I really need all the listed tools, like a chisel set, for a basic window repair?
While a putty knife, measuring tape, and screwdriver are essential, a full chisel set might only be necessary for significant wood rot or complex sash damage. For simpler repairs like minor wood filler application, a sturdy putty knife might suffice. Assess the extent of your sash damage to determine if specialized tools like chisels are truly needed.
What are common mistakes beginners make when repairing damaged window sashes?
A common mistake is not fully removing all rot or loose wood before applying wood filler like J-B Weld KwikWood; ensure the area is clean and dry for proper adhesion. Another error is rushing the drying time for wood glue or filler, which can compromise the repair's strength. Always follow product instructions for curing times.
The project estimates 8 hours; is that realistic for someone new to window repair?
The 8-hour estimate is a general guideline and can vary significantly for beginners, especially if you encounter unexpected issues or are repairing multiple windows. Take your time, particularly during glass installation and sash repair, to ensure quality results. It's better to spend more time doing it correctly than having to redo the work later.
How do I know what type of replacement glass to buy for my window?
Measure the exact dimensions of the opening where the glass will sit, subtracting about 1/8 inch for expansion. For residential windows, single-strength glass is common for smaller panes, while double-strength is recommended for larger ones. Consult local building codes or a glass supplier for advice on tempered or insulated glass if needed.
How crucial is replacing weatherstripping, and can I skip it to save time?
Replacing old or damaged weatherstripping is highly crucial for improving energy efficiency and preventing drafts, dust, and moisture infiltration. Skipping this step can negate much of the benefit from other repairs, leading to higher energy bills and discomfort. It's a relatively easy and cost-effective task that significantly impacts overall window performance.