
:max_bytes(150000):strip_icc()/SPR-types-of-wrenches-6831283-hero-H-B_13651-12b52242ef914372808d60f7fa83ab86.jpg)
How to Use a Basin Wrench: A Plumber's Guide to Tight Spaces
About This Project
This project outlines how to use a basin wrench, a specialized plumbing tool designed for tackling tight spaces. The process begins by positioning the wrench: locate the target fitting (faucet supply line, sink drain nut, etc.) and securely grip it with the spring-loaded jaws. Next, determine whether to tighten or loosen the fitting. To tighten, smoothly slide the wrench handle in the desired direction; to loosen, reverse the handle's movement. Apply consistent, moderate pressure, avoiding excessive force. This method allows for effective plumbing repairs in confined areas.
Best for homeowners and DIY enthusiasts with basic plumbing knowledge.
Tools & Materials
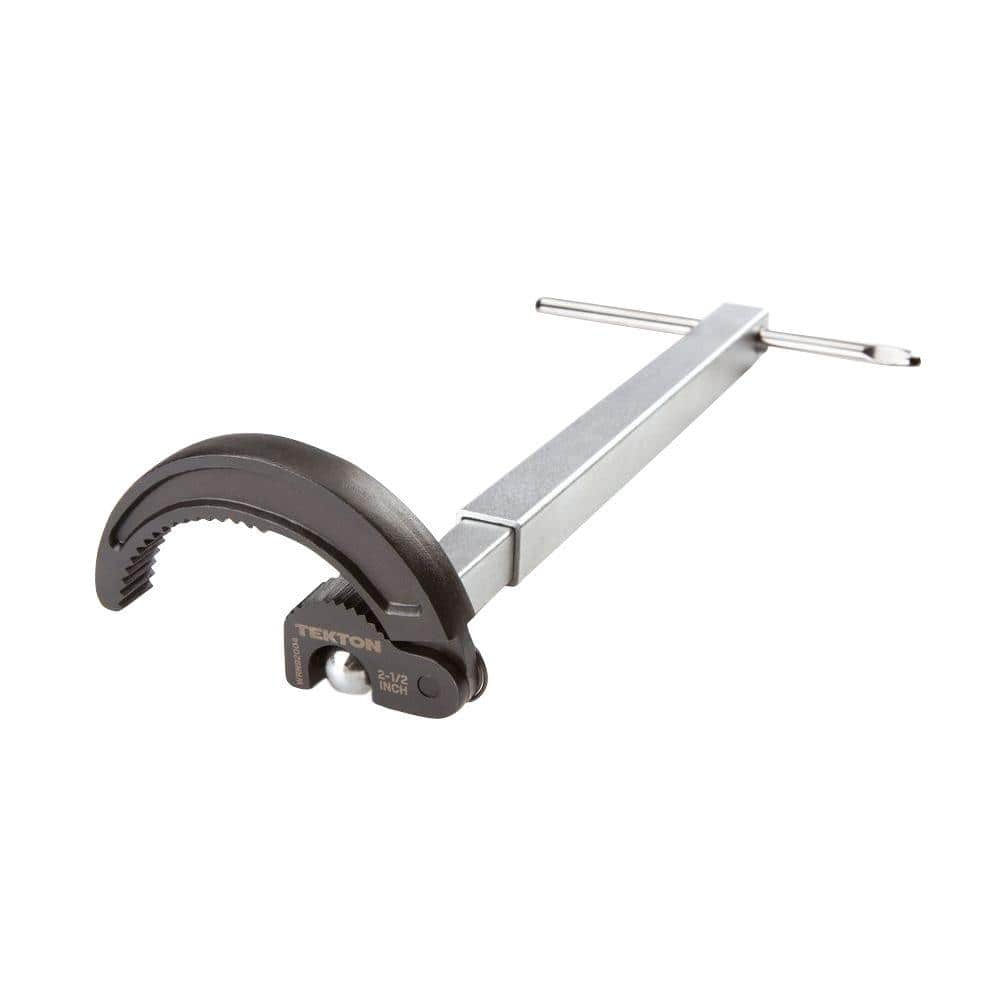
TEKTON 10 in. to 17 in. Telescoping 7/8 - 2-1/2 in. Basin Wrench WRN92004
TEKTON 10 in. to 17 in. Telescoping 7/8 - 2-1/2 in. Basin Wrench WRN92004
Uniquely designed for easy, one-handed operation in confined areas, the TEKTON Telescoping Basin Wrench takes the frustration out of under-sink work. Ideal for larger nuts and retaining collars on faucets,
Steps
Positioning the Basin Wrench
2 minsFirst, precisely locate the fitting you'll be working with—whether it's a faucet supply line, sink drain nut, or other fixture. Carefully position the spring-loaded jaws of the basin wrench onto the fitting, ensuring a secure grip on the nut. A firm grip is crucial for successful tightening or loosening.
Turning and Adjusting the Basin Wrench
5 minsNext, carefully assess whether you need to tighten or loosen the fitting. To tighten, smoothly slide the basin wrench's handle in the desired direction. The head will pivot, applying the necessary torque to tighten the fitting. To loosen, simply reverse the handle's movement. Remember to apply consistent, moderate pressure, avoiding sudden or excessive force.
Common Problems
Do not over-tighten the nut, as this can crack the sink or damage the drain components. Tighten until snug and the flange is flush with the sink.
Solution: To avoid this issue: Be mindful of this warning and take appropriate precautions.
Be careful not to over-tighten or apply uneven pressure to plastic nuts, as they can break.
Solution: To avoid this issue: Be mindful of this warning and take appropriate precautions.
Hold the faucet body with one hand while tightening with the other to avoid putting stress on the plumbing pipes.
Solution: To avoid this issue: Be mindful of this warning and take appropriate precautions.
Do not overtighten the valve assembly, as it can damage the new washer or the faucet itself.
Solution: To avoid this issue: Be mindful of this warning and take appropriate precautions.
Be careful that the Allen wrenches don't slip out of the slots, which could cause you to hit your hand or damage the faucet finish.
Solution: To avoid this issue: Be mindful of this warning and take appropriate precautions.
Leaky connections form if new faucet threads aren't properly sealed.
Solution: For a better seal, wrap plumber's tape around the threads of the new faucet before installing it.
Again, be careful not to over-tighten the set screw.
Solution: To avoid this issue: Be mindful of this warning and take appropriate precautions.
Frequently Asked Questions
Why do I need a specialized basin wrench for these plumbing tasks, and can't I just use a regular adjustable wrench?
A basin wrench is uniquely designed with a long shaft and pivoting, spring-loaded jaws to reach and grip nuts in very tight, awkward spaces, like behind a sink basin or under a faucet. Regular wrenches often cannot fit or get the leverage needed in such confined areas, making the basin wrench essential for preventing frustration and damage.
What are the most common mistakes beginners make when using a basin wrench, and how can I avoid them?
The most common mistakes are not properly seating the jaws on the nut, leading to slipping and potentially stripping the nut, and applying excessive force. To avoid this, ensure the jaws fully engage the nut before turning, and use moderate, consistent pressure. Start by hand if possible to ensure the threads are aligned.
How do I know if I'm tightening or loosening a fitting when working in a cramped space with a basin wrench?
Generally, 'righty-tighty, lefty-loosey' still applies. However, since you might be working from an odd angle, visualize the nut's rotation. If looking at the top of the nut, clockwise tightens, counter-clockwise loosens. Always double-check before applying significant force.
Is using a basin wrench truly a beginner-friendly project, and what's a realistic time estimate for a first-timer?
Yes, using a basin wrench is considered beginner-friendly because its operation is straightforward once you understand the basic grip and turning motion. While the project description estimates 30 minutes, a first-timer might take 45-60 minutes to account for initial learning, positioning, and potential troubleshooting.
What should I do if the basin wrench keeps slipping, or I can't get a secure grip on the nut?
First, ensure the spring-loaded jaws are fully open and then properly aligned and closed around the entire nut. If it's still slipping, the nut might be corroded; try cleaning it with a wire brush or applying penetrating oil. Sometimes, adjusting the wrench's length or angle can also improve the grip.
What safety precautions should I take before and during the use of a basin wrench, especially when working under a sink?
Always turn off the water supply to the fixture before starting to prevent leaks or floods. Wear safety glasses to protect against falling debris or splashes. Be mindful of your posture to avoid back strain, and ensure adequate lighting in the confined workspace to clearly see what you're doing.