
How to Replace a Water Heater's T&P Relief Valve
About This Project
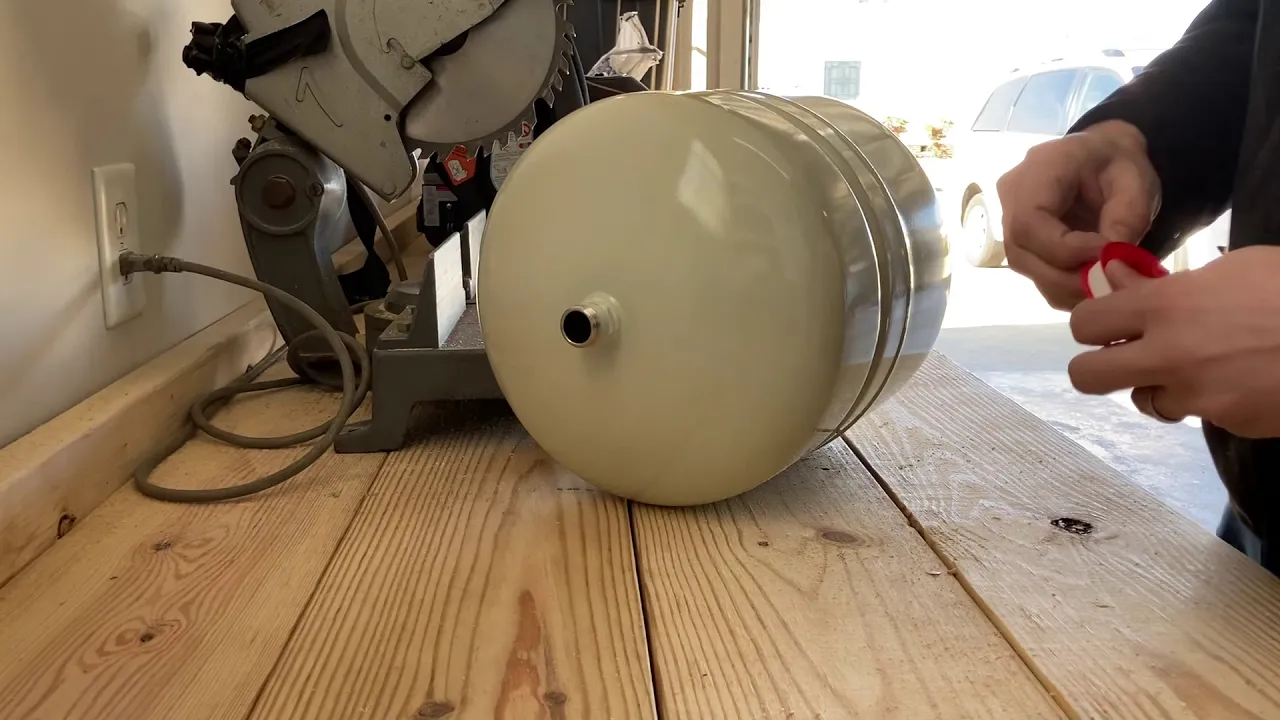
This guide provides comprehensive, step-by-step instructions for safely replacing a leaking or faulty Temperature and Pressure (T&P) relief valve on a residential water heater. The process involves shutting off the power and water supply, partially draining the tank, removing the old valve and its discharge pipe, installing a new, correctly-rated valve with fresh thread sealant, and then carefully restoring the system to full operation. This procedure assumes you are working on an electric water heater with the T&P valve located on the side of the tank, and you are replacing a valve that is currently leaking.
Best for experienced DIYers and homeowners with some experience with basic plumbing knowledge and familiarity with power tools. Requires Safety Glasses.
Tools & Materials
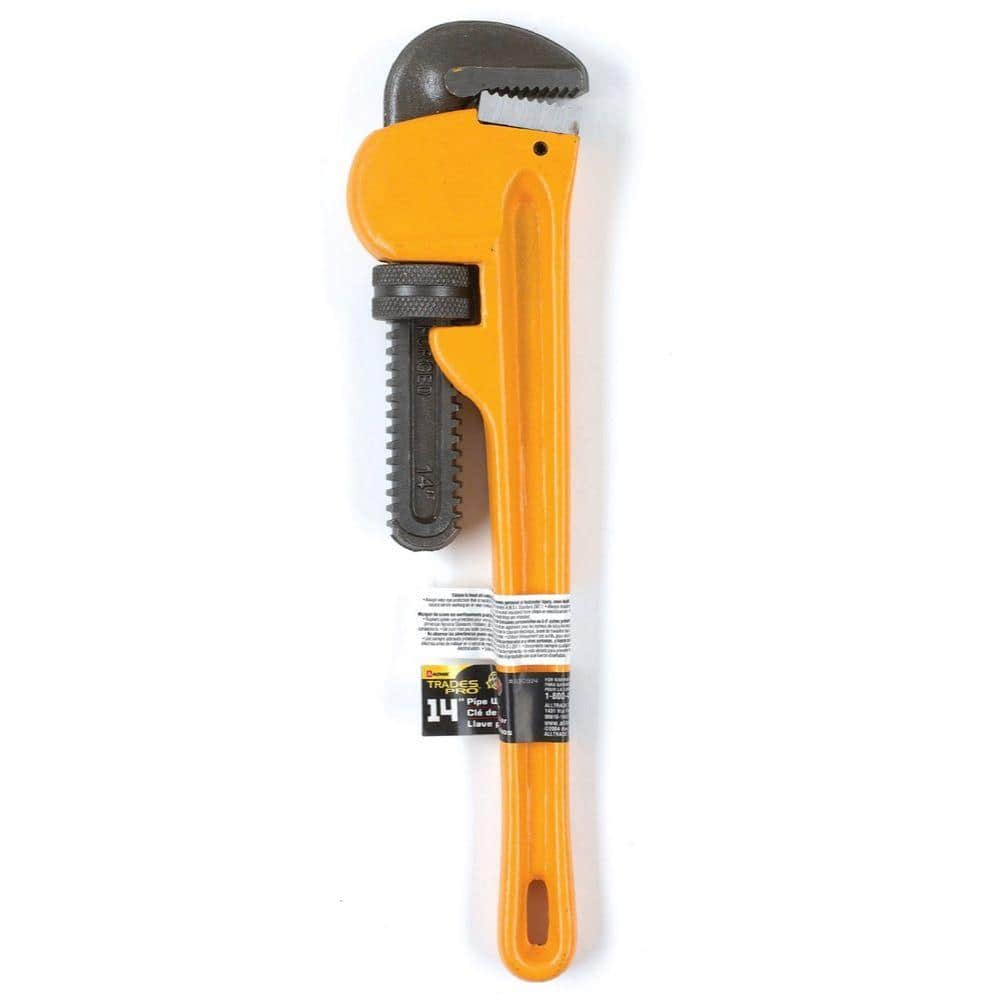
TradesPro 14 in. HD Pipe Wrench 830914

GardenJoy PVC Garden Hose 5/8 in. x 50 ft. Heavy-Duty Durable Hose Outdoor Water Hose LG-GHB5850

Unger 6 Gal. Heavy-Duty Plastic Bucket DB02
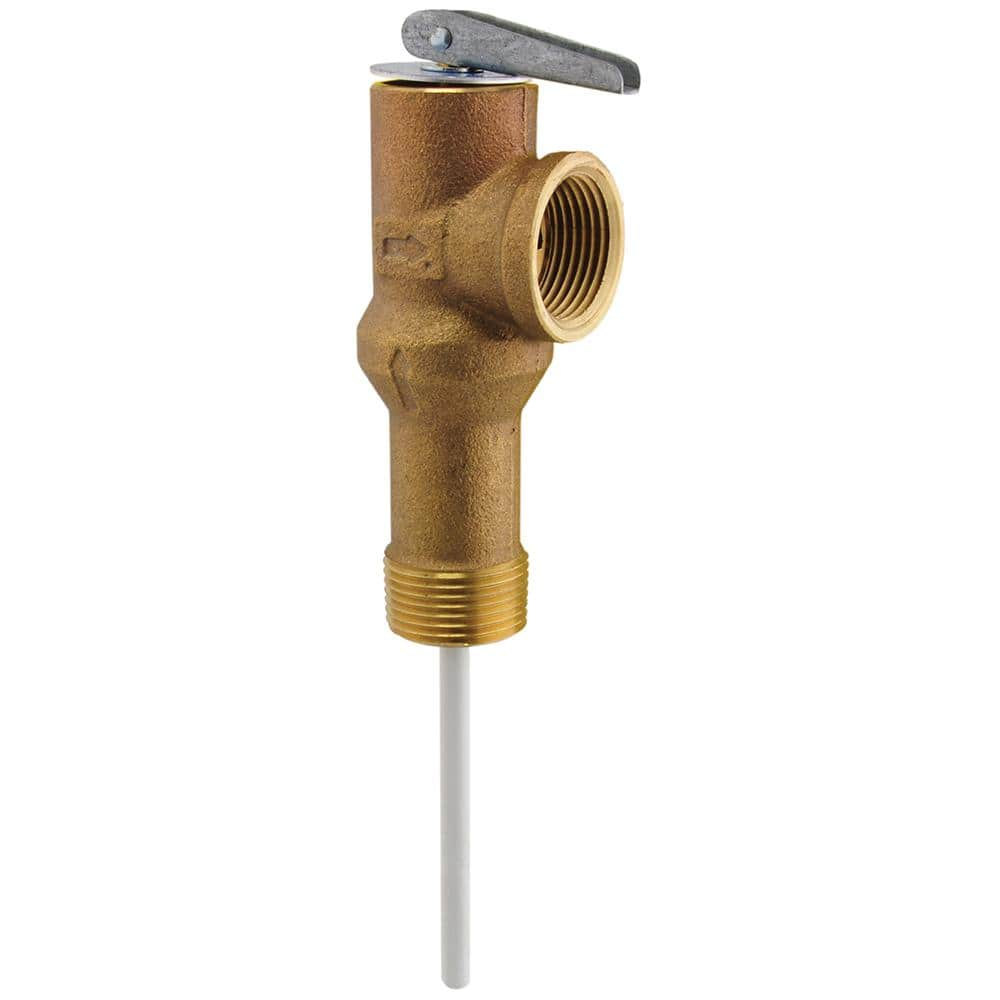
Rheem PROTECH 4-1/4 in. Shank Temperature and Pressure Relief Valve SP12576C
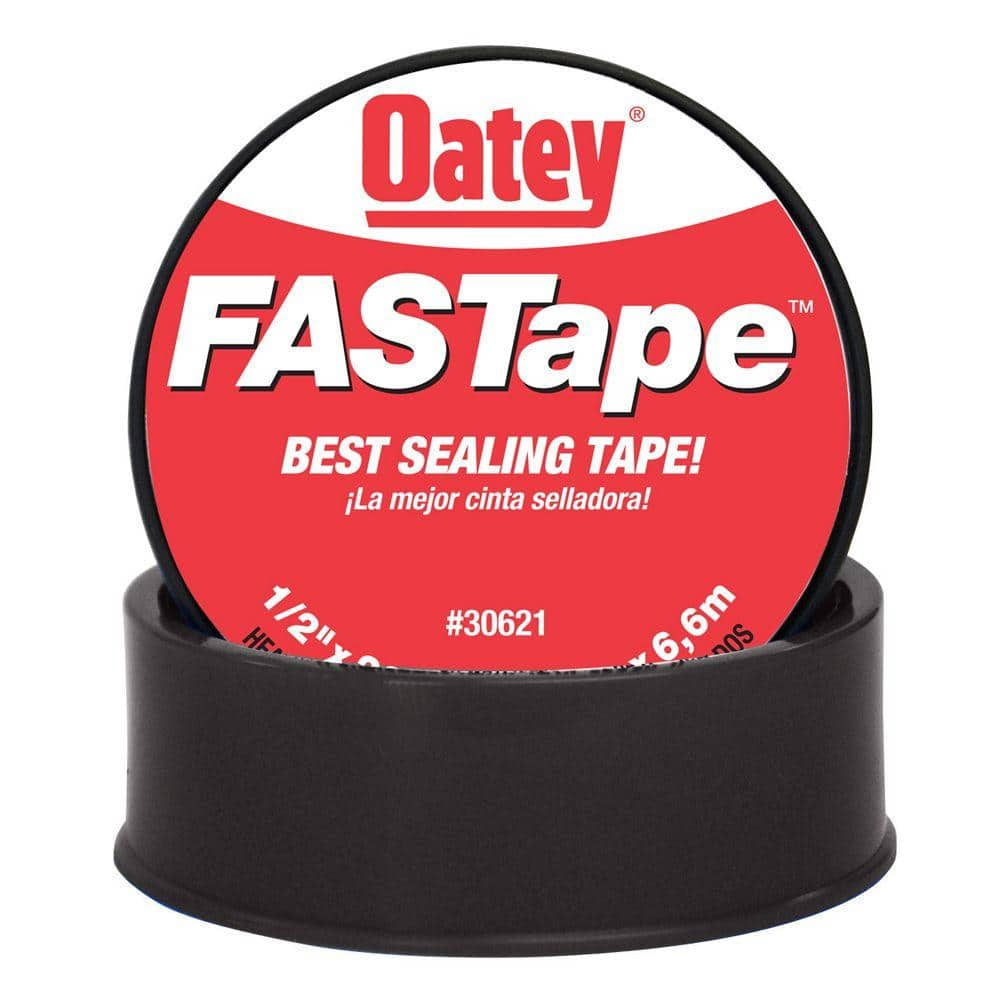
Oatey Fastape 1/2 in. x 260 in. Thread Sealing PTFE Plumber's Tape 306212

Work Gloves
TradesPro 14 in. HD Pipe Wrench 830914
A simple tool that's simply irreplaceable around the house, yard, garage and worksite. Nothing works better at biting, clamping and turning stubborn pipes, fittings and more. This wrench has all the essentials
GardenJoy PVC Garden Hose 5/8 in. x 50 ft. Heavy-Duty Durable Hose Outdoor Water Hose LG-GHB5850
Light-weight and Flexible: Made from premium PVC, our garden hose is both light-weight and durable, allowing for easy handling without kinks or tangles, ideal for all your watering and cleaning needs.
Unger 6 Gal. Heavy-Duty Plastic Bucket DB02
The Unger 6-Gallon Heavy-Duty Professional Cleaning Bucket holds more than 6 Gal. of liquid. The bucket can accommodate a scrubber up to 14 in. L. This bucket features measurement marks and 2-pour spouts
Rheem PROTECH 4-1/4 in. Shank Temperature and Pressure Relief Valve SP12576C
The Rheem PROTECH T and P (Temperature and Pressure Relief) Valves are designed to protect water heaters from overheating and over-pressurization. It is a component that is integral to the safe operation
Oatey Fastape 1/2 in. x 260 in. Thread Sealing PTFE Plumber's Tape 306212
Oatey FasTape is an all-purpose, professional-grade PTFE thread-sealing tape designed for use on a wide range of threaded pipes. It can be used on virtually any piping system including: Stainless steel,
Work Gloves
Protects hands during tasks.
Steps

Gather Tools and Supplies
10 minsBefore starting any work, it's crucial to gather all the necessary tools and supplies. This ensures you can complete the job efficiently without interruptions. You will need a new T&P valve that matches the specifications of your old one (check the PSI and temperature ratings). You'll also need a large pipe wrench to provide the leverage needed to remove the old valve and tighten the new one, Teflon tape for sealing the threads, a garden hose for draining, and a bucket to catch any residual water. Wearing work gloves is recommended for grip and protection against hot surfaces.

Shut Off Power and Water Supply
5 minsThis is the most critical safety step. First, locate your home's main electrical panel (breaker box). Find the breaker that controls the water heater; it is usually a double-pole breaker labeled 'Water Heater' or 'WH'. Flip the breaker to the 'OFF' position. Next, find the cold water shutoff valve for the water heater. This is typically a lever or wheel-style valve on the cold water pipe entering the top of the tank. Turn the valve clockwise (for a wheel) or perpendicular to the pipe (for a lever) to shut off the water supply.

Partially Drain the Water Heater
20 minsTo replace the side-mounted T&P valve, you only need to drain the tank until the water level is below the valve's opening. Attach one end of a garden hose to the drain valve located at the bottom of the water heater. Place the other end of the hose in a floor drain, utility sink, or run it outside to an area where hot water won't cause damage. Open the drain valve (usually requires a flathead screwdriver to turn). To allow air into the tank so it can drain properly, go to a sink inside the house and open a hot water tap. You will hear gurgling as the tank drains. Keep an eye on the T&P valve location and close the drain valve once you are confident the water level is a few inches below it.

Remove the Discharge Pipe
5 minsThe T&P valve has a discharge pipe, typically made of copper or CPVC, attached to its outlet. This pipe directs any discharged water safely towards the floor. Before you can remove the valve itself, you must first detach this pipe. It is usually connected with a threaded fitting. Place your bucket underneath to catch any trapped water. Using your pipe wrench or channel-lock pliers, grip the fitting on the pipe and turn it counter-clockwise to unscrew it from the T&P valve. Once it's loose, set the pipe aside.

Remove the Old T&P Valve
10 minsNow you can remove the valve itself. Position your large pipe wrench onto the hexagonal body of the old T&P valve. Ensure you have a firm grip. Apply steady pressure in a counter-clockwise direction to break the seal and unscrew the valve from the tank. This may require significant force, especially if the valve is old and corroded. Once it's loose, you can typically finish unscrewing it by hand. Be prepared for a small amount of water to spill out; have your rag ready.
Prepare the New Valve
5 minsWith the old valve removed, use a rag to clean the female threads on the water heater port, removing any old tape or sealant. Take your new T&P valve and wrap the male threads with 3 to 4 layers of Teflon tape. It is critical to wrap the tape in a clockwise direction (the same direction you will be turning the valve to tighten it). This ensures the tape tightens into the threads rather than unravelling. Carefully thread the new valve into the port by hand to avoid cross-threading. Hand-tighten it as much as you can.

Install New Valve and Reconnect Discharge Pipe
10 minsOnce the new valve is hand-tight, use the pipe wrench to give it another one to two full turns. The goal is to make it watertight and position the valve so its outlet is pointing straight down towards the floor. Do not overtighten, as this can crack the valve body or damage the threads on the tank. Once the valve is installed, re-attach the discharge pipe to the valve's outlet. Hand-tighten the fitting and then give it a final snug turn with the pipe wrench. The pipe must terminate no more than 6 inches from the floor and should not be threaded at its outlet.

Refill the Tank and Check for Leaks
15 minsThe installation is now complete, and it's time to refill the tank. First, ensure the drain valve at the bottom of the tank is fully closed. Also, make sure the hot water tap you opened earlier is still open. Go to the cold water inlet valve and slowly open it to begin filling the tank. You will hear water flowing and air sputtering from the open hot water tap. Leave the tap open until you have a steady, air-free stream of water coming out. This signifies the tank is full and all air has been purged. Once the tank is full, close the hot water tap. Thoroughly inspect the new T&P valve and its connections for any signs of leaks.

Restore Power
2 minsOnce you have confirmed that the tank is completely full and there are absolutely no leaks, you can safely restore power. Return to the electrical panel and flip the water heater's breaker back to the 'ON' position. The water heater will now begin to heat the new water in the tank. This can take an hour or more, depending on the tank size and the temperature of the incoming water.

Test the New Valve
3 minsAs a final quality check, it's wise to test the new valve's mechanical function. Place a bucket under the end of the discharge pipe. Carefully and briefly lift the test lever on the top of the T&P valve. A burst of hot water should flow out of the pipe. Release the lever; it should snap back down into its original position, and the flow of water should stop completely. If the valve continues to drip or run after the test, it may be defective or have debris from the installation caught in the seat, which may require you to flush it again or replace it.
Common Problems
The water coming out of the tank can be scalding hot. Handle the hose with care.
Solution: To avoid this issue: Be mindful of this warning and take appropriate precautions.
The water in the tank may be very hot. Be careful when handling the hose and the drained water.
Solution: To avoid this issue: Be mindful of this warning and take appropriate precautions.
Water won't drain from T&P valve due to improperly routed hose.
Solution: Ensure the drain hose has no high points or loops, as this will prevent the water from draining properly via gravity.
Tank won't drain or drains extremely slowly due to vacuum.
Solution: To help the tank drain faster, you can open a hot water faucet somewhere in the house to allow air to enter the system and break the vacuum.
New fuse blows immediately, indicating a deeper system fault.
Solution: If the new fuse blows immediately, there is likely a more serious issue with the control board or another component, which may require professional service.
Sudden water flow can cause pipe-shattering water hammer.
Solution: Open the water valve slowly to prevent a 'water hammer' effect, which can damage pipes.
Leaking T&P valve due to inadequate seal.
Solution: The video narrator prefers pipe dope (sealant) over Teflon tape for a better seal.
Frequently Asked Questions
What are the most critical safety steps I must take before replacing the T&P valve?
Always shut off both the electrical power to the water heater at the breaker panel and the cold water supply valve leading into the heater. Failure to do so can lead to severe electrocution, scalding injuries from hot water, or significant water damage. Partially draining the tank reduces pressure and hot water volume, making the job safer.
Can I use regular pliers or an adjustable wrench instead of a heavy-duty pipe wrench to remove the old T&P valve?
A heavy-duty pipe wrench, like the TradesPro 14 in. recommended, is strongly advised. Old T&P valves are often corroded and incredibly tight, requiring significant torque to loosen. Using regular pliers or an adjustable wrench might strip the valve's hex head or slip, making removal much harder and potentially damaging the water heater's tank fitting.
How long should this project take for a beginner, and what's the typical cost involved?
For a DIY beginner, expect this project to take approximately 1 to 2 hours from start to finish, including preparation and cleanup. The primary cost will be for the new T&P relief valve itself, which typically ranges from $15-$30. If you need to purchase specific tools, that will be an additional one-time cost.
My new T&P valve is still leaking slightly after installation. What could be the problem?
A common cause for a persistent leak is insufficient or improperly applied thread sealant. Ensure you wrap 4-5 layers of PTFE plumber's tape clockwise around the threads of the new valve, starting one thread back from the end. Also, confirm the valve is tightened adequately, but avoid overtightening, which can crack the tank's port.
Why is it so crucial to replace a leaking T&P relief valve promptly, even if it's just a small drip?
A T&P relief valve is a vital safety device designed to prevent your water heater from exploding due to excessive temperature or pressure buildup. A leak indicates the valve is faulty or compromised and may not activate correctly in an emergency. Prompt replacement is essential to protect your home and family from a potentially catastrophic failure.
Do I need to replace the discharge pipe connected to the T&P valve, or can I reuse the old one?
It's always a good idea to inspect the existing discharge pipe thoroughly. If it shows signs of corrosion, is clogged with mineral deposits, or is physically damaged, you should replace it with a new one. Ensure the new discharge pipe is rated for hot water, has no obstructions, and terminates safely according to local plumbing codes, typically within 6 inches of the floor.
This guide specifies an electric water heater. Are there any significant differences if I have a gas water heater?
The core procedure for replacing the T&P valve is largely identical for gas water heaters. The primary additional step for gas units is that you must also shut off the gas supply valve to the water heater in addition to the cold water supply. Always consult your gas water heater's manual for specific safety instructions related to gas supply.