

How to Replace a Leaky Bathtub Spout (Thread-on vs. Slip-on)
About This Project
This guide provides comprehensive, step-by-step instructions for replacing a leaky bathtub spout. It covers the critical process of identifying whether your existing spout is a 'slip-on' or 'thread-on' type, removing the old unit, preparing the pipe, and correctly installing the new spout to ensure a watertight seal.
Best for experienced DIYers and homeowners with some experience with basic plumbing knowledge.
Tools & Materials
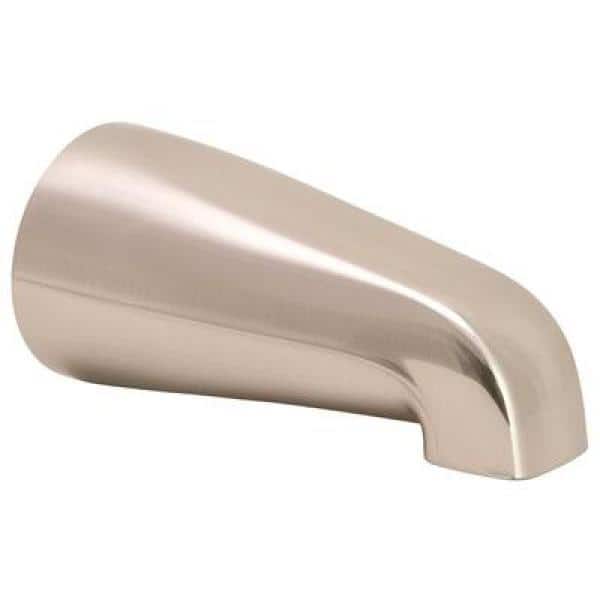
ProPlus 1/2 in. FIP Bathtub Spout without Diverter, Brushed Nickel 102029
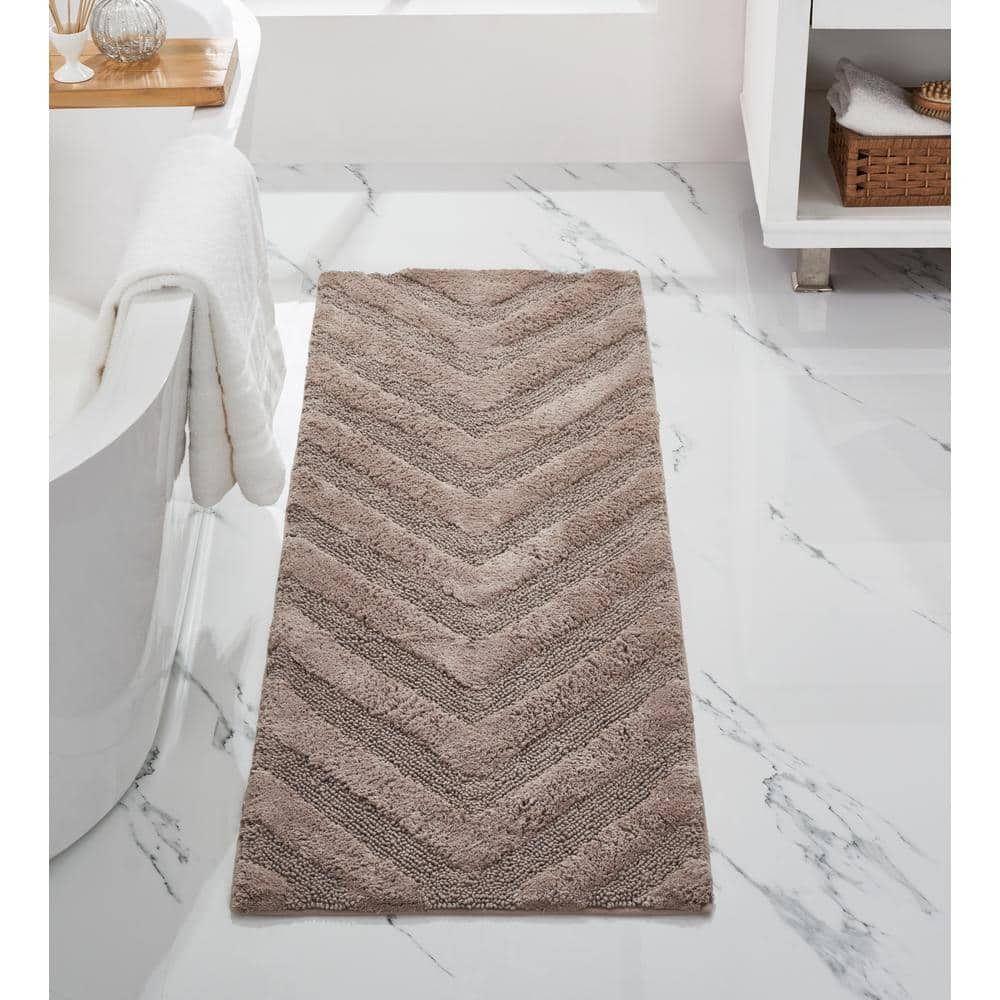
Better Trends Hugo Collection 20 in. x 60 in. Gray 100% Cotton Runner Bath Rug BAHG2060GRY

Anvil Yellow 3-Piece Metal Indoor Outdoor Bistro Set, Patio Foldable Round Table and Chairs Set FY-W1586P143143
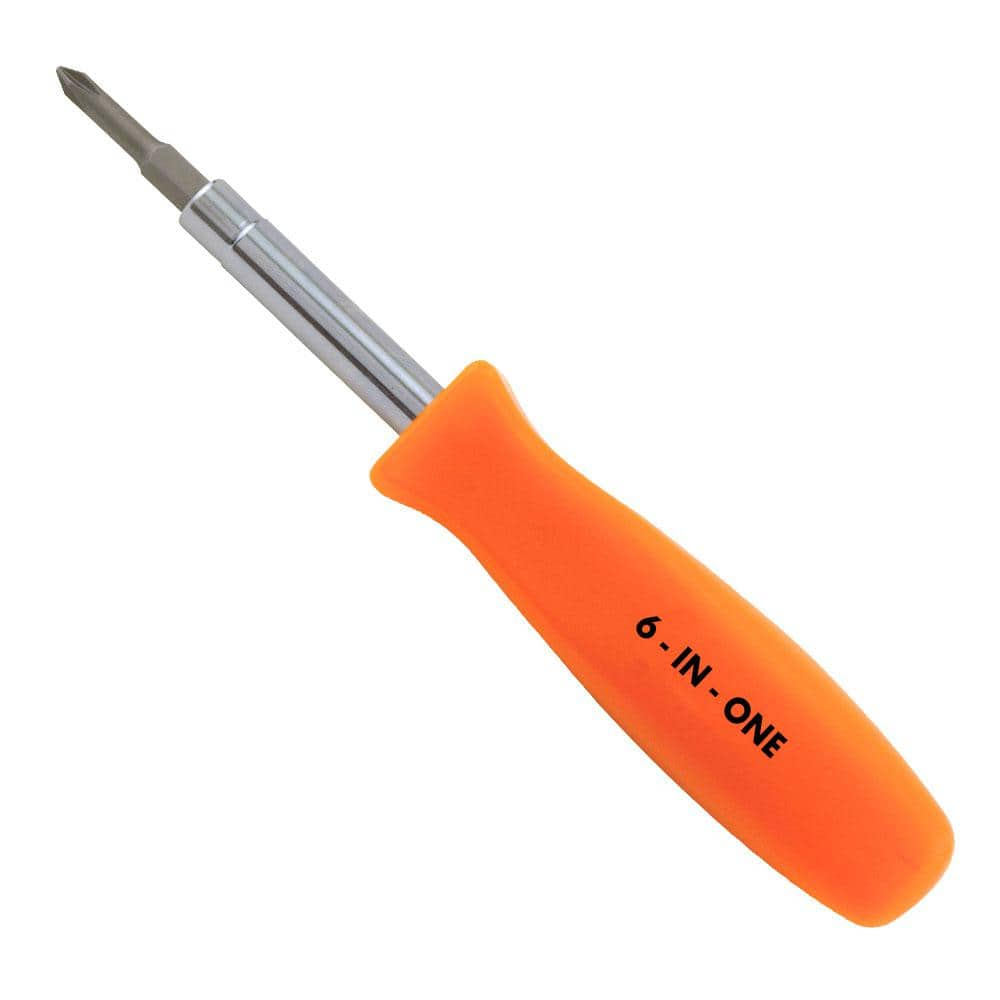
HDX 3-1/4 in. 6-in-1 Screwdriver 120SD12D

Channellock 10 in. Tongue and Groove Plier 430
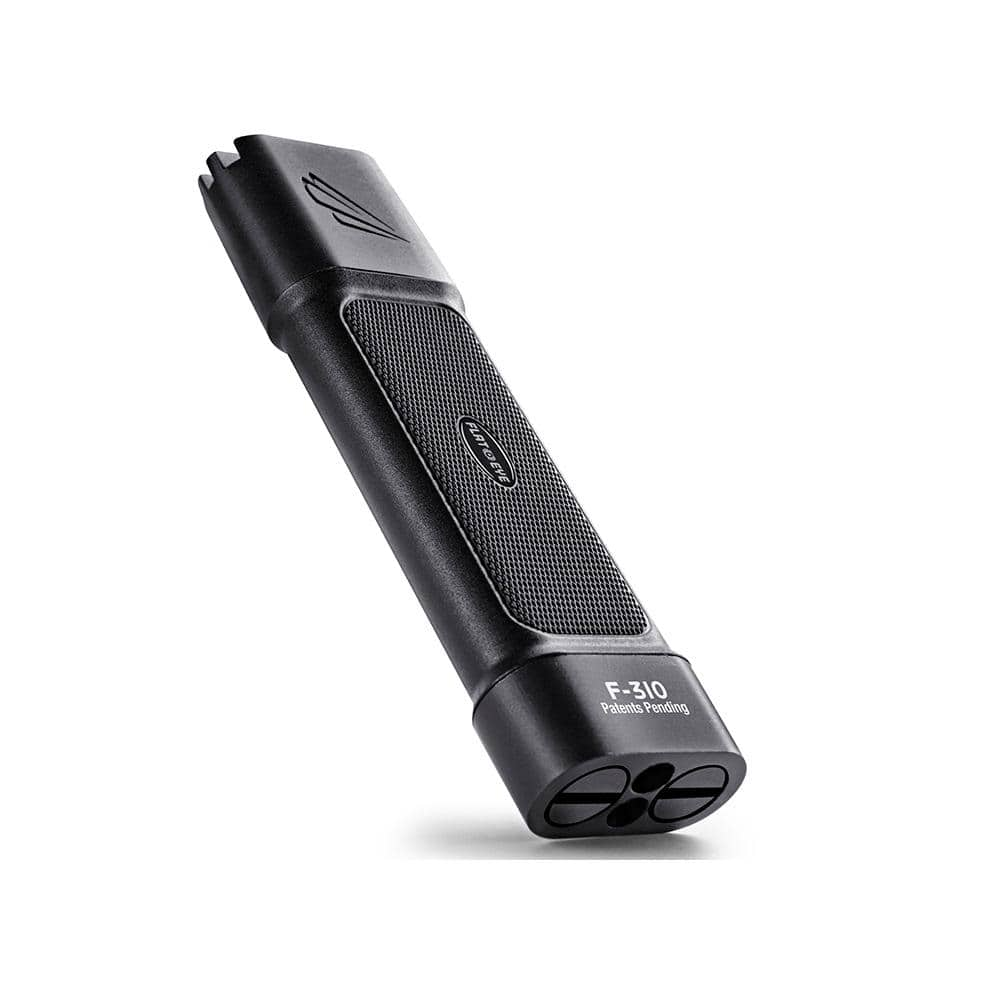
Panther Vision FLATEYE F-310 High Performance 310-Lumen Unround Flashlight CREE LED Multi Position Waterproof and Shockproof FL-6960
ProPlus 1/2 in. FIP Bathtub Spout without Diverter, Brushed Nickel 102029
The product is high quality and reliability and durability. The product is ease to use and attractive styling. The product is wide selection of product choices and great value.
Better Trends Hugo Collection 20 in. x 60 in. Gray 100% Cotton Runner Bath Rug BAHG2060GRY
The epitome of luxury and class goes well with Better Trends and again they are offering you a classy collection of rugs. This collection of Hugo bath rugs have all the qualities and features that anyone
Anvil Yellow 3-Piece Metal Indoor Outdoor Bistro Set, Patio Foldable Round Table and Chairs Set FY-W1586P143143
Enjoy friendly conversation and a cappuccino with the Indoor/Outdoor 3-Piece Bistro Set. This Garden 3-piece folding patio set, featuring 2-dining chairs and 1-dining table. With its simple and practical
HDX 3-1/4 in. 6-in-1 Screwdriver 120SD12D
The HDX 3-1/4 in. 6-in-1 Screwdriver features double-sided bits with the four most common screwdriver tip styles, including a #1 Phillips bit, a #2 Phillips bit, a 3/16 in. flathead bit and a 1/4 in. flathead bit. Both ends of the shaft can be used as 1/4 in. nut drivers when the bits are removed, offering convenient, versatile use. The high-visibility orange handle makes the handy tool easy to find on a job site or in a toolbox.
Channellock 10 in. Tongue and Groove Plier 430
The Channellock 10 in. Straight Jaw Tongue and Groove Pliers are constructed with high-carbon steel and fashioned with laser heat-treated teeth for strong, nonslip jaw action. Undercut tongue-and-groove
Panther Vision FLATEYE F-310 High Performance 310-Lumen Unround Flashlight CREE LED Multi Position Waterproof and Shockproof FL-6960
Every revolution starts with a spark. At 310-Lumens the F-310 has the power to ignite our un-round revolution without overpowering your needs or your wallet. Not your granddads flashlight these bad boys
Steps

Gather Tools and Prepare the Work Area
5 minsBefore beginning any work, gather all the necessary tools and your new replacement bathtub spout. Ensure the new spout is the correct type (or a universal model) for your plumbing. Closing the bathtub drain with a stopper or covering it with a rag is a crucial first step to prevent any small parts like set screws from being lost down the drain.

Identify Spout Type (Slip-on vs. Thread-on)
2 minsTo determine the correct removal procedure, you must first identify your spout type. Inspect the underside of the spout, right against the wall. Look for a small hole. You may need a flashlight to see clearly. If you see a small screw (usually a hex screw) inside this hole, you have a 'slip-on' spout. If there is no hole and no screw, the spout is a 'thread-on' type, which simply unscrews from the pipe.

Remove the Old Spout
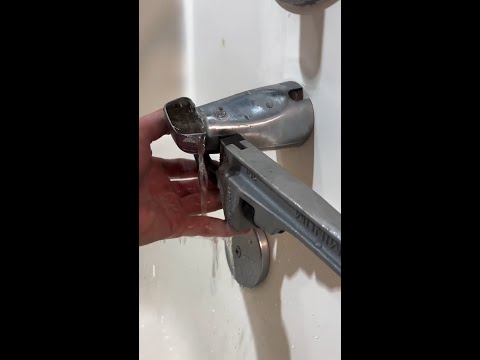
10 minsFirst, use a utility knife to carefully cut any caulk or sealant between the spout and the tub surround. For a SLIP-ON spout: Use the appropriate size hex key (Allen wrench) to turn the set screw on the underside counter-clockwise. You only need to loosen it a few turns; do not remove it completely. Once loose, grasp the spout firmly and pull it straight off the copper pipe. You may need to wiggle it slightly. For a THREAD-ON spout: Grasp the spout firmly with both hands and turn it counter-clockwise. If it's too tight, you can insert the handles of a pair of pliers or the handle of a wrench into the spout's opening for leverage. For very stubborn spouts, wrap the spout with a rag and use a pipe wrench to turn it counter-clockwise.
Clean and Prepare the Pipe Stub-Out
5 minsOnce the old spout is removed, inspect the pipe stub-out. Use the utility knife or a putty knife to scrape away any remaining old caulk, plumber's putty, or sealant from the wall surface. Use a rag to wipe the pipe clean of any debris or mineral deposits. For copper pipe, you can use a piece of emery cloth or fine-grit sandpaper to lightly sand the exterior, ensuring a smooth surface for the new spout to seal against.

Install the New Spout
5 minsFor a THREAD-ON spout: Wrap the male threads on the pipe adapter with 2-3 layers of Teflon tape in a clockwise direction (the same direction you will tighten the spout). This helps create a watertight seal. Screw the new spout onto the pipe by hand until it is snug and pointing straight down. If it's not tight enough, use a wrench (with a rag to protect the finish) to give it another quarter to half turn. Do not overtighten. For a SLIP-ON spout: Simply slide the new spout over the copper pipe until its base is flush against the wall. Ensure the set screw hole is facing down. Use the hex key to tighten the set screw clockwise until it is securely fastened. Do not overtighten, as this can crush the copper pipe.

Seal the Spout and Test for Leaks
5 minsTurn on the water and observe the spout. Check for any drips from the spout's opening. Pull up the diverter knob to send water to the showerhead and carefully check for any leaks around the base of the spout where it meets the wall. If there are no leaks, proceed to the final step. Apply a thin, neat bead of kitchen and bath silicone caulk around the top and sides of the spout where it meets the wall. Leave the bottom edge uncaulked to allow any water that gets behind the spout to drain out. Smooth the bead with a wet finger or a caulk finishing tool.
Common Problems
Spout won't budge; you might be trying to unscrew a set screw spout.
Solution: Some tub spouts may be secured with a set screw on the underside; check for this before trying to unscrew it.
Tub spout won't budge; you might be looking for a set screw that isn't there.
Solution: Some tub spouts may screw on instead of using a set screw. If you don't find a set screw, try turning the entire spout counter-clockwise.
It's important to correctly identify the spout type before attempting removal. Applying twisting force to a spout with a set screw can damage the copper pipe inside the wall.
Solution: To avoid this issue: Be mindful of this warning and take appropriate precautions.
Wrench marks and scratches on the spout finish.
Solution: If you need to use a wrench to unscrew a threaded spout, wrap the spout with a cloth or towel first to protect its finish from scratches.
If the pipe behind the wall feels loose, pull gently to avoid cracking the surrounding tile.
Solution: To avoid this issue: Be mindful of this warning and take appropriate precautions.
Leaky spout due to rough or dirty pipe surface.
Solution: A perfectly clean and smooth pipe surface is essential for achieving a leak-free compression seal.
Leaky solder joints due to pipe residue and rough edges.
Solution: Properly cleaning and deburring the pipe and fitting is the most critical step for a successful solder joint.
Frequently Asked Questions
How can I tell if my existing bathtub spout is a thread-on or slip-on type before I start disassembling anything?
Most thread-on spouts will unscrew directly from the pipe by rotating counter-clockwise. Slip-on spouts usually have a small set screw on the underside near the wall or a clamp that tightens around the pipe. Check for the set screw first; if absent, try twisting.
What should I do if my new bathtub spout still leaks after installation, especially from around the base or the pipe connection?
If leaks are from the base, re-evaluate your silicone caulk seal and ensure it's continuous and watertight. For leaks from the pipe connection, ensure sufficient Teflon tape was used for thread-on spouts, or that the set screw/clamp on a slip-on is tight and the O-ring is properly seated and undamaged.
How long does a typical bathtub spout replacement take for a beginner, and what's the most challenging part of the process?
For a beginner, this project typically takes 30-60 minutes, assuming all tools and materials are readily available. The most challenging aspect is often removing a seized or stubborn old spout without damaging the pipe, or achieving a perfectly smooth, watertight caulk seal.
Are there any special tools or materials mentioned in the guide that are absolutely essential and not common household items?
Yes, a Caulk Gun is essential for applying the GE Tub and Tile Silicone 1 Caulk smoothly and effectively. You'll also likely need a hex key set (like the Husky Metric Short Arm Hex Key Set) if your old or new spout has a set screw for a slip-on connection. Teflon tape is crucial for thread-on spout installations.
What precautions should I take to avoid damaging the pipe stub-out behind the wall when removing the old spout?
When dealing with a thread-on spout, try to hold the copper or galvanized pipe stub-out behind the wall with a second wrench (like channel locks) while unscrewing the spout. This prevents the pipe from twisting within the wall, which could lead to significant plumbing issues. For slip-on spouts, be gentle to avoid bending the pipe.
What is the typical cost for a new bathtub spout, and are there different price points or materials to consider?
A new bathtub spout can range anywhere from $20 to $100+, depending on the material, finish, and brand. Standard chrome spouts like the Everbilt Tub Spout with Diverter are usually more affordable, while brushed nickel, bronze, or designer options will increase the cost. Consider matching your existing fixtures for a cohesive look.
How important is the final caulk seal, and what's the best way to ensure it's watertight and looks professional?
The final caulk seal is crucial for preventing water from seeping behind the wall and causing damage or mold. Ensure the surface is clean and dry. Apply the GE Tub and Tile Silicone 1 Caulk in a continuous bead, then smooth it immediately with a wet finger or a caulk tool for a clean, watertight finish.