
How to Replace a Leaky Angle Stop (Shutoff Valve) Under Your Sink
About This Project
This guide provides comprehensive, step-by-step instructions for replacing a leaky angle stop (the small shutoff valve under a sink) connected to a copper pipe. The process involves shutting off the main water supply, removing the old valve and its compression fittings, preparing the pipe, and installing a new compression-style angle stop.
Best for advanced DIYers and professionals with basic plumbing knowledge and familiarity with power tools. Requires Tracker Safe 5-3/4 in. x 6-1/8 in. General Pocket for Gun Safe PG563.
Tools & Materials

Bucket

FRESHFOLDS Combed Cotton Absorbent Textured 6 Piece Towel Set EC100755
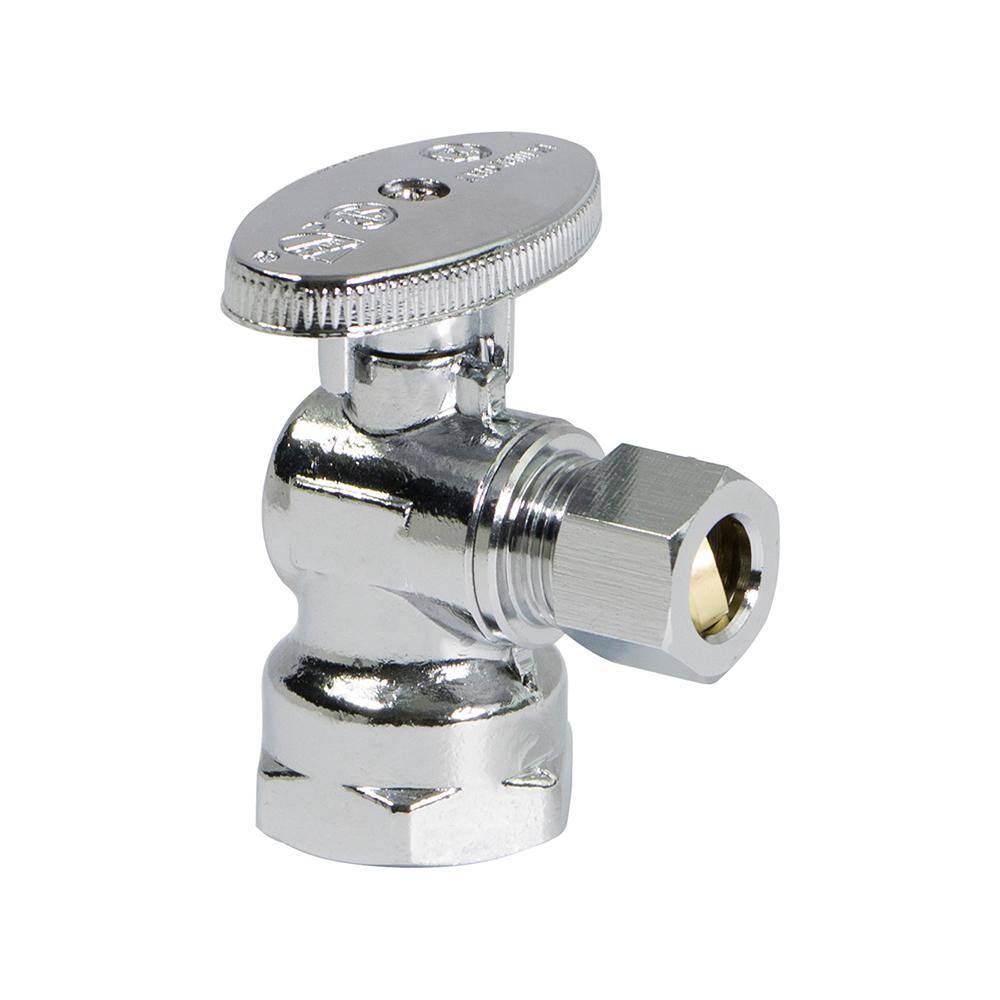
The Plumber's Choice 3/8 in. FIP Inlet x 3/8 in. O.D. Compression Outlet Quarter Turn Angle Stop Valve QTAS3838FIP
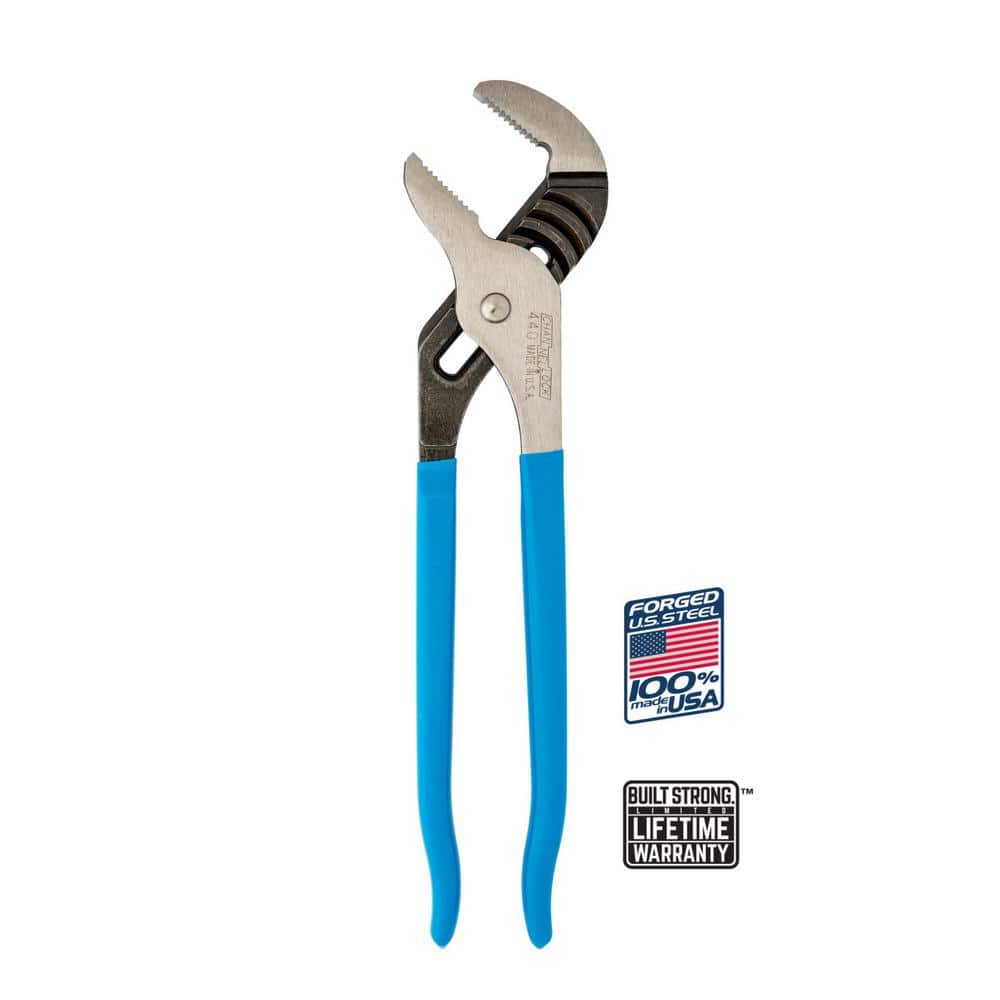
Channellock 12 in. Tongue and Groove Slip Joint Pliers 440
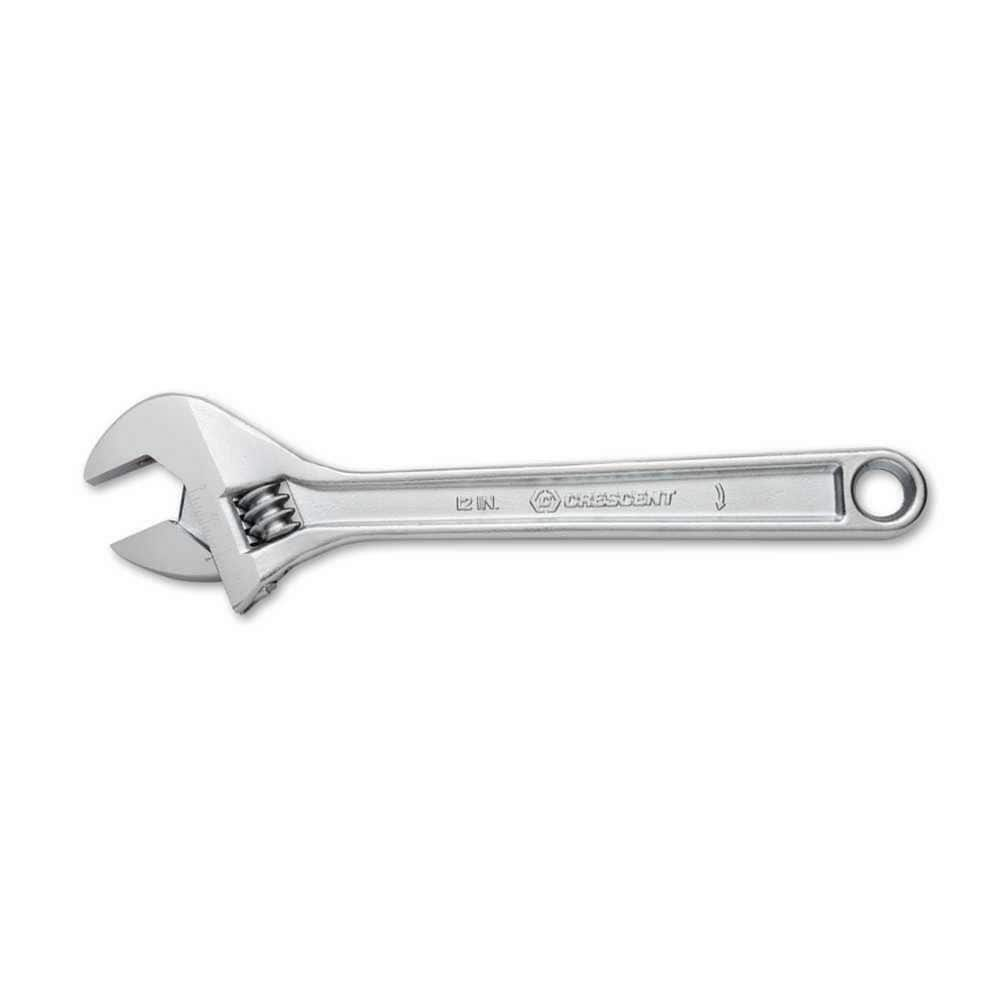
Crescent 12 in. Chrome Adjustable Wrench AC212VS

Unger 6 Gal. Heavy-Duty Plastic Bucket DB02
Bucket
Ideal for carrying or storing liquids.
FRESHFOLDS Combed Cotton Absorbent Textured 6 Piece Towel Set EC100755
Versatile, stylish, and functional are only a few ways to describe these bath towels. These towels are made with long cotton fibers that are looped to create a soft feel while still offering optimal absorbency
The Plumber's Choice 3/8 in. FIP Inlet x 3/8 in. O.D. Compression Outlet Quarter Turn Angle Stop Valve QTAS3838FIP
The Plumbers Choice stop Valve controls water flow to household plumbing fixtures - faucets, toilets, dishwashers, icemakers, washing machines, etc. The valve is most often used where the water pipe enters
Channellock 12 in. Tongue and Groove Slip Joint Pliers 440
The Channellock 12 in. Straight Jaw Tongue and Groove Pliers are constructed with high-carbon C1080 steel. The tool is fashioned with laser heat-treated teeth that clamp down perpendicularly for strong,
Crescent 12 in. Chrome Adjustable Wrench AC212VS
Since the introduction of the original Crescent wrench in the early 1900s, the Crescent brand has become synonymous with adjustable wrenches. Crescent Adjustable Wrenches feature a large knurl for easy
Unger 6 Gal. Heavy-Duty Plastic Bucket DB02
The Unger 6-Gallon Heavy-Duty Professional Cleaning Bucket holds more than 6 Gal. of liquid. The bucket can accommodate a scrubber up to 14 in. L. This bucket features measurement marks and 2-pour spouts
Steps
Shut Off Main Water and Prepare Work Area
15 minsThe first and most critical step is to prevent any water flow to your work area. Locate the main water shutoff valve for your entire house. This is often found in a basement, crawl space, or utility closet near where the water service line enters the home. Turn the handle or lever clockwise until it stops to completely shut off the water. Next, relieve pressure in the plumbing system by opening a faucet on the lowest level of your home (like a basement sink or outdoor spigot) and letting it run until the water stops. Back at your work area, place a small bucket directly under the angle stop you are replacing and lay down several old towels to catch any residual water that will spill out during the process. Finally, gather all the tools and your new angle stop so they are within arm's reach.
Disconnect Faucet Supply Line
5 minsNow you will disconnect the flexible supply line that runs from the top of the angle stop to the faucet. This line is attached with a smaller compression nut. Grip the body of the angle stop with a pair of channel-lock pliers or an adjustable wrench to keep it from moving. Use a second adjustable wrench to grip the nut on the supply line. Turn the wrench on the nut counter-clockwise to loosen it. Once it breaks free, you should be able to unscrew it the rest of the way by hand. As you detach the line, be ready for a small amount of water to drain out into the bucket you placed earlier. Tuck the disconnected supply line out of the way.
Remove Old Angle Stop Valve
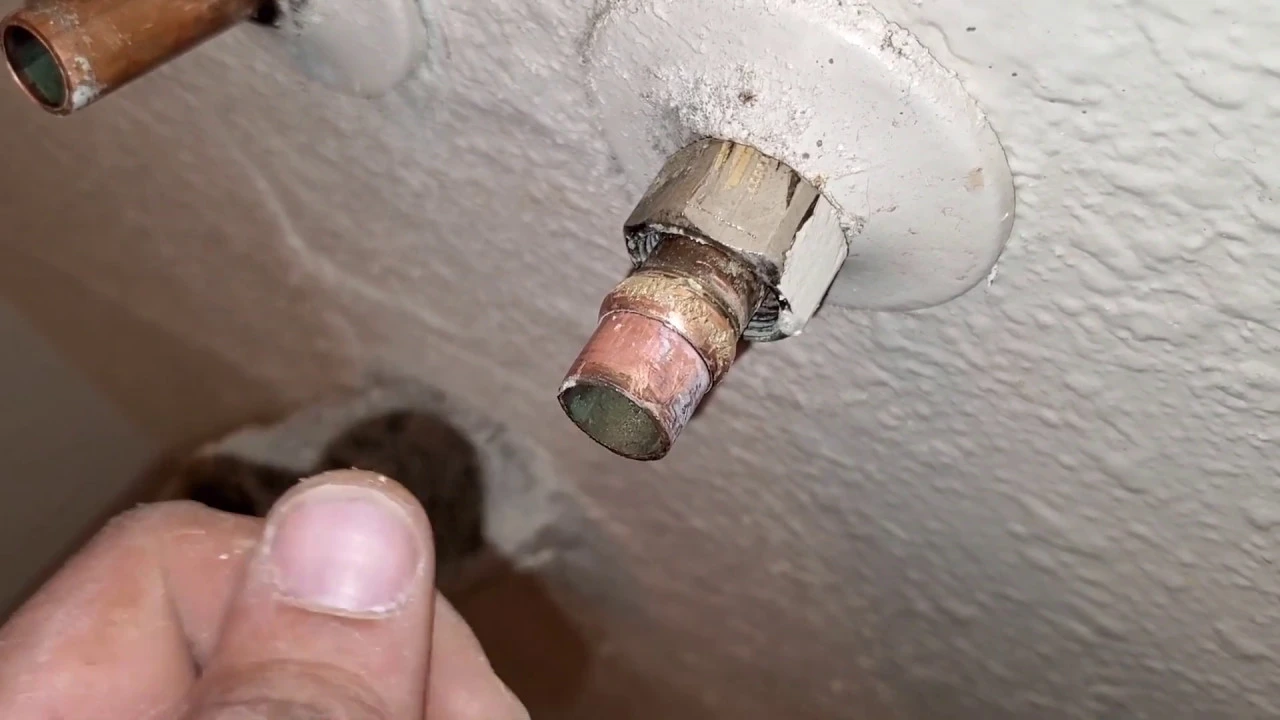
10 minsThis step requires careful application of force. You will use two large wrenches to remove the old valve from the copper pipe stub-out. Place one wrench (a pipe wrench or large channel-locks work well) on the body of the valve itself, positioned to prevent the valve from turning. Place your second wrench (an adjustable wrench is good) on the large compression nut that is right against the wall or escutcheon plate. Turn this nut counter-clockwise. It may be very tight and require significant force to 'break' loose. Once it breaks free, continue to unscrew the nut. Once the nut is fully loosened, you can slide the entire old valve assembly off the end of the copper pipe.
Clean Pipe and Remove Old Ferrule
15 minsWith the old valve removed, you will see the old compression nut and a small brass ring, the ferrule, still on the copper pipe. Slide the old nut off. The ferrule is often compressed tightly and can be difficult to remove. The best tool for this is a ferrule puller, which safely pulls it off without damaging the pipe. If you don't have one, you can try to carefully cut a slot in the ferrule using a mini-hacksaw or a Dremel tool with a cutting wheel. Be extremely careful not to cut into or score the soft copper pipe underneath. Once you've cut almost all the way through, you can use a flat-head screwdriver to pry it open and pop it off. After the old ferrule is removed, use a piece of emery cloth or fine-grit sandpaper to thoroughly clean the last inch of the copper pipe. It should be smooth, shiny, and free of any burrs or old sealant.
Install New Angle Stop Components
5 minsTake your new quarter-turn angle stop and its components. First, slide the new compression nut onto the cleaned copper pipe, ensuring the threaded end faces outwards, away from the wall. Next, slide the new brass ferrule onto the pipe. The tapered end of the ferrule should face away from the wall, towards the end of the pipe where the valve will sit. Now, push the body of the new angle stop firmly onto the end of the pipe. It should slide over the pipe and butt up securely against the ferrule. Slide the compression nut forward and thread it onto the valve body by hand. Tighten it as much as you can with your fingers.
Tighten Compression Nut
5 minsWith the new valve hand-tightened, it's time to create the permanent, watertight seal. As before, you will use two wrenches. Use one wrench (channel-locks or adjustable) to hold the new valve body steady, ensuring its outlet is pointing in the correct direction (usually straight up towards the faucet connection). Use your second wrench to tighten the compression nut. Follow the manufacturer's instructions, but a general rule is to tighten the nut one-half to one full turn past the point where it was hand-tight. You will feel the ferrule compress and bite into the copper. The goal is to be tight enough to seal, but not so tight that you damage the pipe or valve. Do not over-tighten.
Reconnect Supply Line and Test for Leaks
15 minsFirst, ensure the new angle stop is in the 'off' position (the handle should be perpendicular to the pipe for a quarter-turn valve). Re-attach the faucet supply line to the top outlet of the new valve. Hand-tighten the nut, then give it a gentle quarter-turn with an adjustable wrench. Now, go back to your main water shutoff valve and turn it on slowly to re-pressurize your home's pipes. Return to the sink and carefully inspect the new valve, especially around the large compression nut at the wall. Use a dry paper towel to wipe the connection; it will make even the smallest drop of water visible. If there are no leaks, slowly open the new angle stop by turning its handle counter-clockwise. Once open, check all connections again for leaks: the main connection at the wall and the supply line connection. Finally, turn on the faucet to test flow and check for any drips under the sink. Dry everything thoroughly and monitor for the next hour.
Common Problems
Do not crimp or bend the copper tubing at a sharp angle, as this can restrict water flow or cause a weak point.
Solution: To avoid this issue: Be mindful of this warning and take appropriate precautions.
Hold the valve body still to prevent it from rotating and stressing the Teflon tape while you tighten the nut.
Solution: To avoid this issue: Be mindful of this warning and take appropriate precautions.
Ensure the valve is closed before turning the main water back on.
Solution: To avoid this issue: Be mindful of this warning and take appropriate precautions.
Leaking connections due to overtightening or undertightening the angle stop nut.
Solution: A common rule of thumb is to tighten the nut one-half to one full turn past hand-tight, but follow manufacturer instructions if available.
Do not overtighten the compression nut, as this can damage the fitting or the pipe. A common guideline is to tighten it hand-tight plus one full turn with a wrench.
Solution: To avoid this issue: Be mindful of this warning and take appropriate precautions.
Do not overtighten the plastic union nuts, as this can cause them to crack.
Solution: To avoid this issue: Be mindful of this warning and take appropriate precautions.
Ensure the rubber washers are correctly seated inside the connecting nuts before tightening to prevent leaks.
Solution: To avoid this issue: Be mindful of this warning and take appropriate precautions.
Frequently Asked Questions
How difficult is this project really for a beginner, and can it realistically be done in 3 hours?
While labeled beginner, plumbing projects can be tricky, especially if old parts are seized. The 3-hour estimate includes preparation, cleanup, and potential troubleshooting; the actual valve swap might take an experienced DIYer an hour, but for a first-timer, allow ample time and don't rush. Patience and proper preparation are key to success.
The tool list is quite long. Which tools are absolutely essential for this project, and can I get by with fewer?
You'll primarily need two adjustable wrenches (or one wrench and a pair of Channellock pliers) to hold fittings and tighten nuts. A bucket and old towels are absolutely crucial for containing any water. The other specific pliers and wrenches offer convenience and leverage but aren't strictly mandatory if you have a good set of adjustable wrenches.
What should I do if my main water shutoff valve is stuck, or if I can't locate it to turn off the water?
Do NOT proceed with the project if you cannot fully shut off the main water supply. If your main shutoff is stuck, try gently exercising the valve handle back and forth, but avoid forcing it to prevent breakage. If you can't find or operate it, it's best to call a plumber to address the main shutoff issue before starting this project.
What are the most common reasons for a new angle stop to leak right after installation, and how can I troubleshoot it?
Leaks often occur from overtightening, which can damage the compression ring (ferrule), or undertightening, preventing a proper seal. Ensure the pipe end is clean, burr-free, and the ferrule is seated correctly before tightening the compression nut. Apply firm, but not excessive, pressure – usually about a quarter to half turn past hand-tight with a wrench is sufficient.
What's the best approach if the old angle stop is seized onto the copper pipe and won't budge?
Use two wrenches: one to hold the body of the old valve steady and prevent the copper pipe from twisting, and the other to turn the compression nut counter-clockwise. Applying penetrating oil to the old nut and letting it sit for a bit can help loosen stubborn connections. If it's truly seized, you may need to carefully score and split the old compression ring with a utility knife or small hacksaw, being extremely careful not to damage the copper pipe itself.
Are there alternative types of angle stops, like 'push-to-connect' valves, and are they easier to install for a beginner?
Yes, 'push-to-connect' (e.g., SharkBite) angle stops are an excellent alternative and are often much easier for beginners to install. They simply push onto a properly cut and deburred copper pipe without the need for compression fittings or specialized tools. While convenient, ensure the pipe end is perfectly clean and smooth for a secure, leak-free connection.