
How to Install an Undermount Kitchen Sink
About This Project
A comprehensive guide to removing an old undermount kitchen sink and installing a new one. This process involves shutting off the water supply, disconnecting all plumbing components including the garbage disposal and drain lines, removing the old sink, cleaning the countertop surface, preparing and mounting the new sink with a waterproof silicone seal, and finally reconnecting all plumbing and testing for leaks.
Best for advanced DIYers and professionals with basic plumbing knowledge and familiarity with power tools. Requires Commercial Electric Adjustable Non-Contact Voltage Tester NCV-8908 and Safety Glasses and Safety gloves.
Tools & Materials

Bucket

Towel

Work Gloves
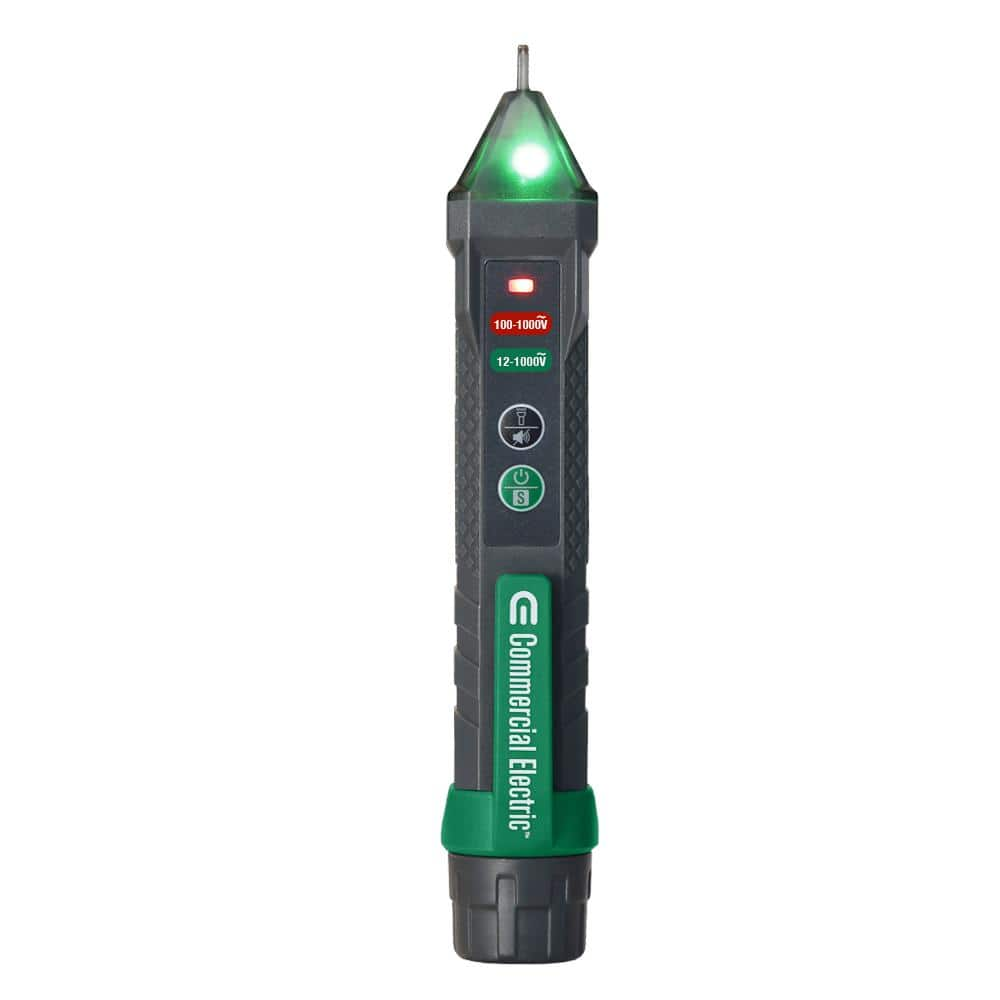
Commercial Electric Adjustable Non-Contact Voltage Tester NCV-8908

Channellock 10 in. Tongue and Groove Plier 430
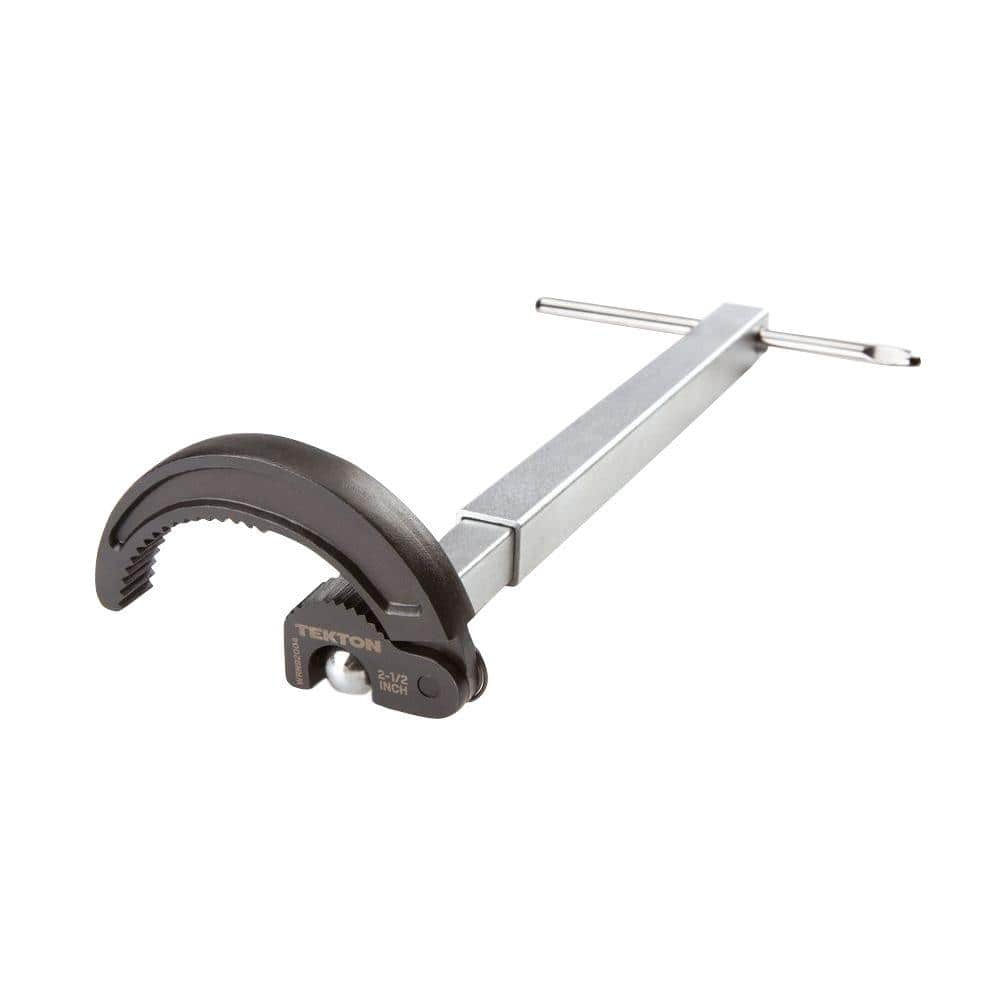
TEKTON 10 in. to 17 in. Telescoping 7/8 - 2-1/2 in. Basin Wrench WRN92004
Bucket
Ideal for carrying or storing liquids.
Towel
Absorbs moisture and dries surfaces.
Work Gloves
Protects hands during tasks.
Commercial Electric Adjustable Non-Contact Voltage Tester NCV-8908
Commercial Electric NCV-8908 is a new innovated Non-contact AC Voltage detector. The tester could be used for non-contact detection in circuits, outlet socket, cables, switches, lighting fixtures and wires. We engineered the NCVT-8908 to reliable detect voltages with adjustable sensitivity selection which assist user easy to determine the range of voltage and IP67 rated advanced industrial design.
Channellock 10 in. Tongue and Groove Plier 430
The Channellock 10 in. Straight Jaw Tongue and Groove Pliers are constructed with high-carbon steel and fashioned with laser heat-treated teeth for strong, nonslip jaw action. Undercut tongue-and-groove
TEKTON 10 in. to 17 in. Telescoping 7/8 - 2-1/2 in. Basin Wrench WRN92004
Uniquely designed for easy, one-handed operation in confined areas, the TEKTON Telescoping Basin Wrench takes the frustration out of under-sink work. Ideal for larger nuts and retaining collars on faucets,
Steps

Preparation and Safety
30 minsBegin by preparing the work area for a safe and clean project. Clear everything from the under-sink cabinet. Turn off the hot and cold water supply by twisting the shutoff valves clockwise until they stop. Turn the faucet on to release any remaining pressure and water in the lines. Place a bucket and some old towels under the drain pipes (P-trap) to catch any residual water during disassembly. If there is a garbage disposal, disconnect it from the power source. If it's hardwired, turn off the corresponding circuit breaker at the main electrical panel.

Disconnect Plumbing and Disposal
45 minsWith the bucket in place, start disconnecting the plumbing. Use a pair of channel-lock pliers to loosen the slip nuts on the P-trap assembly that connects the sink drain and garbage disposal to the wall pipe. Water will drain out, so be ready. Next, disconnect the dishwasher drain hose from the garbage disposal, if applicable. Using a basin wrench or adjustable wrench, loosen the nuts connecting the hot and cold flexible water supply lines to the faucet and the shutoff valves. Finally, address the garbage disposal. Insert a disposal wrench into the bottom and rotate to unlock it from its mounting ring, then carefully lower the unit. It can be heavy.

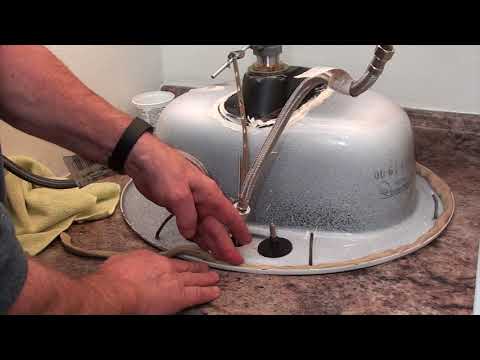
Remove the Old Sink
1 minThe old sink is held in place by a combination of silicone adhesive and metal mounting clips. First, use a utility knife to carefully slice through the silicone bead between the sink rim and the underside of the countertop. Be thorough and cut all the way around. Next, locate the mounting clips screwed into the countertop's underside. Use a screwdriver or socket wrench to loosen and remove all of these clips. Have your helper support the sink from below, or create a support brace using a 2x4 and a bar clamp. Once all clips are removed and the silicone is cut, carefully lower the old sink and remove it from the cabinet.
Clean the Countertop Surface
45 minsA clean surface is essential for a waterproof seal. Use a plastic putty knife or a dedicated caulk remover tool to scrape away all the old silicone residue from the underside of the granite countertop. Be patient and thorough. For stubborn residue, apply denatured alcohol or a specialized adhesive remover with a rag to soften it before scraping again. Once all the gunk is removed, wipe the entire surface clean with a rag and denatured alcohol to ensure it is completely free of dust, oils, and debris. The surface must be perfectly clean and dry for the new silicone to adhere properly.

Prepare the New Sink
45 minsIt is much easier to install components onto the sink before it's mounted under the counter. Place the new stainless steel sink upside down on a soft surface, like cardboard or towels, to prevent scratches. First, install the new faucet, following its manufacturer's instructions. This usually involves feeding the lines through the holes and tightening a retaining nut from below. Next, install the drain assembly (strainer) and the garbage disposal mounting flange. Apply a rope of plumber's putty or a bead of kitchen/bath silicone under the lip of the drain flange before inserting it into the sink's drain hole. From underneath, assemble the gasket, flange body, and retaining ring, and tighten the screws evenly.

Mount and Support the Sink
30 minsNow it's time to mount the sink. First, apply a continuous, generous bead (about 3/8-inch thick) of 100% silicone sealant to the top rim of the new sink. With a helper, carefully lift the sink into the cabinet and press it firmly up against the underside of the countertop. Ensure it is centered correctly in the opening. To hold it in place while the silicone cures and you attach the clips, use a support system. The most common method is to place a 2x4 board across the top of the sink opening on the countertop, and use one or two bar clamps running through the drain hole(s) up to the board to pull the sink up snugly against the counter. Do not overtighten, as this could damage the sink or counter.

Install Mounting Clips
1 minWith the sink held in place by the support brace, install the permanent mounting clips. The sink kit should include at least 8-10 clips. Position a clip against the sink rim and mark the spot for the anchor on the countertop underside. Drill a shallow hole for the anchor, being careful not to drill through the countertop. Use a drill bit with a stop collar for safety. Tap the anchor into the hole, then position the clip and tighten the screw until it's snug. Repeat this process for all clips, spacing them evenly around the sink's perimeter. Tighten them in an alternating pattern, like tightening lug nuts on a tire, to ensure even pressure. Once all clips are tight, you can remove the 2x4 support brace.

Reconnect Plumbing
1 minNow, reconnect all the plumbing components. Start by connecting the new faucet's hot and cold supply lines to the shutoff valves. Hand-tighten the nuts and then give them a quarter-turn with a basin wrench or adjustable wrench. Do not overtighten. Lift the new garbage disposal into place, align the tabs with the mounting ring, and use the disposal wrench to turn the ring and lock the unit in place. Reconnect the dishwasher drain line to the disposal's inlet port. Finally, reassemble the P-trap, connecting the sink strainer and disposal outlet to the drain pipe in the wall. You may need to trim pipes with a hacksaw for a perfect fit. Hand-tighten all the plastic slip nuts, then give them a slight snug with channel-lock pliers.

Final Checks and Cleanup
30 minsThe final step is to check your work. Remove all tools and materials from the cabinet. Slowly turn the hot and cold water shutoff valves back on (counter-clockwise). Immediately inspect all connections for drips: where the supply lines meet the valves and where they connect to the faucet. If you see any drips, tighten the connection slightly. Next, place a bucket under the P-trap and fill both sink basins with water. Let them sit for a few minutes, checking the silicone seal around the sink rim for any leaks. Then, release the water and check the entire drain assembly and P-trap for leaks. Finally, turn on the power to the garbage disposal. Run water and turn on the disposal to ensure it operates correctly and there are no leaks from the vibration. Once everything is confirmed to be dry and working, clean up your tools and the work area.
Common Problems
Ensure the power is completely disconnected by unplugging the unit before starting any work.
Solution: To avoid this issue: Be mindful of this warning and take appropriate precautions.
Hands are full supporting the disposal, making it impossible to tighten the locking ring.
Solution: Use your knee to support the weight of the disposal while twisting the locking ring, which frees up your hands.
Confirm that both water and electricity are completely shut off before proceeding to the next steps.
Solution: To avoid this issue: Be mindful of this warning and take appropriate precautions.
Water spills and messes occur when disconnecting water lines without preparation.
Solution: Have a bucket and towels ready before disconnecting water lines to manage spills.
Dishwasher hose tears during sink installation.
Solution: If the dishwasher hose is stuck, you can gently pry it with a flathead screwdriver, but be careful not to tear the hose.
Water spills onto the floor and cabinets when disconnecting sink pipes.
Solution: Have a bucket or a pan ready underneath the pipes to catch any water that drains out when you disconnect them.
Confirm that the power is off by trying to turn on the dishwasher. If it doesn't power on, you have successfully cut the electricity.
Solution: To avoid this issue: Be mindful of this warning and take appropriate precautions.
Frequently Asked Questions
How difficult is installing an undermount kitchen sink for a DIYer, and what's a realistic time estimate?
This is an intermediate-level DIY project, primarily due to the plumbing disconnections, heavy lifting, and precise sealing required. While the estimated time is 8 hours, allow for a full day (or even two half-days) to account for unexpected issues, sealant drying time, and careful work, especially if you're new to plumbing. Patience and attention to detail are key to a successful, leak-free installation.
Are there any essential specialized tools for installing an undermount sink that I might not already own?
Yes, several tools are crucial for this specific project. A heavy-duty caulk gun (e.g., Husky 19PT0902) is vital for applying a consistent, strong silicone bead. You'll also definitely need bar clamps (e.g., BESSEY GSCC3.536+2K) to hold the sink firmly against the countertop while the sealant cures, along with lumber for support. A comprehensive socket set (like the Omega 83029) will be very helpful for various plumbing connections.
What are the most important safety precautions to take when replacing an undermount kitchen sink?
Always shut off the main water supply to the kitchen faucet and disposal, and disconnect power to the disposal before starting any work. Wear work gloves to protect your hands from sharp edges and cleaning chemicals, and safety glasses when working overhead or with power tools. Be prepared for potential water spills with a bucket and towels.
What are the most common mistakes that lead to leaks after installing a new undermount sink, and how can I prevent them?
Leaks often occur due to inadequate sealant application or insufficient curing time. Ensure you apply a continuous, generous bead of DAP Silicone Max around the entire rim of the sink, then clamp it firmly in place and allow at least 24 hours for the silicone to fully cure before reconnecting plumbing and running water. Also, double-check all plumbing connections for tightness.
How do I properly support the new undermount sink and ensure a good seal while it's curing?
After applying silicone sealant, you'll need to use bar clamps and lumber (2x2s or 2x4s) to press the sink firmly against the underside of the countertop. Position the lumber across the sink opening, with the clamps holding it against the sink flange. This ensures consistent pressure for a strong, waterproof bond and prevents the sink from sagging while the sealant dries.
Do I have to buy a new garbage disposal when installing a new kitchen sink?
Not necessarily. If your existing garbage disposal is in good working condition, you can typically reuse it with your new sink, provided the drain opening sizes are compatible. Just ensure you carefully disconnect it from the old sink and reattach it securely to the new one, following the manufacturer's instructions for a watertight seal.
What's the best way to clean the countertop surface before installing the new sink for optimal adhesion?
Thoroughly cleaning the countertop surface is critical for a strong seal. After removing the old sink, use a putty knife to scrape off any old silicone or adhesive residue. Then, wipe the area down with isopropyl alcohol (like SAFETY WERCS SWIPA32OZ-CA) to remove any grease, grime, or dust. A clean, dry surface ensures the new silicone sealant adheres properly.


