
How to Install an Air Admittance Valve (AAV)
About This Project
This guide provides comprehensive, step-by-step instructions for installing an Air Admittance Valve (AAV) on a sink drain line. The process involves identifying the correct installation point, cutting the existing drainpipe, installing a sanitary tee fitting, and attaching the AAV to allow air into the drain system, which prevents sewer gases from escaping while improving drainage performance.
Best for experienced DIYers and homeowners with some experience with basic plumbing knowledge and familiarity with power tools. Requires Safety Glasses.
Tools & Materials

Bucket
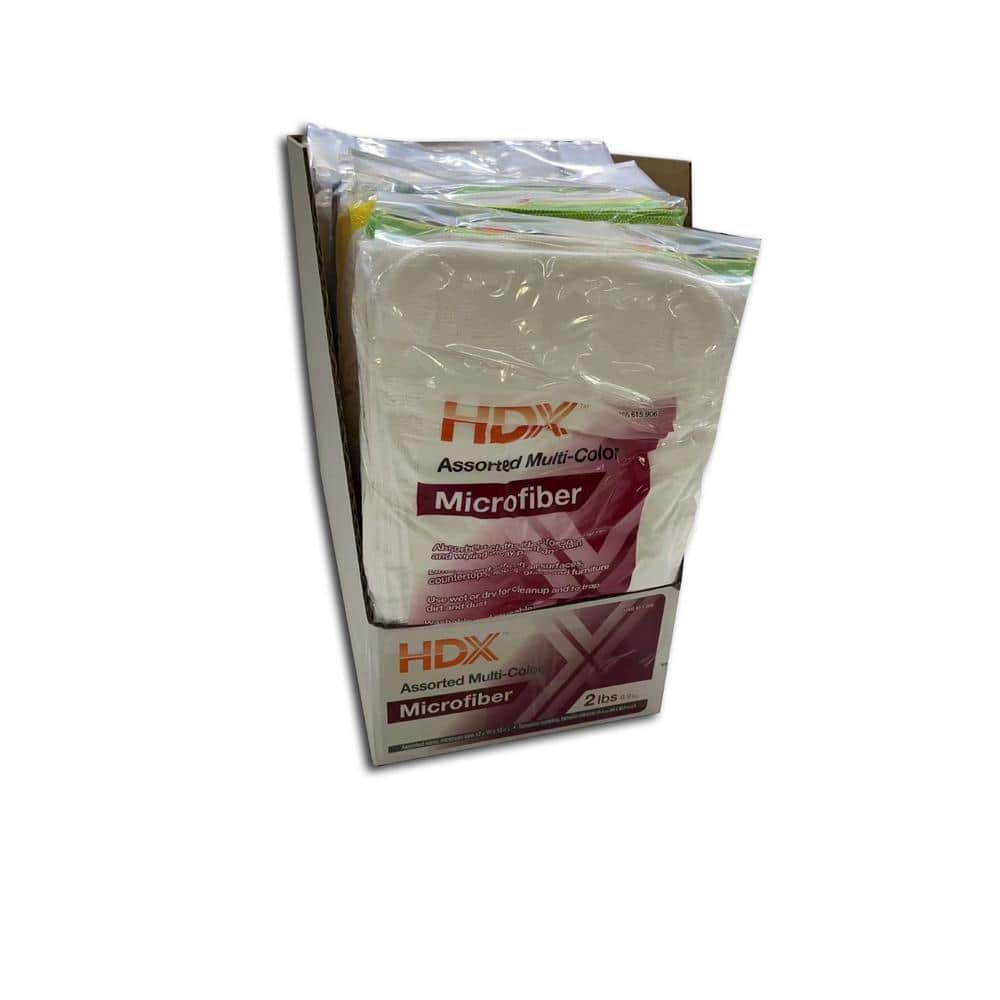
HDX 2 lbs. Microfiber Rags RHDMF2LB-RAGS
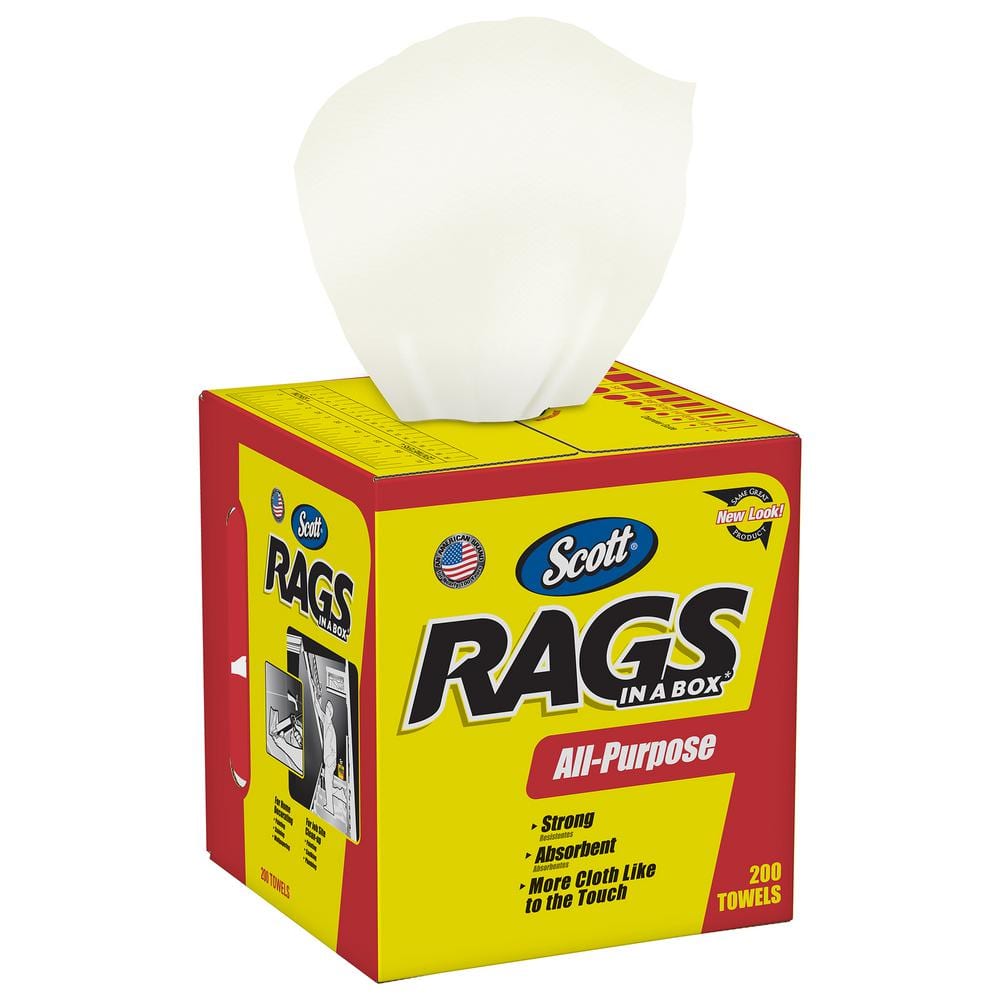
Scott Rags in A Box in White (200-Shop Towels per Box) 75260

Channellock 10 in. Tongue and Groove Plier 430
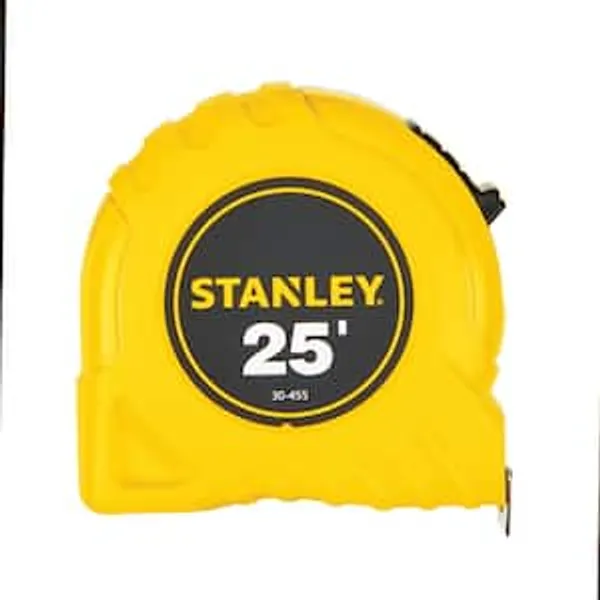
25 ft. Tape Measure
FASTCAP Black Long Nose Pattern Marker FC.LNM
Bucket
Ideal for carrying or storing liquids.
HDX 2 lbs. Microfiber Rags RHDMF2LB-RAGS
HDX Microfiber Cloth is built to last. It's designed to handle the toughest of project with ease and is washable and reusable. Microfiber can hold more liquid than your average cotton towel and is also
Scott Rags in A Box in White (200-Shop Towels per Box) 75260
When you have tough jobs to tackle, you can trust Scott Rags in a Box, All-Purpose. These white disposable towels are made of cellulose fibers with a latex binder for thickness, absorbency, and strength.
Channellock 10 in. Tongue and Groove Plier 430
The Channellock 10 in. Straight Jaw Tongue and Groove Pliers are constructed with high-carbon steel and fashioned with laser heat-treated teeth for strong, nonslip jaw action. Undercut tongue-and-groove
25 ft. Tape Measure
Measure with precision and ease.
FASTCAP Black Long Nose Pattern Marker FC.LNM
Fast Cap Long Nose Pattern Marker solves all your tricky layout problems. It has a 1-1/8 in. in long fine point tip for marking inside holes and along walls while the other end has a wide tip for general
Steps

Preparation and Safety
15 minsFirst, ensure your safety and prepare the work area. Clear everything from under the sink to give yourself ample room to work. Place a bucket or shallow pan directly under the P-trap and drain arm to catch any residual water when you disconnect the pipes. It's also wise to check local plumbing codes to confirm that AAVs are permitted in your area for this application.

Mark the Cut Location
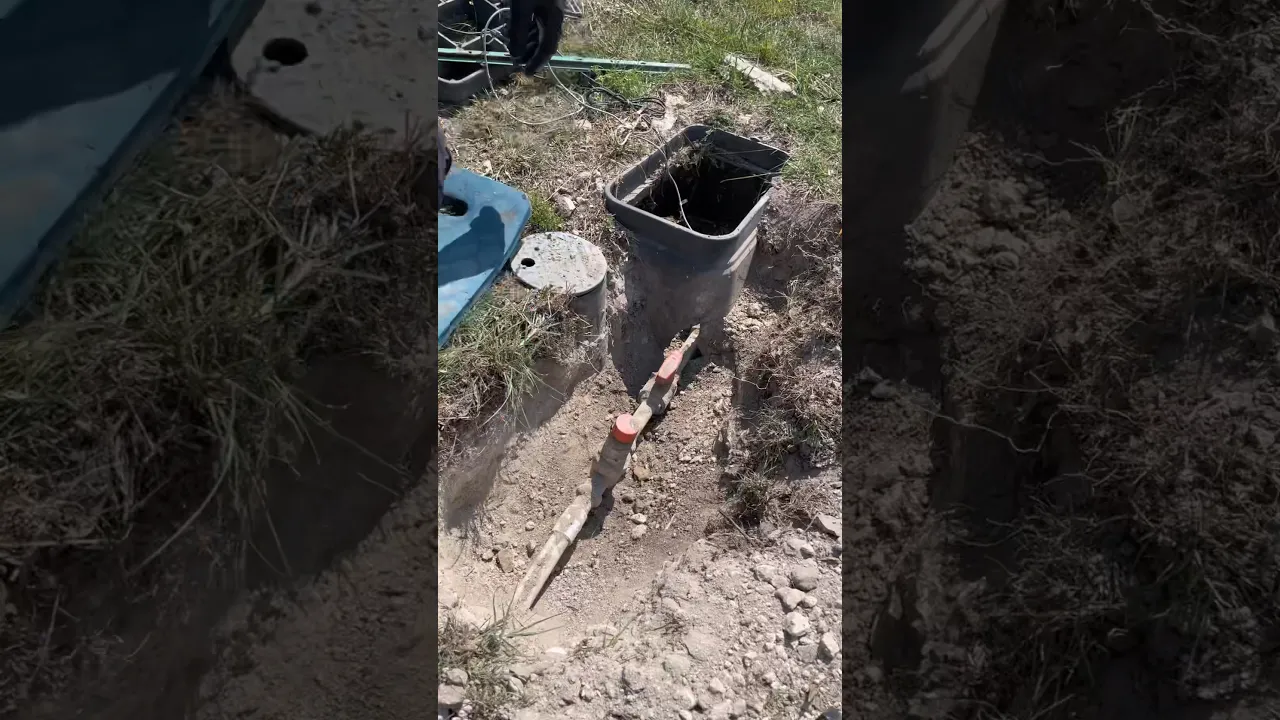
10 minsIdentify the correct location for the AAV. It must be installed on the horizontal drain arm between the P-trap and the wall connection. Crucially, the valve must be positioned at least 4 inches above the top of the horizontal drain arm. It also needs to be as high as practically possible under the sink, but still below the flood-level rim of the sink itself. Use a measuring tape and a marker to mark the section of the horizontal pipe where you will cut to install the new sanitary tee fitting. Ensure the marked section is long enough to accommodate the body of the tee.

Cut the Drain Pipe
15 minsUsing a hacksaw or a dedicated PVC pipe cutter, carefully cut out the section of the drainpipe you marked. Make the cuts as straight and square as possible to ensure the new fitting will seat properly. After cutting, use a deburring tool or a utility knife to carefully remove any burrs or rough edges from the inside and outside of the cut ends of the pipe. A smooth surface is essential for a good solvent weld.

Install the Sanitary Tee
20 minsThis is the most critical step. First, dry-fit the sanitary tee into the gap you created to ensure a proper fit. The side opening (branch) of the tee must point straight up. Once you confirm the fit, you can begin the solvent welding process. Open the PVC primer and cement. Using the dauber attached to the lid, apply a liberal coat of the purple PVC primer to the outside of the pipe ends and the inside of the tee's sockets. The primer cleans and softens the plastic. Immediately follow up with a coat of PVC cement to the same surfaces. Firmly push the tee onto one pipe end, give it a quarter turn to spread the cement, and hold it for 30 seconds. Repeat for the other side, ensuring the tee remains oriented correctly.
Attach Vertical Vent Pipe
10 minsCut a short piece of PVC pipe that will extend vertically from the sanitary tee. The length should be sufficient to raise the AAV to the desired height (at least 4 inches above the drain arm). Deburr the ends of this new pipe piece. Apply PVC primer and then cement to the outside of one end of the pipe and the inside of the tee's vertical socket. Insert the pipe into the tee, giving it a quarter-turn twist, and hold firmly for 30 seconds.

Install the AAV
10 minsThe final step is to attach the AAV itself. Most AAVs come with a threaded adapter. First, glue this adapter to the top of the vertical pipe you just installed. Apply primer and cement to the outside of the pipe and the inside of the adapter's socket, then push it on with a quarter-turn. Once the adapter is set, simply screw the Air Admittance Valve into the threaded opening. Hand-tightening is usually sufficient; do not overtighten with a wrench, as this can crack the plastic.

Testing for Leaks and Performance
30 minsAfter allowing the PVC cement to cure according to the manufacturer's instructions (typically 15-30 minutes for handling, longer for full pressure), it's time to test your work. Reconnect the P-trap to the sink drain. Turn on the faucet and fill the sink completely with water. Then, release the stopper and let it drain all at once. Watch all the new joints carefully for any signs of leaks. Listen for the sound of the AAV opening; you may hear a faint hiss as it draws in air. The water should drain quickly and smoothly without any gurgling sounds.
Common Problems
Uneven cuts can cause leaks or improper sealing.
Solution: Using a marker to draw cut lines ensures accuracy.
Deburr the inside and outside of the cut pipe to prevent snagging and ensure a good seal.
Solution: To avoid this issue: Be mindful of this warning and take appropriate precautions.
Clogs in the main drain stack become impossible to clear without dismantling sink plumbing.
Solution: Installing a cleanout on the main drain stack is crucial for accessing and clearing clogs in the line without disassembling the sink plumbing.
Apply a liberal but even coat of primer and cement. Too little can result in a weak joint, while too much can create drips inside the pipe that may catch debris.
Solution: To avoid this issue: Be mindful of this warning and take appropriate precautions.
AAV pops off before glue sets.
Solution: Hold the fitting in place for 30 seconds after connecting to prevent it from pushing back off due to pressure.
The P-trap is designed to hold water to block sewer gases, so it will be full. Ensure your bucket is in position before loosening the nuts.
Solution: To avoid this issue: Be mindful of this warning and take appropriate precautions.
Water spills onto the floor and cabinet during AAV installation.
Solution: Having a bucket ready is essential to prevent water from spilling onto the floor and inside the cabinet.
Frequently Asked Questions
What are the most important safety precautions I should take when installing an AAV?
Always wear appropriate personal protective equipment, including safety glasses and gloves, especially when cutting PVC pipe and handling chemical solvents. Ensure the work area is well-ventilated when using PVC primer and cement to avoid inhaling fumes. Have a bucket ready to catch any residual water from the drain line.
Do I really need all those specific pipe cutters and deburring tools for this project, or can I use a simpler tool?
While a hacksaw can cut PVC, specialized pipe cutters (like the ratcheting PVC cutter or plastic tubing cutter) provide much cleaner, straighter cuts with less effort, which is crucial for a tight seal. A deburring tool is also highly recommended to smooth edges, preventing snags and ensuring the best bond with primer and cement.
How long does a typical AAV installation take for a beginner, and what's the estimated cost of materials?
For a beginner, this project typically takes 1 to 3 hours, depending on preparation and experience with plumbing. The material costs, including the AAV, PVC fittings, primer, and cement, usually range from $30-$60, assuming you already have basic tools like a tape measure and bucket.
Where is the ideal location to install an AAV on a sink drain line for optimal performance and code compliance?
The AAV must be installed vertically, at least 4 inches above the horizontal drainpipe it serves, and critically, above the fixture's flood level rim. This prevents water from entering the valve and ensures proper air intake, while complying with most plumbing codes.
What are the most common mistakes people make when installing an AAV, and how can I avoid them?
Common mistakes include installing the AAV below the flood level rim, not cleaning pipe surfaces thoroughly before applying primer, or using too little cement. Ensure you apply a generous, even coat of primer and cement to both pipe surfaces, twist fittings for a solid bond, and double-check vertical alignment.
Can I use any type of AAV, or do I need a specific one for a sink drain?
You need an AAV rated for the correct DFU (Drainage Fixture Unit) load of your fixture and the appropriate pipe size (typically 1-1/2" or 2" for a sink). The Oatey Sure-Vent specified is designed for branch lines and widely accepted, but always check local plumbing codes for specific requirements and approved brands.
Do AAVs require any regular maintenance, and how long can I expect one to last before needing replacement?
AAVs are generally maintenance-free and designed for long-term use, often lasting 20-30 years or more. They typically only need replacement if you notice persistent sewer gas odors (indicating a failed seal) or recurring gurgling/slow drainage (suggesting the valve is stuck open or closed).