
:max_bytes(150000):strip_icc()/repairing-a-single-handle-disk-faucet-1824878-hero-b3daee9af5174d8f9b9cb4a2582e7140.jpg)
How to Fix a Leaky Faucet & Water Intake Leak: A Complete DIY Guide
About This Project
This project provides a step-by-step DIY guide on how to fix a leaky faucet and address a water intake leak. It involves five main steps: 1. **Shut Off Water Supply:** Turn off both hot and cold water lines using the shut-off valves under the sink or the main water supply. 2. **Disassemble Your Faucet:** Carefully take apart the faucet, removing the handle, packing nut, and stem. Take pictures for reassembly. 3. **Replace Worn Faucet Parts:** Inspect and replace worn O-rings and washers with new ones, applying plumber's grease. 4. **Fix the Water Intake Leak:** Find and tighten any loose connections on the intake line or replace the fitting/pipe section if needed, using plumber's putty or Teflon tape. 5. **Test for Leaks & Restore Water Supply:** Turn the water back on slowly, checking for leaks. Re-tighten or consult a plumber if necessary.
Best for experienced DIYers and homeowners with some experience.
Tools & Materials
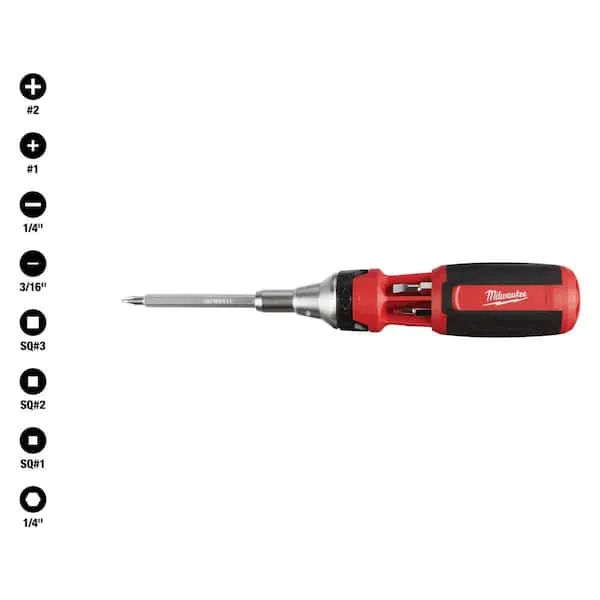
Screwdriver (Multi)
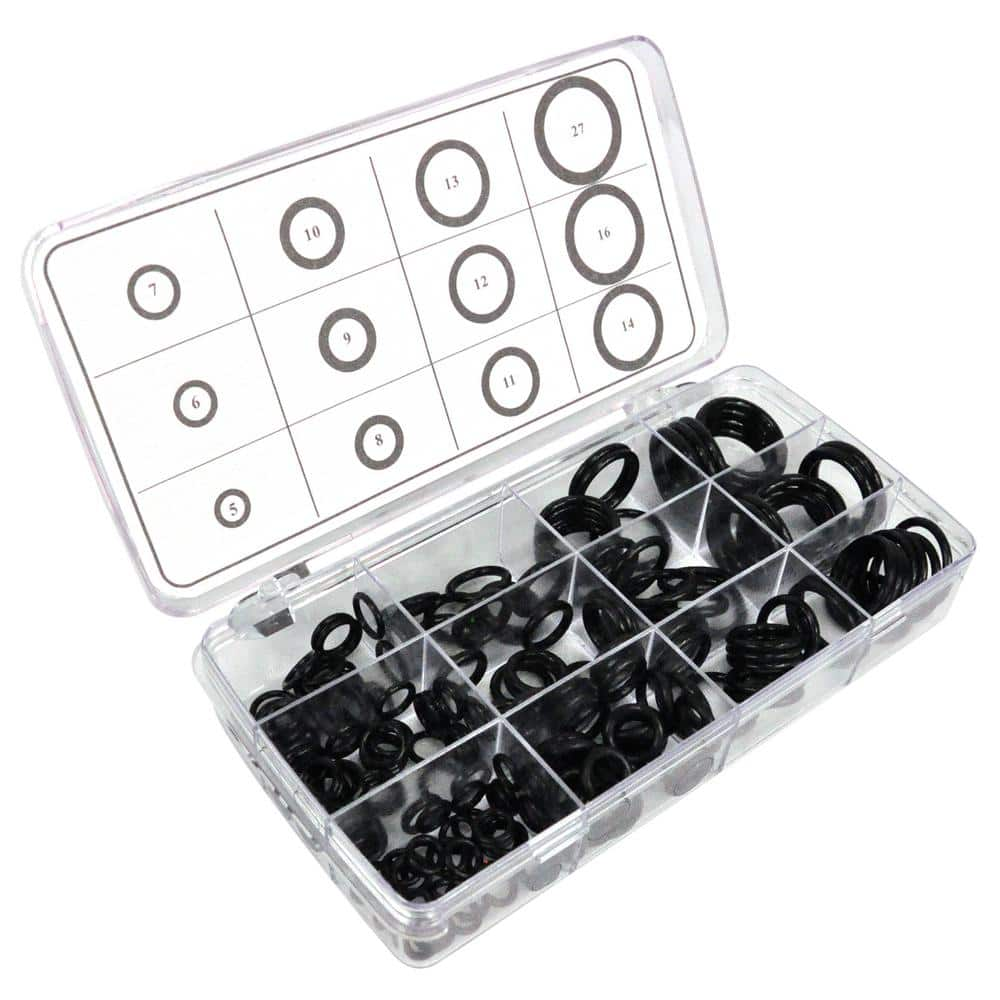
DANCO 200-Piece O-Ring Kit 34443
Bosch 25 in. Laundry Pedestal in Silver with Storage Drawer for Washer WMZPW2XW

Adjustable Wrench
Screwdriver (Multi)
Multiple bits for versatile use.
DANCO 200-Piece O-Ring Kit 34443
O-rings get lost periodically and get warped/worn out over time. A damaged O-ring,(or no faucet O-ring, at all) means a poor seal, leading to a leaky mess. Always have a spare O-ring on hand! Faucet O-rings
Bosch 25 in. Laundry Pedestal in Silver with Storage Drawer for Washer WMZPW2XW
Laundry Pedestal to raise Washer height for easier access. Pedestal includes a pull-out drawer for additional storage. This Pedestal is compatible with Bosch Washer units only.
Adjustable Wrench
Fits various nut and bolt sizes with its adjustable jaw.
Steps
Shut Off Water Supply: First Step to Faucet Repair
5 minsBefore starting, turn off the water supply to both the hot and cold sides of the faucet. Locate the shut-off valves under the sink; if none are present, turn off the main water supply to your home. Open the faucet to relieve any remaining water pressure.
Disassemble Your Faucet: Careful and Methodical
15 minsCarefully disassemble the faucet. Depending on your faucet type (compression, ball, cartridge, etc.), the process will vary. Remove the handle, packing nut, and stem. Take photos of each step for easier reassembly. Gently remove all components, laying them on a clean towel in order of removal. Store in a ziplock bag to prevent losing any tiny parts.
Fix the Water Intake Leak: Tighten or Replace
30 minsLocate the leak on your water intake line. If it's a loose connection, tighten it using an appropriate wrench. If the leak persists, the fitting or section of pipe may need replacing. Use plumber's putty or Teflon tape for a watertight seal.
Common Problems
Safety concern: Always turn off the water supply before starting any plumbing work., If unsure about any step, consult a qualified plumber.
Solution: Take proper safety precautions. Always turn off the water supply before starting any plumbing work., If unsure about any step, consult a qualified plumber.
Prevention: Always follow safety guidelines before starting the project.
You must shut off the water main before starting any work on the filtration system to prevent flooding.
Solution: To avoid this issue: Be mindful of this warning and take appropriate precautions.
Water pressure builds up, making repairs difficult and potentially causing further leaks.
Solution: Opening a large faucet like a tub spout will relieve pressure faster than a smaller sink faucet.
Confirm that the water is completely shut off before attempting to disconnect any pipes.
Solution: To avoid this issue: Be mindful of this warning and take appropriate precautions.
Faucet continues to leak because shut-off valve wasn't fully closed.
Solution: Most modern shut-off valves only require a quarter turn to close. The handle should be perpendicular to the pipe when closed.
Turning the spindle shaft clockwise will strip the threads.
Solution: Note that to re-thread the spindle shaft, you must turn it counter-clockwise.
Turn the water back on slowly to prevent a sudden surge of pressure that could damage fittings.
Solution: To avoid this issue: Be mindful of this warning and take appropriate precautions.
Frequently Asked Questions
What specific replacement parts will I need for both the faucet and water intake, and what's the typical cost?
You'll likely need new O-rings, washers, plumber's grease for the faucet, and Teflon tape for the water intake connections. These parts are generally inexpensive, typically costing under $20-$30 total for a basic repair kit or individual items. It's wise to have a small assortment of common O-ring sizes on hand before starting.
What's the absolute most critical safety step before starting, and what if I can't locate the shut-off valves?
Always turn off both hot and cold water supplies to the faucet using the shut-off valves under the sink to prevent flooding. If you can't find or operate these valves, or they fail to stop the water, you must shut off the main water supply to your house before proceeding with any repair.
After replacing O-rings and washers, why might my faucet still be leaking, and what should I check next?
If your faucet still leaks, first re-check that the new O-rings and washers are seated correctly and are the right size for your specific faucet model. The leak might also be coming from the valve seat, or the water intake leak might be the primary issue, so thoroughly inspect all connections for tightness. Sometimes, the faucet body itself can be cracked, though this is less common.
Is the estimated 3-hour repair time realistic for a beginner, and what should I do if I get stuck during disassembly?
Three hours is a reasonable estimate for a beginner, allowing time for identification, careful disassembly, part replacement, and meticulous reassembly. If you get stuck, refer to your faucet's specific manual or the manufacturer's website for detailed diagrams. The photos you take during disassembly will also be invaluable for guiding reassembly.
When fixing the water intake leak, should I use plumber's putty or Teflon tape, and for which situations?
For threaded pipe connections on the water intake line, always use Teflon tape (also known as thread seal tape) wrapped clockwise around the threads to ensure a watertight seal. Plumber's putty is typically used for sealing the base of a faucet to the sink, or for flange applications, and is not suitable for direct pipe thread connections.
When should I consider calling a professional plumber instead of attempting to fix the leak myself?
You should consider calling a professional plumber if you are unable to successfully shut off the water supply, if the leak persists after multiple careful attempts, or if you encounter significant pipe damage, corrosion, or complex issues beyond a simple tightening or part replacement. Additionally, if you feel overwhelmed or uncomfortable at any stage of the repair, a professional can prevent further damage and ensure a lasting fix.